vue-cli中使用高德地图的方法示例
第一步 去高德地图开放平台申请密钥 高德地图开放平台

第二部 在vue-cli项目目录结构
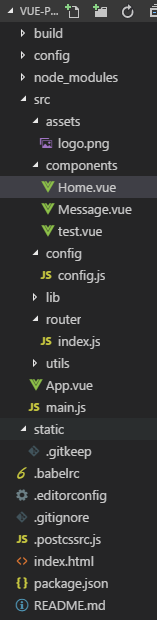
里面多了config文件夹和 utils文件夹
config.js里面是这样的 主要是导出密钥
// 高德地图 key
export const MapKey = '你的密钥key'
// 地图限定城市
export const MapCityName = '武汉'
utils文件夹里面 新建路一个remoteLoad.js
主要是动态创建script标签 封装了一个函数 传入URL地址()
export default function remoteLoad (url, hasCallback) {
 return createScript(url)
 /**
  * 创建script
  * @param url
  * @returns {Promise}
  */
 function createScript (url) {
  var scriptElement = document.createElement('script')
  document.body.appendChild(scriptElement)
  var promise = new Promise((resolve, reject) => {
   scriptElement.addEventListener('load', e => {
    removeScript(scriptElement)
    if (!hasCallback) {
     resolve(e)
    }
   }, false)

   scriptElement.addEventListener('error', e => {
    removeScript(scriptElement)
    reject(e)
   }, false)

   if (hasCallback) {
    window.____callback____ = function () {
     resolve()
     window.____callback____ = null
    }
   }
  })

  if (hasCallback) {
   url += '&callback=____callback____'
  }

  scriptElement.src = url

  return promise
 }

 /**
  * 移除script标签
  * @param scriptElement script dom
  */
 function removeScript (scriptElement) {
  document.body.removeChild(scriptElement)
 }
}
第三步 在Home组件中
<template>
 <div class="m-map">
  <div class="search" v-if="placeSearch">
   <input type="text" placeholder="请输入关键字" v-model="searchKey">
   <button type="button" @click="handleSearch">搜索</button>
   <div id="js-result" v-show="searchKey" class="result"></div>
  </div>
  <div id="js-container" class="map"></div>
 </div>
</template>

<script>
import remoteLoad from '@/utils/remoteLoad.js'
import { MapKey, MapCityName } from '@/config/config'
export default {
 props: ['lat', 'lng'],
 data () {
  return {
   searchKey: '',
   placeSearch: null,
   dragStatus: false,
   AMapUI: null,
   AMap: null
  }
 },
 watch: {
  searchKey () {
   if (this.searchKey === '') {
    this.placeSearch.clear()
   }
  }
 },
 methods: {
  // 搜索
  handleSearch () {
   if (this.searchKey) {
    this.placeSearch.search(this.searchKey)
   }
  },
  // 实例化地图
  initMap () {
   // 加载PositionPicker,loadUI的路径参数为模块名中 'ui/' 之后的部分
   let AMapUI = this.AMapUI = window.AMapUI
   let AMap = this.AMap = window.AMap
   AMapUI.loadUI(['misc/PositionPicker'], PositionPicker => {
    let mapConfig = {
     zoom: 16,
     cityName: MapCityName
    }
    if (this.lat && this.lng) {
     mapConfig.center = [this.lng, this.lat]
    }
    let map = new AMap.Map('js-container', mapConfig)
    // 加载地图搜索插件
    AMap.service('AMap.PlaceSearch', () => {
     this.placeSearch = new AMap.PlaceSearch({
      pageSize: 5,
      pageIndex: 1,
      citylimit: true,
      city: MapCityName,
      map: map,
      panel: 'js-result'
     })
    })
    // 启用工具条
    AMap.plugin(['AMap.ToolBar'], function () {
     map.addControl(new AMap.ToolBar({
      position: 'RB'
     }))
    })
    // 创建地图拖拽
    let positionPicker = new PositionPicker({
     mode: 'dragMap', // 设定为拖拽地图模式,可选'dragMap'、'dragMarker',默认为'dragMap'
     map: map // 依赖地图对象
    })
    // 拖拽完成发送自定义 drag 事件
    positionPicker.on('success', positionResult => {
     // 过滤掉初始化地图后的第一次默认拖放
     if (!this.dragStatus) {
      this.dragStatus = true
     } else {
      this.$emit('drag', positionResult)
     }
    })
    // 启动拖放
    positionPicker.start()
   })
  }
 },
 async created () {
  // 已载入高德地图API,则直接初始化地图
  if (window.AMap && window.AMapUI) {
   this.initMap()
  // 未载入高德地图API,则先载入API再初始化
  } else {
   await remoteLoad(`http://webapi.amap.com/maps?v=1.3&key=${MapKey}`)
   await remoteLoad('http://webapi.amap.com/ui/1.0/main.js')
   this.initMap()
  }
 }
}
</script>

<style lang="css">
.m-map{ min-width: 500px; min-height: 300px; position: relative; }
.m-map .map{ width: 100%; height: 100%; }
.m-map .search{ position: absolute; top: 10px; left: 10px; width: 285px; z-index: 1; }
.m-map .search input{ width: 180px; border: 1px solid #ccc; line-height: 20px; padding: 5px; outline: none; }
.m-map .search button{ line-height: 26px; background: #fff; border: 1px solid #ccc; width: 50px; text-align: center; }
.m-map .result{ max-height: 300px; overflow: auto; margin-top: 10px; }
</style>
第四步 在app.vue中 导入组件
<template>
 <div id="app">
  <div class="g-wraper">
   <div class="m-part">
    <mapDrag @drag="dragMap" class="mapbox"></mapDrag>
   </div>
  </div>

 </div>
</template>

<script>
import mapDrag from './components/Home.vue'
export default {
 name: 'app',
 components: {
  mapDrag
 },
 data () {
  return {
   dragData: {
    lng: null,
    lat: null,
    address: null,
    nearestJunction: null,
    nearestRoad: null,
    nearestPOI: null
   }
  }
 },
 methods: {
  dragMap (data) {
   console.log(data)
   this.dragData = {
    lng: data.position.lng,
    lat: data.position.lat,
    address: data.address,
    nearestJunction: data.nearestJunction,
    nearestRoad: data.nearestRoad,
    nearestPOI: data.nearestPOI
   }
  }
 }
}
</script>

<style>
body{ margin: 0; }
.page-header{
 color: #fff; text-align: center; background: #159957;
 background-image: -webkit-linear-gradient(330deg,#155799,#159957);
 background-image: linear-gradient(120deg,#155799,#159957);
 padding: 3rem 4rem; margin-bottom: 30px;
}
.page-header h1{ margin: 0; font-size: 40px; }
.page-header p{ color: #ccc; margin: 0; margin-bottom: 30px; }
.page-header a{ display: inline-block; border: 1px solid #fff; margin-right: 10px; line-height: 40px; padding: 0 20px; border-radius: 4px; color: #fff; text-decoration: none; transition: all .3s; }
.page-header a:hover{ background: #fff; color: #333; }
.g-wraper{ width: 1000px; margin: 0 auto; color: #666; font-size: 16px; line-height: 30px; }
.m-part{ margin-bottom: 30px; }
.m-part::after{ content: ''; display: block; clear: both; }
.m-part .title{ font-size: 30px; line-height: 60px; margin-bottom: 10px; color: #333; }
.m-part .mapbox{ width: 600px; height: 400px; margin-bottom: 20px; float: left; }
.m-part .info{ margin: 0; padding: 0; list-style: none; line-height: 30px; margin-left: 620px; }
.m-part .info span{ display: block; color: #999; }
.m-part ol{ line-height: 40px; margin-left: 0; padding-left: 0; }
.m-part pre{ padding: 10px 20px; line-height: 30px; border-radius: 3px; box-shadow: 0 0 15px rgba(0,0,0,.5); }
.m-footer{ background: #eee; line-height: 60px; text-align: center; color: #999; font-size: 12px; }
.m-footer a{ margin: 0 5px; color: #999; text-decoration: none; }
</style>
上面 地图初始化渲染的方法 直接拿别人封装好的东西
最后运行后
以上就是本文的全部内容,希望对大家的学习有所帮助,也希望大家多多支持我们。
相关推荐
-
Vue 引入AMap高德地图的实现代码
本文代码仅针对 Vue CLI 3.x 生成的项目有效,但是在第二步配置的时候,可以直接配置 webpack.externals,所以本引入思路是通用的,并不局限于该项目 资源 AMap 准备-入门教程 引入 AMap 在 public/index.html 文件 </body> 前引入 <script type="text/javascript" src="https://webapi.amap.com/maps?v=1.4.14&key=您申请的
-
vue.js高德地图实现热点图代码实例
1.在index.html引入高德地图JSAPI <script src="https://webapi.amap.com/maps?v=1.3&key=xxx"></script> 2.地图dom <div class="map-container"> <div id="container" style="width:100%;height:500px"></di
-

vue调用高德地图实例代码
一. vue-amap,一个基于 Vue 2.x 和高德地图的地图组件 https://elemefe.github.io/vue-amap/#/ 这个就不细说了,按照其文档,就能够安装下来. 二. 按照官方提供的方法引入 1.修改webpac.base.conf.js文件 externals: { 'AMap': 'AMap' } 2.引入sdk 引入有两种方式,一种是页面直接引入 复制代码 代码如下: <script type="text/javascript" src=&q
-
vue高德地图之玩转周边
前言:在之前的博客中,有成功引入高德地图,这是以前的地址 vue 调用高德地图. 因为一些需求,需要使用到地图的周边功能. 完整的项目代码请查看 我的github 一 .先看要实现的结果,参考了链家的周边,如图所示. 二 .原理分析 1.引入高德api,这个在之前的博客提到过,vue 调用高德地图. 2.使用地图的周边插件,这是 高德网站的api. AMap.PlaceSearch //地点搜索服务插件,提供某一特定地区的位置查询服务 在插件中的各种方法中选取了searchNearBy的
-
vue基于Vue2.0和高德地图的地图组件实例
前言 在做基于LBS的应用中,时常会和地图打交道,最直接的解决方案,当然是去对应的地图官网找文档,然后一步步来玩.对于简单场景而言,体验应该还好,但对于一些状态多,变化频繁的复杂场景而言,不仅要时刻维护本地数据状态和地图状态同步,还要查找设置各种状态的地图API,实在是让人头疼的事情. 设计vue-amap的初衷,也就是为了让开发者,在编写地图应用时,能从查找众多地图API和繁琐的地图状态同步中解脱出来. 那么vue-amap是如何做到的,又能给开发者带来怎样的便利与开发体验呢?我们就从一个轻点
-
vue异步加载高德地图的实现
本文介绍了vue异步加载高德地图的实现,分享给大家,具体如下: 几种加载js的方式 同步加载 异步加载 延迟加载 同步加载 用的最多的一种方式,又称阻塞模式,会阻止浏览器的后续处理,停止后续的解析,只有当当前加载完成,才能进行下一步操作.所以默认同步执行才是安全的.但这样如果js中有输出document内容.修改dom.重定向等行为,就会造成页面堵塞.所以一般建议把<script>标签放在<body>结尾处,这样尽可能减少页面阻塞. <script src="htt
-
在vue项目中引入高德地图及其UI组件的方法
引入高德地图: 打开index.html,引用高德地图的JavaScript API: <script type="text/javascript" src="http://webapi.amap.com/maps?v=1.3&key=你的API key"></script> 在"key="这里添加你申请的key,key不需要加引号. 引入高德地图UI组件,只需要在上面代码后面再加一串代码: <script
-
vue+高德地图写地图选址组件的方法
前言 现在做这个移动端的项目中有一个地图选址的功能,本来高德地图中有一个现成的选址组件,但是有两个问题,因为他是用iframe引用的,第一改不了样式,这点还勉强能接受:第二他的左上角有一个返回键,在搜索的时候可以返回到地图界面,但是在地图界面时点返回没有用,试了半天也没搞明白怎么监听到那个返回键的点击事件,所以趁这两天项目基本结束自己写一个把这个功能优化一下,也方便以后使用. 开整 vue的安装使用啥的我在这就不说了,直接开始地图选址组件. 首先上高德开放平台弄一个key,然后在index.ht
-
vue-cli中使用高德地图的方法示例
第一步 去高德地图开放平台申请密钥 高德地图开放平台 第二部 在vue-cli项目目录结构 里面多了config文件夹和 utils文件夹 config.js里面是这样的 主要是导出密钥 // 高德地图 key export const MapKey = '你的密钥key' // 地图限定城市 export const MapCityName = '武汉' utils文件夹里面 新建路一个remoteLoad.js 主要是动态创建script标签 封装了一个函数 传入URL地址() expo
-
vue项目中使用百度地图的方法
1.在百度地图申请密钥: http://lbsyun.baidu.com/ 将 <script type="text/javascript" src="http://api.map.baidu.com/api?v=2.0&ak=密钥" ></script> 中的 密钥替换成你申请的,在 vue项目的index.html引用. 2. 在build 文件下下的 webpack.base.conf.js贴入代码 externals: {
-
VUE项目中调用高德地图的全流程讲解
目录 前言 申请高德key 技术选型 刷新页面,地图加载偶尔失败 在绑定插件的时候,控制台报错 a[d].split is not a function 原生调用高德API 总结 前言 相信大家或多或少都接触过在大屏的项目,在大屏项目中除了用到了echarts中的行政地图,街道地图也是很常见的,今天主要来说一下在vue中调用高德地图遇到的一些问题. 申请高德key 无论我们使用任何方式调用高德地图都需要在高德地图开放平台中申请key 注册帐号 访问高德地图开发平台根据实际情况填写就可以(实名认证
-
vue.js中实现登录控制的方法示例
本文实例讲述了vue.js中实现登录控制的方法.分享给大家供大家参考,具体如下: vue中使用vue-router实现登录的控制在做后台管理系统中很常见,但是不想之前熟悉的流程那样,不过只要大家理解vue-router的使用也是很好实现的. 首先我们需要编写登录页面和主页面: <template> <div class="login"> <table width="100%" height="100%"> &l
-
在vue.js中抽出公共代码的方法示例
前言 当我们在使用vue构建中大型项目时,通常会遇到某些经常用的方法以及属性,比如说搭建一个员工管理系统,请求的url需要一个共同的前缀,或者在某几个view中需要用到时间,这个时间是通过某方法格式化之后的等等,如果每次用到都写共同的代码,那样如果之后有变动的话维护起来会非常麻烦. 所以我们就得想办法抽出公共代码,因为vue是组件化开发,我们就会很自然的与es6的module模块化联系到一起.其实当我们在搭建项目结构时就应该先提前埋下伏笔,有一个util文件夹,里面放的就是我们要写的公共代码,其
-
vue中引入高德地图并多点标注的实现步骤
vue中引入高德地图并多点标记 步骤: 通过vue的方法引入地图 初始化地图,设置宽和高 信息窗口实例 遍历生成多个标记点 首先在项目的public下的index.html中引入地图 <link rel="stylesheet" href="https://cache.amap.com/lbs/static/main1119.css"/> <script src="https://webapi.amap.com/maps?v=1.4.15
-
详解vue项目中调用百度地图API使用方法
步骤一:申请百度地图密钥: JavaScript API v1.4以及以前的版本无序申请秘钥(ak),自v1.5版本开始需要先申请秘钥(ak),才可以使用,如需获取更高的配额,需要申请 认证企业用户.百度地图API 链接地址:http://lbsyun.baidu.com/apiconsole/key 步骤二:在index.html中添加百度地图JavaScript API接口: <script src="http://api.map.baidu.com/api?v=1.4"
-
Vue-Cli 3.0 中配置高德地图的两种方式
vue 中使用高德地图有两种方式 一.vue-amap 组件 官网: https://elemefe.github.io/vue-amap/#/ 开始的时候是打算用这个组件做地图功能的,但是尝试之后存在些问题,所以就放弃了,可能是我的使用方式不对.我所遇到的问题: 1. 安装之后使用,始终提示跨域问题. 2. 页面刷新之后地图出不来,第一次进入页面时没问题.因为这两个问题所以放弃了这个组件的使用.我想可能是我哪个地方代码有问题. 二.直接引用高德地图 SDK 因为第一种方式尝试失败了,所以我选择