vue-cropper插件实现图片截取上传组件封装
基于vue-cropper插件实现图片截取上传组件封装的具体代码,供大家参考,具体内容如下
需求场景:
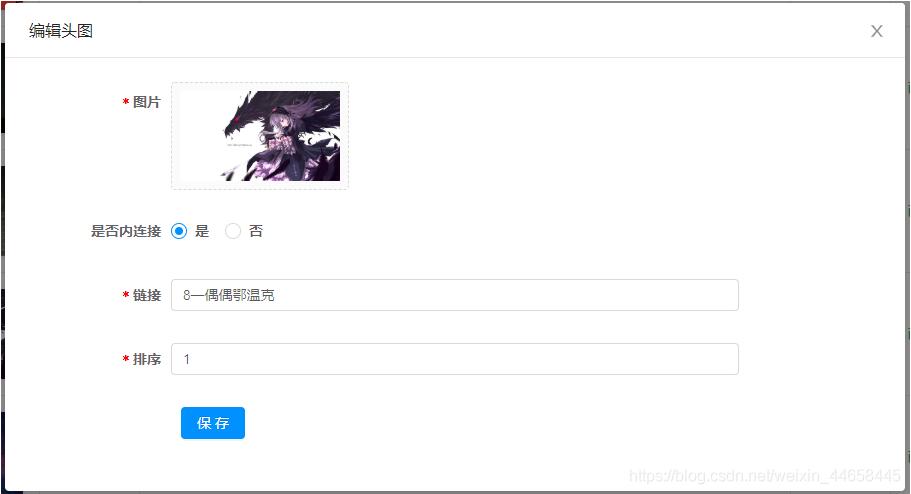
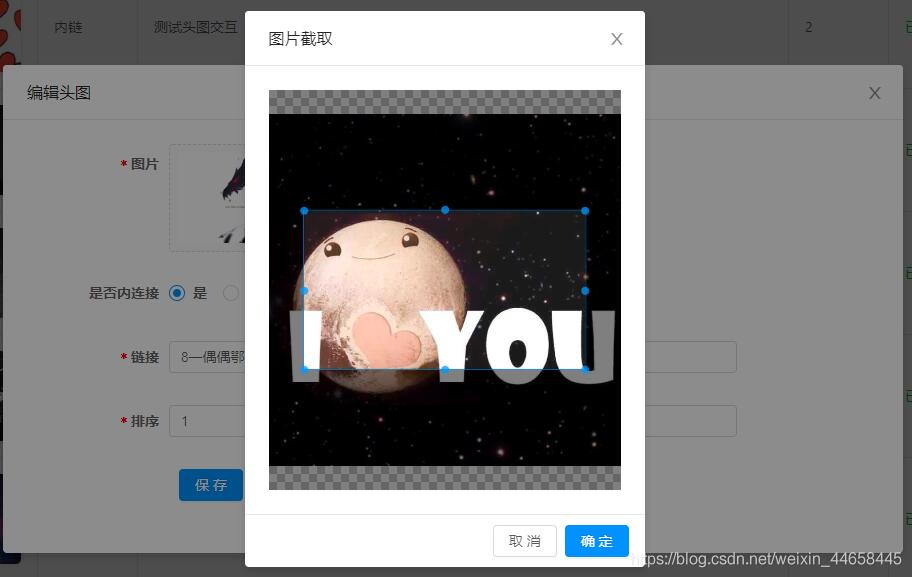
后台开发需要上传图片并进行相应比例尺寸图片的截取,本组件开发采用Ant Design Vue组件库搭配vue-cropper插件进行封装
实现如下


html
<template>
  <div>
    <a-upload
      name="avatar"
      list-type="picture-card"
      class="avatar-uploader"
      :show-upload-list="false"
      :custom-request="customRequest"
      :before-upload="beforeUpload"
      :style="`width: ${width}; height: ${height};`"
    >
      <img
        v-if="imageUrl && !loading"
        :src="imageUrl"
        alt="avatar"
        :style="`width: ${width}; height: ${height};`"
      />
      <div v-else>
        <a-icon :type="loading ? 'loading' : 'plus'" />
        <div class="ant-upload-text">上传图片</div>
      </div>
    </a-upload>
    <a-modal
      v-model="imageCut.isShowModal"
      title="图片截取"
      width="400px"
      @ok="finish"
      @cancel="imageCut.close"
    >
      <div class="cropper-content" v-if="imageCut.isShowModal">
        <div class="cropper" style="text-align:center">
          <vueCropper
            ref="cropper"
            :img="imageCut.imgFile"
            :outputSize="outputSize"
            :outputType="outputType"
            :info="info"
            :full="full"
            :canMove="canMove"
            :canMoveBox="canMoveBox"
            :original="original"
            :autoCrop="autoCrop"
            :fixed="fixed"
            :fixedNumber="fixedNumber"
            :centerBox="centerBox"
            :infoTrue="infoTrue"
            :fixedBox="fixedBox"
          ></vueCropper>
        </div>
      </div>
    </a-modal>
  </div>
</template>
js
<script>
import { uploadImage } from '@/api/common'
import { VueCropper } from "vue-cropper";
export default {
  name: 'ImageUpload',
  components: { VueCropper },
  data() {
    return {
      loading: false,
      imageCut: {
        isShowModal: false,
        imgFile: '',
        init: imgFile => {
          this.imageCut.imgFile = imgFile
          this.imageCut.isShowModal = true
        },
        close: () => {
          this.imageCut.imgFile = ''
          this.imageCut.isShowModal = false
        }
      }
    }
  },
  props: {
    imageUrl: String,
    width: {
      type: String,
      default: '100px'
    },
    height: {
      type: String,
      default: '100px'
    },
    canCut: {
      type: Boolean,
      default: false
    },
    info: {
      type: Boolean,
      default: false
    }, // 裁剪框的大小信息
    outputSize: {
      type: Number,
      default: 0.8
    }, // 裁剪生成图片的质量
    outputType: {
      type: String,
      default: 'jpeg'
    }, // 裁剪生成图片的格式
    canScale: {
      type: Boolean,
      default: true
    }, // 图片是否允许滚轮缩放
    autoCrop: {
      type: Boolean,
      default: true
    }, // 是否默认生成截图框
    // autoCropWidth: 300, // 默认生成截图框宽度
    // autoCropHeight: 200, // 默认生成截图框高度
    fixedBox: {
      type: Boolean,
      default: false
    }, // 固定截图框大小 不允许改变
    fixed: {
      type: Boolean,
      default: true
    }, // 是否开启截图框宽高固定比例
    fixedNumber: {
      type: Array,
      default: () => [1, 1]
    }, // 截图框的宽高比例
    full: {
      type: Boolean,
      default: true
    }, // 是否输出原图比例的截图
    canMove: {
      type: Boolean,
      default: false
    },
    canMoveBox: {
      type: Boolean,
      default: true
    }, // 截图框能否拖动
    original: {
      type: Boolean,
      default: false
    }, // 上传图片按照原始比例渲染
    centerBox: {
      type: Boolean,
      default: true
    }, // 截图框是否被限制在图片里面
    infoTrue: {
      type: Boolean,
      default: true
    } // true 为展示真实输出图片宽高 false 展示看到的截图框宽高
  },
  methods: {
    beforeUpload(file) {
      const isJpgOrPng = file.type === 'image/jpeg' || file.type === 'image/png'
      if (!isJpgOrPng) {
        this.$message.error('请上传JPG或PNG文件!')
      }
      const isLt2M = file.size / 1024 / 1024 < 2
      if (!isLt2M) {
        this.$message.error('请上传2MB以下文件!')
      }
      return isJpgOrPng && isLt2M
    },
    customRequest(file) {
      if (this.canCut) {
        this.readFile(file.file)
      } else {
        this.loading = true
        const formData = new FormData()
        formData.append('fileIdcard', file.file)
        uploadImage(formData).then(res => {
          this.loading = false
          this.$emit('uploadSuccess', res.ossUrl)
        })
      }
    },
    readFile(file) {
      var reader = new FileReader()
      reader.readAsDataURL(file)
      reader.onload = () => {
        this.imageCut.init(reader.result)
      }
    },
    finish() {
      this.$refs.cropper.getCropBlob(data => {
        this.loading = true
        // 上传阿里云服务器
        const formData = new FormData()
        formData.append('fileIdcard', data)
        uploadImage(formData).then(res => {
          this.imageCut.close()
          this.loading = false
          this.$emit('uploadSuccess', res.ossUrl)
        })
      })
    }
  }
}
</script>
css
<style lang="less">
.avatar-uploader > .ant-upload {
  width: 100%;
  height: 100%;
}
.ant-upload-select-picture-card i {
  font-size: 32px;
  color: #999;
}

.ant-upload-select-picture-card .ant-upload-text {
  margin-top: 8px;
  color: #666;
}
.cropper-content {
  .cropper {
    width: auto;
    height: 400px;
  }
}
</style>
组件使用及说明
<image-upload
        :imageUrl="form.diagramUrl"
        @uploadSuccess="uploadSuccess"
        width="160px"
        height="90px"
        :can-edit="canCut"
        :fixed-number="[16,9]"
      />
组件调用时需传入canEdit属性,指定组件是否启动图片选取后的裁剪功能,默认值为不启用裁剪;需裁剪时可传入fixedNumber属性,定义裁剪框的宽高比
以上就是本文的全部内容,希望对大家的学习有所帮助,也希望大家多多支持我们。
赞 (0)

