Android WindowManager深层理解view绘制实现流程
目录
- 前言
- setContentView()流程
- WindowManager.addView流程
前言
又是一年一度的1024程序员节了,今天不写点什么总感觉对不起这个节日。想来想去,就写点关于View的绘制。本文不会重点讲View绘制三大回调函数:onMeasure、onLayout、onDraw,而是站在Android framework的角度去分析一下View的绘制。
- View是如何被渲染到屏幕中的?
- ViewRoot、DecorView、Activity、Window、WindowManager是什么关系?
- View和Surface是什么关系?
- View和SurfaceFlinger、OpenGL ES是什么关系?
计算机的图像一般是需要经过底层的图像引擎输出GPU需要的数据交给GPU,显示器从GPU从不断的取出渲染好的数据显示到屏幕上。
熟悉Andriod体系架构的人都知道,Android底层渲染图像的引擎是OpenGL ES/Vulkan。那么View是被谁渲染的呢?没错,View最终也是交给底层渲染引擎的,那么从View到OpenGL ES这中间经历了哪些过程呢?
setContentView()流程
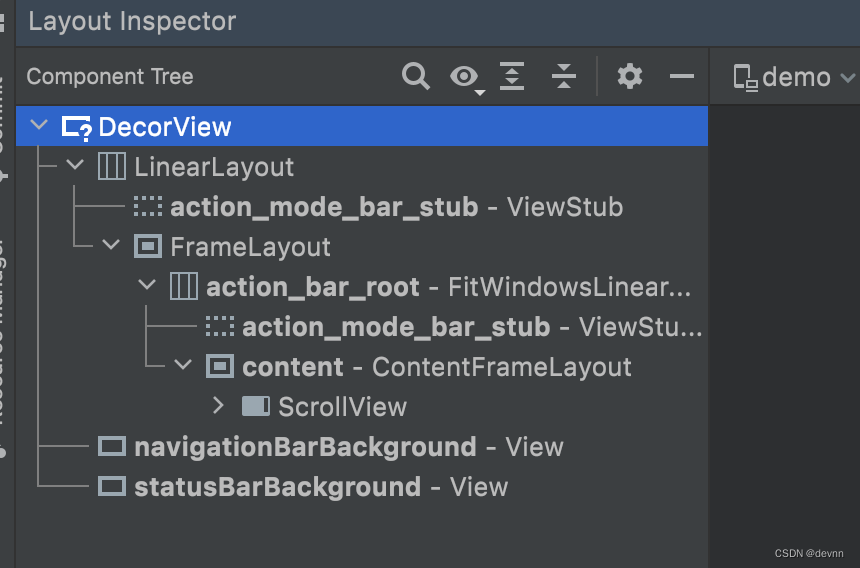
在Activity的onCreate中我们一般会通过setContentView来给Activity设置界面布局。这个时候,Activity是否开始渲染了呢?并没有,setContentView只是构建整个DecorView的树。
//android.app.Activity
 public void setContentView(@LayoutRes int layoutResID) {
        getWindow().setContentView(layoutResID);
        initWindowDecorActionBar();
    }
setContentView是调用Window的setContentView,而PhoneWindow是Window的唯一实现类:
//com.android.internal.policy.PhoneWindow
 @Override
    public void setContentView(int layoutResID) {
         if (mContentParent == null) {
            installDecor();//1,安装DecorView
        } else if (!hasFeature(FEATURE_CONTENT_TRANSITIONS)) {
            mContentParent.removeAllViews();
        }
        if (hasFeature(FEATURE_CONTENT_TRANSITIONS)) {
            final Scene newScene = Scene.getSceneForLayout(mContentParent, layoutResID,
                    getContext());
            transitionTo(newScene);
        } else {
            mLayoutInflater.inflate(layoutResID, mContentParent);//2,解析layoutResID
        }
        mContentParent.requestApplyInsets();
        final Callback cb = getCallback();
        if (cb != null && !isDestroyed()) {
            cb.onContentChanged();
        }
        mContentParentExplicitlySet = true;
1处开始安装DecorView,主要是new一个DecorView,并找到其中id等于content的布局,通过mContentParent引用。我们在xml的写的布局就是添加到这个mContentParent容器中。
//com.android.internal.policy.PhoneWindow
private void installDecor() {
        mForceDecorInstall = false;
        if (mDecor == null) {
            mDecor = generateDecor(-1);//new一个DecorView
            mDecor.setDescendantFocusability(ViewGroup.FOCUS_AFTER_DESCENDANTS);
            mDecor.setIsRootNamespace(true);
            if (!mInvalidatePanelMenuPosted && mInvalidatePanelMenuFeatures != 0) {
                mDecor.postOnAnimation(mInvalidatePanelMenuRunnable);
            }
        } else {
            mDecor.setWindow(this);
        }
         if (mContentParent == null) {
            mContentParent = generateLayout(mDecor);//找到id==content的ViewGroup
            ...
  }
2处通过LayoutInflator解析传入的layoutResID,解析成View并添加到mContentParent中。mContentParent就是我们xml界面的中的id等于content的布局:
综上分析,setContentView主要完成两个功能:
1、构建DecorView
2、解析自定义的xml布局文件,添加到DecorView的content中。
所以setContentView还没有真正开始渲染图像。
思考:如果我们没有调用setContentView,Activity能正常启动吗?为什么?
WindowManager.addView流程
Android的所有View都是通过WindowManager.addView添加到屏幕中的。那么Activity的DecorView是什么时调被添加到屏幕中的呢?
答案在ActivityThread的handleResumeActivity方法中:
//android.app.ActivityThread
   @Override
    public void handleResumeActivity(IBinder token, boolean finalStateRequest, boolean isForward,
            String reason) {
         ...
         //执行Activity的onResume生命周期
        final ActivityClientRecord r = performResumeActivity(token, finalStateRequest, reason);
         ...
		if (r.window == null && !a.mFinished && willBeVisible) {
	            r.window = r.activity.getWindow();
	            View decor = r.window.getDecorView();//1、调用了window.getDecorView()方法
	            decor.setVisibility(View.INVISIBLE);
	            ViewManager wm = a.getWindowManager();
	            WindowManager.LayoutParams l = r.window.getAttributes();
	            a.mDecor = decor;
	            l.type = WindowManager.LayoutParams.TYPE_BASE_APPLICATION;
	            l.softInputMode |= forwardBit;
	            if (r.mPreserveWindow) {
	                a.mWindowAdded = true;
	                r.mPreserveWindow = false;
	                // Normally the ViewRoot sets up callbacks with the Activity
	                // in addView->ViewRootImpl#setView. If we are instead reusing
	                // the decor view we have to notify the view root that the
	                // callbacks may have changed.
	                ViewRootImpl impl = decor.getViewRootImpl();
	                if (impl != null) {
	                    impl.notifyChildRebuilt();
	                }
	            }
	            if (a.mVisibleFromClient) {
	                if (!a.mWindowAdded) {
	                    a.mWindowAdded = true;
	                    wm.addView(decor, l);//2、开始调用WindowManager.addView将view添加到屏幕
	                } else {
	                    // The activity will get a callback for this {@link LayoutParams} change
	                    // earlier. However, at that time the decor will not be set (this is set
	                    // in this method), so no action will be taken. This call ensures the
	                    // callback occurs with the decor set.
	                    a.onWindowAttributesChanged(l);
	                }
	            }
	            // If the window has already been added, but during resume
	            // we started another activity, then don't yet make the
	            // window visible.
	        } else if (!willBeVisible) {
	            if (localLOGV) Slog.v(TAG, "Launch " + r + " mStartedActivity set");
	            r.hideForNow = true;
	        }
wm.addView才是开始DecorView渲染的入口。而它的触发时机是在Activity的onResume生命周期之后,所以说onResume之后View才会显示在屏幕上,并且渲染完成才可以获取到View的宽度。
主要看下1处调用了window的getDecorView()方法:
//com.android.internal.policy.PhoneWindow
   @Override
    public final @NonNull View getDecorView() {
        if (mDecor == null || mForceDecorInstall) {
            installDecor();
        }
        return mDecor;
    }
这里可以看出,即使我们没有调用setContentView,DecorView也会初始化,只是会显示空白页面。
然后我们重点看下2处的代码,通过WindowManager的addView方法将DecorView添加到window中了:wm.addView(decor, l)
继续分析addView之前先梳理一下必要的基本知识。
上面的wm虽然是ViewManager类型的,它实际就是WindowManager。
WindowManager是一个接口,它继承自ViewManager。
public interface WindowManager extends ViewManager {
...
}
可以看到WindowManager的实现类是WindowManagerImpl,后面WindowManager的功能都是靠WindowManagerImpl来实现的。
Window是抽象类,PhoneWindow是它的实现。WindowManager是Window的成员变量,Window和WindowManager都是在Activity的attach方法中初始化的:
//android.app.Activity
  final void attach(Context context, ActivityThread aThread,
            Instrumentation instr, IBinder token, int ident,
            Application application, Intent intent, ActivityInfo info,
            CharSequence title, Activity parent, String id,
            NonConfigurationInstances lastNonConfigurationInstances,
            Configuration config, String referrer, IVoiceInteractor voiceInteractor,
            Window window, ActivityConfigCallback activityConfigCallback, IBinder assistToken) {
        attachBaseContext(context);
        mFragments.attachHost(null /*parent*/);
        mWindow = new PhoneWindow(this, window, activityConfigCallback);//1,初始化window
        ...省略无关代码

        mWindow.setWindowManager(  //2、给window初始化windowManager
                (WindowManager)context.getSystemService(Context.WINDOW_SERVICE),
                mToken, mComponent.flattenToString(),
                (info.flags & ActivityInfo.FLAG_HARDWARE_ACCELERATED) != 0);
        if (mParent != null) {
            mWindow.setContainer(mParent.getWindow());
        }
        mWindowManager = mWindow.getWindowManager();//3、Activity通过mWindowManager引用window中的WindowManager,两个wm是同一个东西。
        mCurrentConfig = config;
        mWindow.setColorMode(info.colorMode);
        setAutofillOptions(application.getAutofillOptions());
        setContentCaptureOptions(application.getContentCaptureOptions());
    }
1处开始初始化window,并赋值给Activity的成员变量mWindow
2处给window设置windowManager
3处Activity通过mWindowManager引用window中的WindowManager,两个wm是同一个东西。
然后重点看下setWindowManager方法的实现:
//android.view.Window
   public void setWindowManager(WindowManager wm, IBinder appToken, String appName,
            boolean hardwareAccelerated) {
        mAppToken = appToken;
        mAppName = appName;
        mHardwareAccelerated = hardwareAccelerated;
        if (wm == null) {
            wm = (WindowManager)mContext.getSystemService(Context.WINDOW_SERVICE);
        }
        mWindowManager = ((WindowManagerImpl)wm).createLocalWindowManager(this);
    }
梳理完基本关系,再回头看下wm.addView过程。
//android.view.WindowManagerImpl
    @Override
    public void addView(@NonNull View view, @NonNull ViewGroup.LayoutParams params) {
        applyDefaultToken(params);
        mGlobal.addView(view, params, mContext.getDisplay(), mParentWindow);
    }
可以看到wm.addView交给了mGolbal对象。
mGolbal是WindowManagerGlobal类型的全局单例:
public final class WindowManagerImpl implements WindowManager {
   @UnsupportedAppUsage
   private final WindowManagerGlobal mGlobal = WindowManagerGlobal.getInstance();
   ...
继续看WindowManagerGlobal.addView是如何实现的。
//android.view.WindowManagerGlobal
 public void addView(View view, ViewGroup.LayoutParams params,
           Display display, Window parentWindow) {
 	   		// ...省略无关代码
   			ViewRootImpl root;
       		View panelParentView = null;
       	 	// ...省略无关代码
           root = new ViewRootImpl(view.getContext(), display);
           view.setLayoutParams(wparams);
           mViews.add(view);
           mRoots.add(root);
           mParams.add(wparams);
           // do this last because it fires off messages to start doing things
           try {
               root.setView(view, wparams, panelParentView);
           } catch (RuntimeException e) {
               // BadTokenException or InvalidDisplayException, clean up.
               if (index >= 0) {
                   removeViewLocked(index, true);
               }
               throw e;
           }
       }
   }
可以看到,这里创建了一个ViewRootImpl对象root,并将view、root、wparams保存到了集合中。最后调用了ViewRootImpl的setView方法设置视图。
继续跟踪ViewRootImpl的setView方法。
//android.view.ViewRootImpl
  public void setView(View view, WindowManager.LayoutParams attrs, View panelParentView) {
        synchronized (this) {
            if (mView == null) {
                mView = view;
				//...省略不重要代码
                mAdded = true;
                int res; /* = WindowManagerImpl.ADD_OKAY; */
                // Schedule the first layout -before- adding to the window
                // manager, to make sure we do the relayout before receiving
                // any other events from the system.
                requestLayout();
                if ((mWindowAttributes.inputFeatures
                        & WindowManager.LayoutParams.INPUT_FEATURE_NO_INPUT_CHANNEL) == 0) {
                    mInputChannel = new InputChannel();
                }
                mForceDecorViewVisibility = (mWindowAttributes.privateFlags
                        & PRIVATE_FLAG_FORCE_DECOR_VIEW_VISIBILITY) != 0;
                try {
                    mOrigWindowType = mWindowAttributes.type;
                    mAttachInfo.mRecomputeGlobalAttributes = true;
                    collectViewAttributes();
                    res = mWindowSession.addToDisplay(mWindow, mSeq, mWindowAttributes,
                            getHostVisibility(), mDisplay.getDisplayId(), mTmpFrame,
                            mAttachInfo.mContentInsets, mAttachInfo.mStableInsets,
                            mAttachInfo.mOutsets, mAttachInfo.mDisplayCutout, mInputChannel,
                            mTempInsets);
                    setFrame(mTmpFrame);
                } catch (RemoteException e) {
                    mAdded = false;
                    mView = null;
                    mAttachInfo.mRootView = null;
                    mInputChannel = null;
                    mFallbackEventHandler.setView(null);
                    unscheduleTraversals();
                    setAccessibilityFocus(null, null);
                    throw new RuntimeException("Adding window failed", e);
                } finally {
                    if (restore) {
                        attrs.restore();
                    }
                }
              //...省略不重要代码
                if (view instanceof RootViewSurfaceTaker) {
                    mInputQueueCallback =
                        ((RootViewSurfaceTaker)view).willYouTakeTheInputQueue();
                }
                if (mInputChannel != null) {
                    if (mInputQueueCallback != null) {
                        mInputQueue = new InputQueue();
                        mInputQueueCallback.onInputQueueCreated(mInputQueue);
                    }
                    mInputEventReceiver = new WindowInputEventReceiver(mInputChannel,
                            Looper.myLooper());
                }
                view.assignParent(this);
                //...省略不重要代码
            }
        }
    }
WMS是Android窗口管理系统,在将View树注册到WMS之前,必须先执行一次layout,WMS除了窗口管理之外,还负责各种事件的派发,所以在向WMS注册前app在确保这棵view树做好了接收事件准备。
ViewRoot起到中介的作用,它是View树的管理者,同时也兼任与WMS通信的功能。
mWindowSession.addToDisplay将View的渲染交给了WindowManagerService。
mWindowSession是IWindowSession类型的变量,在服务端的实现类是Session.java,它是一个Binder对象。
  @UnsupportedAppUsage
    public static IWindowSession getWindowSession() {
        synchronized (WindowManagerGlobal.class) {
            if (sWindowSession == null) {
                try {
                    // Emulate the legacy behavior.  The global instance of InputMethodManager
                    // was instantiated here.
                    // TODO(b/116157766): Remove this hack after cleaning up @UnsupportedAppUsage
                    InputMethodManager.ensureDefaultInstanceForDefaultDisplayIfNecessary();
                    IWindowManager windowManager = getWindowManagerService();
                    sWindowSession = windowManager.openSession(
                            new IWindowSessionCallback.Stub() {
                                @Override
                                public void onAnimatorScaleChanged(float scale) {
                                    ValueAnimator.setDurationScale(scale);
                                }
                            });
                } catch (RemoteException e) {
                    throw e.rethrowFromSystemServer();
                }
            }
            return sWindowSession;
        }
    }
 @Override
    public int addToDisplay(IWindow window, int seq, WindowManager.LayoutParams attrs,
            int viewVisibility, int displayId, Rect outContentInsets, Rect outStableInsets,
            Rect outOutsets, InputChannel outInputChannel) {
        return mService.addWindow(this, window, seq, attrs, viewVisibility, displayId,
                outContentInsets, outStableInsets, outOutsets, outInputChannel);
    }
可以看到最终是通过WindowManagerService完成了Window的添加。
到此这篇关于Android WindowManager深层理解view绘制实现流程的文章就介绍到这了,更多相关Android view绘制内容请搜索我们以前的文章或继续浏览下面的相关文章希望大家以后多多支持我们!
相关推荐
-
Android中WindowManager与WMS的解析
最近在改bug的时候发现在windowManager.addView的时候会发生莫名其妙的崩溃,那个崩溃真的是让你心态爆炸,潜心研究了两天window相关的东西,虽然不是很深奥的东西,本人也只是弄清楚了window的添加逻辑,在此分享给大家: 一.悬浮窗的概念 在android中,无论我们的app界面,还是系统桌面,再或者是手机下方的几个虚拟按键和最上方的状态栏,又或者是一个吐司...我们所看到的所有界面,都是由一个个悬浮窗口组成的. 但是这些窗口有不同的级别: 系统的是老大,是最高级别,你没见
-

Android使用WindowManager构造悬浮view
一般在android显示一个View都是通过Activity的setContentView设置的,但是还有一种方法,可以直接使用WindowManager在整个应用的最上层绘制我们需要显示的view,总体的效果类似于AlertDialog的弹出效果. 使用WindowManager构造这样的一个悬浮View也比较简单,直接通过windowmanager.addView()方法即可. package com.gearmotion.app.windowmanagermotion; import an
-
深入理解Android中的Window和WindowManager
Window表示一个窗口的概念,Window是一个抽象类,它的具体实现是PhoneWindow.创建一个Window,需要通过WindowManager即可完成,WindowManager是外界访问Window的入口,Window具体实现位于WindowManagerService中,WindowManager和WindowManagerService的交互是一个IPC的过程.Android中,所有的视图都是通过Window来呈现,不管是Activity.Dialog.还是Toast,它们的视图
-
Android利用WindowManager实现悬浮窗
前言 你会发现QQ视频的时候,就算手机回到主页,视频小模块依旧能悬浮在桌面上.还有当年很火的各种手机杀毒软件的桌面小助手,总能在呆在桌面.这种悬浮窗的操作就需要用到Window. 效果 gif图看着有点儿卡,其实实际上还是很流畅的. Window Window即窗口,是个抽象类,具体实现就是PhoneWindow,对就是那个装着DecorView的PhoneWindow. Window整体分三种类型:应用Window.子Window.系统Window. 应用Window:对应一个Activity
-
Android WindowManager深层理解view绘制实现流程
目录 前言 setContentView()流程 WindowManager.addView流程 前言 又是一年一度的1024程序员节了,今天不写点什么总感觉对不起这个节日.想来想去,就写点关于View的绘制.本文不会重点讲View绘制三大回调函数:onMeasure.onLayout.onDraw,而是站在Android framework的角度去分析一下View的绘制. View是如何被渲染到屏幕中的? ViewRoot.DecorView.Activity.Window.WindowMan
-
浅谈Android View绘制三大流程探索及常见问题
View绘制的三大流程,指的是measure(测量).layout(布局).draw(绘制) measure负责确定View的测量宽/高,也就是该View需要占用屏幕的大小,确定完View需要占用的屏幕大小后,就会通过layout确定View的最终宽/高和四个顶点在手机界面上的位置,等通过measure和layout过程确定了View的宽高和要显示的位置后,就会执行draw绘制View的内容到手机屏幕上. 在详细介绍这三大流程之前,需要简单了解一下ViewRootImpl,View绘制的三大步骤
-
Android应用开发中View绘制的一些优化点解析
一个通常的错误观念就是使用基本的布局结构(例如:LinearLayout.FrameLayout等)能够在大多数情况下 产生高效率 的布局. 显然,你的应用程序里添加的每一个控件和每一个布局都需要初始化.布局(layout). 绘制 (drawing).举例来说:嵌入一个LinearLayout会产生一个太深的布局层次.更严重的是,嵌入几个使 用 layout_weight属性的LinearLayout 将会导致大量的开销,因为每个子视图都需要被测量两次.这是反复解析 布
-
Android中View绘制流程详细介绍
创建Window Window即窗口,这个概念在AndroidFramework中的实现为android.view.Window这个抽象类,这个抽象类是对Android系统中的窗口的抽象.在介绍这个类之前,我们先来看看究竟什么是窗口呢? 实际上,窗口是一个宏观的思想,它是屏幕上用于绘制各种UI元素及响应用户输入事件的一个矩形区域.通常具备以下两个特点: 独立绘制,不与其它界面相互影响: 不会触发其它界面的输入事件: 在Android系统中,窗口是独占一个Surface实例的显示区域,每个窗口的S
-
深入理解Android中View绘制的三大流程
前言 最近对Android中View的绘制机制有了一些新的认识,所以想记录下来并分享给大家.View的工作流程主要是指measure.layout.draw这三大流程,即测量.布局和绘制,其中measure确定View的测量宽高,layout根据测量的宽高确定View在其父View中的四个顶点的位置,而draw则将View绘制到屏幕上,这样通过ViewGroup的递归遍历,一个View树就展现在屏幕上了. 说的简单,下面带大家一步一步从源码中分析: Android的View是树形结构的: 基本概
-
Android view绘制流程详解
绘制流程 measure 流程测量出 View 的宽高尺寸. layout 流程确定 View 的位置及最终尺寸. draw 流程将 View 绘制在屏幕上. Measure 测量流程 系统是通过 MeasureSpec 测量 View 的,在了解测量过程之前一定要了解这个 MeasureSpec . MeasureSpec MeasureSpec 是一个 32 位的 int 值打包而来的,打包为 MeasureSpec 主要是为了避免过多的对象内存分配. 为了方便操作,MeasureSpec
-
Android自定义View绘制贝塞尔曲线实现流程
目录 前言 二阶贝塞尔曲线 三阶贝塞尔曲线 前言 对于Android开发,实现贝塞尔曲线还是比较方便的,有对应的API供你调用.由于一阶贝塞尔曲线就是一条直线,实际没啥多大用处,因此,下面主要讲解二阶和三阶. 二阶贝塞尔曲线 在Android中,使用quadTo来实现二阶贝塞尔 path.reset() path.moveTo(startX, startY) path.quadTo(currentX, currentY, endX, endY) canvas.drawPath(path, cur
-
13问13答全面学习Android View绘制
本文通过13问13答学习Android View绘制,供大家参考,具体内容如下 1.View的绘制流程分几步,从哪开始?哪个过程结束以后能看到view? 答:从ViewRoot的performTraversals开始,经过measure,layout,draw 三个流程.draw流程结束以后就可以在屏幕上看到view了. 2.view的测量宽高和实际宽高有区别吗? 答:基本上百分之99的情况下都是可以认为没有区别的.有两种情况,有区别.第一种 就是有的时候会因为某些原因 view会多次测量,那第
-
Android View 绘制机制的详解
View 绘制机制一. View 树的绘图流程 当 Activity 接收到焦点的时候,它会被请求绘制布局,该请求由 Android framework 处理.绘制是从根节点开始,对布局树进行 measure 和 draw.整个 View 树的绘图流程在ViewRoot.java类的performTraversals()函数展开,该函数所做 的工作可简单概况为是否需要重新计算视图大小(measure).是否需要重新安置视图的位置(layout).以及是否需要重绘(draw),流程图如下: Vie
-
Android自定义View绘制随机生成图片验证码
本篇文章讲的是Android自定义View之随机生成图片验证码,开发中我们会经常需要随机生成图片验证码,但是这个是其次,主要还是想总结一些自定义View的开发过程以及一些需要注意的地方. 按照惯例先看看效果图: 一.先总结下自定义View的步骤: 1.自定义View的属性 2.在View的构造方法中获得我们自定义的属性 3.重写onMesure 4.重写onDraw 其中onMesure方法不一定要重写,但大部分情况下还是需要重写的 二.View 的几个构造函数 1.public CustomV