WPF制作一个简单的倒计时器实例附源码
实例一:
早上起来后闲的无事,于是想到前些日子学院的某个老师让大家给他找个什么倒计时的小软件,当时大家忙于复习所以也懒得搭理这件事,囧~。既然早上没事干,何不写个玩玩~既然要写,就用以前没怎么捣鼓过的WPF写一个吧,也算是一次学习WPF的初探吧(感觉自己很落后了)!
在Vs2008和Vs2010之间徘徊了许久之后,最终还是选择了Vs2008做开发IDE。在Vs2008中建了个WPF工程后,浏览了下默认生成的工程文件结构,一个App.xaml(当然还有App.xaml.cs)和一个Windows1.xaml(Windows1.xaml.cs)。设计界面也和之前的Window Form程序大不一样了,感觉和Flex差不多,不支持直接拖拽到指定位置的界面设计(在此感谢 cesium和 Muse为我指出问题所在),还真是有点不怎么习惯哦~
好了,开始做个简单的倒计时器了。 先让大家看下运行效果吧,显示在屏幕正中央且置顶显示: 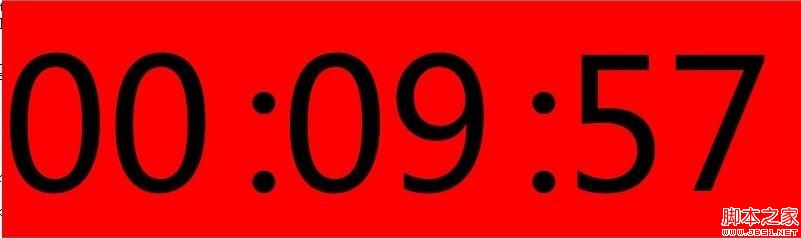
由于比较简单,就三个文件便写完了,分别为界面设计的MainWin.xaml和应用程序类App.xaml 和倒计时处理类ProcessCount.cs类文件。代码分别如下:
倒计时处理类ProcessCount.cs :
代码如下:
Code highlighting produced by Actipro CodeHighlighter (freeware)http://www.CodeHighlighter.com/--> 1 using System;
using System.Collections.Generic;
using System.Linq;
using System.Text;
namespace CountDown
{
/// <summary>
/// 实现倒计时功能的类
/// </summary>
public class ProcessCount
{
private Int32 _TotalSecond;
public Int32 TotalSecond
{
get { return _TotalSecond; }
set { _TotalSecond = value; }
}
/// <summary>
/// 构造函数
/// </summary>
public ProcessCount(Int32 totalSecond)
{
this._TotalSecond = totalSecond;
}
/// <summary>
/// 减秒
/// </summary>
/// <returns></returns>
public bool ProcessCountDown()
{
if (_TotalSecond == 0)
return false;
else
{
_TotalSecond--;
return true;
}
}
/// <summary>
/// 获取小时显示值
/// </summary>
/// <returns></returns>
public string GetHour()
{
return String.Format("{0:D2}", (_TotalSecond / 3600));
}
/// <summary>
/// 获取分钟显示值
/// </summary>
/// <returns></returns>
public string GetMinute()
{
return String.Format("{0:D2}", (_TotalSecond % 3600) / 60);
}
/// <summary>
/// 获取秒显示值
/// </summary>
/// <returns></returns>
public string GetSecond()
{
return String.Format("{0:D2}", _TotalSecond % 60);
}
}
}
Code highlighting produced by Actipro CodeHighlighter (freeware)http://www.CodeHighlighter.com/--> 1 <Window x:Class="CountDown.MainWin"
xmlns="http://schemas.microsoft.com/winfx/2006/xaml/presentation"
xmlns:x="http://schemas.microsoft.com/winfx/2006/xaml" Height="400" Width="800" HorizontalAlignment="Center" VerticalAlignment="Center"
Title=" " Topmost="True" WindowStyle="None" Background="Transparent" AllowsTransparency="True" WindowStartupLocation="CenterScreen">
<Grid>
<Grid.ColumnDefinitions>
<ColumnDefinition />
<ColumnDefinition Width="40"/>
<ColumnDefinition />
<ColumnDefinition Width="40"/>
<ColumnDefinition />
</Grid.ColumnDefinitions>
<TextBlock Text="00" Name="HourArea" VerticalAlignment="Center" FontSize="180" Background="Red" Grid.Column="0"/>
<TextBlock Text=":" Name="HourSplitMinute" VerticalAlignment="Center" FontSize="180" Background="Red" Grid.Column="1"/>
<TextBlock Text="10" Name="MinuteArea" VerticalAlignment="Center" FontSize="180" Background="Red" Grid.Column="2" />
<TextBlock Text=":" Name="MinuteSplitSecond" VerticalAlignment="Center" FontSize="180" Background="Red" Grid.Column="3"/>
<TextBlock Text="00" Name="SecondArea" VerticalAlignment="Center" FontSize="180" Background="Red" Grid.Column="4"/>
</Grid>
</Window>
窗口界面逻辑设计文件:MainWin.xaml.cs:
代码如下:
Code highlighting produced by Actipro CodeHighlighter (freeware)http://www.CodeHighlighter.com/--> 1 using System;
using System.Collections.Generic;
using System.Linq;
using System.Text;
using System.Windows;
using System.Windows.Controls;
using System.Windows.Data;
using System.Windows.Documents;
using System.Windows.Input;
using System.Windows.Media;
using System.Windows.Media.Imaging;
using System.Windows.Shapes;
using System.Windows.Threading;
namespace CountDown
{
/// <summary>
/// Interaction logic for MainWin.xaml
/// </summary>
public partial class MainWin : Window
{
private DispatcherTimer timer;
private ProcessCount processCount;
public MainWin()
{
InitializeComponent();
this.Loaded += new RoutedEventHandler(MainWin_Loaded);
}
/// <summary>
/// 窗口加载事件
/// </summary>
/// <param name="sender"></param>
/// <param name="e"></param>
private void MainWin_Loaded(object sender, RoutedEventArgs e)
{
//设置定时器
timer = new DispatcherTimer();
timer.Interval = new TimeSpan(10000000); //时间间隔为一秒
timer.Tick += new EventHandler(timer_Tick);
//转换成秒数
Int32 hour= Convert.ToInt32(HourArea.Text);
Int32 minute = Convert.ToInt32(MinuteArea.Text);
Int32 second = Convert.ToInt32(SecondArea.Text);
//处理倒计时的类
processCount = new ProcessCount(hour*3600+minute*60+second);
CountDown += new CountDownHandler(processCount.ProcessCountDown);
//开启定时器
timer.Start();
}
/// <summary>
/// Timer触发的事件
/// </summary>
/// <param name="sender"></param>
/// <param name="e"></param>
private void timer_Tick(object sender, EventArgs e)
{
if (OnCountDown())
{
HourArea.Text = processCount.GetHour();
MinuteArea.Text = processCount.GetMinute();
SecondArea.Text = processCount.GetSecond();
}
else
timer.Stop();
}
/// <summary>
/// 处理事件
/// </summary>
public event CountDownHandler CountDown;
public bool OnCountDown()
{
if (CountDown != null)
return CountDown();
return false;
}
}
/// <summary>
/// 处理倒计时的委托
/// </summary>
/// <returns></returns>
public delegate bool CountDownHandler();
}
鉴于代码中注释的比较详细,所以笔者也不再一一赘述了,希望对大家能有所帮助。完整的工程包下载:http://xiazai.jb51.net/201212/yuanma/CountDown_jb51.rar。
实例二:
效果:
UI:放置一个Label ---><Label Name="lblSecond" FontSize="20" Foreground="Red" ></Label>
CS:
代码如下:
private int countSecond=300; //记录秒数
private void UserControl_Loaded(object sender, RoutedEventArgs e)
{
private DispatcherTimer disTimer = new DispatcherTimer();
disTimer.Interval = new TimeSpan(0, 0, 0, 1); //参数分别为:天,小时,分,秒。此方法有重载,可根据实际情况调用。
disTimer.Tick += new EventHandler(disTimer_Tick); //每一秒执行的方法
disTimer.Start();
}
void disTimer_Tick(object sender, EventArgs e)
{
if(countSecond==0)
{
MessageBox.Show("结束");
}
else
{
//判断lblSecond是否处于UI线程上
if (lblSecond.Dispatcher.CheckAccess())
{
lblSecond.Content=countSecnd.ToString();
}
else
{
lblSecond.Dispatcher.BeginInvoke(DispatcherPriority.Normal,(Action)(() =>{
lblSecond.Content=countSecond.ToString();
}));
}
countSecond--;
}
}
相关推荐
-

WPF实现渐变淡入淡出的登陆窗口效果
本文实例讲述了WPF实现渐变淡入淡出的登陆窗口效果的方法.分享给大家供大家参考.具体实现方法如下: 1.实现原理 ① 利用UIElement.OpacityMask属性,用于改变对象区域的不透明度的画笔.可以使元素的特定区域透明或部分透明,从而实现比较新颖的效果. ② OpacityMask属性接受任何画刷,可利用LinearGradientBrush线性渐变画刷,通过对渐变画刷中各颜色点加以动画处理即可. 2.渐变淡入实现 渐变淡入效果,可通过事件触发器触发Loaded事件实现,所以可以仅用前
-
关于.NET/C#/WCF/WPF 打造IP网络智能视频监控系统的介绍
OptimalVision网络视频监控系统 OptimalVision(OV)网络视频监控系统(Video Surveillance System),是一套基于.NET.C#.WCF.WPF等技术构建的IP网络视频监控系统.设计与实现该系统的初衷是希望在家用电脑中部署该系统,连接本地或局域网设备,通过浏览器或手机客户端浏览宝宝实时视频,也就是俗称的"宝宝在线"或"家庭看护". 但由于业余时间总是有限,完成系统中的服务.配置.采集.传输和桌面GUI部分后,继续完成后续
-
WPF绑定实例详解
本文详细讲述了WPF绑定的用法,分享给大家供大家参考.具体用法分析如下: 1.WPF绑定使用的源属性必须是依赖项属性,这是因为依赖项属性具有内置的更改通知支持,元素绑定表达式使用了Xaml扩展标记,WPF绑定一个控件是使用Binding.ElementName,绑定非控件对象时使用Source,RelativeSource,DataContext属性(WPF特有,而非XAML),只能绑定对象的共有字段. 下边是部分Binding 属性名,完整列表参考 :http://msdn.microsoft
-
WPF字体或内容模糊的解决方法
本文会给大家介绍尝试过的一些方法,大家可以一起看看. 1.用WPF4.0中的新字体渲染方法,没有改善 <Setter Property="TextOptions.TextFormattingMode" Value="Display" /> <Setter Property="TextOptions.TextRenderingMode" Value="ClearType" /> 2.给控件加上SnapsT
-
在WinForm和WPF中使用GMap.Net地图插件简单教程
如何在WinForm中使用GMap.Net 项目主页:https://greatmaps.codeplex.com/ 下载GMap.Net,我下载的版本:greatmaps_81b71bf30091,编译三个核心项目: GMap.Net.Core:核心DLL GMap.Net.WindowsForms:WinForm中使用的DLL GMap.NET.WindowsPresentation:WPF中使用的DLL 在WinForm项目中使用GMap: 1.新建一个Visual C# 的Windows
-
仿vs实现WPF好看的进度条
为了界面友好,一般的操作时间较长时,都需要增加进度条提示.由于WPF自带的进度条其实不怎么好看,而且没啥视觉效果.后来,装VS2012时,发现安装过程中进度条效果不错,于是上网查了资料.学习了ModernUI(开源的),地址:https://github.com/firstfloorsoftware/mui. 后来,做了尝试写了个Demo,效果不错.另外,专门录制了tif文件,方便大家看到效果.废话不多说,先展示效果: 一.效果展示 A.VS2012安装界面图: B.个人尝试Demo效果图: 二
-
wpf将表中数据显示到datagrid示例
a.在.xaml文件中拖入一个datagrid,然后添加列名,使用Binding="{Binding 数据库中的列名称}",如下: 复制代码 代码如下: <DataGrid AutoGenerateColumns="False" Height="438"HorizontalAlignment="Left" Margin="23,278,0,0" Name="dataGrid1"
-
在Winform和WPF中注册全局快捷键实现思路及代码
快捷键辅助类 复制代码 代码如下: class HotKey { /// <summary> /// 如果函数执行成功,返回值不为0. /// 如果函数执行失败,返回值为0.要得到扩展错误信息,调用GetLastError..NET方法:Marshal.GetLastWin32Error() /// </summary> /// <param name="hWnd">要定义热键的窗口的句柄</param> /// <param na
-
关于WPF异步MVVM等待窗体的介绍
需求描述•在ViewModel中处理Model中的数据需要一定时间的等待•ViewModel或Model在获取数据或访问同步服务时有一定延迟需要等待•ViewModel操作View加载数据需要一段时间解决办法•显示一个等待UI,当数据处理完毕或服务接口返回后等待UI消失转动齿轮控件•参考开源实现SprocketControl :http://wpfspark.codeplex.com/等待控件 复制代码 代码如下: <Grid> <local:SprocketControl Gr
-
WPF的数据绑定详细介绍
一.WPF数据绑定的概要 数据绑定:是应用程序 UI 与业务逻辑之间建立连接的过程. 如果绑定正确设置并且数据提供正确通知,则当数据的值发生更改时,绑定到数据的视觉元素会自动反映更改. 数据绑定可能还意味着如果视觉元素中数据的外部表现形式发生更改,则基础数据可以自动更新以反映更改. 例如:如果用户编辑 TextBox 元素中的值,则基础数据值会自动更新以反映该更改. 1. 数据绑定涉及到两个方面: 一个是绑定源,一个是绑定目标.绑定源即控件绑定所使用的源数据,绑定目标即数据显示的控件. 2. 对