在jupyter notebook中调用.ipynb文件方式
正常来说在jupyter notebook 中只能调用.py文件,要想要调用jupyter notebook自己的文件会报错。
Jupyter Notebook官网介绍了一种简单的方法:
http://jupyter-notebook.readthedocs.io/en/latest/examples/Notebook/Importing%20Notebooks.html
添加jupyter notebook解析文件
首先,创建一个python文件,例如Ipynb_importer.py,代码如下:
import io, os,sys,types
from IPython import get_ipython
from nbformat import read
from IPython.core.interactiveshell import InteractiveShell

class NotebookFinder(object):
 """Module finder that locates Jupyter Notebooks"""
 def __init__(self):
  self.loaders = {}

 def find_module(self, fullname, path=None):
  nb_path = find_notebook(fullname, path)
  if not nb_path:
   return

  key = path
  if path:
   # lists aren't hashable
   key = os.path.sep.join(path)

  if key not in self.loaders:
   self.loaders[key] = NotebookLoader(path)
  return self.loaders[key]

def find_notebook(fullname, path=None):
 """find a notebook, given its fully qualified name and an optional path

 This turns "foo.bar" into "foo/bar.ipynb"
 and tries turning "Foo_Bar" into "Foo Bar" if Foo_Bar
 does not exist.
 """
 name = fullname.rsplit('.', 1)[-1]
 if not path:
  path = ['']
 for d in path:
  nb_path = os.path.join(d, name + ".ipynb")
  if os.path.isfile(nb_path):
   return nb_path
  # let import Notebook_Name find "Notebook Name.ipynb"
  nb_path = nb_path.replace("_", " ")
  if os.path.isfile(nb_path):
   return nb_path

class NotebookLoader(object):
 """Module Loader for Jupyter Notebooks"""
 def __init__(self, path=None):
  self.shell = InteractiveShell.instance()
  self.path = path

 def load_module(self, fullname):
  """import a notebook as a module"""
  path = find_notebook(fullname, self.path)

  print ("importing Jupyter notebook from %s" % path)

  # load the notebook object
  with io.open(path, 'r', encoding='utf-8') as f:
   nb = read(f, 4)

  # create the module and add it to sys.modules
  # if name in sys.modules:
  # return sys.modules[name]
  mod = types.ModuleType(fullname)
  mod.__file__ = path
  mod.__loader__ = self
  mod.__dict__['get_ipython'] = get_ipython
  sys.modules[fullname] = mod

  # extra work to ensure that magics that would affect the user_ns
  # actually affect the notebook module's ns
  save_user_ns = self.shell.user_ns
  self.shell.user_ns = mod.__dict__

  try:
   for cell in nb.cells:
   if cell.cell_type == 'code':
    # transform the input to executable Python
    code = self.shell.input_transformer_manager.transform_cell(cell.source)
    # run the code in themodule
    exec(code, mod.__dict__)
  finally:
   self.shell.user_ns = save_user_ns
  return mod
sys.meta_path.append(NotebookFinder())
调用jupyter notebook module
只要在我们的工作目录下放置Ipynb_importer.py文件,就可以正常调用所有的jupyter notebook文件。 这种方法的本质就是使用一个jupyter notenook解析器先对.ipynb文件进行解析,把文件内的各个模块加载到内存里供其他python文件调用。
新建一个文件foo.ipynb
def foo():
 print("foo")
再新建一个ipynb文件,调用foo这个文件
import Ipynb_importer
import foo
foo.foo()
运行结果如下:
importing Jupyter notebook from foo.ipynb
foo
补充知识:jupyter notebook_主函数文件如何调用类文件
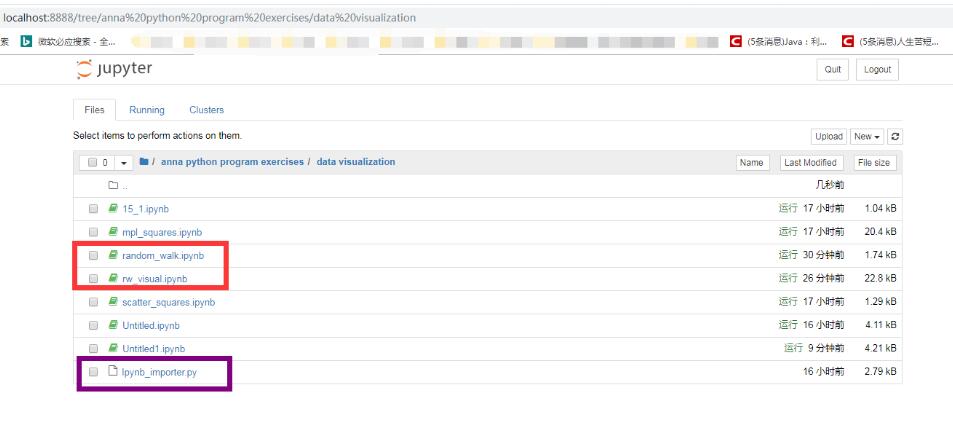
使用jupyter notebook编写python程序,rw_visual.jpynb是写的主函数,random_walk.jpynb是类(如图)。在主函数中将类实例化后运行会报错,经网络查找解决了问题,缺少Ipynb_importer.py这样一个链接文件。
解决方法:
1、在同一路径下创建名为Ipynb_importer.py的文件:File-->download as-->Python(.py),该文件内容如下:
#!/usr/bin/env python
# coding: utf-8
# In[ ]:

import io, os,sys,types
from IPython import get_ipython
from nbformat import read
from IPython.core.interactiveshell import InteractiveShell

class NotebookFinder(object):
 """Module finder that locates Jupyter Notebooks"""
 def __init__(self):
  self.loaders = {}

 def find_module(self, fullname, path=None):
  nb_path = find_notebook(fullname, path)
  if not nb_path:
   return

  key = path
  if path:
   # lists aren't hashable
   key = os.path.sep.join(path)

  if key not in self.loaders:
   self.loaders[key] = NotebookLoader(path)
  return self.loaders[key]

def find_notebook(fullname, path=None):
 """find a notebook, given its fully qualified name and an optional path
 This turns "foo.bar" into "foo/bar.ipynb"
 and tries turning "Foo_Bar" into "Foo Bar" if Foo_Bar
 does not exist.
 """
 name = fullname.rsplit('.', 1)[-1]
 if not path:
  path = ['']
 for d in path:
  nb_path = os.path.join(d, name + ".ipynb")
  if os.path.isfile(nb_path):
   return nb_path
  # let import Notebook_Name find "Notebook Name.ipynb"
  nb_path = nb_path.replace("_", " ")
  if os.path.isfile(nb_path):
   return nb_path

class NotebookLoader(object):
 """Module Loader for Jupyter Notebooks"""
 def __init__(self, path=None):
  self.shell = InteractiveShell.instance()
  self.path = path

 def load_module(self, fullname):
  """import a notebook as a module"""
  path = find_notebook(fullname, self.path)

  print ("importing Jupyter notebook from %s" % path)

  # load the notebook object
  with io.open(path, 'r', encoding='utf-8') as f:
   nb = read(f, 4)

  # create the module and add it to sys.modules
  # if name in sys.modules:
  # return sys.modules[name]
  mod = types.ModuleType(fullname)
  mod.__file__ = path
  mod.__loader__ = self
  mod.__dict__['get_ipython'] = get_ipython
  sys.modules[fullname] = mod

  # extra work to ensure that magics that would affect the user_ns
  # actually affect the notebook module's ns
  save_user_ns = self.shell.user_ns
  self.shell.user_ns = mod.__dict__

  try:
   for cell in nb.cells:
   if cell.cell_type == 'code':
    # transform the input to executable Python
    code = self.shell.input_transformer_manager.transform_cell(cell.source)
    # run the code in themodule
    exec(code, mod.__dict__)
  finally:
   self.shell.user_ns = save_user_ns
  return mod
sys.meta_path.append(NotebookFinder())
2、在主函数中import Ipynb_importer
import matplotlib.pyplot as plt
import Ipynb_importer

from random_walk import RandomWalk

rw = RandomWalk()
rw.fill_walk()
plt.scatter(rw.x_values, rw.y_values, s=15)
plt.show()
3、运行主函数,调用成功
ps:random_walk.jpynb文件内容如下:
from random import choice

class RandomWalk():
 def __init__(self, num_points=5000):
  self.num_points = num_points
  self.x_values = [0]
  self.y_values = [0]

 def fill_walk(self):
  while len(self.x_values) < self.num_points:
   x_direction = choice([1,-1])
   x_distance = choice([0,1,2,3,4])
   x_step = x_direction * x_distance

   y_direction = choice([1,-1])
   y_distance = choice([0,1,2,3,4])
   y_step = y_direction * y_distance

   if x_step == 0 and y_step == 0:
    continue

   next_x = self.x_values[-1] + x_step
   next_y = self.y_values[-1] + y_step

   self.x_values.append(next_x)
   self.y_values.append(next_y)
运行结果:

以上这篇在jupyter notebook中调用.ipynb文件方式就是小编分享给大家的全部内容了,希望能给大家一个参考,也希望大家多多支持我们。
相关推荐
-
jupyter notebook 调用环境中的Keras或者pytorch教程
1.安装插件,在非虚拟环境 conda install nb_conda conda install ipykernel 2.安装ipykernel包,在虚拟环境下安装 在Windows使用下面命令:激活环境并安装插件(这里的 Keras 是我的环境名,安装的时候换成自己的环境名即可) activate keras conda install ipykernel 在linux 使用下面的命令: 激活环境并安装插件 source activate keras conda install ipyke
-
Jupyter Notebook打开任意文件夹操作
废话不多说 1.win+R 启动"运行" 输入cmd 点确定 2.输入 cd /d xxxxxxx 回车 jupyter notebook 回车 在这里我想打开H:\机器学习入门 3.等待一会,在浏览器中自动跳出 也可以复制图2中红框的内容,在浏览器中打开 完成! 补充知识:关于在JupyterNotebook下导入自己的模块的问题 在jupyternotebook下导入自己写的模块,有两点需要注意: 1.要将自己写的模块编程xxx.py的形式,而不是.ipynb文件 2.当更改自己的
-
服务器端jupyter notebook映射到本地浏览器的操作
1.远程服务器上安装jupyter notebook(配置jupyter_notebook_config.py文件) sudo pip install jupyter 2.远程服务器(8890端口,没有下面括号中内容默认在服务器8888端口打开jupyter notebook,下面将使用默认端口8888)启动jupyter notebook jupyter notebook (--no-browser --port=8890 --ip=127.0.0.1 --allow-root) 3.将远程j
-
Jupyter Notebook 文件默认目录的查看以及更改步骤
输入命令 jupyter notebook --generate-config 可以看到此时Jupyter Notebook的默认目录 找到对应路径下的jupyter_notebook_config.py文件,用文本编辑器打开,找到这一句 #c.NotebookApp.notebook_dir = '' 然后删掉前面的#,再在 '' 中间放希望设置的路径即可. 补充知识:Jupyter Notebook 查看函数细节 方法一:使用help函数 方法二:在函数名后面加上? 举个例子: help:
-
使用jupyter notebook将文件保存为Markdown,HTML等文件格式
在jupyter notebook运行的页面内,找到如下图片下载格式,选择相应下载格式就可下载保存到本地文件. 补充知识:jupyter notebook的project管理--.ipynb中调用.py文件 做课题和数据挖掘竞赛用python比较多,比较常用的是在服务器终端输入jupyter notebook --ip 0.0.0.0,打开jupyter notebook的一个后台,并在本地windows电脑浏览器进入该服务端写python代码. 将.ipynb和.py结合,可以使得jupyte
-
使用Jupyter notebooks上传文件夹或大量数据到服务器
我们都知道如何上传单个文件,但如果有大量文件或大量数据,这就扎心了,可能会变得单调.因此目前想到一种办法,将文件压缩成zip包,然后再解压到工作目录 解压缩文件 import zipfile import os files = zipfile.ZipFile('homework.zip', 'r') files.extractall(os.getcwd()) files.close() 打包成zip 但是,有时可能还需要从笔记本中下载多个文件.有几种方法可以做到这一点,但最简单的方法是压缩目录并
-
在jupyter notebook中调用.ipynb文件方式
正常来说在jupyter notebook 中只能调用.py文件,要想要调用jupyter notebook自己的文件会报错. Jupyter Notebook官网介绍了一种简单的方法: http://jupyter-notebook.readthedocs.io/en/latest/examples/Notebook/Importing%20Notebooks.html 添加jupyter notebook解析文件 首先,创建一个python文件,例如Ipynb_importer.py,代码如
-
解决Jupyter notebook中.py与.ipynb文件的import问题
在jupyter notebook中,因为其解析文件的方式是基于json的,所以其默认保存的文件格式不是.py而是.ipynb.而.ipynb文件并不能简单的import进.py或者.ipynb文件中,这就为开发带来了极大不便.因为在jupyter notebook中,一定要是在默认的.ipynb下才能有一系列的特性支持,比如自动补全,控制台等待,而.py文件只能通过文本编辑器修改,非常非常不便. 因为.ipynb可以import .py的module,所以其中一个解决方法是将已经写好的.ipy
-
离线状态下在jupyter notebook中使用plotly实例
首先创建一个新的python3记录,之后在开始位置输入以下语句并执行: import plotly import plotly.offline as py py.init_notebook_mode(connected=False) import plotly.graph_objs as go 注意此时实际上是将plotly的库文件写在了ipynb文件内部,因此保存后的ipynb文件会比较大,一般在5M以上. 补充知识:plotly 绘制离线图例(折线) 我就废话不多说了,还是直接看代码吧! #
-
Android 通过API获取数据库中的图片文件方式
Overview 今天复习了一下Android 如何将我们数据库中图片获取出来,并且将其转换为bitmap进行显示. 开发环境以及技术 使用Visual Studio 2019 Android Studio 3.5 API 使用 ASP .NET WEB API 开发 数据库操作只用Entity Framework 使用本地数据库作为数据源 如果你是一个需要开发软件和API的程序员,那么你可以看一下,如果你不是可以选择跳过 $\color{#6995C2}{API开发}$. API 开发 这里我
-
ipython jupyter notebook中显示图像和数学公式实例
1. # 可以使用LaTeX表示数学公式 # 可以使用LaTeX表示数学公式 from IPython.display import Latex Latex(r"$\sqrt{x^2+y^2}$") 2. # SymPy的表达式也可以显示为LaTex %load_ext sympyprinting from sympy import * x, y = symbols("x,y") sqrt(x**2+y**2) 3. # 用Image类显示"jupyter
-
jupyter notebook中新建cell的方法与快捷键操作
jupyter notebook中,你可能需要在当前cell的上面或下面添加新的cell,通过菜单栏.工具栏和快捷键可以实现 菜单栏: 工具栏: 但工具栏中的+号只能在当前cell的下方加新的cell 快捷键: 在当前cell上方新建cell:A 在当前cell下方新建cell:B 注意: 大写状态下的A和小写状态下的a都可以 快捷键方式都是要在非编辑状态下按下才有用 非编辑状态: 编辑状态: 编辑状态下可以按Esc到非编辑状态 另外,有两个经常会用到的快捷键: 执行当前cell,并自动跳到下一
-

Jupyter notebook中5个有趣的魔法命令分享
目录 1.脚本代码写入本地文件 2.执行Py文件 3.监测代码运行时间 4.使用系统命令行 5.快速debug 知识点补充 众所周知,Jupyter notebook是一个交互式的Python shell,也就是IPython的封装版,非常适合用来进行数据分析和机器学习. Jupyter notebook中有很多实用且鲜为人知的功能,可以实现有趣的操作 这次举5个简单的例子. 1.脚本代码写入本地文件 %%file方法可以将脚本代码写入本地Py文件. %%file E:\hello.py de
-
Sql Server 数据库中调用dll文件的过程
1.首先新建一个空的解决方案,并添加一个类库,代码如下,编译并生产dll using System; using System.Collections.Generic; using System.Data.SqlTypes; using System.Linq; using System.Text; namespace TEST { public class TestTrans { [Microsoft.SqlServer.Server.SqlFunction] public static Sq
-
jupyter notebook中美观显示矩阵实例
我就废话不多说了,还是直接看代码吧! from IPython.display import display,Latex,Math %matplotlib inline from IPython.core.interactiveshell import InteractiveShell sh = InteractiveShell.instance() def number_to_str(n,cut=5): ns=str(n) format_='{0:.'+str(cut)+'f}' if 'e'
-
解决matplotlib.pyplot在Jupyter notebook中不显示图像问题
在代码首行添加: %matplotlib inline 即可. 补充知识:jupyter不能显示Matplotlib 动画 看莫烦老师的matplotlib教程中,有一段sinx函数动画,用Jupyter跑却不能显示动画效果. 解决方案:在前面加一句%matplotlib notebook 动画代码如下: %matplotlib notebook import tensorflow as tf import numpy as np import matplotlib.pyplot as plt