Android中ScrollView监听滑动距离案例讲解

需求:想实现像美团中列表下拉后出现悬浮窗的效果。

思路:首先对ScrollView进行滑动监听,然后在onScrollChanged()方法中获取到滑动的Y值,接着进行相关操作即可。

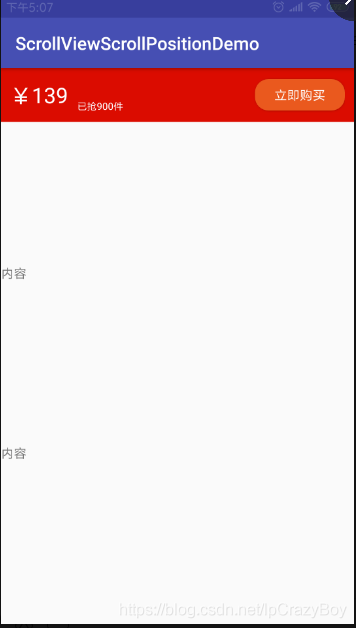
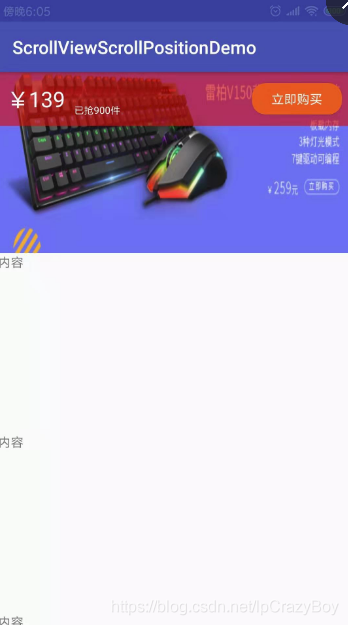
效果一如如下:
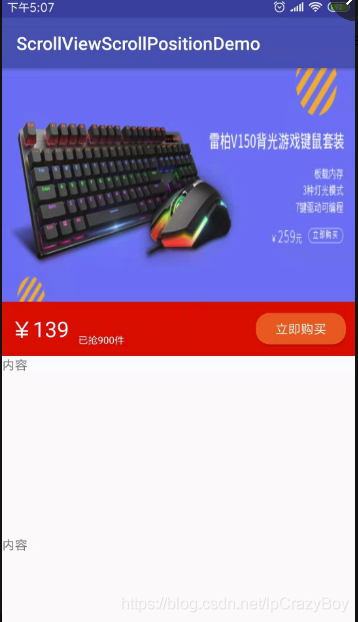
实现步骤:

1、自定义MyScrollView

(1)重写onScrollChanged()获取Y值。

(2)自定义滑动监听接口onScrollListener并公开此接口。

public class MyScrollView extends ScrollView {

    private OnScrollListener onScrollListener;

    public MyScrollView(Context context) {
        super(context);
    }

    public MyScrollView(Context context, AttributeSet attrs) {
        super(context, attrs);
    }

    public MyScrollView(Context context, AttributeSet attrs, int defStyleAttr) {
        super(context, attrs, defStyleAttr);
    }

    @Override
    protected int computeVerticalScrollRange() {
        return super.computeVerticalScrollRange();
    }

    @Override
    protected void onScrollChanged(int l, int t, int oldl, int oldt) {
        super.onScrollChanged(l, t, oldl, oldt);
        if (onScrollListener != null) {
            onScrollListener.onScroll(t);
        }
    }

    /**
     * 接口对外公开
     * @param onScrollListener
     */
    public void setOnScrollListener(OnScrollListener onScrollListener) {
        this.onScrollListener = onScrollListener;
    }

    /**
     *
     * 滚动的回调接口
     *
     * @author xiaanming
     *
     */
    public interface OnScrollListener{
        /**
         * 回调方法, 返回MyScrollView滑动的Y方向距离
         * @param scrollY
         *              、
         */
        void onScroll(int scrollY);
    }
}

2、布局文件如下:

(主要是创建两个相同的布局,顶部一个,相应的位置一个,后面有用)

<?xml version="1.0" encoding="utf-8"?>
<LinearLayout android:layout_width="match_parent"
    android:id="@+id/Main_lLayoutParent"
    android:layout_height="match_parent"
    android:orientation="vertical"
    xmlns:android="http://schemas.android.com/apk/res/android">

    <com.deepreality.scrollviewscrollpositiondemo.MyScrollView
        android:id="@+id/Main_myScrollView"
        android:layout_width="match_parent"
        android:layout_height="match_parent">

        <FrameLayout
            android:layout_width="match_parent"
            android:layout_height="wrap_content">

            <LinearLayout
                android:layout_width="match_parent"
                android:layout_height="match_parent"
                android:orientation="vertical">

                <ImageView
                    android:layout_width="match_parent"
                    android:layout_height="260dp"
                    android:src="@mipmap/icon_product"
                    android:scaleType="fitXY"/>

                <LinearLayout
                    android:id="@+id/Main_lLayoutViewTemp"
                    android:layout_width="match_parent"
                    android:layout_height="60dp"
                    android:orientation="horizontal"
                    android:background="@color/colorRed"
                    android:gravity="center_vertical"
                    android:paddingLeft="10dp"
                    android:paddingRight="10dp">

                    <TextView
                        android:layout_width="wrap_content"
                        android:layout_height="wrap_content"
                        android:text="¥139"
                        android:textSize="24dp"
                        android:textColor="@color/colorWhite"/>

                    <LinearLayout
                        android:layout_width="0dp"
                        android:layout_weight="1"
                        android:layout_height="match_parent"
                        android:orientation="vertical"
                        android:gravity="bottom"
                        android:paddingLeft="10dp"
                        android:paddingBottom="10dp">

                        <TextView
                            android:layout_width="wrap_content"
                            android:layout_height="wrap_content"
                            android:text="已抢900件"
                            android:textSize="11dp"
                            android:textColor="@color/colorWhite"/>

                    </LinearLayout>

                    <Button
                        android:layout_width="100dp"
                        android:layout_height="35dp"
                        android:text="立即购买"
                        android:textColor="@color/colorWhite"
                        android:background="@drawable/btn_corner"/>

                </LinearLayout>

                <TextView
                    android:layout_width="match_parent"
                    android:layout_height="200dp"
                    android:text="内容"/>

                <TextView
                    android:layout_width="match_parent"
                    android:layout_height="200dp"
                    android:text="内容"/>

                <TextView
                    android:layout_width="match_parent"
                    android:layout_height="200dp"
                    android:text="内容"/>

                <TextView
                    android:layout_width="match_parent"
                    android:layout_height="200dp"
                    android:text="内容"/>

            </LinearLayout>

            <LinearLayout
                android:id="@+id/Main_lLayoutView"
                android:layout_width="match_parent"
                android:layout_height="60dp"
                android:orientation="horizontal"
                android:background="@color/colorRed"
                android:gravity="center_vertical"
                android:paddingLeft="10dp"
                android:paddingRight="10dp">

                <TextView
                    android:layout_width="wrap_content"
                    android:layout_height="wrap_content"
                    android:text="¥139"
                    android:textSize="24dp"
                    android:textColor="@color/colorWhite"/>

                <LinearLayout
                    android:layout_width="0dp"
                    android:layout_weight="1"
                    android:layout_height="match_parent"
                    android:orientation="vertical"
                    android:gravity="bottom"
                    android:paddingLeft="10dp"
                    android:paddingBottom="10dp">

                    <TextView
                        android:layout_width="wrap_content"
                        android:layout_height="wrap_content"
                        android:text="已抢900件"
                        android:textSize="11dp"
                        android:textColor="@color/colorWhite"/>

                </LinearLayout>

                <Button
                    android:id="@+id/Main_btnBuy"
                    android:layout_width="100dp"
                    android:layout_height="35dp"
                    android:text="立即购买"
                    android:textColor="@color/colorWhite"
                    android:background="@drawable/btn_corner"/>

            </LinearLayout>

        </FrameLayout>

    </com.deepreality.scrollviewscrollpositiondemo.MyScrollView>

</LinearLayout>

3、MainActivity.java的代码如下:

public class MainActivity extends AppCompatActivity implements MyScrollView.OnScrollListener, View.OnClickListener {

    private Context mContext;

    private LinearLayout lLayoutParent, lLayoutTemp, lLayoutView;
    private Button btnBuy;
    private MyScrollView myScrollView;

    @Override
    protected void onCreate(Bundle savedInstanceState) {
        super.onCreate(savedInstanceState);
        setContentView(R.layout.activity_main);

        baseDataInit();
        bindViews();
        viewsAddListener();
        viewsDataInit();
    }

    private void baseDataInit() {
        mContext = this;
    }

    private void bindViews() {
        lLayoutParent = findViewById(R.id.Main_lLayoutParent);
        lLayoutTemp = findViewById(R.id.Main_lLayoutViewTemp);
        lLayoutView = findViewById(R.id.Main_lLayoutView);
        btnBuy = findViewById(R.id.Main_btnBuy);
        myScrollView = findViewById(R.id.Main_myScrollView);
    }

    private void viewsAddListener() {
        //当布局的状态或者控件的可见性发生改变回调的接口
        lLayoutParent.getViewTreeObserver().addOnGlobalLayoutListener(new ViewTreeObserver.OnGlobalLayoutListener() {
            @Override
            public void onGlobalLayout() {
                //这一步很重要,使得上面的购买布局和下面的购买布局重合
                onScroll(myScrollView.getScrollY());
            }
        });
        myScrollView.setOnScrollListener(this);
        btnBuy.setOnClickListener(this);
    }

    private void viewsDataInit() {

    }

    @Override
    public void onScroll(int scrollY) {
        int mBuyLayout2ParentTop = Math.max(scrollY, lLayoutTemp.getTop());
        lLayoutView.layout(0, mBuyLayout2ParentTop, lLayoutView.getWidth(), mBuyLayout2ParentTop + lLayoutView.getHeight());
    }

    @Override
    public void onClick(View v) {
        Toast.makeText(mContext, "您点击了购买按钮", Toast.LENGTH_SHORT).show();
    }
}

其中,onScroll()接口方法中监听到的是垂直方向滑动的距离Y,可以根据自己的需要进行布局的其他操作。

附加:

效果二如下图所示:

(根据ScrollView下滑距离设置布局的透明度)
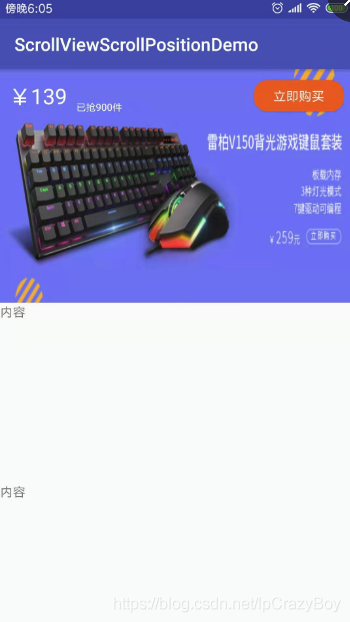
布局文件如下:

<?xml version="1.0" encoding="utf-8"?>
<LinearLayout android:layout_width="match_parent"
    android:id="@+id/Main_lLayoutParent"
    android:layout_height="match_parent"
    android:orientation="vertical"
    xmlns:android="http://schemas.android.com/apk/res/android">

    <RelativeLayout
        android:layout_width="match_parent"
        android:layout_height="match_parent">

        <com.deepreality.scrollviewscrollpositiondemo.MyScrollView
            android:id="@+id/Main_myScrollView"
            android:layout_width="match_parent"
            android:layout_height="match_parent">

            <FrameLayout
                android:layout_width="match_parent"
                android:layout_height="wrap_content">

                <LinearLayout
                    android:layout_width="match_parent"
                    android:layout_height="match_parent"
                    android:orientation="vertical">

                    <LinearLayout
                        android:layout_width="match_parent"
                        android:layout_height="match_parent"
                        android:orientation="vertical">

                        <ImageView
                            android:layout_width="match_parent"
                            android:layout_height="260dp"
                            android:src="@mipmap/icon_product"
                            android:scaleType="fitXY"/>

                        <TextView
                            android:layout_width="match_parent"
                            android:layout_height="200dp"
                            android:text="内容"/>

                        <TextView
                            android:layout_width="match_parent"
                            android:layout_height="200dp"
                            android:text="内容"/>

                        <TextView
                            android:layout_width="match_parent"
                            android:layout_height="200dp"
                            android:text="内容"/>

                        <TextView
                            android:layout_width="match_parent"
                            android:layout_height="200dp"
                            android:text="内容"/>

                    </LinearLayout>

                </LinearLayout>

            </FrameLayout>

        </com.deepreality.scrollviewscrollpositiondemo.MyScrollView>

        <LinearLayout
            android:id="@+id/Main_lLayoutViewTemp1"
            android:layout_width="match_parent"
            android:layout_height="60dp"
            android:orientation="horizontal"
            android:background="@color/colorRed"
            android:gravity="center_vertical"
            android:paddingLeft="10dp"
            android:layout_alignParentTop="true"
            android:paddingRight="10dp">

            <TextView
                android:layout_width="wrap_content"
                android:layout_height="wrap_content"
                android:text="¥139"
                android:textSize="24dp"
                android:textColor="@color/colorWhite"/>

            <LinearLayout
                android:layout_width="0dp"
                android:layout_weight="1"
                android:layout_height="match_parent"
                android:orientation="vertical"
                android:gravity="bottom"
                android:paddingLeft="10dp"
                android:paddingBottom="10dp">

                <TextView
                    android:layout_width="wrap_content"
                    android:layout_height="wrap_content"
                    android:text="已抢900件"
                    android:textSize="11dp"
                    android:textColor="@color/colorWhite"/>

            </LinearLayout>

            <Button
                android:id="@+id/Second_btnBuy"
                android:layout_width="100dp"
                android:layout_height="35dp"
                android:text="立即购买"
                android:textColor="@color/colorWhite"
                android:background="@drawable/btn_corner"/>

        </LinearLayout>

    </RelativeLayout>

</LinearLayout>

相应的代码和上一个样式的代码基本一致,只是改了接口中的实现方法。

@Override
public void onScroll(int scrollY) {
    if (scrollY >= 225) {
        scrollY = 225;
    }
    lLayoutViewTemp1.getBackground().setAlpha(scrollY);
}

到此这篇关于Android中ScrollView监听滑动距离案例讲解的文章就介绍到这了,更多相关Android中ScrollView监听滑动距离内容请搜索我们以前的文章或继续浏览下面的相关文章希望大家以后多多支持我们!

(0)

相关推荐

  • Android 滑动Scrollview标题栏渐变效果(仿京东toolbar)

    Scrollview标题栏滑动渐变 仿京东样式(上滑显示下滑渐变消失) /** * @ClassName MyScrollView * @Author Rex * @Date 2021/1/27 17:38 */ public class MyScrollView extends ScrollView { private TranslucentListener mTranslucentListener; public void setTranslucentListener(Translucent

  • Android制作一个锚点定位的ScrollView

    因为遇到了一个奇怪的需求:将垂直线性滚动的布局添加一个Indicator.定位布局中的几个标题项目.为了不影响原有的布局结构所以制作了这个可以锚点定位的ScrollView,就像MarkDown的锚点定位一样.所以自定义了一个ScrollView实现这个业务AnchorPointScrollView 完成效果图 需求分析 怎么滚动? 一个锚点定位的ScrollView.在ScrollView中本身有smoothScrollBy(Int,Int).scrollTo(Int,Int)这种可以滚动到指

  • Android解决ScrollView下嵌套ListView和GridView中内容显示不全的问题

    最近为公司做的一个Demo里面用到了ScrollView嵌套了GridView和ListView,然而在嵌套的时候我发现GridView和ListView都是不能完全显示,显示的基本上都是单行的数据,最后查找资料和翻阅文档看到原因是ListView和GridView的绘制过程中在ScrollView中无法准确的测量自身的高度,而且listVIew和GridView抢占了焦点,使得ListView和GrideView具有自身的显示的效果,这样就测量出显示一行条目即可的距离,其他的条目根据自身的滑动

  • Android scrollview如何监听滑动状态

    ScrollView 视图的滚动过程,其实是在不断修改原点坐标.当手指触摸后,ScrollView会暂时拦截触摸事件,使用一个计时器.假如在计时器到点后没有发生手指移动事件,那么ScrollView发送tracking events到被点击的subView:若是在计时器到点后发生了移动事件,那么ScrollView取消tracking自己促发滚动. 首先说一下 NestedScrollView 的滑动事件的监听, 如果使用 nestedScrollView.setOnScrollChangeLi

  • Android使用ScrollView实现滚动效果

    本文实例为大家分享了ScrollView实现滚动效果的具体代码,供大家参考,具体内容如下 如果长文本的内容超过一屏幕 则只能显示一屏幕的内容 设置ScrollView 通过滚动浏览下面的内容 若将标签更改为<HorizontalScrollView></HorizontalScrollView>则为水平滚动效果 xml文件: <?xml version="1.0" encoding="utf-8"?> <android.su

  • Android ScrollView实现横向和竖向拖动回弹效果

    本文实例为大家分享了Android ScrollView实现拖动回弹效果的具体代码,供大家参考,具体内容如下 原理 在android2.3版本中,View类中新增了一个方法:overScrollBy.通过覆盖该方法,就可以达到阻尼回弹的效果. 示例1.竖向滚动 public class ReboundScrollView extends ScrollView{ private static final int MAX_SCROLL = 200; private static final floa

  • Android scrollview实现底部继续拖动查看图文详情

    本文实例为大家分享了Android实现底部拖动查看图文详情的具体代码,供大家参考,具体内容如下 一.效果图 二.实现步骤 1.xml布局的实现/p> <ScrollView android:id="@+id/mymyscrollview" android:layout_width="fill_parent" android:layout_height="fill_parent" android:layout_above="@

  • Android使用HorizontalScrollView实现水平滚动

    HorizontalScrollView 和 ScrollView 都是由 FrameLayout 派生出来的.它们就是一个用于为普通组件添加滚动条的组件.且 HorizontalScrollView 和 ScrollView 里面最多只能包含一个组件(当然组件里面还可以嵌套组件).它们不同的是 HorizontalScrollView 用于添加水平滚动,而 ScrollView 用于添加垂直滚动. 突然间想到 做一个屏幕下方水平滑动,屏幕上方并作出相应的反应的效果.只是在下方滚动时,屏幕上方没

  • Android中ScrollView监听滑动距离案例讲解

    需求:想实现像美团中列表下拉后出现悬浮窗的效果. 思路:首先对ScrollView进行滑动监听,然后在onScrollChanged()方法中获取到滑动的Y值,接着进行相关操作即可. 效果一如如下: 实现步骤: 1.自定义MyScrollView (1)重写onScrollChanged()获取Y值. (2)自定义滑动监听接口onScrollListener并公开此接口. public class MyScrollView extends ScrollView { private OnScrol

  • Android 中的监听和按键处理详情

    目录 各种监听 按键处理 onKeyDown() onBackPressed() Fragment中监听Back返回键 各种监听 我们来练习下各种监听.我们在 TextView 上添加了触摸监听,在 Button 上添加了长按监听,在 Spinner 下拉框选项发生变化的时候添加了监听,在 ListView 选中选项时增加了监听. xml <LinearLayout xmlns:android="http://schemas.android.com/apk/res/android"

  • Android中实现监听ScrollView滑动事件

    时候我们需要监听ScroView的滑动情况,比如滑动了多少距离,是否滑到布局的顶部或者底部.可惜的是SDK并没有相应的方法,不过倒是提供了一个 复制代码 代码如下: protected void onScrollChanged(int x, int y, int oldx, int oldy) 方法,显然这个方法是不能被外界调用的,因此就需要把它暴露出去,方便使用.解决方式就是写一个接口, 复制代码 代码如下: package com.example.demo1;    public inter

  • Android中解决WebView上下滑动监听问题

    有些时候我们需要监听webview的滚动事件,但WebView没有直接监听滑动的方法,看WebView的源码则会发现有一个protected void onScrollChanged(int l, int t, int oldl, int oldt)方法. 这个方法.是受到保护的所以我们无法直接使用,所以我们写一个加强的WebView,重写onScrollChanged方法并利用接口回调. public class NewWebView extends WebView{ private OnSc

  • Android ListView监听滑动事件的方法(详解)

    ListView的主要有两种滑动事件监听方法,OnTouchListener和OnScrollListener 1.OnTouchListener OnTouchListener方法来自View中的监听事件,可以在监听三个Action事件发生时通过MotionEvent的getX()方法或getY()方法获取到当前触摸的坐标值,来对用户的滑动方向进行判断,并可在不同的Action状态中做出相应的处理 mListView.setOnTouchListener(new View.OnTouchLis

  • flutter 中监听滑动事件

    在移动端,各个平台或 UI 系统的原始指针事件模型基本都是一致,即:一次完整的事件分为三个阶段:手指按下.手指移动.和手指抬起,而更高级别的手势(如点击.双击.拖动等)都是基于这些原始事件的. Flutter 中可以使用 Listener widget 来监听原始触摸事件,它也是一个功能性 widget. Listener 的常见属性 属性 类型 说明 onPointerDown (PointerDownEvent event){} 手指按下时触发 onPointerMove (PointerD

  • Android TextWatcher内容监听死循环案例详解

    Android TextWatcher内容监听死循环 TextWatcher如何避免在afterTextChanged中调用setText后导致死循环,今天在用TextView时,添加了addTextChangedListener方法监听内容改变,在afterTextChanged方法中又执行了setText方法,结果造成afterTextChanged方法再次调用,然后setText,因此造成了死循环的问题.列出此问题,以备后忘. 先贴Google文档原文说明: /** * This meth

  • Android中判断listview是否滑动到顶部和底部的实现方法

    今天实现listview的下拉刷新和上拉加载的时候,遇到了一个问题,*就是说需要根据listview中滑动的位置来进行下拉刷新和上拉加载.* 具体点,只有当我的listview滑动到最顶部的时候,这时候下拉才执行刷新操作:只有当我的listview滑动到最底部的时候,这时候上拉才执行加载操作. 那么怎么判断listview的滑动位置呢?其实还是比较好解决的,说一下我的想法: 顶部的判断,根据listview中的第一个item距离listview顶部的距离是否为0. 底部的判断,根据listvie

  • Android 中ScrollView嵌套GridView,ListView的实例

    Android 中ScrollView嵌套GridView,ListView的实例 在Android开发中,经常有一些UI需要进行固定style的动态布局,然而由于现在的UI都喜欢把一个界面拉的很长,所以我们很多情况下需要使用ScrollView来嵌套列表控件来实现UI.这样就导致了很多不顺心的问题. 问题一:列表控件显示不完全 原因是嵌套情况下,ScrollView不能正确的计算列表控件的高度. 有两种解决方案 方案一 在适配器赋值完成后代码动态计算列表的高度.这里贴出ListView的计算代

随机推荐