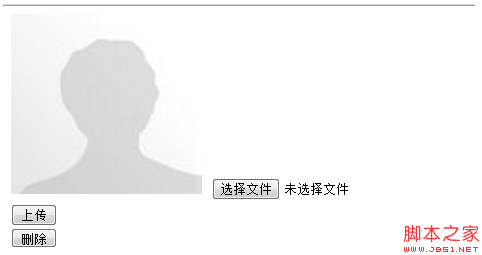
Asp.net FileUpload+Image制作头像效果示例代码
在Web开发中会经常使用到个人信息注册,而个人信息中通常需要自己的头像或者照片。今天主要介绍一下使用FileUpload+img控件上传照片。
FileUpLoad控件使用介绍
FileUpLoad控件的PostedFile属性主要获取上传文件的一些基础信息。
.ContentLength
获取上传文件的大小。返回值为int类型,单位为字节。
用途
1、判断上传文件的大小
if (this.FileUpload1.PostedFile.ContentLength <= 4000000) //4M
{
Response.Write("<script>alert('" +FileUpload1.PostedFile.ContentLength + "')</script>");
}
else
{
Response.Write("<script>alert('太大了不能上传!')</script>");
}
其中FileUpload1是上传控件的ID,this.FileUpload1.PostedFile.ContentLength是上传文件的大小
2、修改ASP.NET上传的默认值
ASP.NET的默认最大上传值是4M,通过修改web.config,可以实现上传大文件:
代码如下:
<system.web>
<httpRuntime maxRequestLength="4096"//这里的4096就是4m,原先是默认的。你改一下这个,就可以了。
executionTimeout="3600"
/>
</system.web>
.ContentType
获取上传文件的MIME内容类型。PostedFile.ContentType这个属性通常用来判断上传文件的MIME类型,我们通常以此来拒绝某些类型的上传,比如仅允许上传图像文件,或者指定固定图片的格式。
".*"="application/octet-stream"
".001"="application/x-001"
".301"="application/x-301"
".323"="text/h323"
".906"="application/x-906"
".907"="drawing/907"
".a11"="application/x-a11"
".acp"="audio/x-mei-aac"
".ai"="application/postscript"
".aif"="audio/aiff"
".aifc"="audio/aiff"
".aiff"="audio/aiff"
".anv"="application/x-anv"
".asa"="text/asa"
".asf"="video/x-ms-asf"
".asp"="text/asp"
".asx"="video/x-ms-asf"
".au"="audio/basic"
".avi"="video/avi"
".awf"="application/vnd.adobe.workflow"
".biz"="text/xml"
".bmp"="application/x-bmp"
".bot"="application/x-bot"
".c4t"="application/x-c4t"
".c90"="application/x-c90"
".cal"="application/x-cals"
".cat"="application/vnd.ms-pki.seccat"
".cdf"="application/x-netcdf"
".cdr"="application/x-cdr"
".cel"="application/x-cel"
".cer"="application/x-x509-ca-cert"
".cg4"="application/x-g4"
".cgm"="application/x-cgm"
".cit"="application/x-cit"
".class"="java/*"
".cml"="text/xml"
".cmp"="application/x-cmp"
".cmx"="application/x-cmx"
".cot"="application/x-cot"
".crl"="application/pkix-crl"
".crt"="application/x-x509-ca-cert"
".csi"="application/x-csi"
".css"="text/css"
".cut"="application/x-cut"
".dbf"="application/x-dbf"
".dbm"="application/x-dbm"
".dbx"="application/x-dbx"
".dcd"="text/xml"
".dcx"="application/x-dcx"
".der"="application/x-x509-ca-cert"
".dgn"="application/x-dgn"
".dib"="application/x-dib"
".dll"="application/x-msdownload"
".doc"="application/msword"
".dot"="application/msword"
".drw"="application/x-drw"
".dtd"="text/xml"
".dwf"="Model/vnd.dwf"
".dwf"="application/x-dwf"
".dwg"="application/x-dwg"
".dxb"="application/x-dxb"
".dxf"="application/x-dxf"
".edn"="application/vnd.adobe.edn"
".emf"="application/x-emf"
".eml"="message/rfc822"
".ent"="text/xml"
".epi"="application/x-epi"
".eps"="application/x-ps"
".eps"="application/postscript"
".etd"="application/x-ebx"
".exe"="application/x-msdownload"
".fax"="image/fax"
".fdf"="application/vnd.fdf"
".fif"="application/fractals"
".fo"="text/xml"
".frm"="application/x-frm"
".g4"="application/x-g4"
".gbr"="application/x-gbr"
".gcd"="application/x-gcd"
".gif"="image/gif"
".gl2"="application/x-gl2"
".gp4"="application/x-gp4"
".hgl"="application/x-hgl"
".hmr"="application/x-hmr"
".hpg"="application/x-hpgl"
".hpl"="application/x-hpl"
".hqx"="application/mac-binhex40"
".hrf"="application/x-hrf"
".hta"="application/hta"
".htc"="text/x-component"
".htm"="text/html"
".html"="text/html"
".htt"="text/webviewhtml"
".htx"="text/html"
".icb"="application/x-icb"
".ico"="image/x-icon"
".ico"="application/x-ico"
".iff"="application/x-iff"
".ig4"="application/x-g4"
".igs"="application/x-igs"
".iii"="application/x-iphone"
".img"="application/x-img"
".ins"="application/x-internet-signup"
".isp"="application/x-internet-signup"
".IVF"="video/x-ivf"
".java"="java/*"
".jfif"="image/jpeg"
".jpe"="image/jpeg"
".jpe"="application/x-jpe"
".jpeg"="image/jpeg"
".jpg"="application/x-jpg"
".js"="application/x-javascript"
".jsp"="text/html"
".la1"="audio/x-liquid-file"
".lar"="application/x-laplayer-reg"
".latex"="application/x-latex"
".lavs"="audio/x-liquid-secure"
".lbm"="application/x-lbm"
".lmsff"="audio/x-la-lms"
".ls"="application/x-javascript"
".ltr"="application/x-ltr"
.FileName
获取上传文件的完整路径及名称。此路径为改文件所在在客户端文件中的路径。通常用这个属性来获取上传文件的名称并保保存。
.FileUpload1.SaveAs
将上传文件保存到指定路径的文件下。通常借助Server.MapPath()方法保存文件到服务器指定文件下。(获取Web服务器指定虚拟路径相对应的物理文件路径)
图片上传实例
FileUpload+Image控件实现上传指定图片大小、格式、保存到指定路径文件下。
.axps
代码如下:
<%@ Page Language="C#" AutoEventWireup="true" CodeBehind="Fileup.aspx.cs" Inherits="Testcookie.Fileup" %>
<!DOCTYPE html PUBLIC "-//W3C//DTD XHTML 1.0 Transitional//EN" "http://www.w3.org/TR/xhtml1/DTD/xhtml1-transitional.dtd">
<html xmlns="http://www.w3.org/1999/xhtml">
<head runat="server">
<title></title>
</head>
<body>
<form id="form1" runat="server">
<div>
<asp:Image ID="Image1" runat="server" Height="180px" Width="191px" ImageUrl="~/Photo/untitled.png" />
<asp:FileUpload ID="FileUpload1" runat="server" />
<asp:Button ID="btnupload" runat="server" Text="Button" onclick="btnupload_Click<SPAN style="FONT-FAMILY: Arial, Helvetica, sans-serif">" /></SPAN>
<asp:Button ID="btndelete" runat="server" Text="Button" onclick="btndelete_Click" />
</div>
</form>
</body>
</html>
using System;
using System.Collections.Generic;
using System.Linq;
using System.Web;
using System.Web.UI;
using System.Web.UI.WebControls;
namespace Testcookie
{
public partial class Fileup : System.Web.UI.Page
{
protected void Page_Load(object sender, EventArgs e)
{
}
protected void btnupload_Click(object sender, EventArgs e)
{
int length= this.FileUpload1.PostedFile.ContentLength;//<SPAN style="COLOR: #ff0000">获取图片大小,以字节为单位</SPAN>
if(length<4000)
{
Response.Write("<script language='javascript'>alert('您选择的图片过大!');</script>");
}
else{
String type=this.FileUpload1.PostedFile.ContentType;//<SPAN style="COLOR: #ff0000">获取上传文件类型</SPAN>
String fullfilename = this.FileUpload1.PostedFile.FileName;//<SPAN style="COLOR: #ff0000">获取上传文件在客户端的路径及名称</SPAN>
String filename = fullfilename.Substring(fullfilename.LastIndexOf("\\")+1);
String extensions = filename.Substring(filename.LastIndexOf (".")+1);//<SPAN style="COLOR: #ff0000">获取文件扩展名</SPAN>
string name=DateTime.Now.ToString("yyyyMMddHHmmss");
if (type == "image/jpeg" || type == "image/png" )//限制上传格式
{
this.FileUpload1.SaveAs(Server.MapPath("Photo") + "\\" + name + "." + extensions);//<SPAN style="COLOR: #ff0000">将图片以当前时间命名保存,避免上传图片命名重复</SPAN>
<SPAN style="COLOR: #ff0000">//设置上传图片大小为原图片大小</SPAN>
//System.Drawing.Image img = System.Drawing.Image.FromFile(this.Server.MapPath("Photo") + "\\" + name + "." + extensions);//获得图片文件
//int width = img.Width;
//this.Image1.Width = width;//这是宽设置Image控件的宽度为图片宽度
//int height = img.Height;
//this.Image1.Height = height;//这是高,设置Image控件的高度为图片的高度
this.Image1.ImageUrl = "Photo/" + name + "." + extensions;
}
else
{
Response.Write("<script language='javascript'>alert('您选择的图片有误!');</script>");
}
}
}
protected void btndelete_Click (object sender, EventArgs e)
{
<SPAN style="COLOR: #ff0000">//删除图片</SPAN>
if (System.IO.File.Exists(Server.MapPath("Photo")+"\\20130808084433.PNG"))
{
try
{
System.IO.File.Delete(Server.MapPath("Photo") + "\\20130808084433.PNG");
}
catch
{
throw new Exception("文件删除失败!");
}
}
}
}
}
效果
文件上传前 
文件上传后

