react Table准备Spin Empty ConfigProvider组件实现
目录
- 前言
- 目录结构
- 开搞ConfigProvider
- Empty组件实现
- Spin组件
前言
继续搞react组件库,该写table了,学习了arco design的table的运行流程,发现准备工作还是挺多的,我们就先解决以下问题吧!

比如你要配置国际化,组件库的所有组件都要共享当前语言的变量,比如是中文,还是英文,这样组件才能渲染对应国家的字符串。
也就是说,你自己的组件库有什么想全局共享的变量,就写在这个组件里。
table使用的地方
  const {
    getPrefixCls, // 获取css前缀
    loadingElement, // loading显示的组件
    size: ctxSize, // size默认值
    renderEmpty, // 空数据时Empty组件显示的内容
    componentConfig, // 全局component的config
  } = useContext(ConfigContext);
我简单解释一下,getPrefixCls获取了组件的css前缀,比如arco deisgn 的前缀自然是arco了,他们的组件的所有css都会加上这个前缀,现在组件库都这么玩。
其他的就不详细描述了,比如table请求数据有loading,你想自定义loading样式可以在loadingElement属性上配置等等,也就是说全局你自定义的loading组件,所有组件都会共享,不用你一个一个去配置了。
而这里的 useContext(ConfigContext) ConfigContext就是ConfigProvider组件创建的context,类似这样(细节不用纠结,后面我们会实现这个组件):
export const ConfigContext = createContext<ConfigProviderProps>({
  getPrefixCls: (componentName: string, customPrefix?: string) => `${customPrefix || defaultProps.prefixCls}-${componentName}`,
  ...defaultProps,
});
 <ConfigContext.Provider value={config}>{children}</ConfigContext.Provider>;
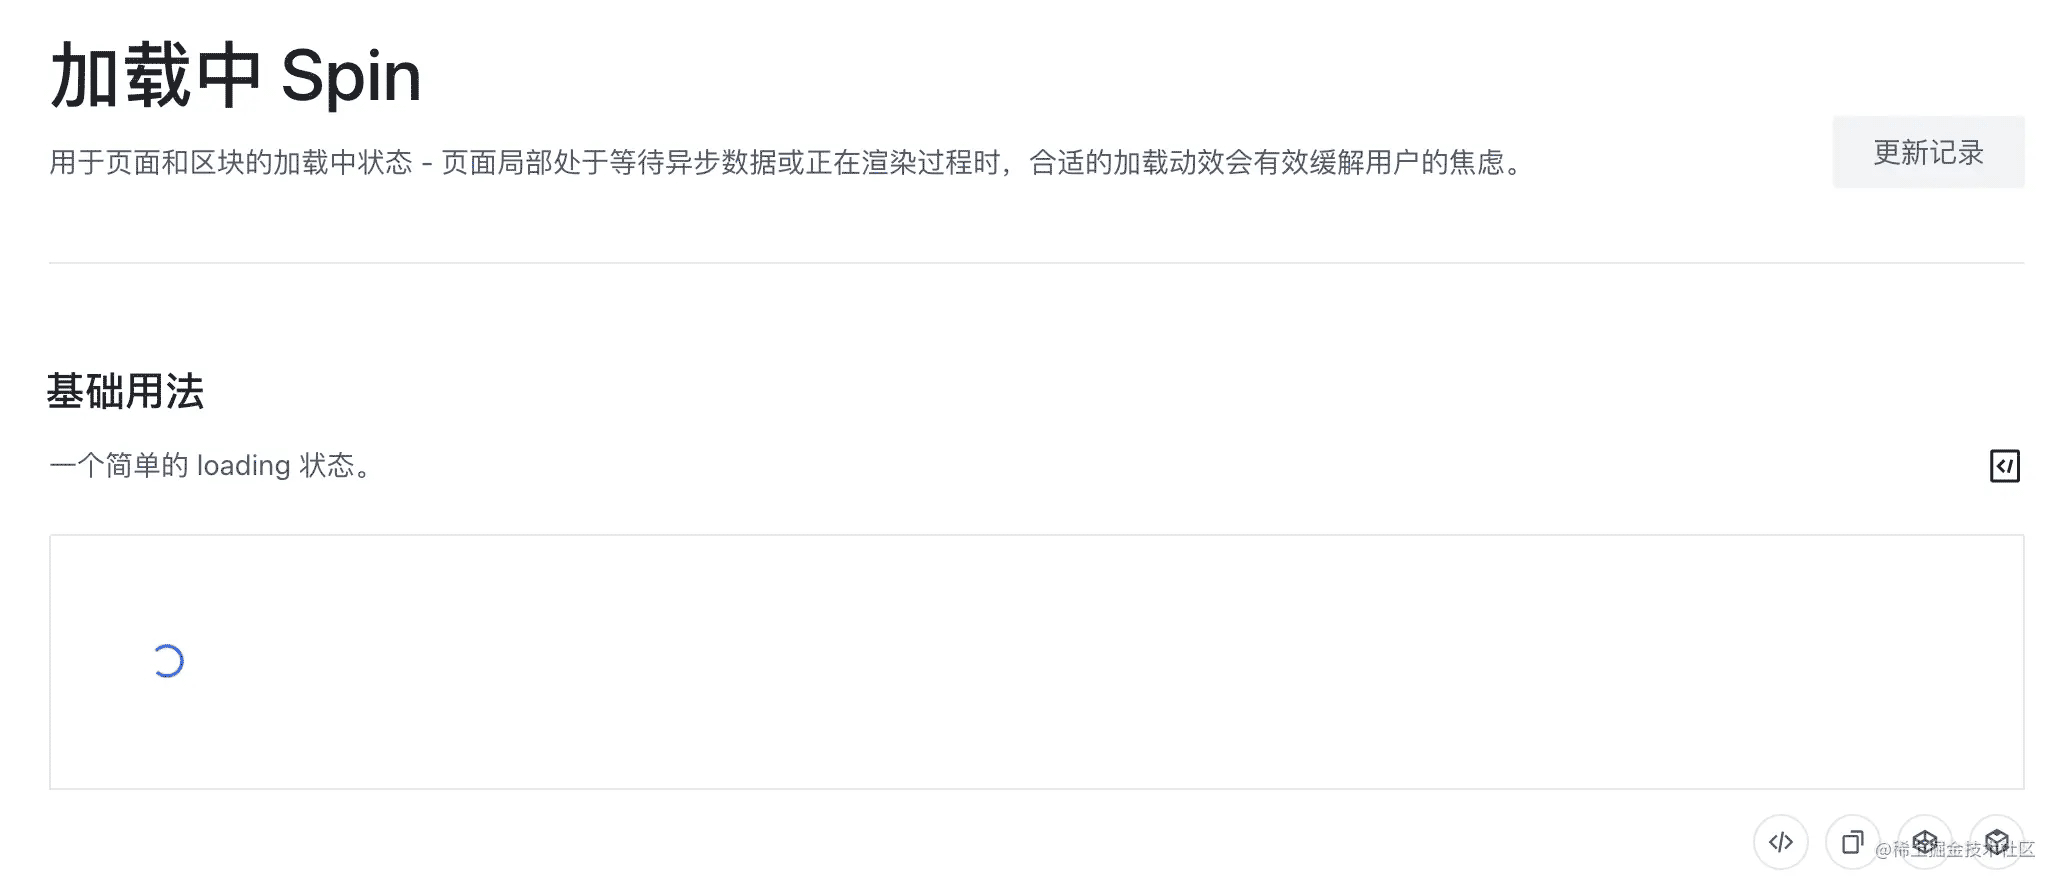
Spin组件就是显示loading态的组件,这里改造了arco的Spin组件,主要添加了样式层,我认可将样式层和js控制的html,也就是jsx分层
主要体现在,组件里新增getClassnames和getStyles两个函数,配合css,收敛所有组件的样式。
在复杂组件里,我还会尝试收敛数据层和渲染层,但是spin组件和后面的empty组件太简单了,就没有做这步

在table中这样使用
<Spin element={loadingElement} {...loading}>
        {renderTable()}
</Spin>
table组件没有数据的时候就会显示它

这篇基本全是代码,大家简单看看就好,重点是下一篇将table组件,这里主要是做个记录
目录结构
├── ConfigProvider
│   ├── config // 配置文件
│   │   ├── constants.tsx // 常量
│   │   └── utils_fns // 工具函数文件夹
│   ├── index.tsx
│   └── interface.ts // ts定义文件
├── Empty
│   ├── config  // 配置文件
│   │   ├── constants.ts
│   │   └── utils_fns // 工具函数文件夹
│   │       ├── getDesDefault.ts
│   │       ├── xxx
│   │       └── index.ts
│   ├── index.tsx
│   ├── interface.ts  // ts定义文件
│   └── style // 样式文件
│       ├── index.less
│       └── index.ts
├── Icon // Icon是单独一个项目,自动化生成Icon,还有点复杂度的,这个后面组件库详细讲吧
│   ├── index.tsx
│   └── style
│       └── index.less
├── Spin
│   ├── config
│   │   ├── hooks // 自定义hook
│   │   └── utils_fns
│   ├── index.tsx
│   ├── interface.ts
│   └── style
│       ├── index.less
│       └── index.ts
├── Table
│   ├── config
│   │   └── util_fns
│   └── table.tsx
├── config // 公共配置文件
│   ├── index.ts
│   └── util_fns
│       ├── index.ts
│       └── pickDataAttributes.ts
├── index.ts
├── locale // 国际化文件夹
│   ├── default.tsx
│   ├── en-US.tsx
│   ├── interface.tsx
│   └── zh-CN.tsx
└── style // 样式文件夹
    ├── base.less
    ├── common.less
    ├── index.less
    ├── normalize.less
    └── theme
开搞ConfigProvider
index.tsx,详情见注释
import React, { createContext, useCallback, useMemo } from 'react';
// omit相当于lodash里的omit,不过自己写的性能更好,因为没有那么多兼容性,很简单
// useMergeProps是合并外界传入的props,和默认props还有组件全局props的hook
import { omit, useMergeProps } from '@mx-design/utils';
// 国际化文件,默认是中文
import defaultLocale from '../locale/default';
// 接口
import type { ConfigProviderProps } from './interface';
// componentConfig是空对象
// PREFIX_CLS是你想自定义的css样式前缀
import { componentConfig, PREFIX_CLS } from './config/constants';
// 渲染空数据的组件
import { renderEmpty } from './config/utils_fns';
// 默认参数
const defaultProps: ConfigProviderProps = {
  locale: defaultLocale,
  prefixCls: PREFIX_CLS,
  getPopupContainer: () => document.body,
  size: 'default',
  renderEmpty,
};
// 默认参数
export const ConfigContext = createContext<ConfigProviderProps>({
  ...defaultProps,
});
function ConfigProvider(baseProps: ConfigProviderProps) {
  // 合并props,baseProps也就是用户传入的props优先级最高
  const props = useMergeProps<ConfigProviderProps>(baseProps, defaultProps, componentConfig);
  const { prefixCls, children } = props;
// 获取css前缀名的函数
  const getPrefixCls = useCallback(
    (componentName: string, customPrefix?: string) => {
      return `${customPrefix || prefixCls || defaultProps.prefixCls}-${componentName}`;
    },
    [prefixCls]
  );
 // 传递给所有子组件的数据
  const config: ConfigProviderProps = useMemo(
    () => ({
      ...omit(props, ['children']),
      getPrefixCls,
    }),
    [getPrefixCls, props]
  );
// 使用context实现全局变量传递给子组件的目的
  return <ConfigContext.Provider value={config}>{children}</ConfigContext.Provider>;
}
ConfigProvider.displayName = 'ConfigProvider';
export default ConfigProvider;
export type { ConfigProviderProps };
注意在default中,有个renderEmpty函数,实现如下:
export function renderEmpty() {
  return <Empty />;
}
所以,我们接着看Empty组件如何实现
这里顺便贴一下ConfigProvider中的类型定义,因为初期组件比较少,参数不多,大多数从arco deisgn源码copy的
import { ReactNode } from 'react';
import { Locale } from '../locale/interface';
import type { EmptyProps } from '../Empty/interface';
import type { SpinProps } from '../Spin/interface';
export type ComponentConfig = {
  Empty: EmptyProps;
  Spin: SpinProps;
};
/**
 * @title ConfigProvider
 */
export interface ConfigProviderProps {
  /**
   * @zh 用于全局配置所有组件的默认参数
   * @en Default parameters for global configuration of all components
   * @version 2.23.0
   */
  componentConfig?: ComponentConfig;
  /**
   * @zh 设置语言包
   * @en Language package setting
   */
  locale?: Locale;
  /**
   * @zh 配置组件的默认尺寸,只会对支持`size`属性的组件生效。
   * @en Configure the default size of the component, which will only take effect for components that support the `size` property.
   * @defaultValue default
   */
  size?: 'mini' | 'small' | 'default' | 'large';
  /**
   * @zh 全局组件类名前缀
   * @en Global ClassName prefix
   * @defaultValue arco
   */
  prefixCls?: string;
  getPrefixCls?: (componentName: string, customPrefix?: string) => string;
  /**
   * @zh 全局弹出框挂载的父级节点。
   * @en The parent node of the global popup.
   * @defaultValue () => document.body
   */
  getPopupContainer?: (node: HTMLElement) => Element;
  /**
   * @zh 全局的加载中图标,作用于所有组件。
   * @en Global loading icon.
   */
  loadingElement?: ReactNode;
  /**
   * @zh 全局配置组件内的空组件。
   * @en Empty component in component.
   * @version 2.10.0
   */
  renderEmpty?: (componentName?: string) => ReactNode;
  zIndex?: number;
  children?: ReactNode;
}
Empty组件实现
index.tsx
import React, { memo, useContext, forwardRef } from 'react';
import { useMergeProps } from '@mx-design/utils';
import { ConfigContext } from '../ConfigProvider';
import type { EmptyProps } from './interface';
import { emptyImage, getDesDefault } from './config/utils_fns';
import { useClassNames } from './config/hooks';
function Empty(baseProps: EmptyProps, ref) {
  // 获取全局参数
  const { getPrefixCls, locale: globalLocale, componentConfig } = useContext(ConfigContext);
  // 合并props
  const props = useMergeProps<EmptyProps>({}, componentConfig?.Empty, baseProps);
  const { style, className, description, icon, imgSrc } = props;
  // 获取国际化的 noData字符串
  const { noData } = globalLocale.Empty;
  // class样式层
  const { containerCls, wrapperCls, imageCls, descriptionCls } = useClassNames({ getPrefixCls, className });
  // 获取描述信息
  const alt = getDesDefault(description);
  return (
    <div ref={ref} className={containerCls} style={style}>
      <div className={wrapperCls}>
        <div className={imageCls}>{emptyImage({ imgSrc, alt, icon })}</div>
        <div className={descriptionCls}>{description || noData}</div>
      </div>
    </div>
  );
}
const EmptyComponent = forwardRef(Empty);
EmptyComponent.displayName = 'Empty';
export default memo(EmptyComponent);
export type { EmptyProps };
useClassNames,主要是通过useMemo缓存所有的className,一般情况下,这些className都不会变
import { cs } from '@mx-design/utils';
import { useMemo } from 'react';
import { ConfigProviderProps } from '../../../ConfigProvider';
import { EmptyProps } from '../..';
interface getClassNamesProps {
  getPrefixCls: ConfigProviderProps['getPrefixCls'];
  className: EmptyProps['className'];
}
export function useClassNames(props: getClassNamesProps) {
  const { getPrefixCls, className } = props;
  const prefixCls = getPrefixCls('empty');
  const classNames = cs(prefixCls, className);
  return useMemo(
    () => ({
      containerCls: classNames,
      wrapperCls: `${prefixCls}-wrapper`,
      imageCls: `${prefixCls}-image`,
      descriptionCls: `${prefixCls}-description`,
    }),
    [classNames, prefixCls]
  );
}
getDesDefault,
import { DEFAULT_DES } from '../constants';
export function getDesDefault(description) {
  return typeof description === 'string' ? description : DEFAULT_DES;
}
getEmptyImage
import { IconEmpty } from '@mx-design/icon';
import React from 'react';
import { IEmptyImage } from '../../interface';
export const emptyImage: IEmptyImage = ({ imgSrc, alt, icon }) => {
  return imgSrc ? <img alt={alt} src={imgSrc} /> : icon || <IconEmpty />;
};
Spin组件
也很简单,值得一提的是,你知道写一个debounce函数怎么写吗,很多网上的人写的简陋不堪,起码还是有个cancel方法,好吧,要不你useEffect想在组件卸载的时候,清理debounce的定时器都没办法。
debounce实现
interface IDebounced<T extends (...args: any) => any> {
  cancel: () => void;
  (...args: any[]): ReturnType<T>;
}
export function debounce<T extends (...args: any) => any>(func: T, wait: number, immediate?: boolean): IDebounced<T> {
  let timeout: number | null;
  let result: any;
  const debounced: IDebounced<T> = function (...args) {
    const context = this;
    if (timeout) clearTimeout(timeout);
    if (immediate) {
      let callNow = !timeout;
      timeout = window.setTimeout(function () {
        timeout = null;
      }, wait);
      if (callNow) result = func.apply(context, args);
    } else {
      timeout = window.setTimeout(function () {
        result = func.apply(context, args);
      }, wait);
    }
    // Only the first time you can get the result, that is, immediate is true
    // if not,result has little meaning
    return result;
  };
  debounced.cancel = function () {
    clearTimeout(timeout!);
    timeout = null;
  };
  return debounced;
}
顺便我们在写一个useDebounce的hook吧,项目中也要用
import { debounce } from '@mx-design/utils';
import { useCallback, useEffect, useState } from 'react';
import type { SpinProps } from '../../interface';
interface debounceLoadingProps {
  delay: SpinProps['delay'];
  propLoading: SpinProps['loading'];
}
export const useDebounceLoading = function (props: debounceLoadingProps): [boolean] {
  const { delay, propLoading } = props;
  const [loading, setLoading] = useState<boolean>(delay ? false : propLoading);
  const debouncedSetLoading = useCallback(debounce(setLoading, delay), [delay]);
  const getLoading = delay ? loading : propLoading;
  useEffect(() => {
    delay && debouncedSetLoading(propLoading);
    return () => {
      debouncedSetLoading?.cancel();
    };
  }, [debouncedSetLoading, delay, propLoading]);
  return [getLoading];
};
index.tsx
import React, { useContext } from 'react';
import { useMergeProps } from '@mx-design/utils';
import { ConfigContext } from '../ConfigProvider';
import type { SpinProps } from './interface';
import InnerLoading from './InnerLoading';
import { useClassNames, useDebounceLoading } from './config/hooks';
function Spin(baseProps: SpinProps, ref) {
  const { getPrefixCls, componentConfig } = useContext(ConfigContext);
  const props = useMergeProps<SpinProps>(baseProps, {}, componentConfig?.Spin);
  const { style, className, children, loading: propLoading, size, icon, element, tip, delay, block = true } = props;
  const [loading] = useDebounceLoading({ delay, propLoading });
  const { prefixCls, wrapperCls, childrenWrapperCls, loadingLayerCls, loadingLayerInnerCls, tipCls } = useClassNames({
    getPrefixCls,
    block,
    loading,
    tip,
    children,
    className,
  });
  return (
    <div ref={ref} className={wrapperCls} style={style}>
      {children ? (
        <>
          <div className={childrenWrapperCls}>{children}</div>
          {loading && (
            <div className={loadingLayerCls} style={{ fontSize: size }}>
              <span className={loadingLayerInnerCls}>
                <InnerLoading prefixCls={prefixCls} icon={icon} size={size} element={element} tipCls={tipCls} tip={tip} />
              </span>
            </div>
          )}
        </>
      ) : (
        <InnerLoading prefixCls={prefixCls} icon={icon} size={size} element={element} tipCls={tipCls} tip={tip} />
      )}
    </div>
  );
}
const SpinComponent = React.forwardRef<unknown, SpinProps>(Spin);
SpinComponent.displayName = 'Spin';
export default SpinComponent;
export { SpinProps };
LoadingIcon.tsx
import { IconLoading } from '@mx-design/icon';
import { cs } from '@mx-design/utils';
import React, { FC, ReactElement } from 'react';
import { ConfigProviderProps } from '../../../ConfigProvider';
import type { SpinProps } from '../../interface';
interface loadingIconProps {
  prefixCls: ConfigProviderProps['prefixCls'];
  icon: SpinProps['icon'];
  size: SpinProps['size'];
  element: SpinProps['element'];
}
export const LoadingIcon: FC<loadingIconProps> = function (props) {
  const { prefixCls, icon, size, element } = props;
  return (
    <span className={`${prefixCls}-icon`}>
      {icon
        ? // 这里可以让传入的icon自动旋转
          React.cloneElement(icon as ReactElement, {
            className: `${prefixCls}-icon-loading`,
            style: {
              fontSize: size,
            },
          })
        : element || <IconLoading className={`${prefixCls}-icon-loading`} style={{ fontSize: size }} />}
    </span>
  );
};
以上就是react Table准备Spin Empty ConfigProvider组件实现的详细内容,更多关于react Table组件的资料请关注我们其它相关文章!

