.Net Core使用MongoDB的详细教程
前言
MongoDB 是由C++语言编写的,是一个基于分布式且面向文档存储的开源数据库系统。
下载地址:
https://www.mongodb.com/download-center/community
在.Net Core中使用需要引入核心包 MongoDB.Driver
添加数据:
//与Mongodb建立连接
MongoClient client = new MongoClient("mongodb://127.0.0.1");
//获得数据库,没有则自动创建
IMongoDatabase db = client.GetDatabase("db1");
//拿到集合(表)
IMongoCollection<Student> student = db.GetCollection<Student>("Student");
var data = new Student();
data.id = 1;
data.name = "江北";
data.age = 22;
data.remarks = "暂无";
//添加一条数据
student.InsertOne(data);
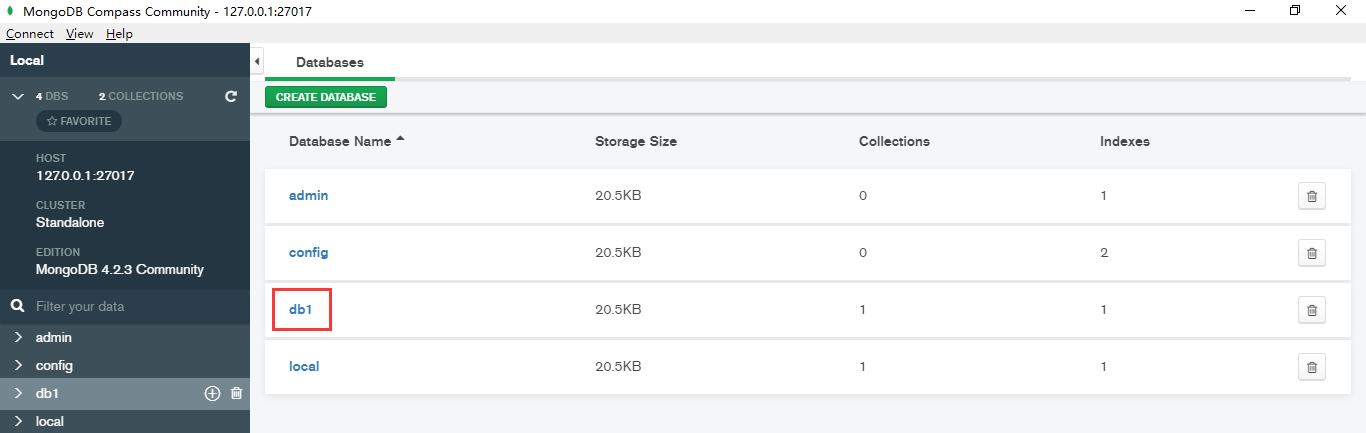
在图形化界面中查看一下

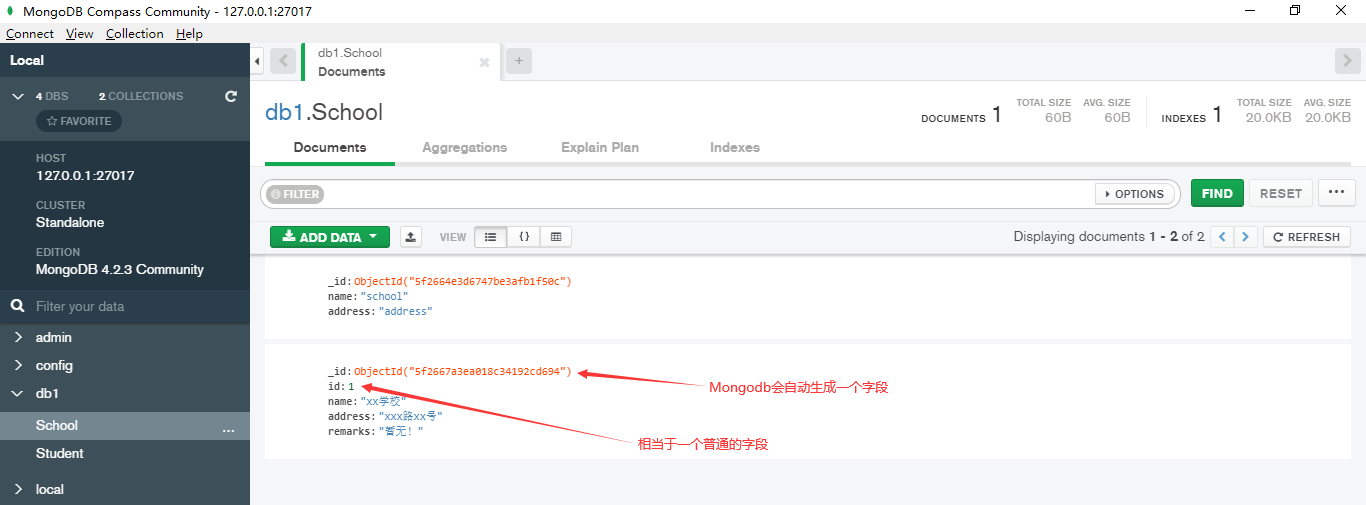
Mongodb默认用id做主键,因此不会显式的指定id是主键。Mongdb中没有内置"自增字段",可以把id声明为ObjectId类型,这样插入以后就自动给字段赋值。
例如,建一个类:
public class School
{
 public ObjectId id { get; set; }
 public string name { get; set; }
 public string address { get; set; }
}//需引入命名空间 using MongoDB.Bson;


当然School对象之后多加或者去掉一个字段都行。Mongodb是用Json保存的,因此也可以直接用Json格式插入,可用BsonDocument对象作为泛型对象。
//与Mongodb建立连接
MongoClient client = new MongoClient("mongodb://127.0.0.1");
//获得数据库,没有则自动创建
IMongoDatabase db = client.GetDatabase("db1");
//拿到集合(表)
IMongoCollection<BsonDocument> document = db.GetCollection<BsonDocument>("School");
db.GetCollection<BsonDocument>("School");
var json = "{id:1,name:'xx学校',address:'xxx路xx号',remarks:'暂无!'}";
BsonDocument bsons = BsonDocument.Parse(json);
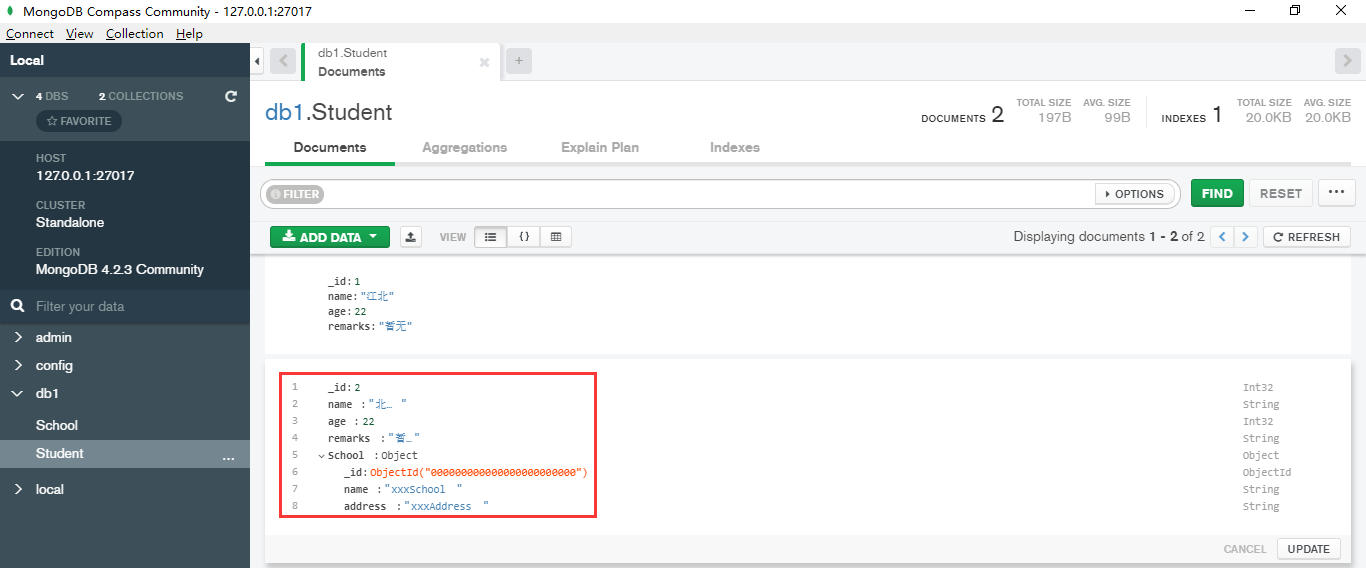
学生和学校是有对应关系的,我们可以添加有嵌套关系类型的对象
public class Student
{
 public int id { get; set; }
 public string name { get; set; }
 public int age { get; set; }
 public string remarks { get; set; }
 public School School { get; set; }
}
//与Mongodb建立连接
MongoClient client = new MongoClient("mongodb://127.0.0.1");
//获得数据库,没有则自动创建
IMongoDatabase db = client.GetDatabase("db1");
//拿到集合(表)
IMongoCollection<Student> student = db.GetCollection<Student>("Student");
Student student1 = new Student();
student1.id = 2;
student1.name = "北晚舟";
student1.age = 22;
student1.remarks = "暂无";
School school = new School();
school.name = "xxxSchool";
school.address = "xxxAddress";
student1.School = school;
student.InsertOne(student1);
数据查询:
//与Mongodb建立连接
MongoClient client = new MongoClient("mongodb://127.0.0.1");
//获得数据库,没有则自动创建
IMongoDatabase db = client.GetDatabase("db1");
//拿到集合(表)
IMongoCollection<Student> student = db.GetCollection<Student>("Student");
var data = Builders<Student>.Filter.Gt(m => m.age, 21);//Gt:大于
var result = student.Find(data).ToList();

我们安装的NuGet包是支持Lamda表达式的,可用条件表达式来查找数据
//与Mongodb建立连接
MongoClient client = new MongoClient("mongodb://127.0.0.1");
//获得数据库,没有则自动创建
IMongoDatabase db = client.GetDatabase("db1");
//拿到集合(表)
IMongoCollection<Student> student = db.GetCollection<Student>("Student");
var data = Builders<Student>.Filter.Where(m => m.age > 21 && m.name.Contains("江"));
var result = student.Find(data).ToList();
分页查询:
//与Mongodb建立连接
MongoClient client = new MongoClient("mongodb://127.0.0.1");
//获得数据库,没有则自动创建
IMongoDatabase db = client.GetDatabase("db1");
//拿到集合(表)
IMongoCollection<Student> student = db.GetCollection<Student>("Student");
var filter = Builders<Student>.Filter.Where(m => m.age > 21);
FindOptions<Student, Student> findOpt = new FindOptions<Student, Student>();
findOpt.Limit = 2;
findOpt.Skip = 1;
findOpt.Sort = Builders<Student>.Sort.Ascending(m => m.age).Descending(m => m.name);
var result = (student.FindAsync(filter, findOpt).Result).ToList();
数据更新:
//与Mongodb建立连接
MongoClient client = new MongoClient("mongodb://127.0.0.1");
//获得数据库,没有则自动创建
IMongoDatabase db = client.GetDatabase("db1");
//拿到集合(表)
IMongoCollection<Student> student = db.GetCollection<Student>("Student");
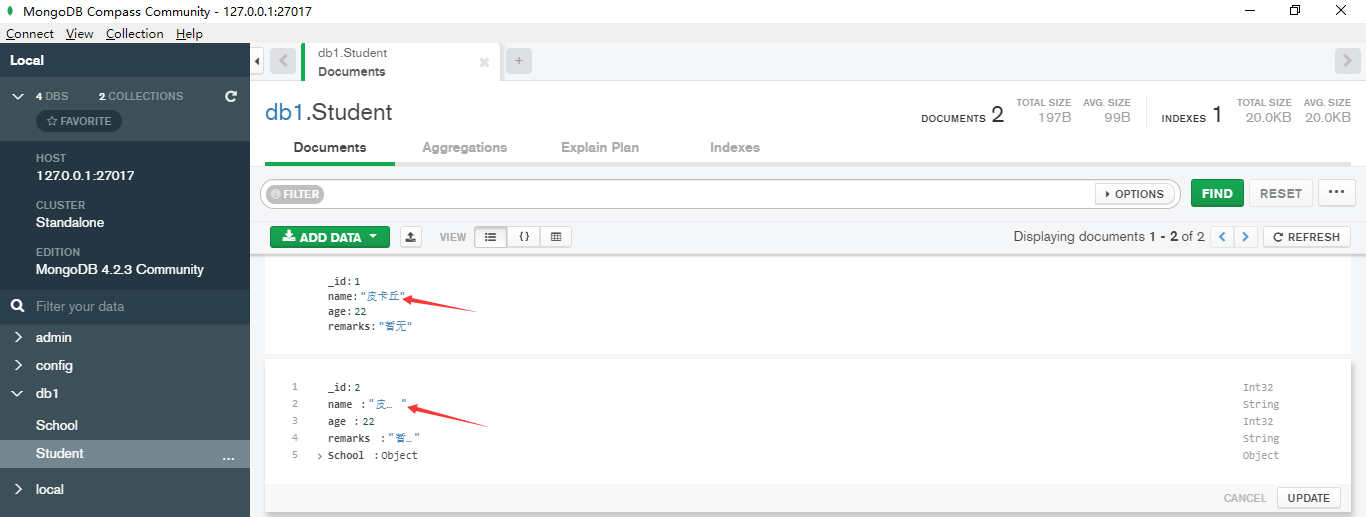
var filter = Builders<Student>.Filter.Where(m => m.age > 21);
var update = Builders<Student>.Update.Set(m => m.name, "皮卡丘");
//update Student set name="皮卡丘" where age>21
student.UpdateMany(filter, update);
数据删除:
//与Mongodb建立连接
MongoClient client = new MongoClient("mongodb://127.0.0.1");
//获得数据库,没有则自动创建
IMongoDatabase db = client.GetDatabase("db1");
//拿到集合(表)
IMongoCollection<Student> student = db.GetCollection<Student>("Student");
var filter = Builders<Student>.Filter.Where(m => m.age > 21);
//delete from Student where age>21
//student.DeleteMany(filter);
student.DeleteOne(filter);//只删除一个

MongoDB中文网:https://www.mongodb.org.cn
总结
到此这篇关于.Net Core使用MongoDB的完整步骤的文章就介绍到这了,更多相关.Net Core使用MongoDB内容请搜索我们以前的文章或继续浏览下面的相关文章希望大家以后多多支持我们!
相关推荐
-

asp.net core集成MongoDB的完整步骤
一.前言及MongoDB的介绍 最近在整合自己的框架,顺便把MongoDBD的最简单CRUD重构一下作为组件化集成到asp.net core项目中,当然此篇文章中没有讲解mongodb的集群部署,等有机会分享一下. 首先,我们在MongoDB的官方文档中看到,MongoDb的2.4以上的For .Net的驱动是支持.Net Core 2.0的. 针对MongoDB,我想大家应该不陌生,没有用过也有听过. 1.mongodb是什么? MongoDB是一个基于分布式文件存储的数据库,为web应用提供
-
.net Core连接MongoDB数据库的步骤详解
前言 前两天在学习MongoDB相关的知识,做了个小Demo,做的是省份下面有多少所学校,嗯,做的比较粗暴... 我们在MongoDB的官方文档中看到,MongoDb的2.4以上的For .Net的驱动是支持.Net Core 2.0的. 所以,在我们安装好了MangoDB后,就可以开始MangoDB的.Net之旅了. 方法如下: 连接MongoDB首先要通过Nuget添加一个MongoDB的包,下载此包 安装完毕后开始写代码了,创建一个省份实体,一个学校实体 using MongoDB.Bso
-
.Net Core如何对MongoDB执行多条件查询
以前项目基本上全部使用MySQL数据库, 最近项目排期空出了一点时间leader决定把日志模块迁移到插入/查询性能更好的MongoDB上. 多条件查询的写法着实费了些功夫, 撰文记录一下. 一.准备工作 1. 安装过程, 不赘述了 2. 添加ReferencePackage dotnet add package mongodb.bson dotnet add package mongodb.driver 3. appsetting.json添加连接配置 "MongodbHost": {
-
.Net Core使用MongoDB的详细教程
前言 MongoDB 是由C++语言编写的,是一个基于分布式且面向文档存储的开源数据库系统. 下载地址: https://www.mongodb.com/download-center/community 在.Net Core中使用需要引入核心包 MongoDB.Driver 添加数据: //与Mongodb建立连接 MongoClient client = new MongoClient("mongodb://127.0.0.1"); //获得数据库,没有则自动创建 IMongoDa
-
Ubuntu16.04手动安装MongoDB的详细教程
我最近在研究MongoDB的路上,那么今天也算个学习笔记吧!今天用Ubuntu16.04手动安装MongoDB,分享给大家 注意事项: 仔细按步骤阅读操作 注意别写错字 牢记上面两点 一.用自带的火狐浏览器下载Ubuntu 16.04 Linux 64-bit x64 1.地址:http://www.mongodb.org/downloads 2.选择linux选项卡,再在下拉框中选中Ubuntu 16.04 Linux 64-bit x64 3.点击Download按钮(浏览器弹出的下载单选框
-
NodeJS中的MongoDB快速入门详细教程
MongoDB 是一个基于分布式文件存储的数据库.由 C++ 语言编写.旨在为 WEB 应用提供可扩展的高性能数据存储解决方案. MongoDB 是一个介于关系数据库和非关系数据库之间的产品,是非关系数据库当中功能最丰富,最像关系数据库的. 一.MongoDB必须理解的概念 1.数据库:每个数据库都有自己的权限和集合. 2.文档:一个键值对. 3.集合:一组文档,即一组键值对.当第一个文档插入时,集合就会被创建. 二.Mac下的MongoDB安装和启动 1.使用brew进行安装:brew ins
-
Win10 64位安装MongoDB数据库的详细教程
选择对应的系统并下载MongoDB https://www.mongodb.com/download-center/community 选择操作系统对应的版本 我是win10 64位,所以选择如下版本: 下载完的安装包: 双击安装时,选择自定义,可以修改安装目录: 我修改目录如下: D:\Program Files\MongoDB\Server\4.2\ 安装过程中的配置选择 服务配置说明 Run Service as Network Service user 以网络服务用户身份运行服务(默认)
-
Java的idea连接mongodb数据库的详细教程
最近有一个java实验,要求用java使用数据库,于是本人新手小白,在idea上卡了好半天 希望看到这个博客的人能解决问题,跳过一些坑 首先,我这里用的是 mongodb 数据库(ps:node.js下mongo太好用了,就没有mysql) 1,用idea创建一个maven工程 由于不牵扯太多功能,直接 next 就行了, 很无奈,创建完就直接报错了 找不到 maven 相关的插件 Cannot resolve plugin org.apache.maven.plugins:maven-comp
-
Navicat Premium连接mongodb详细教程
0 环境 操作系统:win10 1 准备 navicat15 破解 CentOS Docker 安装 Docker 安装 MongoDB 2 Docker 安装 MongoDB 注意:保持网络稳定 3 Navicat Premium连接mongodb 连接 配置连接 测试连接 到此这篇关于Navicat Premium连接mongodb详细教程的文章就介绍到这了,更多相关Navicat Premium连接mongodb内容请搜索我们以前的文章或继续浏览下面的相关文章希望大家以后多多支持我们!
-
Windows 10 与 MySQL 5.5 安装使用及免安装使用详细教程(图文)
本文介绍Windows 10环境下, MySQL 5.5的安装使用及免安装使用 资源下载: MySQL安装文件:http://download.csdn.net/detail/lf19820717/9892711 MySQL免安装文件:http://download.csdn.net/detail/lf19820717/9892716 ---------------------------------------------------------------------------------
-
linux 自动化运维工具ansible的使用详细教程
一.ansible简介 1.ansible ansible是新出现的自动化运维工具,基于Python研发.糅合了众多老牌运维工具的优点实现了批量操作系统配置.批量程序的部署.批量运行命令等功能.仅需在管理工作站上安装ansible程序配置被管控主机的IP信息,被管控的主机无客户端.ansible应用程序存在于epel(第三方社区)源,依赖于很多python组件.主要包括: (1).连接插件connection plugins:负责和被监控端实现通信: (2).host inventory:指定操
-
centos7.3 安装mysql5.7.18的详细教程
1查看Linux发行版本 [root@typecodes ~]# cat /etc/redhat-release CentOS Linux release 7.2.1511 (Core) 2 下载MySQL官方的Yum Repository 根据Linux发行版本(CentOS.Fedora都属于红帽系),从mysql官方(http://dev.mysql.com/downloads/repo/yum/)获取Yum Repository. [root@typecodes ~]# wget -i
-
window下homestead开发环境安装详细教程
一.资源准备 链接:http://pan.baidu.com/s/1mh7qUBe 密码:p4wx 1. virtualbox.box文件放在C盘根目录上. 2. metadata.json文件放在C盘用户目录上.比如我的是 C:\Users\pc 3. Git-2.9.3-64-bit.exe 下载安装,全部默认就好. 4. vagrant_1.8.5.msi 下载安装. 5. VirtualBox-5.1.4-110228-Win.exe 下载安装. 二.简介 1. 什么是vagrant?