MyBatis框架零基础快速入门案例详解
目录
- 一、创建数据库和表
- 二、创建maven工程
- 三、代码编写
- 1、编写Student实体类
- 2、编写DAO接口StudentDao
- 3、编写DAO接口Mapper映射文件StudentDao.xml。
- 4、创建MyBatis主配置文件
- 四、创建测试类进行测试
- 1、创建测试类MyBatisTest
- 2、配置日志功能
- 五、增删改操作
- insert操作
MyBatis下载地址:https://github.com/mybatis/mybatis-3/releases
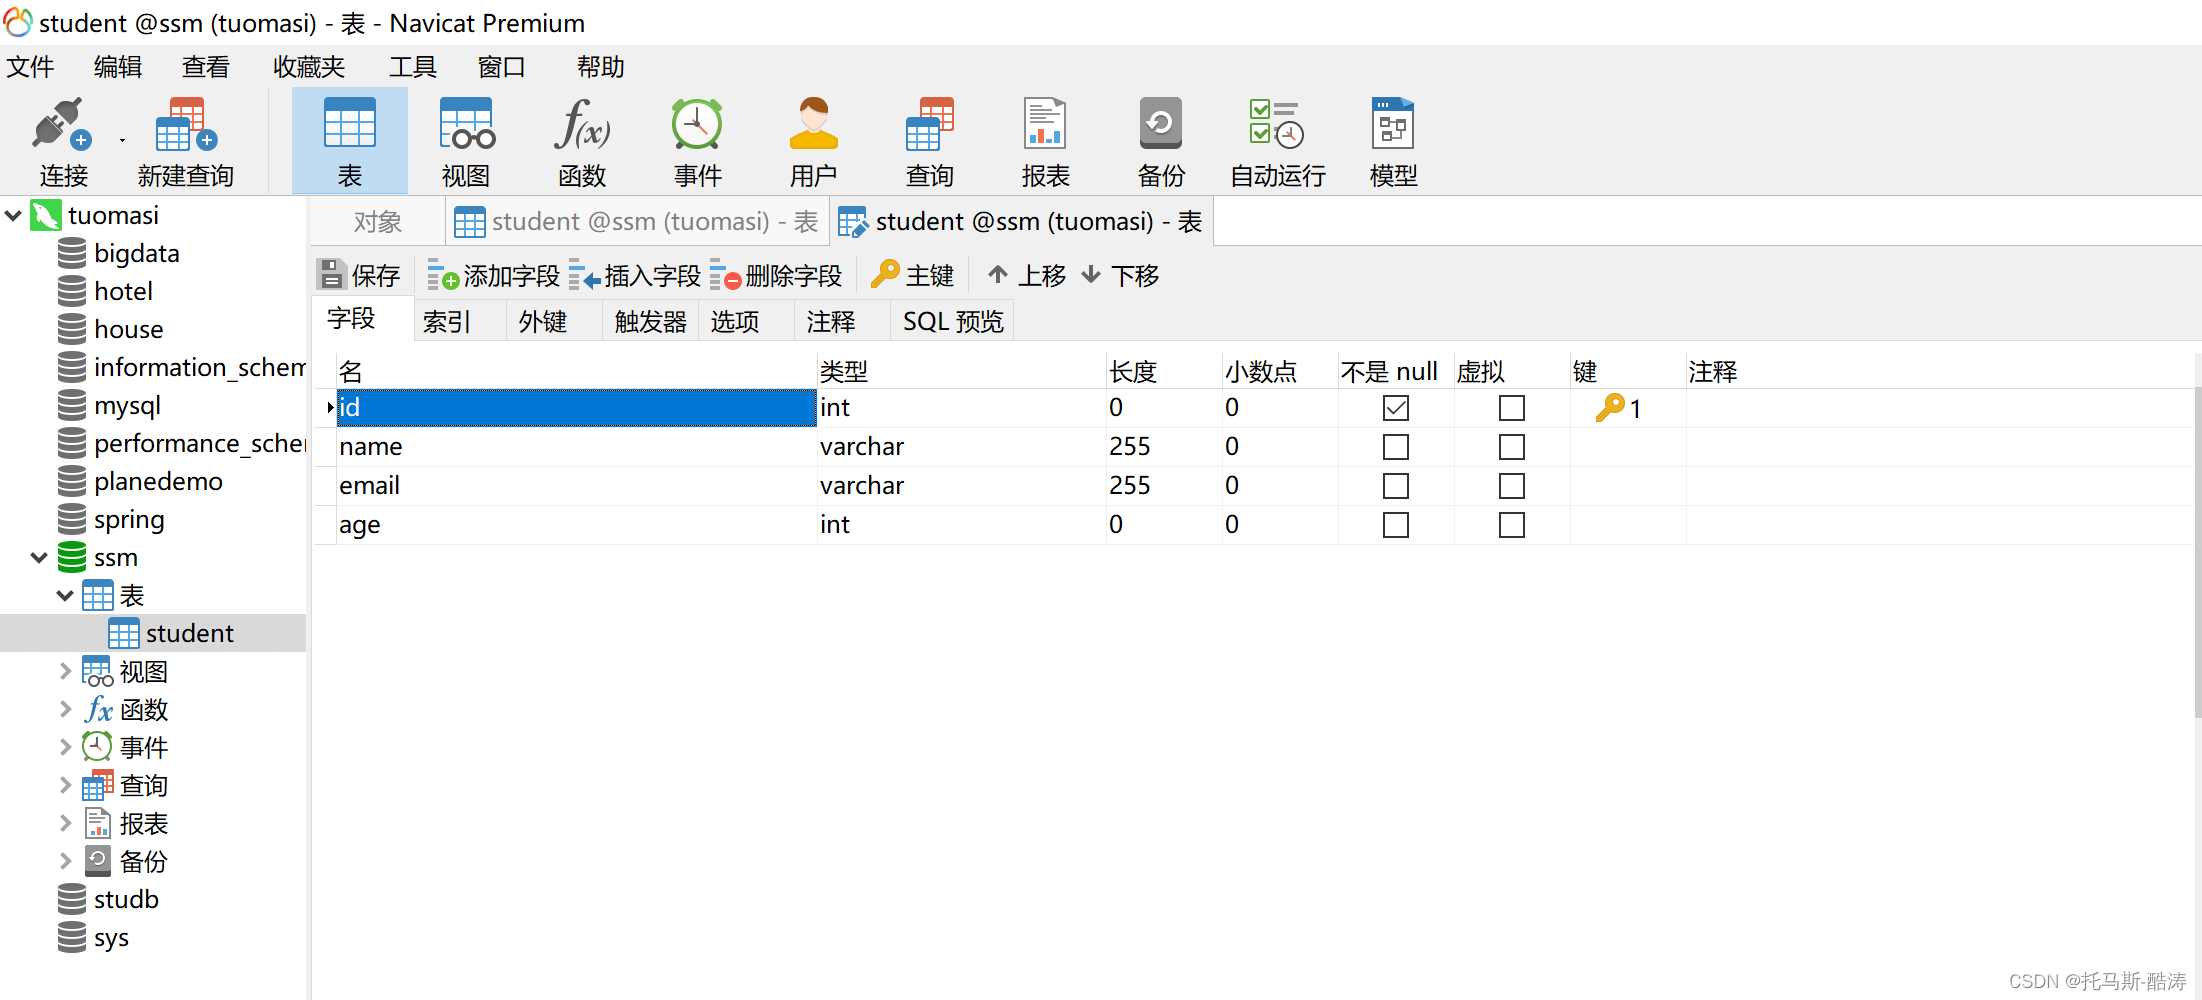
一、创建数据库和表
数据库名ssm,数据表student
mysql> create database ssm;
Query OK, 1 row affected (0.01 sec)
mysql> use ssm
Database changed
mysql> CREATE TABLE `student` (
    ->  `id` int(11) NOT NULL ,
    ->  `name` varchar(255) DEFAULT NULL,
    ->  `email` varchar(255) DEFAULT NULL,
    ->  `age` int(11) DEFAULT NULL,
    ->  PRIMARY KEY (`id`)
    -> ) ENGINE=InnoDB DEFAULT CHARSET=utf8;
Query OK, 0 rows affected, 3 warnings (0.03 sec)
二、创建maven工程
1、pom.xml加入maven坐标
<dependencies>
 <dependency>
<groupId>junit</groupId>
 <artifactId>junit</artifactId>
 <version>4.11</version>
 <scope>test</scope>
</dependency>
 <dependency>
 <groupId>org.mybatis</groupId>
 <artifactId>mybatis</artifactId>
 <version>3.5.1</version>
</dependency>
 <dependency>
 <groupId>mysql</groupId>
 <artifactId>mysql-connector-java</artifactId>
 <version>5.1.9</version>
 </dependency>
 </dependencies>
2、加入maven插件
<build>
<resources>
 <resource>
 <directory>src/main/java</directory><!--所在的目录-->
 <includes><!--包括目录下的.properties,.xml 文件都会扫描到-->
 <include>**/*.properties</include>
 <include>**/*.xml</include>
 </includes>
 <filtering>false</filtering>
 </resource>
</resources>
 <plugins>
 <plugin>
 <artifactId>maven-compiler-plugin</artifactId>
 <version>3.1</version>
 <configuration>
 <source>1.8</source>
 <target>1.8</target>
 </configuration>
 </plugin>
 </plugins>
</build>
三、代码编写
1、编写Student实体类
创建包 com.Example.domain, 包中创建 Student 类
package com.bjpowernode.domain;
/**
 * <p>Description: 实体类 </p>
 * <p>Company: http://www.bjpowernode.com
 */
public class Student {
 //属性名和列名一样
 private Integer id;
 private String name;
 private String email;
 private Integer age;
 // set ,get , toString
}
2、编写DAO接口StudentDao
创建 com.Example.dao 包,创建 StudentDao 接口
package com.bjpowernode.dao;
import com.bjpowernode.domain.Student;
import java.util.List;
/*
 * <p>Description: Dao 接口 </p>
 * <p>Company: http://www.bjpowernode.com
 */
public interface StudentDao {
 /*查询所有数据*/
 List<Student> selectStudents();
}
3、编写DAO接口Mapper映射文件StudentDao.xml。
- 在 dao 包中创建文件 StudentDao.xml
- 要 StudentDao.xml 文件名称和接口 StudentDao 一样,区分大小写的一 样。
<?xml version="1.0" encoding="UTF-8" ?>
<!DOCTYPE mapper
 PUBLIC "-//mybatis.org//DTD Mapper 3.0//EN"
 "http://mybatis.org/dtd/mybatis-3-mapper.dtd">
<!--
 namespace:必须有值,自定义的唯一字符串
 推荐使用:dao 接口的全限定名称
-->
<mapper namespace="com.Example.dao.StudentDao">
 <!--
 <select>: 查询数据, 标签中必须是 select 语句
 id: sql 语句的自定义名称,推荐使用 dao 接口中方法名称,
 使用名称表示要执行的 sql 语句
 resultType: 查询语句的返回结果数据类型,使用全限定类名
 -->
 <select id="selectStudents"
resultType="com.Example.domain.Student">
 <!--要执行的 sql 语句-->
 select id,name,email,age from student
 </select>
</mapper>
4、创建MyBatis主配置文件
项目 src/main 下创建 resources 目录,设置 resources 目录为 resources root
创建主配置文件:名称为 mybatis.xml
<?xml version="1.0" encoding="UTF-8" ?>
<!DOCTYPE configuration
 PUBLIC "-//mybatis.org//DTD Config 3.0//EN"
 "http://mybatis.org/dtd/mybatis-3-config.dtd">
<configuration>
 <!--配置 mybatis 环境-->
 <environments default="mysql">
 <!--id:数据源的名称-->
 <environment id="mysql">
 <!--配置事务类型:使用 JDBC 事务(使用 Connection 的提交和回
滚)-->
 <transactionManager type="JDBC"/>
 <!--数据源 dataSource:创建数据库 Connection 对象
 type: POOLED 使用数据库的连接池
 -->
 <dataSource type="POOLED">
 <!--连接数据库的四个要素-->
 <property name="driver" value="com.mysql.jdbc.Driver"/>
 <property name="url"
value="jdbc:mysql://localhost:3306/ssm"/>
 <property name="username" value="root"/>
 <property name="password" value="123456"/>
 </dataSource>
 </environment>
 </environments>
 <mappers>
 <!--告诉 mybatis 要执行的 sql 语句的位置-->
 <mapper resource="com/Example/dao/StudentDao.xml"/>
 </mappers>
</configuration>
支持中文的url
jdbc:mysql://localhost:3306/ssm?useUnicode=true&characterEncoding=utf-8
四、创建测试类进行测试
1、创建测试类MyBatisTest
src/test/java/com/Example/ 创建 MyBatisTest.java 文件
/*
* mybatis 入门
*/
@Test
public void testStart() throws IOException {
 //1.mybatis 主配置文件
 String config = "mybatis-config.xml";
 //2.读取配置文件
 InputStream in = Resources.getResourceAsStream(config);
 //3.创建 SqlSessionFactory 对象,目的是获取 SqlSession
 SqlSessionFactory factory = new SqlSessionFactoryBuilder().build(in);
 //4.获取 SqlSession,SqlSession 能执行 sql 语句
 SqlSession session = factory.openSession();
 //5.执行 SqlSession 的 selectList()
 List<Student> studentList =
session.selectList("com.bjpowernode.dao.StudentDao.selectStudents");
 //6.循环输出查询结果
 studentList.forEach( student -> System.out.println(student));
 //7.关闭 SqlSession,释放资源
 session.close();
}
List<Student> studentList =
session.selectList("com.bjpowernode.dao.StudentDao.selectStudents");
近似等价的 jdbc 代码
Connection conn = 获取连接对象
String sql=” select id,name,email,age from student”
PreparedStatement ps = conn.prepareStatement(sql);
ResultSet rs = ps.executeQuery();
2、配置日志功能
mybatis.xml 文件加入日志配置,可以在控制台输出执行的 sql 语句和参数
<settings>
 <setting name="logImpl" value="STDOUT_LOGGING" />
</settings>
五、增删改操作
insert操作
(1)StudentDAO接口中的方法
int insertStudent(Student student);
(2)StudentDAO.xml加入sql语句
<insert id="insertStudent">
 insert into student(id,name,email,age)
values(#{id},#{name},#{email},#{age})
</insert>
(3)增加测试方法
@Test
public void testInsert() throws IOException {
 //1.mybatis 主配置文件
 String config = "mybatis-config.xml";
 //2.读取配置文件
 InputStream in = Resources.getResourceAsStream(config);
 //3.创建 SqlSessionFactory 对象
 SqlSessionFactory factory = new SqlSessionFactoryBuilder().build(in);
 //4.获取 SqlSession
 SqlSession session = factory.openSession();
 //5.创建保存数据的对象
 Student student = new Student();
 student.setId(1005);
 student.setName("张丽");
 student.setEmail("zhangli@163.com");
 student.setAge(20);
 //6.执行插入 insert
 int rows = session.insert(
"com.bjpowernode.dao.StudentDao.insertStudent",student);
 //7.提交事务
 session.commit();
 System.out.println("增加记录的行数:"+rows);
 //8.关闭 SqlSession
 session.close();
}
到此这篇关于MyBatis框架零基础快速入门案例详解的文章就介绍到这了,更多相关MyBatis 案例内容请搜索我们以前的文章或继续浏览下面的相关文章希望大家以后多多支持我们!
相关推荐
-
MyBatis-Plus 快速入门案例(小白教程)
一.引言 学习MyBatis-Plus前提需要掌握:数据库相关操作.java等相关知识,最好熟悉Mybatis. 那么本章就来讲解快速搭建MyBatis-Plus开发环境以及对数据库实际操作. 二.准备工作 步骤一:使用IDEA快速搭建SpringBoot项目,填写相关信息即可. 步骤二:引入所需要maven依赖,小编这里有使用lombok依赖,有不了解的小伙伴可以自行学习一下,很简单的. <!--lombok--> <dependency> <groupId>org.
-

Mybatis-Plus环境配置与入门案例分析
目录 1 初识Mybatis-Plus 2 入门案例 前期环境准备 各层代码编写 入门案例查询结果 1 初识Mybatis-Plus MyBatis-Plus简称 MP,是一个 MyBatis的增强工具,在MyBatis的基础上只做增强不做改变,为简化开发.提高效率而生.MyBatis-Plus有很多的特点支持很多的标准数据库,具体等学到相关特性的时候再去详细了解.MyBatis-Plus的官方文档:https://baomidou.com/ 关于MyBatis-Plus的框架结构,也就是框
-
MyBatis框架零基础快速入门案例详解
目录 一.创建数据库和表 二.创建maven工程 三.代码编写 1.编写Student实体类 2.编写DAO接口StudentDao 3.编写DAO接口Mapper映射文件StudentDao.xml. 4.创建MyBatis主配置文件 四.创建测试类进行测试 1.创建测试类MyBatisTest 2.配置日志功能 五.增删改操作 insert操作 MyBatis下载地址:https://github.com/mybatis/mybatis-3/releases 一.创建数据库和表 数据库名ss
-
MyBatis框架简介及入门案例详解
目录 前言 MyBatis简介 快速入门 映射文件 sql片段与resultMap MyBatis的增删改查 1.添加操作 2.修改操作 3.删除操作 前言 传统的JDBC操作数据库都是通过写一个java类,在类中调用接口下的API执行相应的SQL,存在大量的硬编码.试想,若是开发一个日活度高的系统,那SQL的变动的非常大,就要我们去相应的类中修改Java代码,特别是进行查询操作时需要我们手动将结果集封装到实体类中,造成后期维护压力山大 总而言之,缺点多多 MyBatis简介 mybatis是一
-
hibernate4快速入门实例详解
Hibernate是什么 Hibernate是一个轻量级的ORMapping框架 ORMapping原理(Object RelationalMapping) ORMapping基本对应规则: 1:类跟表相对应 2:类的属性跟表的字段相对应 3:类的实例与表中具体的一条记录相对应 4:一个类可以对应多个表,一个表也可以对应对个类 5:DB中的表可以没有主键,但是Object中必须设置主键字段 6:DB中表与表之间的关系(如:外键)映射成为Object之间的关系 7:Object中属性的个数和名称可
-
SpringMVC框架整合Junit进行单元测试(案例详解)
本文主要介绍在SpringMVC框架整合Junit框架进行单元测试.闲话少述,让我们直入主题. 系统环境 软件 版本 spring-webmvc 4.3.6.RELEASE spring-test 4.3.6.RELEASE junit 4.12 引入依赖 <dependency> <groupId>junit</groupId> <artifactId>junit</artifactId> <version>4.12</ver
-
mybatis mybatis-plus-generator+clickhouse自动生成代码案例详解
目录 依赖 配置 CodeGenerator mybatis-plus-generator + clickhouse 自动生成代码 依赖 <!--> mybatis-plus </!--> <dependency> <groupId>com.baomidou</groupId> <artifactId>mybatis-plus-boot-starter</artifactId> <version>3.4.3.1
-
three.js 入门案例详解
最近公司需要用tree.js实现一个3D图的显示,就看了官方文档,正好有时间,就记录下来. 由于我们公司的前端框架用的是angular,所以我就把我的treejs封装在一个directives里面.后面放源码 首先我们要知道three.js的下载地址它的地址是: https://github.com/mrdoob/three.js. 其次,什么是three.js? three.js的几个步骤: 1:引入three.js文件(打开调试窗口,并在Console下输入 THREE.REVISION命令
-
python快速入门题目详解
目录 九九乘法表 列表 元组(不可变序列) 集合 字符串 总结 九九乘法表 for i in range(1,10): for j in range(1,i + 1): print(str(j) + " * " + str(i) + " = " + str(i * j), end='\t') print() 列表 #列表插入操作 lis = [12,32,232,123,1234,1234,12345,12346,4563734,23452345] lis1 = l
-
react.js框架Redux基础案例详解
react.js框架Redux https://github.com/reactjs/redux 安装: npm install redux react-redux #基于react,我们在前面已经安装过了 Redux参考文档: http://redux.js.org/ Redux核心概念:Store 我们可以简单的理解为就是用来存储 各个组件的State或你自己定义的独立的state,对state进行统一读取.更新.监听等操作. http://redux.js.org/docs/basics/
-
BootStrop前端框架入门教程详解
Bootstrap,来自 Twitter,是目前最受欢迎的前端框架.Bootstrap 是基于 HTML.CSS.JAVASCRIPT 的,它简洁灵活,使得 Web 开发更加快捷. bootstrap 的学习非常简单,并且它所提供的样式又非常精美.只要稍微简单的学习就可以制作出漂亮的页面. bootstrap中文网:http://v3.bootcss.com/ bootstrap提供了三种类型的下载: -----------------------------------------------