iOS实现悬浮按钮
前言
开发中会遇到有悬浮按钮功能。
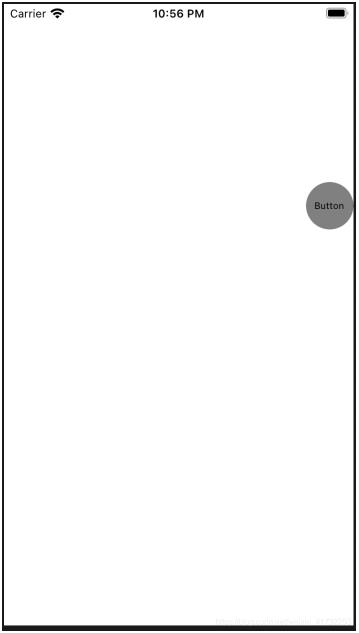
效果

上代码
SuspensionButton.h
#import <UIKit/UIKit.h>

NS_ASSUME_NONNULL_BEGIN

@interface SuspensionButton : UIButton

@property(nonatomic, assign)BOOL MoveEnable;
@property(nonatomic, assign)BOOL MoveEnabled;
@property(nonatomic, assign)CGPoint beginpoint;

@end

NS_ASSUME_NONNULL_END
SuspensionButton.m
#import "SuspensionButton.h"

@implementation SuspensionButton

- (instancetype)initWithFrame:(CGRect)frame {
 if (self = [super initWithFrame:frame]) {
 self.frame = CGRectMake([[UIScreen mainScreen] bounds].size.width - 51, 50, 51, 51);
 [self setBackgroundImage:[UIImage imageNamed:@"icon_move"] forState:UIControlStateNormal];
 [self setTitle:@"Button" forState:UIControlStateNormal];
 self.titleLabel.font = [UIFont systemFontOfSize:10];
 [self setTitleColor:[UIColor blackColor] forState:UIControlStateNormal];
 _MoveEnable = YES;
 }
 return self;
}

//开始触摸的方法
//触摸-清扫
- (void)touchesBegan:(NSSet *)touches withEvent:(UIEvent *)event {
 _MoveEnabled = NO;
 [super touchesBegan:touches withEvent:event];
 if (!_MoveEnable) {
 return;
 }
 UITouch *touch = [touches anyObject];
 _beginpoint = [touch locationInView:self];
}

//触摸移动的方法
- (void)touchesMoved:(NSSet *)touches withEvent:(UIEvent *)event {
 _MoveEnabled = YES;//单击事件可用
 if (!_MoveEnable) {
 return;
 }
 UITouch *touch = [touches anyObject];
 CGPoint currentPosition = [touch locationInView:self];
 //偏移量
 float offsetX = currentPosition.x - _beginpoint.x;
 float offsetY = currentPosition.y - _beginpoint.y;
 //移动后的中心坐标
 self.center = CGPointMake(self.center.x + offsetX, self.center.y + offsetY);

 //x轴左右极限坐标
 if (self.center.x > (self.superview.frame.size.width - self.frame.size.width / 2)) {
 CGFloat x = self.superview.frame.size.width - self.frame.size.width / 2;
 self.center = CGPointMake(x, self.center.y + offsetY);
 } else if (self.center.x < self.frame.size.width / 2) {
 CGFloat x = self.frame.size.width / 2;
 self.center = CGPointMake(x, self.center.y + offsetY);
 }

 //y轴上下极限坐标
 if (self.center.y > (self.superview.frame.size.height - self.frame.size.height)) {
 CGFloat x = self.center.x;
 CGFloat y = self.superview.frame.size.height - self.frame.size.height * 1.5;
 self.center = CGPointMake(x, y);
 } else if (self.center.y <= self.frame.size.height) {
 CGFloat x = self.center.x;
 CGFloat y = self.frame.size.height * 1.2;
 self.center = CGPointMake(x, y);
 }
}

- (void)touchesEnded:(NSSet *)touches withEvent:(UIEvent *)event {
 if (!_MoveEnable) {
 return;
 }

 if (self.center.x >= self.superview.frame.size.width / 2) {//向右侧移动
 //偏移动画
 [UIView beginAnimations:@"move" context:nil];
 [UIView setAnimationDuration:1];
 [UIView setAnimationDelegate:self];
 self.frame = CGRectMake(self.superview.frame.size.width - 51, self.center.y - 25.5, 51, 51);
 //提交UIView动画
 [UIView commitAnimations];
 } else {//向左侧移动

 [UIView beginAnimations:@"move" context:nil];
 [UIView setAnimationDuration:1];
 [UIView setAnimationDelegate:self];
 self.frame=CGRectMake(0.f,self.center.y - 25.5, 51, 51);
 //提交UIView动画
 [UIView commitAnimations];
 }

 //不加此句话,UIButton将一直处于按下状态
 [super touchesEnded: touches withEvent: event];

}
@end
使用
ViewController.m
#import "ViewController.h"
#import "SuspensionButton.h"//悬浮按钮

@interface ViewController ()

@property(nonatomic, strong) SuspensionButton *suspensionButton;

@end

@implementation ViewController

- (void)viewDidLoad {
 [super viewDidLoad];
 [self.view addSubview:self.suspensionButton];
}

- (SuspensionButton *)suspensionButton {
 if(_suspensionButton == nil) {
 _suspensionButton = [SuspensionButton buttonWithType:UIButtonTypeCustom];
 _suspensionButton.backgroundColor = [UIColor grayColor];
 _suspensionButton.layer.masksToBounds = YES;
 _suspensionButton.layer.cornerRadius = self.suspensionButton.frame.size.width/2;
 [_suspensionButton addTarget:self action:@selector(suspensionButtonClick) forControlEvents:UIControlEventTouchUpInside];
 }
 return _suspensionButton;
}

- (void)suspensionButtonClick {

}

@end
以上就是本文的全部内容,希望对大家的学习有所帮助,也希望大家多多支持我们。
赞 (0)

