Pygame游戏开发实例讲解之图形绘制与键鼠事件
目录
- 图形绘制
- 绘制矩形
- 绘制直线
- 绘制圆弧
- 案例
- 键鼠事件
- 键盘事件
- 鼠标事件
图形绘制
格式:
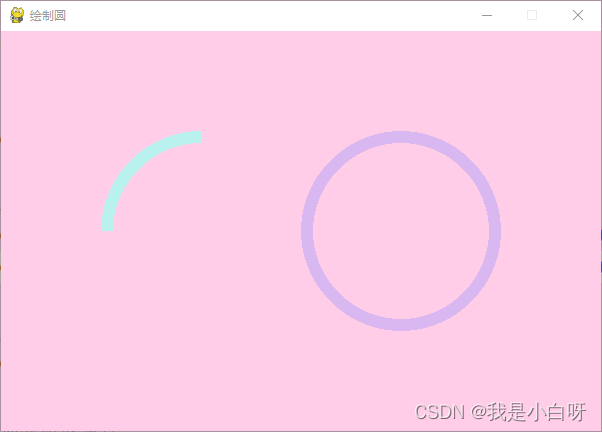
pygame.draw.circle(surface, color, center, radius, width=0, draw_top_right=None, draw_top_left=None, draw_bottom_left=None, draw_bottom_right=None)
参数:
- surface: 需要绘制的表面
- color: RGB 格式, 圆形的颜色
- center: 元组格式 (x, y), 圆心坐标
- radius: 圆形半径
- width: 圆形厚度
- draw_top_right: 布尔类型, 只画右上角 1/4, 默认为 None
- draw_top_left: 布尔类型, 只画左上角 1/4, 默认为 None
- draw_bottom_right: 布尔类型, 只画右下角 1/4, 默认为 None
- draw_bottom_left: 布尔类型, 只画左下角 1/4, 默认为 None
例子:
import pygame
from pygame.locals import *
import sys
# 初始化 pygame
pygame.init()
# 设置窗口大小
screen = pygame.display.set_mode((600, 400))
# 设置背景颜色
screen.fill((255, 205, 232))
# 设置标题
pygame.display.set_caption("绘制圆")
# 绘制圆
pygame.draw.circle(screen, (184, 241, 237), (200, 200), 100, 12, draw_top_left=True)
pygame.draw.circle(screen, (217, 184, 241), (400, 200), 100, 12)
# 更新显示
pygame.display.update()
# 捕获游戏事件
typelist = [QUIT]
while True:
    # 获取事件
    for event in pygame.event.get():
        # 接收到退出事件, 退出程序
        if event.type in typelist:
            sys.exit()  # 退出
输出结果:

绘制矩形
格式:
pygame.draw.rect(surface, color, rect, width=0, border_radius=0, border_top_left_radius=-1, border_top_right_radius=-1, border_bottom_left_radius=-1, border_bottom_right_radius=-1)
参数:
- surface: 需要绘制的表面
- color: RGB 格式, 颜色
- rect: 元组格式 (x, y, w, h), 矩形的坐标和尺寸
- width: 矩形粗细
- border_radius: 使矩形有圆角, 圆角的半径
- border_top_left_radius: 矩形左上角的圆角半径
- border_top_right_radius: 矩形右上角的圆角半径
- border_bottom_left_radius: 矩形左下角的圆角半径
- border_bottom_right_radius: 矩形右下角的圆角半径
例子:
import pygame
from pygame.locals import *
import sys
# 初始化 pygame
pygame.init()
# 设置窗口大小
screen = pygame.display.set_mode((600, 400))
# 设置背景颜色
screen.fill((255, 205, 232))
# 设置标题
pygame.display.set_caption("绘制矩形")
# 绘制矩形
pygame.draw.rect(screen, (184, 241, 204), (50, 200, 150, 150), 12, border_radius=25)  # 圆角矩形
pygame.draw.rect(screen, (184, 241, 237), (250, 200, 150, 150), 12, border_top_right_radius=25)  # 右上角圆角
pygame.draw.rect(screen, (217, 184, 241), (450, 200, 120, 120), 12)
# 更新显示
pygame.display.update()
# 捕获游戏事件
typelist = [QUIT]
while True:
    # 获取事件
    for event in pygame.event.get():
        # 接收到退出事件, 退出程序
        if event.type in typelist:
            sys.exit()  # 退出
输出结果:

绘制直线
格式:
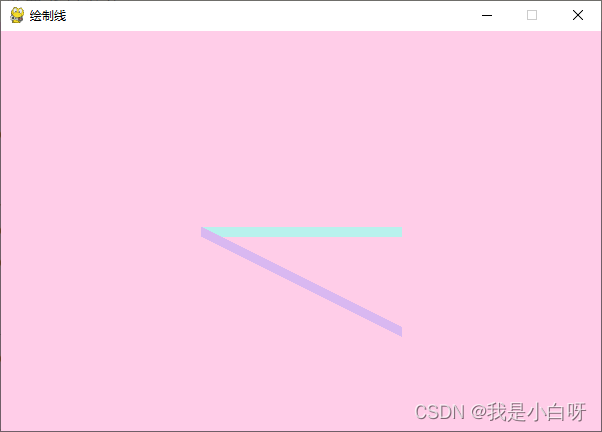
pygame.draw.line(surface, color, start_pos, end_pos, width=1)
参数:
- surface: 需要绘制的表面
- color: RGB 格式, 颜色
- start_pos: 元组格式 (x, y), 起始坐标
- end_pos: 元组格式 (x, y), 结束坐标
- width: 线粗细
例子:
import pygame
from pygame.locals import *
import sys
# 初始化 pygame
pygame.init()
# 设置窗口大小
screen = pygame.display.set_mode((600, 400))
# 设置背景颜色
screen.fill((255, 205, 232))
# 设置标题
pygame.display.set_caption("绘制线")
# 绘制线
pygame.draw.line(screen, (184, 241, 237), (200, 200), (400, 200), 10)  # 直线
pygame.draw.line(screen, (217, 184, 241), (200, 200), (400, 300), 10)  # 斜线
# 更新显示
pygame.display.update()
# 捕获游戏事件
typelist = [QUIT]
while True:
    # 获取事件
    for event in pygame.event.get():
        # 接收到退出事件, 退出程序
        if event.type in typelist:
            sys.exit()  # 退出
输出结果:

绘制圆弧
格式:
pygame.draw.arc(surface, color, rect, start_angle, stop_angle, width=1)
参数:
- surface: 需要绘制的表面
- color: RGB 格式, 颜色
- rect: 元组格式 (x, y, w, h), 矩形的坐标和尺寸
- start_angle: 起始弧度
- stop_angle: 结束弧度
- width: 圆弧粗细
例子:
import pygame
from pygame.locals import *
import sys
import math
# 初始化 pygame
pygame.init()
# 设置窗口大小
screen = pygame.display.set_mode((600, 400))
# 设置背景颜色
screen.fill((255, 205, 232))
# 设置标题
pygame.display.set_caption("绘制圆弧")
# 绘制圆弧
pygame.draw.arc(screen, (184, 241, 237), (100, 100, 200, 200), math.radians(0), math.radians(180), 10)
pygame.draw.arc(screen, (217, 184, 241), (400, 100, 200, 250), math.radians(90), math.radians(270), 10)
# 更新显示
pygame.display.update()
# 捕获游戏事件
typelist = [QUIT]
while True:
    # 获取事件
    for event in pygame.event.get():
        # 接收到退出事件, 退出程序
        if event.type in typelist:
            sys.exit()  # 退出
输出结果:

通过math.radians()方法, 将角度值转换为弧度.
案例
pygame 实现矩形移动:
import pygame
from pygame.locals import *
import sys
import time
# 初始化 pygame
pygame.init()
# 设置窗口大小
screen = pygame.display.set_mode((500, 500))
# 设置背景颜色
screen.fill((255, 205, 232))
# 设置标题
pygame.display.set_caption("移动的矩形")
# 捕获游戏事件
typelist = [QUIT]
# 矩形的初始横坐标
pos_x = 300
pos_y = 250
# 矩形移动距离
vel_x = 2
vel_y = 1
while True:
    # 获取事件
    for event in pygame.event.get():
        # 接收到退出事件, 退出程序
        if event.type in typelist:
            sys.exit()  # 退出
    # 刷新背景
    screen.fill((255, 205, 232))
    # 刷新矩形
    pos_x += vel_x
    pos_y += vel_y
    # 边缘反弹
    if pos_x >= 400 or pos_x <= 0:
        vel_x = -vel_x
    if pos_y >= 400 or pos_y <= 0:
        vel_y = -vel_y
    # 绘制矩形
    pygame.draw.rect(screen, (217, 184, 241), (pos_x, pos_y, 100, 100), 0)
    time.sleep(0.01)
    # 更新显示
    pygame.display.update()
输出结果:

键鼠事件
键盘事件
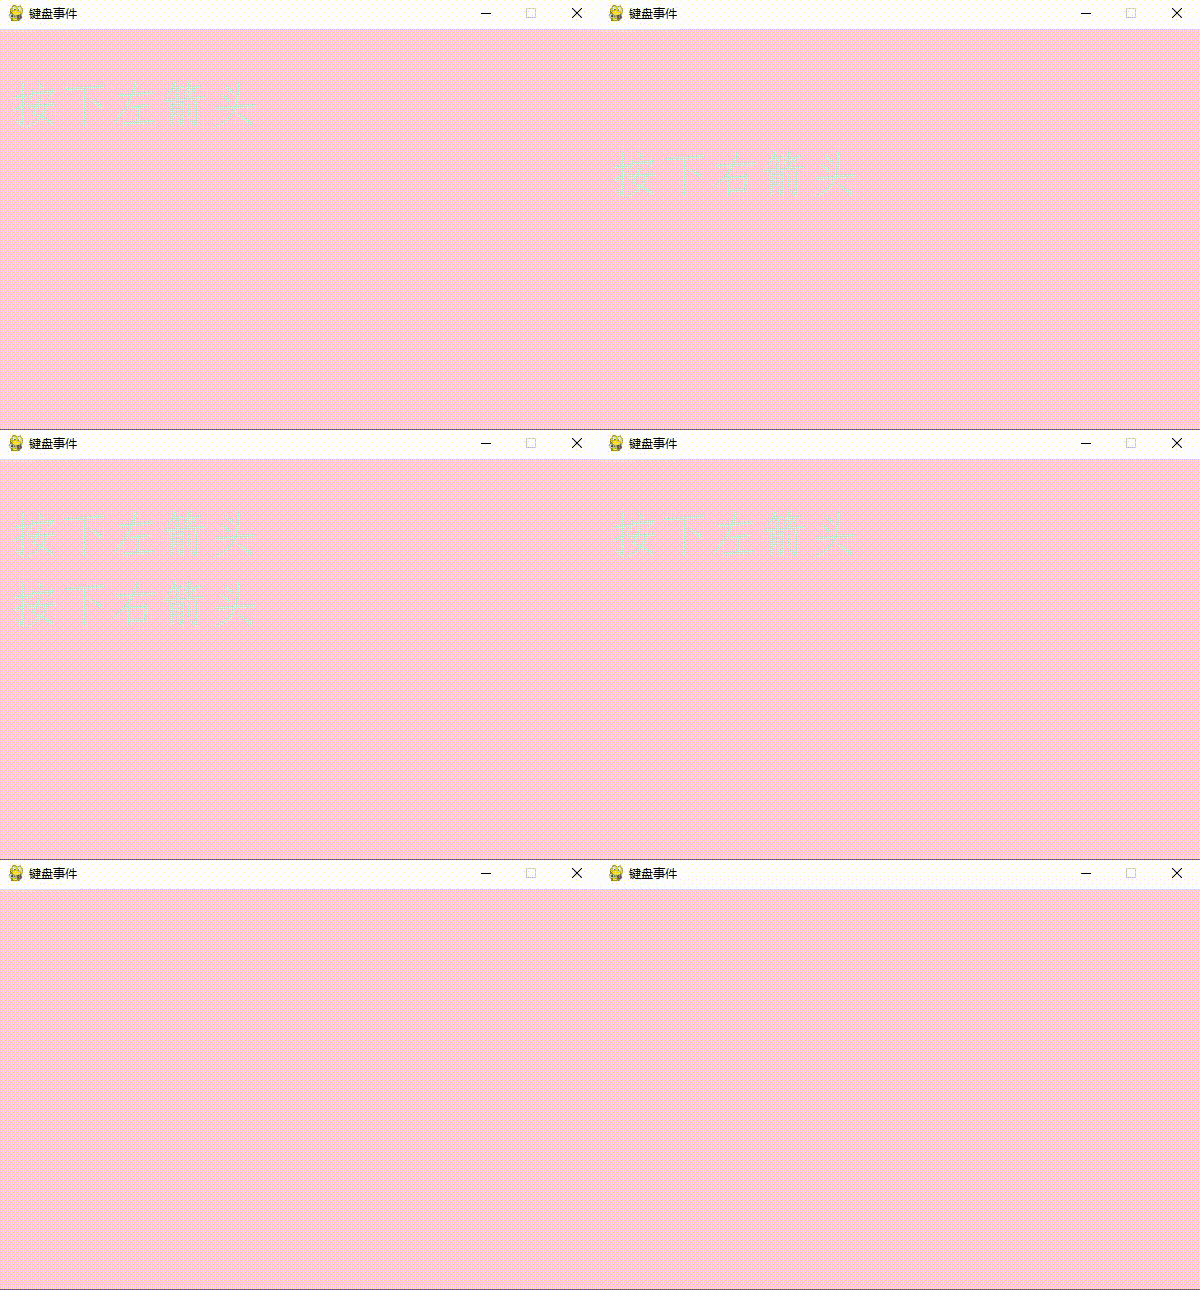
pygame.key.get_pressed()会返回一个按键列表, 用 True / False 表示键盘各个键是否按下.
格式:
keys = pygame.key.get_pressed()
例子:
import pygame
from pygame.locals import *
import sys
# 初始化 pygame
pygame.init()
# 设置窗口大小
screen = pygame.display.set_mode((600, 400))
# 设置字体和字号 (仿宋)
myFont = pygame.font.Font("C:\Windows\Fonts\simfang.ttf", 50)
# 设置背景颜色
screen.fill((255, 205, 232))
# 设置标题
pygame.display.set_caption("键盘事件")
# 捕获游戏事件
typelist = [QUIT]
while True:
    # 获取事件
    for event in pygame.event.get():
        # 接收到退出事件, 退出程序
        if event.type  == QUIT:
            sys.exit()  # 退出
    # 获取按键
    keys = pygame.key.get_pressed()
    # 刷新背景
    screen.fill((255, 205, 232))
    # 键盘事件
    if keys[K_LEFT]:
        # 显示文字
        text_img1 = myFont.render("按下左箭头", True, (184, 241, 237))
        screen.blit(text_img1, (10, 50))
    if keys[K_RIGHT]:
        text_img2 = myFont.render("按下右箭头", True, (184, 241, 237))
        screen.blit(text_img2, (10, 120))
    # 更新显示
    pygame.display.update()
输出结果:

鼠标事件
event.pos获取事件坐标, event.rel获取事件相对位置.
例子:
import pygame
from pygame.locals import *
import sys
# 初始化 pygame
pygame.init()
# 设置窗口大小
screen = pygame.display.set_mode((600, 400))
# 设置字体和字号 (仿宋)
myFont = pygame.font.Font("C:\Windows\Fonts\simfang.ttf", 50)
# 设置背景颜色
screen.fill((255, 205, 232))
# 设置标题
pygame.display.set_caption("鼠标事件")
# 捕获游戏事件
typelist = [QUIT]
# 初始化变量
mouse_x = mouse_y = 0  # 鼠标位置
move_x = move_y = 0
mouse_down = 0  # 按键按下
mouse_down_x = mouse_down_y = 0  # 按键按下位置
mouse_up = 0  # 按键抬起
mouse_up_x = mouse_up_y = 0  # 按键按下位置
while True:
    # 获取事件
    for event in pygame.event.get():
        # 接收到退出事件, 退出程序
        if event.type  == QUIT:
            sys.exit()  # 退出
        # 获取鼠标位置
        elif event.type == MOUSEMOTION:
            mouse_x, mouse_y = event.pos
            move_x, move_y = event.rel
        # 获取鼠标按键
        elif event.type == MOUSEBUTTONDOWN:
            mouse_down = event.button
            mouse_down_x, mouse_down_y = event.pos
        elif event.type == MOUSEBUTTONUP:
            mouse_up = event.button
            mouse_up_x, mouse_up_y = event.pos
    # 获取按键
    keys = pygame.key.get_pressed()
    # 刷新背景
    screen.fill((255, 205, 232))
    # 鼠标事件
    text_img1 = myFont.render("鼠标位置: " + str(mouse_x) + ", " + str(mouse_y), True, (184, 241, 237))
    text_img2 = myFont.render("鼠标相对位置: " + str(move_x) + ", " + str(move_y), True, (184, 241, 237))
    text_img3 = myFont.render("鼠标按钮按下: " + str(mouse_down) + ", " + str(mouse_down_x) + ", " + str(mouse_down_y), True, (184, 241, 237))
    text_img4 = myFont.render("鼠标按钮抬起: " + str(mouse_up) + ", " + str(mouse_up_x) + ", " + str(mouse_up_y), True, (184, 241, 237))
    screen.blits([(text_img1, (10, 50)), (text_img2, (10, 100)), (text_img3, (10, 150)), (text_img4, (10, 200))])
    # 更新显示
    pygame.display.update()
输出结果:

到此这篇关于Pygame游戏开发实例讲解之图形绘制与键鼠事件的文章就介绍到这了,更多相关Pygame图形绘制与键鼠事件内容请搜索我们以前的文章或继续浏览下面的相关文章希望大家以后多多支持我们!
赞 (0)

