Vue封装svg-icon组件使用教程
目录
- 一、SVG可缩放矢量图形
- 二、SVG在vue项目中的配置与使用
一、SVG可缩放矢量图形
SVG(Scalable Vector Graphics)可缩放矢量图形,是一种用于描述基于二维的矢量图形的 XML 标记语言,其基本矢量显示对象包括矩形、圆、椭圆、多边形、直线、任意曲线等,还能显示文字对象和嵌入式外部图像(包括 PNG、JPEG、SVG 等)。实际项目中大多数图标都是使用的 SVG 图标文件,其主要有以下几个优点:
1.内容可读,文件是纯粹的 XML。
2.图像文件小,可伸缩性强。
3.矢量放缩,能以不牺牲图像质量为前提,进行任意缩放。
4.还能基于 DOM 模型实现动态和一些交互功能
二、SVG在vue项目中的配置与使用
1. 下载
npm install vue-svg-icon xml-loader -D
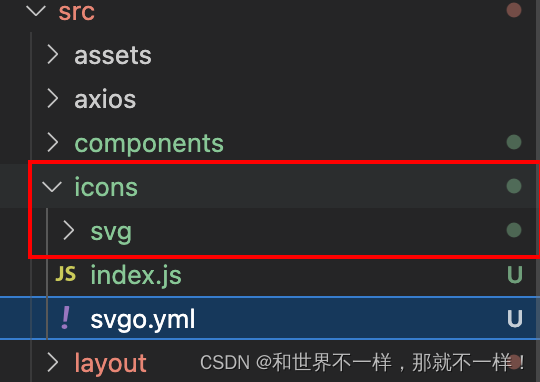
2. 下载的.svg的文件,存放于src/icons/svg文件

3. 配置src/icons/index.js文件
import Vue from 'vue'
import SvgIcon from '@/components/SvgIcon'// svg component
// register globally
Vue.component('svg-icon', SvgIcon)
// 在./svg下查找 “.svg”文件
const req = require.context('./svg', false, /\.svg$/)
const requireAll = requireContext => requireContext.keys().map(requireContext)
requireAll(req)
4.在main.js中引入icon/index.js文件中全局设置
//全局加载就可以了
import '@/icons/index.js'
5. 封装组件
/src/components/svgIcon/index.vue
<template>
  <div v-if="isExternal" :style="styleExternalIcon" class="svg-external-icon svg-icon" v-on="$listeners" />
  <svg v-else :class="svgClass" aria-hidden="true" v-on="$listeners">
    <use :xlink:href="iconName" rel="external nofollow"  />
  </svg>
</template>
<script>
// doc: https://panjiachen.github.io/vue-element-admin-site/feature/component/svg-icon.html#usage
import { isExternal } from '@/utils'
export default {
  name: 'SvgIcon',
  props: {
    iconClass: {
      type: String,
      required: true
    },
    className: {
      type: String,
      default: ''
    }
  },
  computed: {
    isExternal() {
      return isExternal(this.iconClass)
    },
    iconName() {
      return `#icon-${this.iconClass}`
    },
    svgClass() {
      if (this.className) {
        return 'svg-icon ' + this.className
      } else {
        return 'svg-icon'
      }
    },
    styleExternalIcon() {
      return {
        mask: `url(${this.iconClass}) no-repeat 50% 50%`,
        '-webkit-mask': `url(${this.iconClass}) no-repeat 50% 50%`
      }
    }
  }
}
</script>
<style scoped>
.svg-icon {
  width: 1em;
  height: 1em;
  vertical-align: -0.15em;
  fill: currentColor;
  overflow: hidden;
}
.svg-external-icon {
  background-color: currentColor;
  mask-size: cover!important;
  display: inline-block;
}
</style>
6.页面使用
<div>
  <svg-icon icon-class="peoples" />
</div>
到目前为止使用 < svg-icon icon-class=“left-indent” /> 还没有效果,因为还缺少配置文件
7. vue.config.js 中配置 svg-sprite-loader
安装:
npm install svg-sprite-loader -D
配置 vue.config.js:
使用chainWebpack方法可自定义配置 loader vue.config.js
module.exports = {
   	 chainWebpack: config => {
   	    config.module
   	    .rule('svg')
   	    .exclude.add(resolve('src/icons'))
   	    .end()
   	    config.module
   	    .rule('icons')
   	    .test(/\.svg$/)
   	    .include.add(resolve('src/icons'))
   	    .end()
   	    .use('svg-sprite-loader')
   	    .loader('svg-sprite-loader')
   	    .options({
   	      symbolId: 'icon-[name]'
   	    })
   	    .end()
   	  }
   }
重启项目遇到报错:error: resolve is not defined
在vue.config.js中没有配置 resolve 方法, 需要自定义一个,代码如下
const path = require('path')
function resolve(dir) {
  return path.join(__dirname, dir)
}
此时,图标在页面已经出效果;

到此这篇关于Vue封装svg-icon组件使用教程的文章就介绍到这了,更多相关Vue svg icon组件内容请搜索我们以前的文章或继续浏览下面的相关文章希望大家以后多多支持我们!

