shell脚本源码安装nginx的详细过程
SHELL概念
- SHELL是什么?SHELL是Linux内核跟用户之间沟通的桥梁;
- SHELL也是一个命令解释器,用户可以输入命令到SHELL,SHELL将命令传递给Linux内核,内核处理完毕,返回给SHELL,SHELL将返回的结果返给用户终端;
- SHELL是外壳,中间件,外壳有很多的种类,bash、csh、ksh、zsh等;
- SHELL和SHELL编程有什么关系?SHELL是命令解释器,用户和操作系统沟通桥梁,而SHELL编程基于SHELL解释器来实现具体的功能或者需求;
- SHELL命令、SHELL脚本、SHELL编程、SHELL之间解释?
SHELL编程用途
- SHELL编程的目的将重复的工作变成自动化,可以理解为批处理;
- SHELL主要是为了减轻人工的频繁的操作、提高运维工作效率,保证网站稳定、高效的运行;
- 例如需要源码编译LNMP WEB架构,20台都需要编译怎么办?
如何开启Shell编程
- 任何的编程语言,都是从Hello,world;
- SHELL编程其实就是将SHELL命令写入到脚本文件中;
- SHELL编程规范,脚本内容第一行必须以#!开头,其后接SHELL的种类,例如/bin/bash,/bin/sh等;
下面脚本看下shell脚本源码安装nginx的过程。
[root@localhost ~]# vim nginx.sh
[root@localhost ~]# cat nginx.sh
#!/bin/bash
version=nginx-1.20.1.tar.gz
name=nginx-1.20.1
install_dir=/usr/local
log=/var/log/nginx
#解决依赖关系
yum -y install gcc pcre pcre-devel zlib zlib-devel openssl openssl-devel wget gd-devel gcc gcc-c++
yum -y groups mark install 'Development Tools'
#创建用户
id nginx &>/dev/null
if [ $? -ne 0 ];then
        useradd -s /sbin/nologin nginx
fi
#创建日志存放目录
if [ ! -d $log ];then
    mkdir -p /var/log/nginx
    chown -R nginx.nginx /var/log/nginx
fi
#下载nginx
cd /usr/src/
wget   http://nginx.org/download/$version
#解压
tar xf $version
mv $name nginx
cd nginx/ && ./configure \
--prefix=$install_dir/nginx \
--user=nginx \
--group=nginx \
--with-debug \
--with-http_ssl_module \
--with-http_realip_module \
--with-http_image_filter_module \
--with-http_gunzip_module \
--with-http_gzip_static_module \
--with-http_stub_status_module \
--http-log-path=$log/access.log \
--error-log-path=$log/error.log

make && make install
#配置环境变量
echo "export PATH=$install_dir/nginx/sbin:\$PATH" > /etc/profile.d/nginx.sh
source /etc/profile.d/nginx.sh

#创建服务文件
cat > /usr/lib/systemd/system/nginx.service <<EOF

[Unit]
Description=nginx
After=network.target

[Service]
Type=forking
ExecStart=$install_dir/nginx/sbin/nginx
ExecReload=$install_dir/nginx/sbin/nginx -s reload
ExecStop=$install_dir/nginx/sbin/nginx -s quit
PrivateTmp= true

[Install]
WantedBy=multi-user.target

EOF
#开机自启
systemctl enable --now nginx
//测试
[root@localhost ~]# ./nginx.sh
已加载插件:fastestmirror
Loading mirror speeds from cached hostfile
 * base: mirrors.aliyun.com
 * extras: mirrors.aliyun.com
 * updates: mirrors.aliyun.com
软件包 gcc-4.8.5-44.el7.x86_64 已安装并且是最新版本
软件包 pcre-8.32-17.el7.x86_64 已安装并且是最新版本
软件包 pcre-devel-8.32-17.el7.x86_64 已安装并且是最新版本
软件包 zlib-1.2.7-19.el7_9.x86_64 已安装并且是最新版本
软件包 zlib-devel-1.2.7-19.el7_9.x86_64 已安装并且是最新版本
软件包 1:openssl-1.0.2k-22.el7_9.x86_64 已安装并且是最新版本
软件包 1:openssl-devel-1.0.2k-22.el7_9.x86_64 已安装并且是最新版本
软件包 wget-1.14-18.el7_6.1.x86_64 已安装并且是最新版本
软件包 gd-devel-2.0.35-27.el7_9.x86_64 已安装并且是最新版本
软件包 gcc-4.8.5-44.el7.x86_64 已安装并且是最新版本
软件包 gcc-c++-4.8.5-44.el7.x86_64 已安装并且是最新版本
无须任何处理
已加载插件:fastestmirror
Loading mirror speeds from cached hostfile
 * base: mirrors.aliyun.com
 * extras: mirrors.aliyun.com
 * updates: mirrors.aliyun.com
Marked install: Development Tools
--2021-10-25 12:15:53--  http://nginx.org/download/nginx-1.20.1.tar.gz
正在解析主机 nginx.org (nginx.org)... 52.58.199.22, 3.125.197.172, 2a05:d014:edb:5702::6, ...
正在连接 nginx.org (nginx.org)|52.58.199.22|:80... 已连接。
已发出 HTTP 请求,正在等待回应... 200 OK
长度:1061461 (1.0M) [application/octet-stream]
正在保存至: “nginx-1.20.1.tar.gz.1”

100%[===================================================================================================================>] 1,061,461    670KB/s 用时 1.5s

2021-10-25 12:15:55 (670 KB/s) - 已保存 “nginx-1.20.1.tar.gz.1” [1061461/1061461])

checking for OS
 + Linux 3.10.0-862.el7.x86_64 x86_64
checking for C compiler ... found
 + using GNU C compiler
 + gcc version: 4.8.5 20150623 (Red Hat 4.8.5-44) (GCC)
省略....
nginx http uwsgi temporary files: "uwsgi_temp"
  nginx http scgi temporary files: "scgi_temp"

make -f objs/Makefile
make[1]: 进入目录“/usr/local/nginx”
cc -c -pipe  -O -W -Wall -Wpointer-arith -Wno-unused-parameter -Werror -g  -I src/core -I src/event -I src/event/modules -I src/os/unix -I objs \
        -o objs/src/core/nginx.o \
        src/core/nginx.c
cc -c -pipe  -O -W -Wall -Wpointer-arith -Wno-unused-parameter -Werror -g  -I src/core -I src/event -I src/event/modules -I src/os/unix -I objs \
        -o objs/src/core/ngx_log.o \
        src/core/ngx_log.c
test -f '/usr/local/nginx/conf/nginx.conf' \
        || cp conf/nginx.conf '/usr/local/nginx/conf/nginx.conf'
cp conf/nginx.conf '/usr/local/nginx/conf/nginx.conf.default'
test -d '/usr/local/nginx/logs' \
        || mkdir -p '/usr/local/nginx/logs'
test -d '/var/log/nginx' \
        || mkdir -p '/var/log/nginx'
test -d '/usr/local/nginx/html' \
        || cp -R html '/usr/local/nginx'
test -d '/var/log/nginx' \
        || mkdir -p '/var/log/nginx'
make[1]: 离开目录“/usr/src/nginx”
Created symlink from /etc/systemd/system/multi-user.target.wants/nginx.service to /usr/lib/systemd/system/nginx.service.
[root@localhost ~]# systemctl start nginx
[root@localhost ~]# systemctl stop firewalld
[root@localhost ~]# ss -antl
State       Recv-Q Send-Q                                 Local Address:Port                                                Peer Address:Port
LISTEN      0      128                                                *:80                                                             *:*
LISTEN      0      128                                                *:22                                                             *:*
LISTEN      0      100                                        127.0.0.1:25                                                             *:*
LISTEN      0      128                                               :::22                                                            :::*
LISTEN      0      100                                              ::1:25                                                            :::*
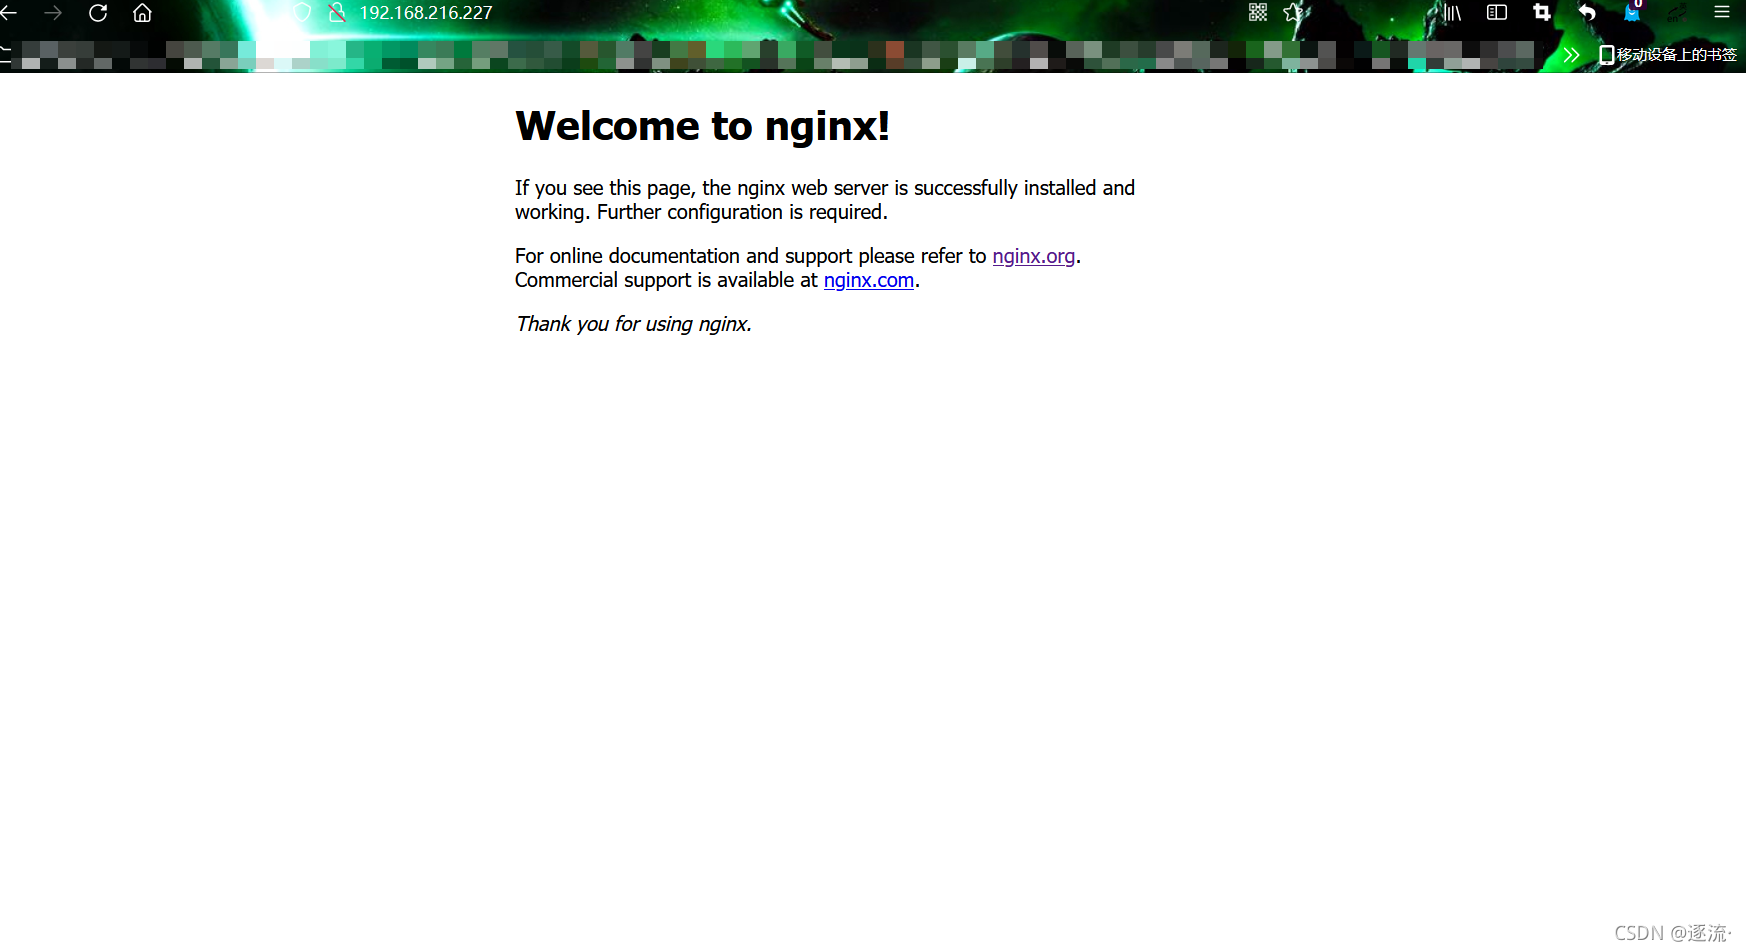
经过测试,想要直接使用nginx命令 需要在终端手动读取配置
//配置文件脚本里已经写好,这里直接读取就可以
[root@localhost ~]# source /etc/profile.d/nginx.sh
[root@localhost ~]# which nginx
/usr/local/nginx/sbin/nginx
[root@localhost ~]# nginx -V
nginx version: nginx/1.20.1
built by gcc 4.8.5 20150623 (Red Hat 4.8.5-44) (GCC)
built with OpenSSL 1.0.2k-fips  26 Jan 2017
TLS SNI support enabled
configure arguments: --prefix=/usr/local/nginx --user=nginx --group=nginx --with-debug --with-http_ssl_module --with-http_realip_module --with-http_image_filter_module --with-http_gunzip_module --with-http_gzip_static_module --with-http_stub_status_module --http-log-path=/var/log/nginx/access.log --error-log-path=/var/log/nginx/error.log
或者用source nginx.sh执行脚本
[root@localhost ~]# source nginx.sh
//这种方式不需要手动读取环境变量
到此这篇关于shell脚本源码安装nginx的文章就介绍到这了,更多相关shell脚本安装nginx内容请搜索我们以前的文章或继续浏览下面的相关文章希望大家以后多多支持我们!
相关推荐
-
shell脚本分析 nginx日志访问次数最多及最耗时的页面(慢查询)
当服务器压力比较大,跑起来很费力时候.我们经常做站点页面优化,会去查找那些页面访问次数比较多,而且比较费时. 找到那些访问次数高,并且比较耗时的地址,就行相关优化,会取得立竿见影的效果的. 下面是我在做优化时候,经常用到的一段shell 脚本. 这个也可以算是,统计web页面的slowpage 慢访问页面,象mysql slowquery . 以下是我的:nginx 配制 复制代码 代码如下: log_format main '$remote_addr - $remote_user [$ti
-
nginx日志切割shell脚本
一.脚本思路 第一步就是重命名日志文件,不用担心重命名后nginx找不到日志文件而丢失日志.在你未重新打开原名字的日志文件前,nginx还是会向你重命名的文件写日志,linux是靠文件描述符而不是文件名定位文件. 第二步向nginx主进程发送USR1信号. nginx主进程接到信号后会从配置文件中读取日志文件名称,重新打开日志文件(以配置文件中的日志名称命名),并以工作进程的用户作为日志文件的所有者. 重新打开日志文件后,nginx主进程会关闭重名的日志文件并通知工作进程使用新打开的日志文件.
-

nginx虚拟主机防webshell完美版
我们先来看下nginx.conf server { listen 80; server_name www.a.com; index index.html index.htm index.php; root /data/htdocs/www.a.com/; #limit_conn crawler 20; location ~ .*\.(php|php5)?$ { #fastcgi_pass unix:/tmp/php-c
-
Shell脚本批量清除Nginx缓存
前言*随着整个互联网的发展,产生了无数大大小小的网站,随之而来用户对网站UI和速度体验也在日益加强,对企业或者个人来说,赢得用户体验也就意味着赢得先机. 那今天我们在这里针对网站速度这方面来一起交流,提高网站速度对于运维工程师.程序员来说变得至关重要.运维工程师首先得在日常网站运维中发现影响网站速度的各种因素得逐个推动然后解决. 提高网站速度体验除了本身网站程序优化外,对于LinuxSA来说还有大量的工作要做,优化系统内核.调整WEB服务器的参数.优化数据库.增加网站架构缓存等等一系列的工作.
-
shell脚本之nginx自动化脚本
这个脚本,可以满足nginx开启,停止和重启的操作 #!/bin/bash . /etc/init.d/functions function usage() { echo $"usage:$0 {start|stop|restart}" exit 1 } function start() { /usr/local/nginx/sbin/nginx sleep 1 if [ `netstat -antlpe | grep nginx | wc -l` -ge 0 ];then actio
-
shell脚本源码安装nginx的详细过程
SHELL概念 SHELL是什么?SHELL是Linux内核跟用户之间沟通的桥梁: SHELL也是一个命令解释器,用户可以输入命令到SHELL,SHELL将命令传递给Linux内核,内核处理完毕,返回给SHELL,SHELL将返回的结果返给用户终端: SHELL是外壳,中间件,外壳有很多的种类,bash.csh.ksh.zsh等: SHELL和SHELL编程有什么关系?SHELL是命令解释器,用户和操作系统沟通桥梁,而SHELL编程基于SHELL解释器来实现具体的功能或者需求: SHELL命令.
-
centos8中使用yum安装 nginx的详细过程
目录 centos8中怎样使用yum安装 nginx yum 直接安装 使用vim编辑 nginx基本命令 centos8中怎样使用yum安装 nginx centos8 安装 nginx yum 直接安装 centos8和centos7安装nginx有点点不一样,centos8 自带了nginx 1.14.1 ,我们先升级到新稳定版1.20.1 在etc目录下创建repo源文件 cd /etc/yum.repos.d touch nginx.repo 使用vim编辑 vim nginx.rep
-
shell脚本多实例部署nginx的详细教程
1. 创建一个目录,用来存放脚本和安装包 [root@localhost nginx]# tree . ├── install.sh └── packages └── nginx-1.20.1.tar.gz 1 directory, 2 files [root@localhost nginx]# 2. 下载好对应的安装包 [root@localhost packages]# wget https://nginx.org/download/nginx-1.20.1.tar.gz [root@loc
-
centos8 安装 nginx的详细教程(图文)
Nginx发音为" engine x",是一种开源的高性能HTTP和反向代理服务器,负责处理Internet上一些最大站点的负载.它可用作HTTP和非HTTP服务器的独立Web服务器,负载平衡器,内容缓存和反向代理. 与Apache相比,Nginx可以处理大量并发连接,并且每个连接的内存占用量较小. 本教程说明了如何在CentOS 8上安装Nginx. NGINX官网 http://nginx.org/ 创建文件夹mkdir nginx 进入创建的文件夹 根据自己需要下载合适版本 通
-
Linux服务器离线安装 nginx的详细步骤
目录 Linux服务器 离线安装 nginx 1.资源 2.安装步骤 常用命令 操作 启动nginx 停止nginx 重启nginx 查看端口占用 Linux服务器 离线安装 nginx 1.资源 nginx-1.20.1.tar.gz(下载链接中包含gcc.g++.pcre.libtool.nginx) 百度网盘下载: 链接: https://pan.baidu.com/s/1avQD-zGYVcj0ttRtnPNTIA 提取码: 6yhi 2.安装步骤 (1)安装gcc rpm -Uvh *
-
在麒麟V10服务器上编译安装Storm的详细过程
1 简介 Apache Storm是一个免费开源.分布式.高容错的实时计算系统,可以用来处理大量的数据,类似于Hadoop.Apache Storm是用Java和Clojure写的. 2 准备工作 源码下载地址: https://github.com/apache/storm 这里下载了1.1.0版本进行验证: 1.1.0 https://archive.apache.org/dist/storm/apache-storm-1.1.0/apache-storm-1.1.0.tar.gz 验证环境
-
亲手教你Docker Compose安装DOClever的详细过程
目录 一.Docker Compose是什么以及Docker Compose安装和使用 二.DOClever是什么 三.使用Docker Compose安装DOClever步骤 一.Docker Compose是什么以及Docker Compose安装和使用 点击查看我的另外一篇:<Docker Compose的安装和使用> 二.DOClever是什么 DOClever是一个可视化免费开源的接口管理工具 ,可以分析接口结构,校验接口正确性, 围绕接口定义文档,通过一系列自动化工具提升我们的协作
-
使用vmware测试PXE批量安装服务器的详细过程
目录 一.准备阶段 1.准备环境 2.安装方式 3.网卡配置 二.安装阶段 1.安装httpd 2.安装tftp-server 3.复制pxe文件 4.安装dhcp服务 三.安装kickstart自动安装工具 四.在客户主机上测试 五.相关服务 一.准备阶段 1.准备环境 Vmware workstation Centos7一台做pxe-server 地址:192.168.138.5 子网掩码:255.255.255.0 网关:192.168.138.2 关闭selinux和防火墙 2.安装方式
-
在vmware虚拟机安装dpdk的详细过程
1. 打开vmware,选择centos7.6镜像,开始安装操作系统 2. 安装完毕后,关机,点击“编辑虚拟机设置”按钮,点击“处理器”,在右侧勾选第三个“虚拟化IOMMU”.由于我的宿主机是win11,已经支持了Intel VT-x,所以第一个选项就不必勾选了,win7和win10可能需要勾选. 另外,我多添加了几个网络适配器,便于测试. 注意,如果勾选了第一个选项: 启动虚拟机时报错:. 则需要取消勾选第一个. 3. 编辑本虚拟机配置文件CentOS 7 64 位.vmx(使用记事本打开),
-
win10环境安装kettle与linux环境安装kettle的详细过程
目录 前言 一.Kettle下载 : 1.kettle源代码下载地址 : 2.官网下载 3.JDK安装 二.win10环境安装kettle 1.解压kettle 2.双击spoon启动 3.启动界面如下: 三.linux环境安装kettle 1.上传kettle压缩包到linux 2.解压安装包 3.linux下启动kettle 总结 前言 kettle是一款免费开源的.可视化的.国际上比较流行的.功能强大的ETL必备工具,在ETL这一方面做的还不错,下面介绍一下基于win10操作系统安装ket