el-table树形表格表单验证(列表生成序号)
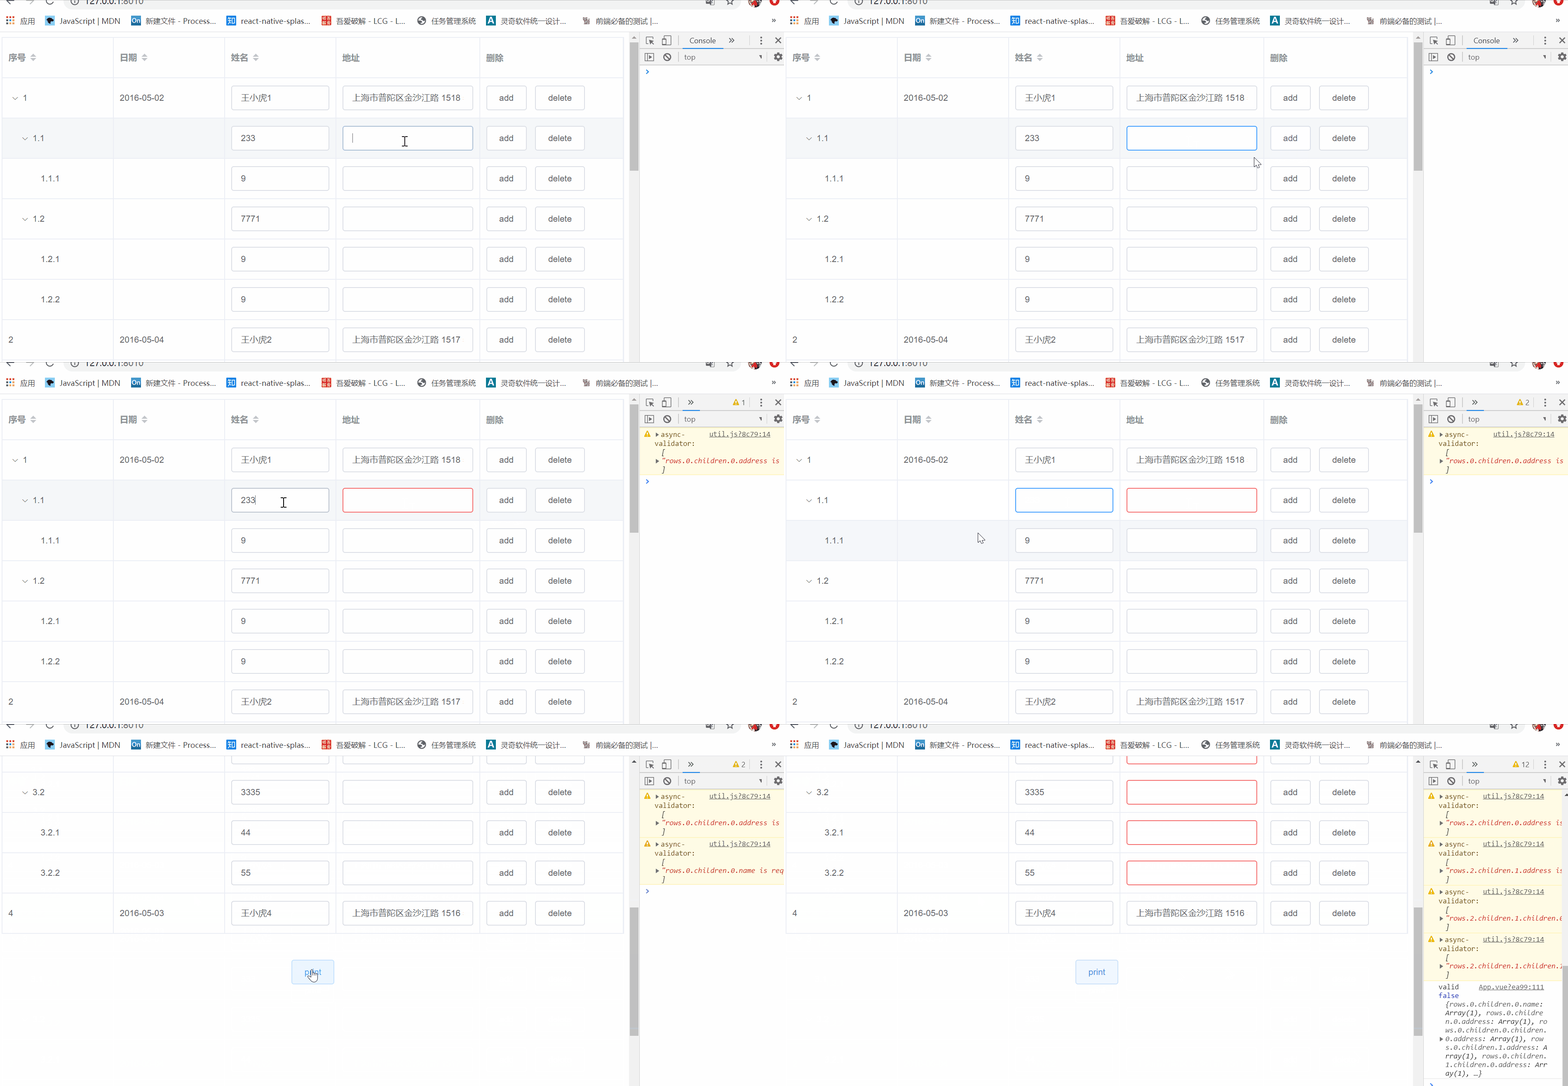
树形表格表单验证预览

树形列表生成序号
首先需要生成一个序号用来确定表单验证的目标row,通过广度优先遍历,以1,1.1,1.1.1的规则对树形列表生成确定唯一值的索引,因为列表自身可以做CURD,因此需要每次列表的item增加或减少时重新调用生成索引的方法。
 setIndex = (data) => {
        let queue = [...data];
        let loop = 0;
        while (queue.length > 0) {
          loop++
          [...queue].forEach((child, i) => {
            queue.shift()
            if (loop == 1) {
              child.customIndex = i + 1 + "";
              child.currentIndex = i;
            }
            if (child.children && child.children.length > 0) {
              child.dataType = 1
              for (let ci = 0; ci < child.children.length; ci++) {
                child.children[ci].currentIndex = ci
                child.children[ci].customIndex = child.customIndex + "." + (ci + 1)
              }
              queue.push(...child.children)
            } else {
              child.dataType = 2
            }
          })
        }
      }
      const rows = [
        {
          id: "1",
          date: "2016-05-02",
          name: "王小虎1",
          address: "上海市普陀区金沙江路 1518 弄",
          children: [
            {
              name: "233",
              customIndex: "1.1",
              children: [{name: "9"}]
            },
            {
              name: "7771",
              customIndex: "1.2",
              children: [
                {
                  name: "9"
                },
                {
                  name: "9",
                }]
            }
          ]
        },
        {
          id: "2",
          date: "2016-05-04",
          name: "王小虎2",
          address: "上海市普陀区金沙江路 1517 弄",
          children: []
        },
       ]
 setIndex(rows)
表单校验
要想实现对表格的表单验证,需要用form-item将整个表格包裹,然后在以子集的方式将每一列用form-item包裹。
 <el-form ref="form" :model="form" label-width="80px" :rules="rules">
      <el-form-item label-width="0" prop="rows">
        <el-table>
        </el-table>
      </el-form-item>
    </el-form>
<el-table-column
              prop="name"
              label="姓名"
              sortable
              width="180">
            <template v-slot="{$index, row}">
                           {{`rows${getPathByKey(row.customIndex,"customIndex",form.rows)}.name`}}
              <el-form-item label-width="0" :rules="rules.name"
                     :prop="`${row.customIndex!=='tempIndex'?`rows${getPathByKey(row.customIndex,'customIndex',form.rows)}.name`:''}`">
                <el-input v-model="row.name"></el-input>
              </el-form-item>
            </template>
          </el-table-column>
实现方式,表单校验本质是对于目标数据的路径查找,当el-form-item 上的prop匹配不到正确的目标是的时候就不能正常触发校验

因此,需要记录每一个row上面的属性路径,即实现记录每一行中属性(name,address)路径的方法。
 getPathByKey = (value, key, arr) => {
        let temppath = [];
        let realPath = ""
        try {
          function getNodePath(node) {
            temppath.push(node.currentIndex);
            //找到符合条件的节点,通过throw终止掉递归
            if (node[key] === value) {
              temppath.forEach((v, i) => {
                if (i == 0) {
                  realPath += "." + v
                } else {
                  realPath += `.children.${v}`
                }
              })
              // temppath = temppath.join(",")
              throw ("GOT IT!");
              // return;
            }
            if (node.children && node.children.length > 0) {
              for (var i = 0; i < node.children.length; i++) {
                getNodePath(node.children[i]);
              }

              //当前节点的子节点遍历完依旧没找到,则删除路径中的该节点
              temppath.pop();
            } else {

              //找到叶子节点时,删除路径当中的该叶子节点
              temppath.pop();
            }
          }

          for (let i = 0; i < arr.length; i++) {
            getNodePath(arr[i]);
          }
        } catch (e) {
          return realPath;
        }
      },
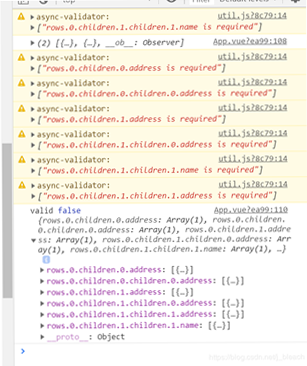
将每一列需要验证的item,路径查找好之后,form就可以具体监控到所有的表格输入,并触发正确的验证了,如图:

到此这篇关于el-table树形表格表单验证(列表生成序号)的文章就介绍到这了,更多相关el-table树形表格表单验证内容请搜索我们以前的文章或继续浏览下面的相关文章希望大家以后多多支持我们!
赞 (0)

