使用maven-assembly-plugin如何打包多模块项目
目录
- maven-assembly-plugin打包多模块项目
- 概述
- 1. 需求
- 2. 打包流程
- 使用maven-assembly-plugin插件来定制化打包
- 使用内置的Assembly Descriptor
- 自定义Assembly Descriptor
- Assembly Plugin更多配置
maven-assembly-plugin打包多模块项目
概述
maven-assembly-plugin 是目前maven项目中最常用的打包工具,它便利、配置简单,因此可以满足我们大部分的需求。
实际开发过程中大部分Maven项目都是多模块的,因为工作需要,对其进行了研究与尝试,目前可以将多模块按照自己需求打包到一起。
1. 需求
项目本身代码非常复杂,最深可以到三层模块,即GrandFather -> Parent -> child,要求打包后的结构如下:

目录的含义不
再追溯,下面直接将打包方法。
2. 打包流程
2.1 新建打包模块
Maven多模块打包在一起时,需要新建一个专门用于打包的模块,该模块不需要有任何Java代码,只需要配置一些最终形成的环境即可。但是该模块有一个非常重要的要求: 该模块必须是整个项目最后一个进行打包的。
可以通过配置pom.xml中加载模块的顺序来控制,最后配置进入的即最后进行打包的:
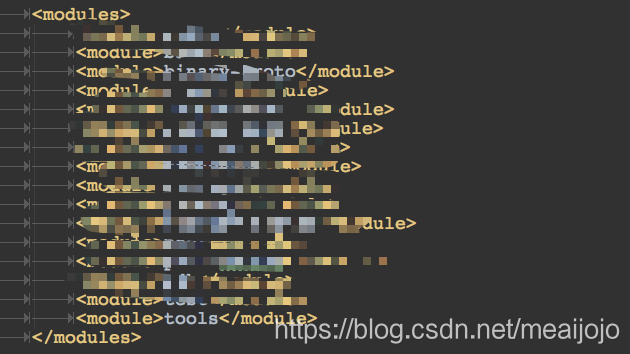
本人项目比较复杂,最终配置的打包是在tools子模块下的tools-package模块中进行配置。
2.2 配置打包模块
根据最终生成的路径需求,将所有的相关路径及一些命令、配置文件等按照要求在打包模块中实现,放在resources目录即可。

注:该项目中不需要任何Java代码
2.3 配置打包模块的pom.xml
<build>
        <plugins>
            <plugin>
                <groupId>org.apache.maven.plugins</groupId>
                <artifactId>maven-assembly-plugin</artifactId>
                <version>2.4.1</version>
                <executions>
                    <execution>
                        <id>make-assembly</id>
                        <phase>package</phase>
                        <goals>
                            <goal>single</goal>
                        </goals>
                        <configuration>
                            <finalName>xxxxx</finalName>
                            <descriptors>
                                <descriptor>src/main/resources/assemble/assemble.xml</descriptor>
                            </descriptors>
                        </configuration>
                    </execution>
                </executions>
            </plugin>
        </plugins>
    </build>
2.4 配置其他模块打包方式
因为项目中使用的SpringBoot,SpringBoot也提供了一种打包方式:spring-boot-maven-plugin,这种方式打包时会将该项目中所有依赖的包(包括静态文件)统一打包至一个jar中,这个不是我们项目的需求,我们的需求是将所有的jar包(包括第三方及当前项目的jar包)都放在lib目录,且是单独存在。
因此需要将其他模块的打包配置修改,修改分为两步:
1)不再使用spring-boot-maven-plugin进行打包,即将其从pom.xml中删除;
2)在pom.xml文件中使用maven-jar-plugin进行打包,该打包如何配置请参考文章(待定)。
2.5 配置assemble.xml文件
assemble.xml文件中描述了具体如何打包,该打包过程和实际需求关系密切
<?xml version='1.0' encoding='UTF-8'?>
<assembly xmlns="http://maven.apache.org/plugins/maven-assembly-plugin/assembly/1.1.0"
          xmlns:xsi="http://www.w3.org/2001/XMLSchema-instance"
          xsi:schemaLocation="http://maven.apache.org/plugins/maven-assembly-plugin/assembly/1.1.0
                    http://maven.apache.org/xsd/assembly-1.1.0.xsd">
    <id>${project.version}</id>
    <formats>
        <format>tar.gz</format>
    </formats>
    <includeBaseDirectory>true</includeBaseDirectory>
    <moduleSets>
        <moduleSet>
            <useAllReactorProjects>true</useAllReactorProjects>
            <includes>
                <include>xxx.xx.x:base1</include>
                <include>xxx.xx.x:base2</include>
                <include>xxx.xx.x:base3</include>
                <include>xxx.xx.x:base4</include>
            </includes>
            <binaries>
                <outputDirectory>lib</outputDirectory>
                <unpack>false</unpack>
            </binaries>
        </moduleSet>
    </moduleSets>
    <fileSets>
        <fileSet>
            <directory>src/main/resources/bin</directory>
            <outputDirectory>bin</outputDirectory>
        </fileSet>
        <fileSet>
            <directory>src/main/resources/conf</directory>
            <outputDirectory>conf</outputDirectory>
        </fileSet>
        <fileSet>
            <directory>src/main/resources/docs</directory>
            <outputDirectory>docs</outputDirectory>
        </fileSet><fileSet>
        <directory>src/main/resources/keys</directory>
        <outputDirectory>keys</outputDirectory>
    </fileSet>
        <fileSet>
            <includes>
                <include>README.md</include>
            </includes>
            <outputDirectory></outputDirectory>
        </fileSet>
    </fileSets>
    <dependencySets>
        <dependencySet>
            <unpack>false</unpack>
            <useProjectArtifact>true</useProjectArtifact>
            <outputDirectory>lib</outputDirectory>
            <scope>provided</scope>
        </dependencySet>
        <dependencySet>
            <unpack>false</unpack>
            <useProjectArtifact>true</useProjectArtifact>
            <outputDirectory>lib</outputDirectory>
            <scope>system</scope>
        </dependencySet>
        <dependencySet>
            <unpack>false</unpack>
            <useProjectArtifact>true</useProjectArtifact>
            <outputDirectory>lib</outputDirectory>
            <scope>runtime</scope>
        </dependencySet>
    </dependencySets>
</assembly>
具体的配置参数可以查看 https://maven.apache.org/plugins/maven-assembly-plugin/assembly.html
本人在实验过程中重点是处理了dependencySet这个配置:
<dependencySets>
        <dependencySet>
            <unpack>false</unpack>
            <useProjectArtifact>true</useProjectArtifact>
            <outputDirectory>lib</outputDirectory>
            <scope>provided</scope>
        </dependencySet>
        <dependencySet>
            <unpack>false</unpack>
            <useProjectArtifact>true</useProjectArtifact>
            <outputDirectory>lib</outputDirectory>
            <scope>system</scope>
        </dependencySet>
        <dependencySet>
            <unpack>false</unpack>
            <useProjectArtifact>true</useProjectArtifact>
            <outputDirectory>lib</outputDirectory>
            <scope>runtime</scope>
        </dependencySet>
    </dependencySets>
请配置上上述三个部分,要不然总是会缺少一些依赖包打不进来,Mark一下,很重要!
使用maven-assembly-plugin插件来定制化打包
简单的说,maven-assembly-plugin 就是用来帮助打包用的,比如说打出一个什么类型的包,包里包括哪些内容等等。
目前至少支持以下打包类型:
ziptartar.gztar.bz2jardirwar
默认情况下,打jar包时,只有在类路径上的文件资源会被打包到jar中,并且文件名是${artifactId}-${version}.jar,下面看看怎么用maven-assembly-plugin插件来定制化打包。
首先需要添加插件声明:
<plugin>
    <groupId>org.apache.maven.plugins</groupId>
    <artifactId>maven-assembly-plugin</artifactId>
    <version>2.4</version>
    <executions>
        <execution>
            <!-- 绑定到package生命周期阶段上 -->
            <phase>package</phase>
            <goals>
                <!-- 绑定到package生命周期阶段上 -->
                <goal>single</goal>
            </goals>
        </execution>
    </executions>
</plugin>
使用内置的Assembly Descriptor
要使用maven-assembly-plugin,需要指定至少一个要使用的assembly descriptor 文件。默认情况下,maven-assembly-plugin内置了几个可以用的assembly descriptor:
bin: 类似于默认打包,会将bin目录下的文件打到包中;jar-with-dependencies: 会将所有依赖都解压打包到生成物中;src:只将源码目录下的文件打包;project: 将整个project资源打包。
要查看它们的详细定义,可以到maven-assembly-plugin-2.4.jar里去看,例如对应 bin 的assembly descriptor 如下:
<assembly xmlns="http://maven.apache.org/plugins/maven-assembly-plugin/assembly/1.1.0"
    xmlns:xsi="http://www.w3.org/2001/XMLSchema-instance"
    xsi:schemaLocation="http://maven.apache.org/plugins/maven-assembly-plugin/assembly/1.1.0 http://maven.apache.org/xsd/assembly-1.1.0.xsd">
    <id>bin</id>
    <formats>
        <format>tar.gz</format>
        <format>tar.bz2</format>
        <format>zip</format>
    </formats>
    <fileSets>
        <fileSet>
            <directory>${project.basedir}</directory>
            <outputDirectory>/</outputDirectory>
            <includes>
                <include>README*</include>
                <include>LICENSE*</include>
                <include>NOTICE*</include>
            </includes>
        </fileSet>
        <fileSet>
            <directory>${project.build.directory}</directory>
            <outputDirectory>/</outputDirectory>
            <includes>
                <include>*.jar</include>
            </includes>
        </fileSet>
        <fileSet>
            <directory>${project.build.directory}/site</directory>
            <outputDirectory>docs</outputDirectory>
        </fileSet>
    </fileSets>
</assembly>
自定义Assembly Descriptor
一般来说,内置的assembly descriptor都不满足需求,这个时候就需要写自己的assembly descriptor的实现了。先从一个最简单的定义开始:
<?xml version='1.0' encoding='UTF-8'?>
<assembly xmlns="http://maven.apache.org/plugins/maven-assembly-plugin/assembly/1.1.0"
    xmlns:xsi="http://www.w3.org/2001/XMLSchema-instance"
    xsi:schemaLocation="http://maven.apache.org/plugins/maven-assembly-plugin/assembly/1.1.0
                    http://maven.apache.org/xsd/assembly-1.1.0.xsd">
    <id>demo</id>
    <formats>
        <format>jar</format>
    </formats>
    <includeBaseDirectory>false</includeBaseDirectory>
    <fileSets>
        <fileSet>
            <directory>${project.build.directory}/classes</directory>
            <outputDirectory>/</outputDirectory>
        </fileSet>
    </fileSets>
</assembly>
这个定义很简单:
format:指定打包类型;includeBaseDirectory:指定是否包含打包层目录(比如finalName是output,当值为true,所有文件被放在output目录下,否则直接放在包的根目录下);fileSets:指定要包含的文件集,可以定义多个fileSet;directory:指定要包含的目录;outputDirectory:指定当前要包含的目录的目的地。
要使用这个assembly descriptor,需要如下配置:
<configuration>
    <finalName>demo</finalName>
    <descriptors>
        <!--描述文件路径-->
        <descriptor>assemblies/demo.xml</descriptor>
    </descriptors>
    <outputDirectory>output</outputDirectory>
</configuration>
最后会生成一个demo-demo.jar 文件在目录 output 下,其中前一个demo来自finalName,后一个demo来自assembly descriptor中的id,其中的内容和默认的打包出来的jar类似。
如果只想有finalName,则增加配置:
<appendAssemblyId>false</appendAssemblyId>
添加文件
上面演示了添加所有编译后的资源,同样的可以增加其他资源,例如想添加当前工程目录下的某个文件 b.txt ,在assembly descriptor的assembly结点下增加
<files>
    <file>
        <source>b.txt</source>
        <outputDirectory>/</outputDirectory>
    </file>
</files>
这里用到了 files 元素类型,可以想象 fileSets 下的结点都是针对文件夹的;files 下的结点都是针对文件的。
也可以改变打包后的文件名,例如上面的 b.txt ,希望打包后的名字为 b.txt.bak, 只需要在file 里添加以下配置 :
<destName>b.txt.bak</destName>
排除文件
在 fileSet 里可以使用 includes 和 excludes 来更精确的控制哪些文件要添加,哪些文件要排除。
例如要排除某个目录下所有的txt文件:
<fileSet>
    <directory>${project.build.directory}/classes</directory>
    <outputDirectory>/</outputDirectory>
    <excludes>
        <exclude>**/*.txt</exclude>
    </excludes>
</fileSet>
或者某个目录下只想 .class 文件:
<fileSet>
    <directory>${project.build.directory}/classes</directory>
    <outputDirectory>/</outputDirectory>
    <includes>
        <include>**/*.class</include>
    </includes>
</fileSet>
添加依赖
如果想把一些依赖库打到包里,可以用 dependencySets 元素,例如最简单的,把当前工程的所有依赖都添加到包里:
<dependencySets>
    <dependencySet>
        <outputDirectory>/</outputDirectory>
    </dependencySet>
</dependencySets>
在assembly下添加以上配置,则当前工程的依赖和工程本身生成的jar都会被打包进来。
如果要排除工程自身生成的jar,则可以添加
<useProjectArtifact>false</useProjectArtifact>
unpack参数可以控制依赖包是否在打包进来时是否解开,例如解开所有包,添加以下配置:
<unpack>true</unpack>
和 fileSet 一样,可以使用 excludes 和 includes 来更详细的控制哪些依赖需要打包进来;另外 useProjectAttachments,useTransitiveDependencies,useTransitiveFiltering等参数可以对间接依赖、传递依赖进行控制。
其他选项
moduleSets:当有子模块时候用;repositories:想包含库的时候用;containerDescriptorHandlers:可以进行一些合并,定义ArtifactHandler之类的时候可以用,(可以参考:说明);componentDescriptors:如上所述,可以包含一些componentDescriptor定义,这些定义可以被多个assembly共享。
Assembly Plugin更多配置
上面已经看到了一些Assembly Plugin本身的配置,例如 finalName, outputDirectory, appendAssemblyId 和 descriptors 等,除了这些还有其他的一些可配置参数,参见:single,其中某些参数会覆盖在assembly descriptor 中的参数。有一个比较有用的参数是: archive,它的详细配置在:archive。
下面介绍一些archive的用法。
指定Main-Class
archive的一个重要用处就是配置生成的MANIFEST.MF文件。默认会生成一个MANIFEST.MF文件,不过这个文件默认值没什么意义。如果想指定生成jar的Main-Class,可以如下配置:
<archive>
    <manifest>
        <mainClass>demo.DemoMain</mainClass>
    </manifest>
</archive>
下面来看一个项目中实际配置的文件:
pom文件:
<plugin>
    <groupId>org.apache.maven.plugins</groupId>
    <artifactId>maven-assembly-plugin</artifactId>
    <version>${maven-assembly-plugin.version}</version>
    <configuration>
        <descriptors>
            <descriptor>package.xml</descriptor>
        </descriptors>
    </configuration>
    <executions>
        <execution>
            <id>make-assembly</id>
            <phase>package</phase>
            <goals>
                <goal>single</goal>
            </goals>
        </execution>
    </executions>
</plugin>
assembly descriptor 文件:
<assembly>
    <id>${assembly-id}</id>
    <!-- 最终打包成一个用于发布的war文件 -->
    <formats>
        <format>${assembly-format}</format>
    </formats>
    <fileSets>
        <!-- 把项目公用的配置文件,打包进zip文件的config目录 -->
        <fileSet>
            <directory>${project.basedir}/src/main/resources/base</directory>
            <outputDirectory>WEB-INF/classes</outputDirectory>
        </fileSet>
        <!-- 把项目环境的配置文件,打包进zip文件的config目录 -->
        <fileSet>
            <directory>${project.basedir}/src/main/resources/${env}</directory>
            <outputDirectory>WEB-INF/classes</outputDirectory>
        </fileSet>
        <!-- 打包项目自己编译出来的jar文件 -->
        <fileSet>
            <directory>${project.build.directory}</directory>
            <outputDirectory>WEB-INF/lib</outputDirectory>
            <includes>
                <include>*.jar</include>
            </includes>
        </fileSet>
        <!-- 打包项目依赖的jar文件 -->
        <fileSet>
            <directory>${project.build.directory}</directory>
            <outputDirectory>/</outputDirectory>
            <includes>
                <include>WEB-INF/lib/*.jar</include>
            </includes>
        </fileSet>
    </fileSets>
</assembly>
以上为个人经验,希望能给大家一个参考,也希望大家多多支持我们。
相关推荐
-

Maven中利用assembly插件打包jar包
在maven中有几种方法打包项目,在之前的一篇博客中[Java]打包Jar包并用脚本执行,已经介绍了怎么在没有maven插件的情况下,怎么打包项目,并执行的. 而本篇则是在上一篇文章[Maven]Maven系列(一)——环境安装配置和新建maven项目之后,总结一下怎么使用maven插件进行打包项目.maven中有多种插件提供了打包功能,分别是maven-jar-plugin(用来打包成jar包),maven-war-plugin(打包成war包).maven-assembly-plugin.这
-
maven 使用assembly 进行打包的方法
1. pom 中添加assembly 插件 要使用assembly 进项编译打包, 首先主要在pom 中的build中添加插件信息, 具体如图下所示: <build> <finalName>${project.artifactId}</finalName> <sourceDirectory>src/main/java</sourceDirectory> <resources> <resource> <director
-
Maven3种打包方式中maven-assembly-plugin的使用详解
maven-jar-plugin,默认的打包插件,用来打普通的project JAR包: maven-shade-plugin,用来打可执行JAR包,也就是所谓的fat JAR包: maven-assembly-plugin,支持自定义的打包结构,也可以定制依赖项等. 我们日常使用的以maven-assembly-plugin为最多,因为大数据项目中往往有很多shell脚本.SQL脚本..properties及.xml配置项等,采用assembly插件可以让输出的结构清晰而标准化. 要使用该插件
-
使用maven-assembly-plugin如何打包多模块项目
目录 maven-assembly-plugin打包多模块项目 概述 1. 需求 2. 打包流程 使用maven-assembly-plugin插件来定制化打包 使用内置的Assembly Descriptor 自定义Assembly Descriptor Assembly Plugin更多配置 maven-assembly-plugin打包多模块项目 概述 maven-assembly-plugin 是目前maven项目中最常用的打包工具,它便利.配置简单,因此可以满足我们大部分的需求. 实际
-
SpringBoot+Maven 多模块项目的构建、运行、打包实战
本篇文章主要介绍了SpringBoot+Maven 多模块项目的构建.运行.打包,分享给大家,具体如下: 项目使用的工具: IntelliJ IDEA JDK 1.8 apache-maven-3.3.9 项目的目录: 主项目 springboot-multi 子模块 entity.dao.service.web 一.使用IDEA创建一个SpringBoot项目 : File -> new -> Project 项目名称为springboot-multi 二.删除项目中的src目录,把pom.
-
Springboot 整合maven插口调用maven release plugin实现一键打包功能
maven release plugin配置 参考https://www.cnblogs.com/jiujixin/p/16003321.html 配置好pom. 整合maven-invoker使程序去执行mvn命令 1.导包 <dependency> <groupId>org.apache.maven.shared</groupId> <artifactId>maven-invoker</artifactId> <version>3
-
详解使用Maven构建多模块项目(图文)
Maven多模块项目,适用于一些比较大的项目,通过合理的模块拆分,实现代码的复用,便于维护和管理.尤其是一些开源框架,也是采用多模块的方式,提供插件集成,用户可以根据需要配置指定的模块. 项目结构如下: test-hd-parent (父级) ---pom.xml ---test-hd-api (第三方接口层) ----pom.xml ---test-hd-foundation (基础工具层) ----pom.xml ---test-hd-resource (资源层) ----pom.xml -
-
基于maven使用IDEA创建多模块项目
鉴于最近学习一个分布式项目的开发,讲一下关于使用IntelliJ IDEA基于Maven创建多模块项目的实际开发,可能有不合适的地方,但是项目是可以跑通的,也请有不足之处,都提出来,一起讨论下. 一. 项目工程目录 首先展示一下,最终整个项目的工程目录: 简单介绍一下目录结构: common-parent为所有项目的父项目,主要用来管理所有项目使用的jar包及其版本. common-utils为公共的工具类项目,继承父项目,它会被打成jar包供其它项目使用. taotao-manager为我们自
-
构建Maven多模块项目的方法
目录 构建Maven多模块项目 创建父模块 创建子模块:model层 创建子模块:dao模块 创建子模块:service层 创建子模块:web层 编译运行项目 Maven相关特性 父模块的配置 父模块聚合子模块 父模块统一管理依赖包 子模块在pom.xml中声明父模块 参考文章 构建Maven多模块项目 JavaWeb开发一般都会进行分层开发,通常分为 model,模型层 dao,数据访问层 service,业务逻辑层 web,表现层 分层后,各层职责明确,后期维护起来也会容易一些.接下来我们就
-
利用Maven实现将代码打包成第三方公共jar包
目录 一.摘要 二.方法实践 2.1.assembly插件 2.2.shade插件 2.3.Fatjar打包工具(eclipse插件) 三.小结 一.摘要 在项目开发过程中,我们经常需要将一些公共方法提取出来,然后单独封装成一个第三方公共jar包,采用普通的方式打包后的jar,依赖的工程执行编译时,却提示找不到对应的依赖包,那么如何将工程打包为可执行jar包呢? 下面向大家介绍三种通过maven将工程打包成可执行的打包方式. 二.方法实践 2.1.assembly插件 2.1.1.pom.xml
-
java 中使用maven shade plugin 打可执行Jar包
java 中使用maven shade plugin 打可执行Jar包 eclipse里有一个功能叫做"打可执行(runnable) jar包", 用这个功能可以把一个工程自身和所有依赖包打成一个fat jar,并且指定Main方法,这样直接使用java jar xxx.jar就可以运行代码了. 但是在不使用eclipse的时候呢?其实,借助maven,我们很容易实现同样功能.maven提供了一个shade plugin,可以用来打fat jar, 同时也提供了指定main方法的功能.
-
Maven学习教程之搭建多模块企业级项目
首先,前面几次学习已经学会了安装maven,如何创建maven项目等,最近的学习,终于有点进展了,搭建一下企业级多模块项目. 好了,废话不多说,具体如下: 首先新建一个maven项目,pom.xml的文件如下: 搭建多模块项目,必须要有一个packaging为pom的根目录.创建好这个maven项目后,我们对着项目右键-->new 输入你的项目名称 这里就不重复说创建项目了,创建好的目录结构在eclipse中如下: 说明一下这些项目具体都是干嘛的: easyframework-model:数据模
-
Springboot基于assembly的服务化打包方案及spring boot部署方式
在使用assembly来打包springboot微服务项目前,我想说一说,目前springboot项目的几种常见的部署方式. 使用docker容器去部署,将springboot的应用构建成一个docker image,然后通过容器去启动镜像 ,这种方式在需要部署大规模的应用和应用扩展时是非常方便的,属于目前工业级的部署方案,但是需要掌握docker的生态圈技术. 使用fatjar直接部署启动,这是很多初学者或者极小规模情况下的一个简单应用部署方式. 本文主要针对第二种部署方式提供一种更加友好的打