微信小程序获取用户手机号码的详细步骤
目录
- 前言
- 接下来我们通过服务器获取授权
- deciphering解密方法
- 总结
前言
我们在做小程序开发的过程中,经常会涉及到用户身份的问题,最普遍的就是我们要获取用户的手机号码,通过微信获取手机号码后可以减少很多操作,比如用户手机号码验证等,我们还可以给用户发送提示短信,那么本文主要讲解如何获取用户手机号码。
获取用户手机号码 分为以下几步:
第一点击页面获取授权按钮
第二获取用户授权参数
第三根据加解密算法解密手机号码
接下来我们来实现以上三步
先看前端页面
<!--index.wxml-->
<view class="container">
  <view >
    <button class="authbtn" type="primary" open-type="getUserInfo" lang="zh_CN"
      bindgetuserinfo="getUserProfile" bindtap="getUserProfile">获取用户信息</button>
    <button class="authbtn"  open-type="getPhoneNumber" type="primary"
      bindgetphonenumber="onGetPhoneNumber">获取手机号码</button>
    <view class="userinfo">
      <block>
        <view class="userinfo-avatar" bindtap="bindViewTap">
          <image class="userinfo-avatar" type="userAvatarUrl" src="{{userInfo.avatarUrl}}" mode="cover" ></image>
        </view>
        <Text class="userinfo-nickname" >{{userInfo.nickName}}</Text>
        <text class="userinfo-phone" >{{userInfo.phone}}</text>
        <text class="userinfo-phone" wx:if="{{userInfo.gender==0}}">男</text>
        <text class="userinfo-phone" wx:if="{{userInfo.gender==1}}">女</text>
        <picker bindchange="bindPickerLingyuChange" value="{{index}}" range="{{array}}">
          <view  wx:if="{{showLingyu==true}}" class="tips">选择职业 </view>
            <text  class="tips"> {{array[index]}}</text>
          </picker>

          <picker bindchange="bindPickerAearaChange" value="{{i}}" range="{{items}}" range-key="name">
            <view wx:if="{{showAeara==true}}"class="tips">选择地区 </view>
            <text  class="tips">{{items[i].name}}</text>
          </picker>
          <button class="authbtn" type="primary" bindtap="bindViewTap">注册</button>
      </block>
    </view>
  </view>
</view>
大概长这样

获取用户头像的我就直接略过了,网上资料也比较多
接下来我们看关键代码

此处定义
getPhoneNumber是微信官方要求,获取用户手机号码授权
onGetPhoneNumber是回调函数,获取授权后会回调到该方法,也就是获取的电话号码就在这个函数的返回值里面。当然这个函数是自定义的,名字大家可以随便起,上面的getPhoneNumber可不能随便修改。
接下来我们通过服务器获取授权
上代码:这里是js调用我们自己的后台,我们的后台再调用微信服务端
onGetPhoneNumber(e) {
    var that = this;
    wx.login({
      success (res) {
        if (res.code) {
          console.log('步骤2获检查用户登录状态,获取用户电话号码!', res)
          wx.request({
            url: '这里写自己的获取授权的服务器地址',
            data: {code: res.code},
            header: {'content-type': 'application/json'},
            success: function(res) {
              console.log("步骤三获取授权码,获取授权openid,session_key",res);
              var userphone=res.data.data;
              wx.setStorageSync('userphoneKey',userphone);
              //解密手机号
              var msg = e.detail.errMsg;
              var sessionID=wx.getStorageSync("userphoneKey").session_key;
              var encryptedData=e.detail.encryptedData;
              var iv=e.detail.iv;
              if (msg == 'getPhoneNumber:ok') {//这里表示获取授权成功
                wx.checkSession({
                  success:function(){
                        //这里进行请求服务端解密手机号
                    that.deciyption(sessionID,encryptedData,iv);
                  },
                  fail:function(){
                    // that.userlogin()
                  }
                })
              }

            },fail:function(res){
                console.log("fail",res);
            }
          })
        } else {
          console.log('登录失败!' + res.errMsg)
        }
      }
    })
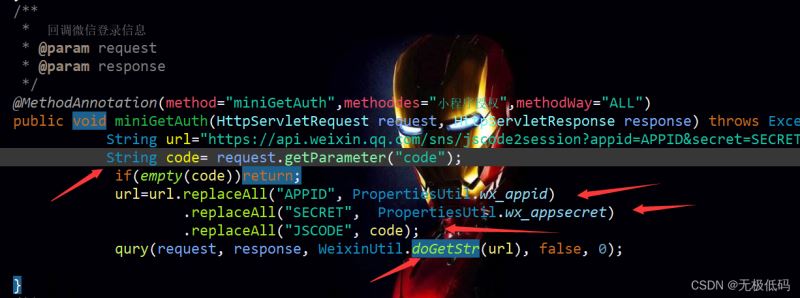
后台调用微信获取授权码

下面是我通过自己写的框架调用的,不用关心注解内容,大家只关注自己的框架注解即可,不管是spring还是servlet只要请求能进到该方法即可,所以重点关注中间部分,把参数值传正确即可
    /**
     *  回调微信登录信息
     * @param request
     * @param response
     */
    @MethodAnnotation(method="miniGetAuth",methoddes="小程序授权",methodWay="ALL")
    public void miniGetAuth(HttpServletRequest request, HttpServletResponse response) throws Exception{
    	 	   String url="https://api.weixin.qq.com/sns/jscode2session?appid=APPID&secret=SECRET&js_code=JSCODE&grant_type=authorization_code";
               String code= request.getParameter("code");
                if(empty(code))return;
    	 		url=url.replaceAll("APPID", PropertiesUtil.wx_appid)
    	 				.replaceAll("SECRET",  PropertiesUtil.wx_appsecret)
    	 				.replaceAll("JSCODE", code);
    	 		qury(request, response, WeixinUtil.doGetStr(url), false, 0);

    }
下面是工具类方法 WeixinUtil.doGetStr(url)
	/**
	 * get请求
	 * @param url
	 * @return
	 * @throws ParseException
	 * @throws IOException
	 */
	public static JSONObject doGetStr(String url) throws ParseException, IOException{
		DefaultHttpClient client = new DefaultHttpClient();
		HttpGet httpGet = new HttpGet(url);
		JSONObject jsonObject = null;
		HttpResponse httpResponse = client.execute(httpGet);
		HttpEntity entity = httpResponse.getEntity();
		if(entity != null){
			String result = EntityUtils.toString(entity,"UTF-8");
			jsonObject = JSONObject.fromObject(result);
		}
		return jsonObject;
	}
这个值可以返回给前端,前端可以收到如下参数


接着我们通过授权之后,获取第三个参数iv,调用下面方法进行服务端解密
that.deciyption(sessionID,encryptedData,iv);
deciyption(sessionID,encryptedData,iv){
    var that = this;

    console.log("步骤4根据秘钥解密手机号码sessionID:",sessionID);
    wx.request({
      url: '解密地址',
      data: {
        sessionID: sessionID,
        encryptedData:encryptedData,
        iv: iv
      },
      header: {'content-type': 'application/json'},
      success: function(res) {
        console.log("79",(res.data.code==20001));
        if(res.data.code==20001){//这里不用管,可以删掉,我的框架里返回值20001是授权失败,可按照自己逻辑处理
          console.log("获取失败,重新获取",res);
          that.setData({
            showPhone:true,
           })
        }else{
          console.log("line 79", JSON.parse(res.data.data));
          var json= JSON.parse(res.data.data);
          wx.setStorageSync('userphone', JSON.parse(res.data.data).phoneNumber);
          console.log("步骤5解密成功",res.data.data);
          that.setData({
            showPhone:false,
            "userInfo.phone":wx.getStorageSync('userphone')
           })
        }

      },fail:function(res){
          console.log("fail",res);
      }
    })
  }
服务端解密代码

 /**
     *
     * @param request
     * @param response
     * @throws Exception
     */
    @MethodAnnotation(method="miniGetPhone",methoddes="小程序解密手机号",methodWay="ALL")
    public void miniGetPhone(HttpServletRequest request, HttpServletResponse response) throws Exception{
               String encrypdata= request.getParameter("encryptedData");
               String ivdata= request.getParameter("iv");
               String sessionkey= request.getParameter("sessionID");
                if(empty(encrypdata,ivdata,sessionkey))return;
    	 		qury(request, response, deciphering(encrypdata, ivdata, sessionkey), false, 0);

    }
deciphering解密方法
  public static String deciphering(String encrypdata,String ivdata, String sessionkey) {
            byte[] encrypData = Base64.decode(encrypdata);
            byte[] ivData = Base64.decode(ivdata);
            byte[] sessionKey = Base64.decode(sessionkey);
            String str="";
            try {
            str = decrypt(sessionKey,ivData,encrypData);
            } catch (Exception e) {
            // TODO Auto-generated catch block
            e.printStackTrace();
            }
            return str;
            }
    public static String decrypt(byte[] key, byte[] iv, byte[] encData) throws Exception {
            AlgorithmParameterSpec ivSpec = new IvParameterSpec(iv);
            Cipher cipher = Cipher.getInstance("AES/CBC/PKCS5Padding");
            SecretKeySpec keySpec = new SecretKeySpec(key, "AES");
            cipher.init(Cipher.DECRYPT_MODE, keySpec, ivSpec);
            return new String(cipher.doFinal(encData),"UTF-8");
    }
最终效果

总结
到此这篇关于微信小程序获取用户手机号码的文章就介绍到这了,更多相关微信小程序获取用户手机号码内容请搜索我们以前的文章或继续浏览下面的相关文章希望大家以后多多支持我们!
赞 (0)

