Spring Cloud搭建eureka过程图解
这篇文章主要介绍了Spring Cloud搭建eureka过程图解,文中通过示例代码介绍的非常详细,对大家的学习或者工作具有一定的参考学习价值,需要的朋友可以参考下
Eureka Server 的搭建
eureka 是 Spring Cloud 的注册中心,提供服务注册和服务发现的功能。
利用idea 快速创建一个eureka应用
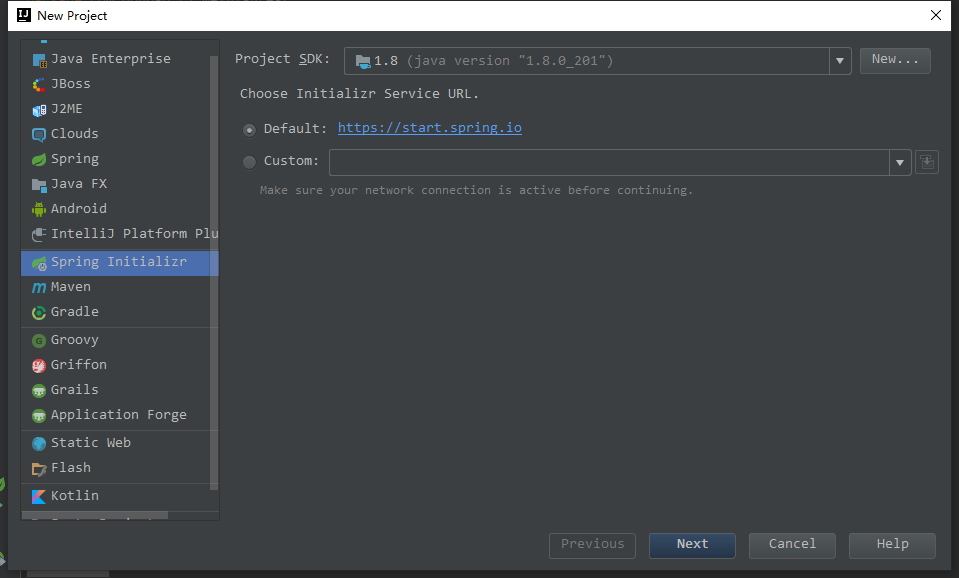
File - NewProject-Spring Initalizr
1.利用 https://start.spring.io 创建spring cloud eureka应用

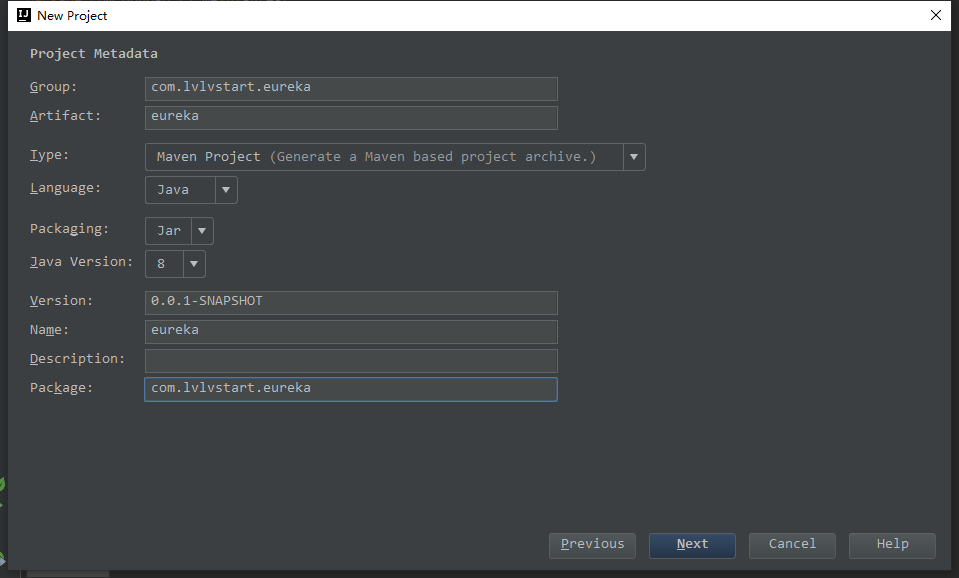
填写应用的maven等信息,下一步

选择 Eureka Server,我们的构建基于Spring Boot 2.2.0-RELEASE版本

选择路径后完成创建工程
2.可以看到构建工程的过程中,pom文件中,已经把我门需要的 eureka server 的包引入到了工程
<dependency>
  <groupId>org.springframework.cloud</groupId>
  <artifactId>spring-cloud-starter-netflix-eureka-server</artifactId>
</dependency>
3.添加配置(习惯使用yml,可以把application.properties 改成 application.yml)
spring:
 application:
  name: spring-eureka
server:
 port: 8761

#spring eureka 注册地址
eureka:
 client:
  service-url:
   defaultZone: http://127.0.0.1:8761/eureka/
  register-with-eureka: false #是否注册到eureka上
  fetch-registry: false #是否从eureka上获取同步信息,单节可以设置为false
 server:
  eviction-interval-timer-in-ms: 10000 #清理无效节点时间
  enable-self-preservation: false #是否开启自我保护 ,Eureka 会统计15分钟之内心跳失败的比例低于85%将会触发保护机制,不剔除服务提供者,如果关闭服务注册中心将不可用的实例正确剔除
4.启动类添加注解 @EnableEurekaServer
import org.springframework.boot.SpringApplication;
import org.springframework.boot.autoconfigure.SpringBootApplication;
import org.springframework.cloud.netflix.eureka.server.EnableEurekaServer;

@SpringBootApplication
@EnableEurekaServer
public class SpringEurekaApplication {

  public static void main(String[] args) {
    SpringApplication.run(SpringEurekaApplication.class, args);
  }

}
5.启动
6.启动多个eureka实例的配置
只需要把 service-url 中的url设置未多个,中间用逗号隔开

各个应用往eureka上注册
1.引入配置
<dependency>
  <groupId>org.springframework.cloud</groupId>
  <artifactId>spring-cloud-starter-netflix-eureka-client</artifactId>
</dependency>
2.application.yml 配置
eureka:
 client:
  service-url:
   defaultZone: http://localhost:8761/eureka/
 instance:
  prefer-ip-address: true
3.启动类注解
import org.springframework.boot.SpringApplication;
import org.springframework.boot.autoconfigure.SpringBootApplication;
import org.springframework.cloud.netflix.eureka.EnableEurekaClient;

@SpringBootApplication
@EnableEurekaClient
public class SpringUserApplication {

  public static void main(String[] args) {
    SpringApplication.run(SpringUserApplication.class, args);
  }

}
以上就是本文的全部内容,希望对大家的学习有所帮助,也希望大家多多支持我们。
赞 (0)

