Android常用的AlertDialog对话框及自定义对话框
常用的Dialog有确认对话框,单选按钮对话框,多选按钮对话框,复选按钮对话框另外还有自定义的对话框
AlertDialog的常用方法
setTitle:为对话框设置标题
setMessage:为对话框设置内容
setIcon:为对话框设置图标
setItems设置对话框要显示的list
setMultiChoiceItems:一般用于复选框显示
setSingleChoiceItem:,设置单选按钮
setNeutralButton:普通按钮
setPositiveButton:添加确定按钮
setNegativeButton:添加取消按钮
setView:设置自定义样式
下面通过一个实例来了解这些方法
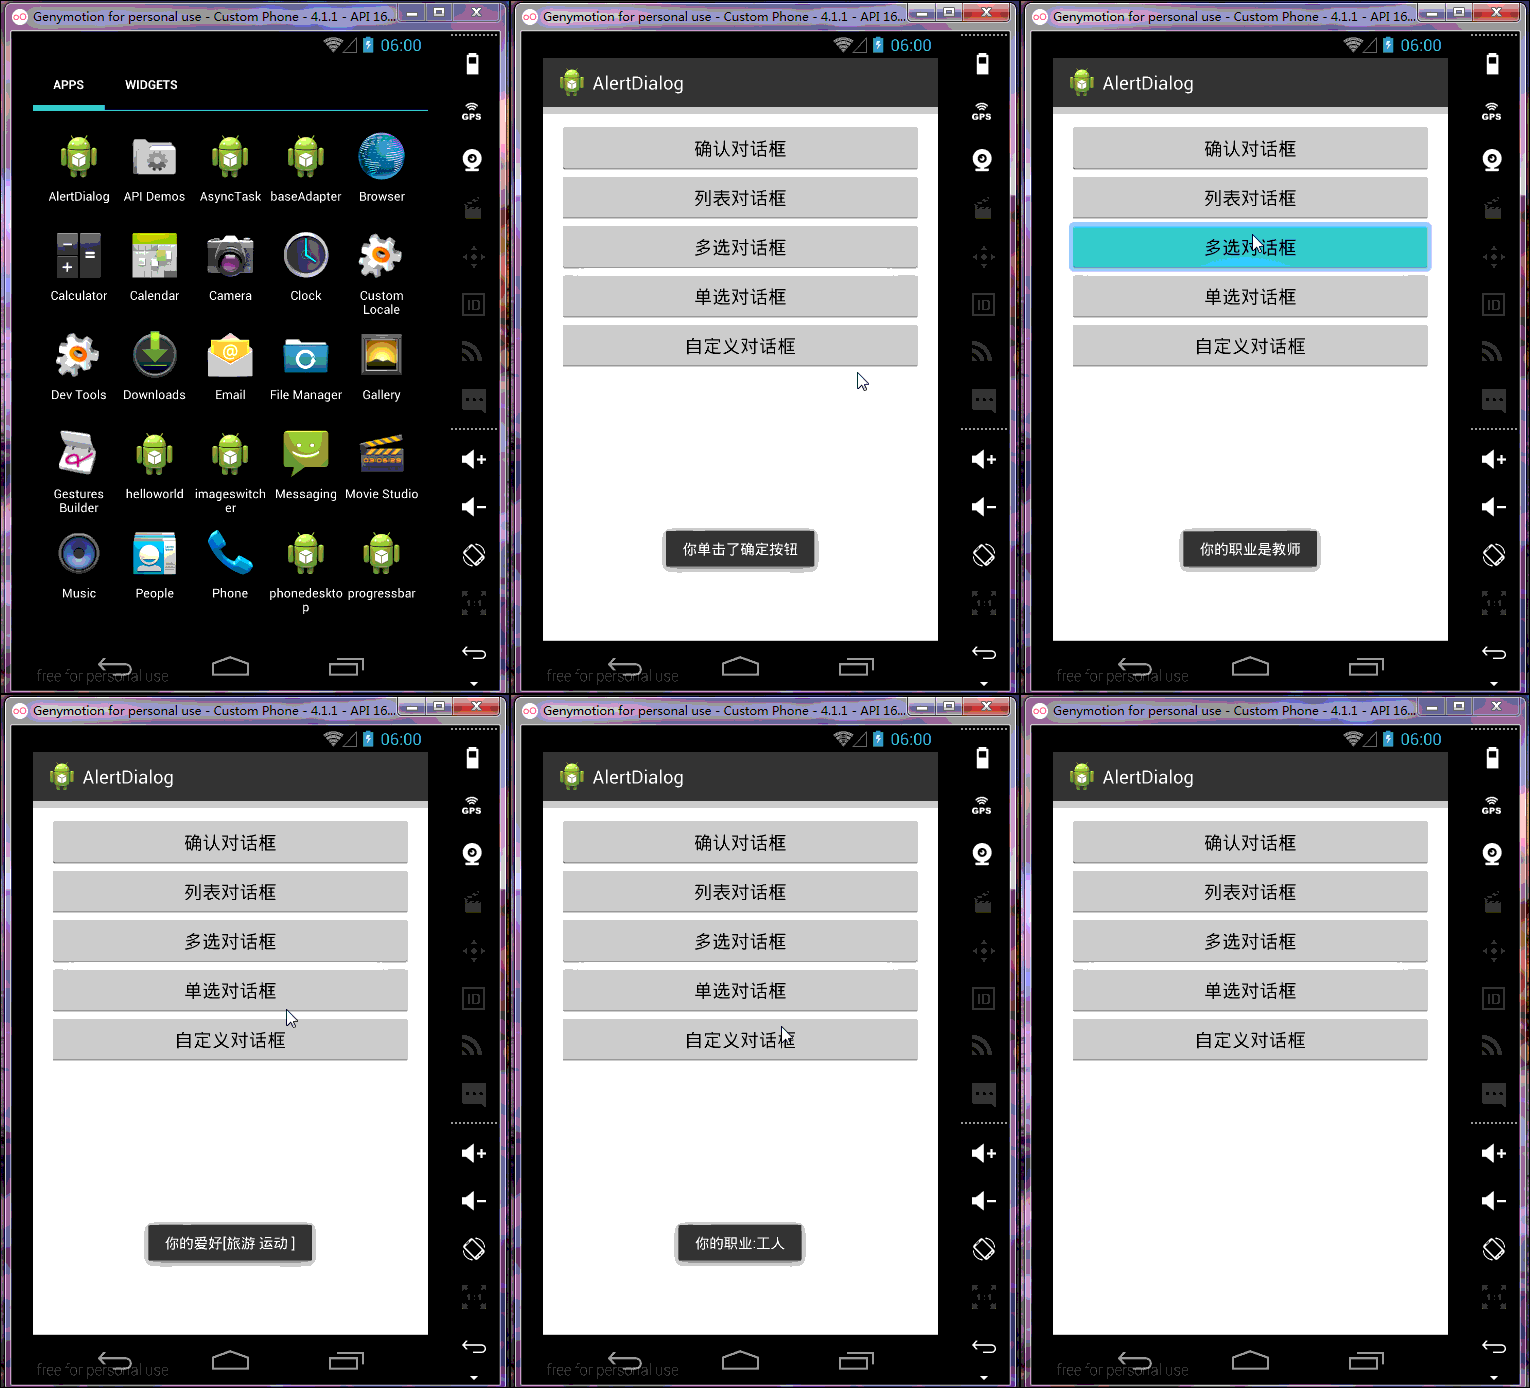
这是运行结果:

MainActivity.class
package com.example.alertdialog;
import android.R.bool;
import android.os.Bundle;
import android.app.Activity;
import android.app.AlertDialog;
import android.app.AlertDialog.Builder;
import android.app.Dialog;
import android.content.DialogInterface;
import android.content.pm.LabeledIntent;
import android.view.LayoutInflater;
import android.view.View;
import android.view.View.OnClickListener;
import android.widget.Button;
import android.widget.Toast;
public class MainActivity extends Activity implements OnClickListener {
 private Button button1;
 private Button button2;
 private Button button3;
 private Button button4;
 private Button button5;
 private int mark=0;
 private String item[] = { "学生", "工人", "教师", "农民" };
 private String multChoice[]={"旅游","电影","运动","读书"};
 @Override
 protected void onCreate(Bundle savedInstanceState) {
 super.onCreate(savedInstanceState);
 setContentView(R.layout.activity_main);
 button1 = (Button) findViewById(R.id.btn_button1);
 button2 = (Button) findViewById(R.id.btn_button2);
 button3 = (Button) findViewById(R.id.btn_button3);
 button4 = (Button) findViewById(R.id.btn_button4);
 button5 = (Button) findViewById(R.id.btn_button5);
 button1.setOnClickListener(this);
 button2.setOnClickListener(this);
 button3.setOnClickListener(this);
 button4.setOnClickListener(this);
 button5.setOnClickListener(this);
 }
 @Override
 public void onClick(View v) {
 // TODO Auto-generated method stub
 switch (v.getId()) {
 //确认对话框
 case R.id.btn_button1: {
 AlertDialog.Builder builder = new Builder(this);
 builder.setIcon(R.drawable.ic_launcher);
 builder.setTitle("确认对话框");
 builder.setMessage("确认退出?");
 builder.setPositiveButton("确定",
  new DialogInterface.OnClickListener() {
  @Override
  public void onClick(DialogInterface dialog, int which) {
  // TODO Auto-generated method stub
  Toast.makeText(MainActivity.this, "你单击了确定按钮",
   Toast.LENGTH_SHORT).show();
  }
  });
 builder.setNegativeButton("取消",
  new DialogInterface.OnClickListener() {
  @Override
  public void onClick(DialogInterface dialog, int which) {
  // TODO Auto-generated method stub
  Toast.makeText(MainActivity.this, "你单击了取消按钮",
   Toast.LENGTH_SHORT).show();
  }
  });
 builder.create();
 builder.show();
 break;
 }
 //列表对话框
 case R.id.btn_button2: {
 AlertDialog.Builder builder = new Builder(this);
 builder.setIcon(R.drawable.ic_launcher);
 builder.setTitle("职业");
 builder.setItems(item, new DialogInterface.OnClickListener() {
 @Override
 public void onClick(DialogInterface dialog, int which) {
  // TODO Auto-generated method stub
  Toast.makeText(MainActivity.this, "你的职业是" + item[which],
  Toast.LENGTH_SHORT).show();
 }
 });
 builder.create();
 builder.show();
 break;
 }
 //多选对话框
 case R.id.btn_button3: {
 final boolean choose[]=new boolean[multChoice.length];
 AlertDialog.Builder builder = new Builder(this);
 builder.setIcon(R.drawable.ic_launcher);
 builder.setTitle("爱好");
 builder.setMultiChoiceItems(multChoice, null, new DialogInterface.OnMultiChoiceClickListener() {
 @Override
 public void onClick(DialogInterface dialog, int which, boolean isChecked) {
  // TODO Auto-generated method stub
  choose[which]=isChecked;
 }
 });
 builder.setPositiveButton("确认", new DialogInterface.OnClickListener() {
 @Override
 public void onClick(DialogInterface dialog, int which) {
  // TODO Auto-generated method stub
  String result="";
  for(int i=0;i<multChoice.length;i++){
  if(choose[i]){
  result+=multChoice[i]+" ";
  }
  }
  Toast.makeText(MainActivity.this, "你的爱好["+result+"]", Toast.LENGTH_SHORT).show();
 }
 });
 builder.create();
 builder.show();
 break;
 }
 //单选对话框
 case R.id.btn_button4: {
 mark=0;
 AlertDialog.Builder builder = new Builder(this);
 builder.setIcon(R.drawable.ic_launcher);
 builder.setTitle("职业");
 builder.setSingleChoiceItems(item, 0, new DialogInterface.OnClickListener() {
 @Override
 public void onClick(DialogInterface dialog, int which) {
  // TODO Auto-generated method stub
  mark=which;
 }
 });
 builder.setPositiveButton("确定",
  new DialogInterface.OnClickListener() {
  @Override
  public void onClick(DialogInterface dialog, int which) {
  // TODO Auto-generated method stub
  Toast.makeText(MainActivity.this, "你的职业:"+item[mark], Toast.LENGTH_SHORT).show();
  }
  });
 builder.create();
 builder.show();
 break;
 }
 //自定义对话框
 case R.id.btn_button5: {
 LayoutInflater inflater=LayoutInflater.from(this);
 View view=inflater.inflate(R.layout.item, null);
 AlertDialog.Builder builder = new Builder(this);
 builder.setIcon(R.drawable.ic_launcher);
 builder.setTitle("自定义对话框");
 builder.setView(view);
 builder.setNeutralButton("普通按钮", new DialogInterface.OnClickListener() {
 @Override
 public void onClick(DialogInterface dialog, int which) {
  // TODO Auto-generated method stub
  Toast.makeText(MainActivity.this,"我是自定义的对话框哦",Toast.LENGTH_SHORT).show();
 }
 });
 builder.create();
 builder.show();
 break;
 }
 }
 }
}
布局文件
activity_main.xml
<RelativeLayout xmlns:android="http://schemas.android.com/apk/res/android"
 xmlns:tools="http://schemas.android.com/tools"
 android:layout_width="match_parent"
 android:layout_height="match_parent"
android:paddingBottom="@dimen/activity_vertical_margin" android:paddingLeft="@dimen/activity_horizontal_margin" android:paddingRight="@dimen/activity_horizontal_margin" android:paddingTop="@dimen/activity_vertical_margin"
 tools:context=".MainActivity" >
 <LinearLayout
 android:layout_width="fill_parent"
 android:layout_height="wrap_content"
 android:orientation="vertical" >
 <Button
 android:id="@+id/btn_button1"
 android:layout_width="fill_parent"
 android:layout_height="wrap_content"
 android:text="确认对话框" />
 <Button
 android:id="@+id/btn_button2"
 android:layout_width="fill_parent"
 android:layout_height="wrap_content"
 android:text="列表对话框" />
 <Button
 android:id="@+id/btn_button3"
 android:layout_width="fill_parent"
 android:layout_height="wrap_content"
 android:text="多选对话框" />
 <Button
 android:id="@+id/btn_button4"
 android:layout_width="fill_parent"
 android:layout_height="wrap_content"
 android:text="单选对话框" />
 <Button
 android:id="@+id/btn_button5"
 android:layout_width="fill_parent"
 android:layout_height="wrap_content"
 android:text="自定义对话框" />
 </LinearLayout>
</RelativeLayout>
自定义的对话框布局文件
item.xml
<?xml version="1.0" encoding="utf-8"?>
<LinearLayout xmlns:android="http://schemas.android.com/apk/res/android"
 android:layout_width="match_parent"
 android:layout_height="match_parent"
 android:orientation="vertical" >
 <ImageView
 android:layout_width="wrap_content"
 android:layout_height="wrap_content"
 android:scaleType="fitCenter"
 android:src="@drawable/icon"
 />
 <TextView
 android:layout_width="fill_parent"
 android:layout_height="wrap_content"
 android:text="我是自定义的对话框"
 />
</LinearLayout>
以上就是本文的全部内容,希望本文的内容对大家的学习或者工作能带来一定的帮助,同时也希望多多支持我们!
赞 (0)

