vue+element实现动态换肤的示例代码
有时候一个项目的主题并不能满足所有人的审美,这时候换肤功能就很友好,本项目基于vue+element实现后台管理项目的换肤功能
1.创建换肤组件
<template>
<el-color-picker
class="theme-picker"
popper-class="theme-picker-dropdown"
v-model="theme"
:predefine="predefineColors"
></el-color-picker>
</template>
<script>
const version = require("element-ui/package.json").version; // element-ui version from node_modules
const ORIGINAL_THEME = "#409EFF"; // default color
export default {
name: "ThemePicker",
props: {
default: {
// 初始化主题,可由外部传入
type: String
// default: '#2668b1'
// default: `${localStorage.getItem("tremePackers")==null?"#C60404":localStorage.getItem("tremePackers")}`
}
// size: { // 初始化主题,可由外部传入
// type: String,
// default: 'small'
// },
},
data() {
return {
chalk: "", // content of theme-chalk css
theme: ORIGINAL_THEME,
showSuccess: true, // 是否弹出换肤成功消息
predefineColors: [
"#2668b1",
"#52b493",
"#429798",
"#32789c",
"#1944a5",
"#5944bc",
"#995dcd",
"#ce7e5b",
"#ee8b9b",
"#283551"
]
};
},
mounted() {
this.theme = this.defaultTheme;
// this.$emit('onThemeChange', this.theme)
this.showSuccess = true;
},
computed: {
defaultTheme() {
return this.$store.state.theme;
}
},
watch: {
async theme(val, oldVal) {
if (typeof val !== "string") return;
const themeCluster = this.getThemeCluster(val.replace("#", ""));
const originalCluster = this.getThemeCluster(oldVal.replace("#", ""));
const getHandler = (variable, id) => {
return () => {
const originalCluster = this.getThemeCluster(
ORIGINAL_THEME.replace("#", "")
);
const newStyle = this.updateStyle(
this[variable],
originalCluster,
themeCluster
);
let styleTag = document.getElementById(id);
if (!styleTag) {
styleTag = document.createElement("style");
styleTag.setAttribute("id", id);
// document.head.appendChild(styleTag)
document
.getElementsByTagName("style")[0]
.insertBefore(styleTag, null);
}
styleTag.innerText = newStyle;
};
};
const chalkHandler = getHandler("chalk", "chalk-style");
if (!this.chalk) {
const url = `../../assets/style/theme/index.css`;//本地css样式地址
// const url = `./dist/index.css`;//项目打包后css地址(原文件放入public文件夹中)
// const url = `https://unpkg.com/element-ui@${version}/lib/theme-chalk/index.css`;//如果是公司内网,此网址则不适用
this.getCSSString(url, chalkHandler, "chalk");
} else {
chalkHandler();
}
const styles = [].slice
.call(document.querySelectorAll("style"))
.filter(style => {
const text = style.innerText;
return (
new RegExp(oldVal, "i").test(text) &&
!/Chalk Variables/.test(text)
);
});
styles.forEach(style => {
const { innerText } = style;
if (typeof innerText !== "string") return;
style.innerText = this.updateStyle(
innerText,
originalCluster,
themeCluster
);
});
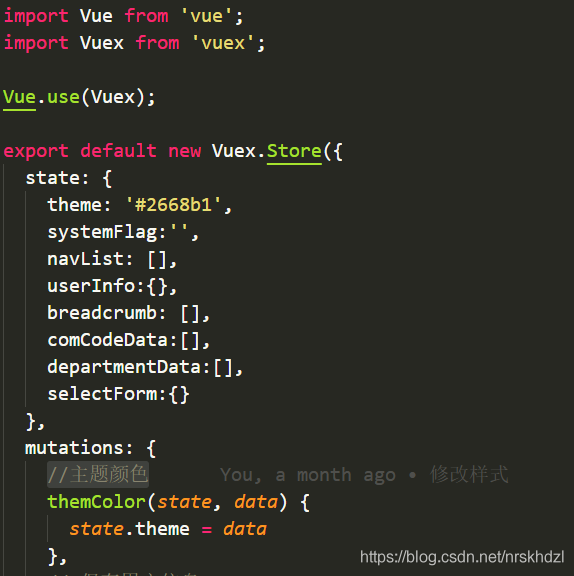
this.$store.commit("themColor", val);//将更换的颜色存入store
this.$emit("onThemeChange", val);
// 响应外部操作
//存入localStorage
// localStorage.setItem('tremePackers',val);
// if(this.showSuccess) {
// this.$message({
// message: '换肤成功',
// type: 'success'
// })
// } else {
// this.showSuccess = true
// }
}
},
methods: {
updateStyle(style, oldCluster, newCluster) {
let newStyle = style;
oldCluster.forEach((color, index) => {
newStyle = newStyle.replace(new RegExp(color, "ig"), newCluster[index]);
});
return newStyle;
},
getCSSString(url, callback, variable) {
const xhr = new XMLHttpRequest();
xhr.onreadystatechange = () => {
if (xhr.readyState === 4 && xhr.status === 200) {
this[variable] = xhr.responseText.replace(/@font-face{[^}]+}/, "");
callback();
}
};
xhr.open("GET", url);
xhr.send();
},
getThemeCluster(theme) {
const tintColor = (color, tint) => {
let red = parseInt(color.slice(0, 2), 16);
let green = parseInt(color.slice(2, 4), 16);
let blue = parseInt(color.slice(4, 6), 16);
if (tint === 0) {
// when primary color is in its rgb space
return [red, green, blue].join(",");
} else {
red += Math.round(tint * (255 - red));
green += Math.round(tint * (255 - green));
blue += Math.round(tint * (255 - blue));
red = red.toString(16);
green = green.toString(16);
blue = blue.toString(16);
return `#${red}${green}${blue}`;
}
};
const shadeColor = (color, shade) => {
let red = parseInt(color.slice(0, 2), 16);
let green = parseInt(color.slice(2, 4), 16);
let blue = parseInt(color.slice(4, 6), 16);
red = Math.round((1 - shade) * red);
green = Math.round((1 - shade) * green);
blue = Math.round((1 - shade) * blue);
red = red.toString(16);
green = green.toString(16);
blue = blue.toString(16);
return `#${red}${green}${blue}`;
};
const clusters = [theme];
for (let i = 0; i <= 9; i++) {
clusters.push(tintColor(theme, Number((i / 10).toFixed(2))));
}
clusters.push(shadeColor(theme, 0.1));
return clusters;
}
}
};
</script>
<style>
.theme-picker .el-color-picker__trigger {
vertical-align: middle;
}
.theme-picker-dropdown .el-color-dropdown__link-btn {
display: none;
}
.el-color-picker--small .el-color-picker__trigger {
border: none;
}
</style>

上面这块代码值得注意,红框里的代码是在head里所有节点后插入一个新的style标签,打包后优先级较高,但有个问题,有些地方的颜色直接消失变成空白影响了样式,于是改成绿框里的代码,但绿框里的代码打包后优先级会低于原来样式颜色的而优先级,所以需要根据项目调样式优先级

这块的代码也需要注意,如果公司直接使用的外网那么直接使用第三个url就行,如果公司使用的内网访问不了外部网页那么可以通过第三条url下载项目对应element版本的css样式,把css文件放到项目里,但要注意放到不会被编译的问价夹里,我项目用的是vue cli4,所以我动态转换的css文件放在public文件夹里,放到assets问价夹中样式文件会被编译,因而路径会报404,并且这块使用的url是文件打包编译后样式的路径,这是值得注意的地方
2.如果项目中有的样式颜色没有用到element,可以把颜色缓存到vuex里,然后在具体逐渐里通过计算属性获取再在样式上动态绑定
vuex:
使用的组件中:


到此这篇关于vue+element实现动态换肤的示例代码的文章就介绍到这了,更多相关vue+element动态换肤内容请搜索我们以前的文章或继续浏览下面的相关文章希望大家以后多多支持我们!
相关推荐
-

基于Vue结合ElementUI的换肤解决方案
目录 写在前面 方案一.使用全局的样式覆盖(前端通用) 方案二.自定义自己的Element-ui配色 方案三.快速改变网站颜色 方案四.实时更换主色调 写在前面 换肤这个功能,不能算是很常见,但是也是有需求的,所以这里提供几种前端的换肤解决方案,供大家参考. 本文将介绍几种基于Vue.Element-UI的换肤实现方案,力争通俗易懂,易上手,希望大家喜欢~ 方案一.使用全局的样式覆盖(前端通用) 这个应该是最常见,也是大家最容易想到的,也是最容易实现的一种方案. 我们单独写一份样式表(css 文
-
vue+element实现动态换肤的示例代码
有时候一个项目的主题并不能满足所有人的审美,这时候换肤功能就很友好,本项目基于vue+element实现后台管理项目的换肤功能 1.创建换肤组件 <template> <el-color-picker class="theme-picker" popper-class="theme-picker-dropdown" v-model="theme" :predefine="predefineColors" &g
-
Vue + Scss 动态切换主题颜色实现换肤的示例代码
根据预设的配色方案,在前端实现动态切换系统主题颜色. 大概的思路就是给html根标签设置一个data-theme属性,然后通过js切换data-theme的属性值,Scss根据此属性来判断使用对应主题变量.这里可以选择持久化Vux或接口来保存用户选择的主题. 一.首先需要给项目下载配置Scss 1.安装依赖 npm install node-sass sass-loader --save-dev 2.找到build中webpack.base.conf.js,在rules中添加scss规则 { t
-
vue+element 实现商城主题开发的示例代码
本文介绍了vue+element 实现商城主题开发的示例代码,分享给大家,具体如下: <template> <div> <div class="set-phone"> <el-form :model="theme" :rules="rules" ref="ruleForm" class="demo-ruleForm"> <el-form-item lab
-
Vue+Element使用富文本编辑器的示例代码
富文本编辑器在任何项目中都会用到,在Element中我们推荐vue-quill-editor组件,现在我就把它提供给大家,希望对大家有用.具体截图如下: 安装编辑器组件 具体方法:npm install vue-quill-editor --save 编写组件 首先我们在components文件夹里创建ue.vue组件,效果图如下: 组件 <!-- 组件代码如下 --> <template> <div> <script id="editor"
-
使用vue + less 实现简单换肤功能的示例
做的换肤效果比较简单,只是顶部导航背景色的改变.下面是效果图. 首先,先说一下我最初的思路. 我最初的想法是使用less定义变量,然后通过js来切换变量,通过切换的变量来达到换肤的效果. 我先新建了一个 theme.less文件,代码如下: @theme:@themea; @themea:pink; @themeb:blue; @themec:gray; 如我最开始的想法,应该是通过点击事件来改变变量 @theme 的值. 我用了element-ui这个框架,所以我的下拉菜单的代码也不复杂: <
-
vue+element table表格实现动态列筛选的示例代码
需求:在用列表展示数据时,出现了很多项信息需要展示导致表格横向特别长,展示就不够明晰,用户使用起来可能会觉得抓不住自己的重点. 设想实现:用户手动选择表格的列隐藏还是展示,并且记录用户选择的状态,在下次进入该时仍保留选择的状态. 效果图如下: 原: 不需要的关掉默认的勾选: 实现代码: HTML部分就是用一个多选框组件展示列选项 用v-if="colData[i].istrue"控制显示隐藏,把列选项传到checkbox里再绑定勾选事件. <el-popover placemen
-
基于element-ui 动态换肤的代码详解
1.在安装好element-ui@2.x 以后,首先安装sass-loader npm i sass-loader node-sass -D 2.安装element-theme npm i element-theme -D 3.安装theme-chalk npm i element-theme-chalk -D # or from github npm i https://github.com/ElementUI/theme-chalk -D 4.初始化变量文件 et -i // 默认的文件是e
-
Vue+Element实现动态生成新表单并添加验证功能
首先有一个这样的需求,表单中默认有一个联系人信息,用户可以再添加新的联系人信息 点击添加更多联系人之后 官方文档中有写用v-for来实现新增表单,但是那是单表单的新增,现在多表单的新增,可以考虑的实现方法是先写死一个必须的表单,需要新增的两个表单放在一个div里,在div中使用v-for生成,达到同时新增的效果 代码如下 //必填一个联系人的表单 <el-form-item class="rules" label="通知对象:" prop="noti
-
vue+element实现批量删除功能的示例
今年开始学习vue+element实现后台开发,在实现批量删除功能时有2个小知识点记录在下: 1.如何实现单击行交替选中当前行的复选框,element官网的table实例中没有找到.--通过row-click和toggleRowSelection实现 2.如何获取选中行的值来实现批量删除.--通过selection-change实现 代码如下 html: <div class="row mt30 pl15"> <el-button type="warning