Spring项目中swagger用法与swagger-ui使用
目录
- 一、swagger用法
- 1.1、编写springboot项目
- 1.2、导入spring-fox依赖
- 1.3、添加注解
- 1.4、访问swagger-ui
- 二、swagger-ui使用
一、swagger用法
1.1、编写springboot项目

package com.xbmu.controller;

import com.xbmu.bean.Person;
import org.springframework.web.bind.annotation.*;

import java.util.ArrayList;
import java.util.List;

@RestController
@RequestMapping(value = "/person")
public class PersonController {
    @PostMapping("/postReq")
    public String postReq()
    {
        return "postReq";
    }
    @GetMapping("/getReq")
    public String getReq(String param1,String param2)
    {
        return "getReq";
    }
    @RequestMapping("/req")
    public String req(String param1)
    {
        return "req";
    }

    @RequestMapping(value = "/getPersonSingle",method = RequestMethod.GET)
    private Person getPersonSingle(Integer id){
        Person person;
        List<Person> personList = new ArrayList<>();
        for (int i = 0; i < 10; i++) {
            person = new Person();
            person.setId(i+1);
            person.setName("zhangsan"+(i+1));
            person.setGender("男"+i);
            person.setAge(18+1);
            person.setAddress("shanxi xian");
            personList.add(person);
        }
        person = personList.get(id);
        return person;
    }
}
1.2、导入spring-fox依赖
在项目pom.xml中导入spring-fox依赖,该项目选择版本为2.9.2。其中springfox-swagger2是核心内容的封装。springfox-swagger-ui是对swagger-ui的封装。
<?xml version="1.0" encoding="UTF-8"?>
<project xmlns="http://maven.apache.org/POM/4.0.0"
         xmlns:xsi="http://www.w3.org/2001/XMLSchema-instance"
         xsi:schemaLocation="http://maven.apache.org/POM/4.0.0 http://maven.apache.org/xsd/maven-4.0.0.xsd">
    <modelVersion>4.0.0</modelVersion>

    <groupId>com.xbmu</groupId>
    <artifactId>swagger-study</artifactId>
    <version>1.0-SNAPSHOT</version>

    <properties>
        <maven.compiler.source>8</maven.compiler.source>
        <maven.compiler.target>8</maven.compiler.target>
    </properties>

    <dependencyManagement>
        <dependencies>
            <dependency>
                <groupId>org.springframework.boot</groupId>
                <artifactId>spring-boot-dependencies</artifactId>
                <version>2.2.5.RELEASE</version>
                <type>pom</type>
                <scope>import</scope>
            </dependency>
        </dependencies>
    </dependencyManagement>

    <dependencies>
        <dependency>
            <groupId>org.springframework.boot</groupId>
            <artifactId>spring-boot-starter-web</artifactId>
        </dependency>
        <dependency>
            <groupId>io.springfox</groupId>
            <artifactId>springfox-swagger2</artifactId>
            <version>2.9.2</version>
        </dependency>
        <dependency>
            <groupId>io.springfox</groupId>
            <artifactId>springfox-swagger-ui</artifactId>
            <version>2.9.2</version>
        </dependency>
    </dependencies>

</project>
1.3、添加注解
在springboot的启动类中添加 @EnableSwagger2 注解。
添加此注解后表示对当前项目中全部控制器进行扫描。应用swagger2。
package com.xbmu;

import org.springframework.boot.SpringApplication;
import org.springframework.boot.autoconfigure.SpringBootApplication;
import springfox.documentation.swagger2.annotations.EnableSwagger2;
/**
 * EnableSwagger2 是springfox提供的一个注解,代表swagger2相关技术开启。
 * 会扫描当前类所在包,及子包中所有的类型中的注解。
 */
@SpringBootApplication
@EnableSwagger2
public class MyApp {
    public static void main(String[] args) {
        SpringApplication.run(MyApp.class,args);
    }
}
1.4、访问swagger-ui
启动项目后在浏览器中输入 http://ip:port/swagger-ui.html 既可以访问到swagger-ui页面,在页面中可以可视化的进行操作项目中所有接口。
二、swagger-ui使用
访问swagger-ui.html后面可以在页面中看到所有需要生成接口文档的额控制器名称。

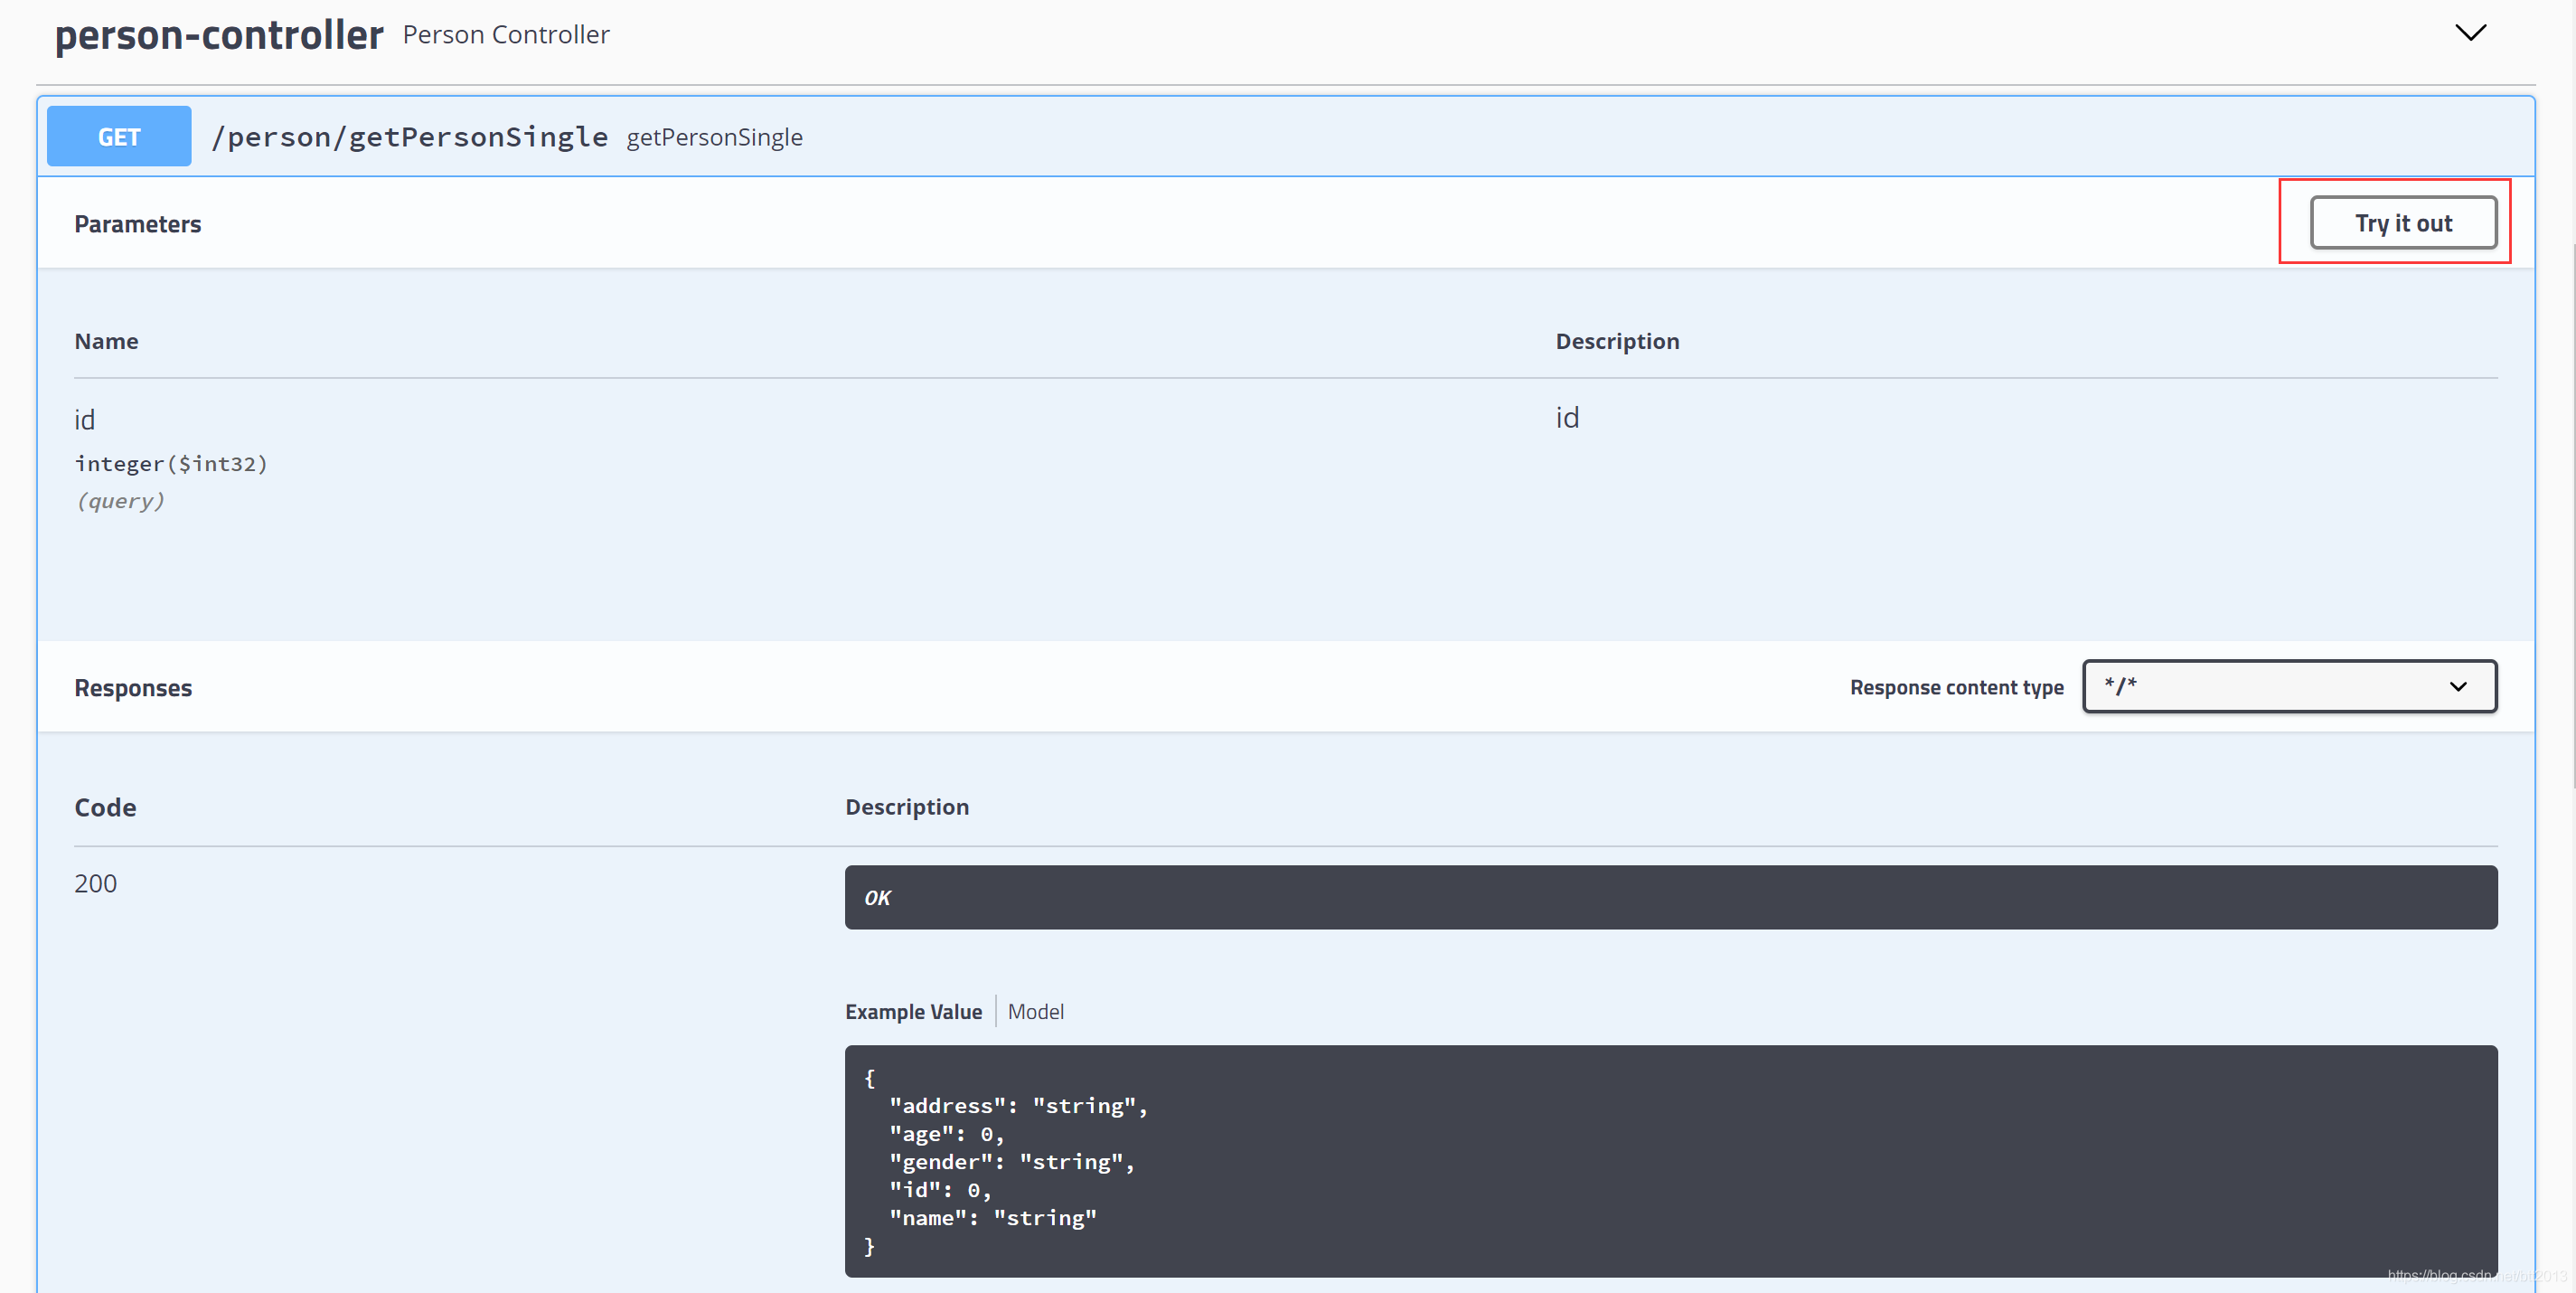
每个控制器中包含多个所有控制器方法的各种访问方式。如果使用的是@RequestMapping进行映射,将显示下面的所有请求方式。如果使用@PostMapping将只有post方式可以能访问,下面也就只显示post的一个。

点击某个请求方式中 try it out

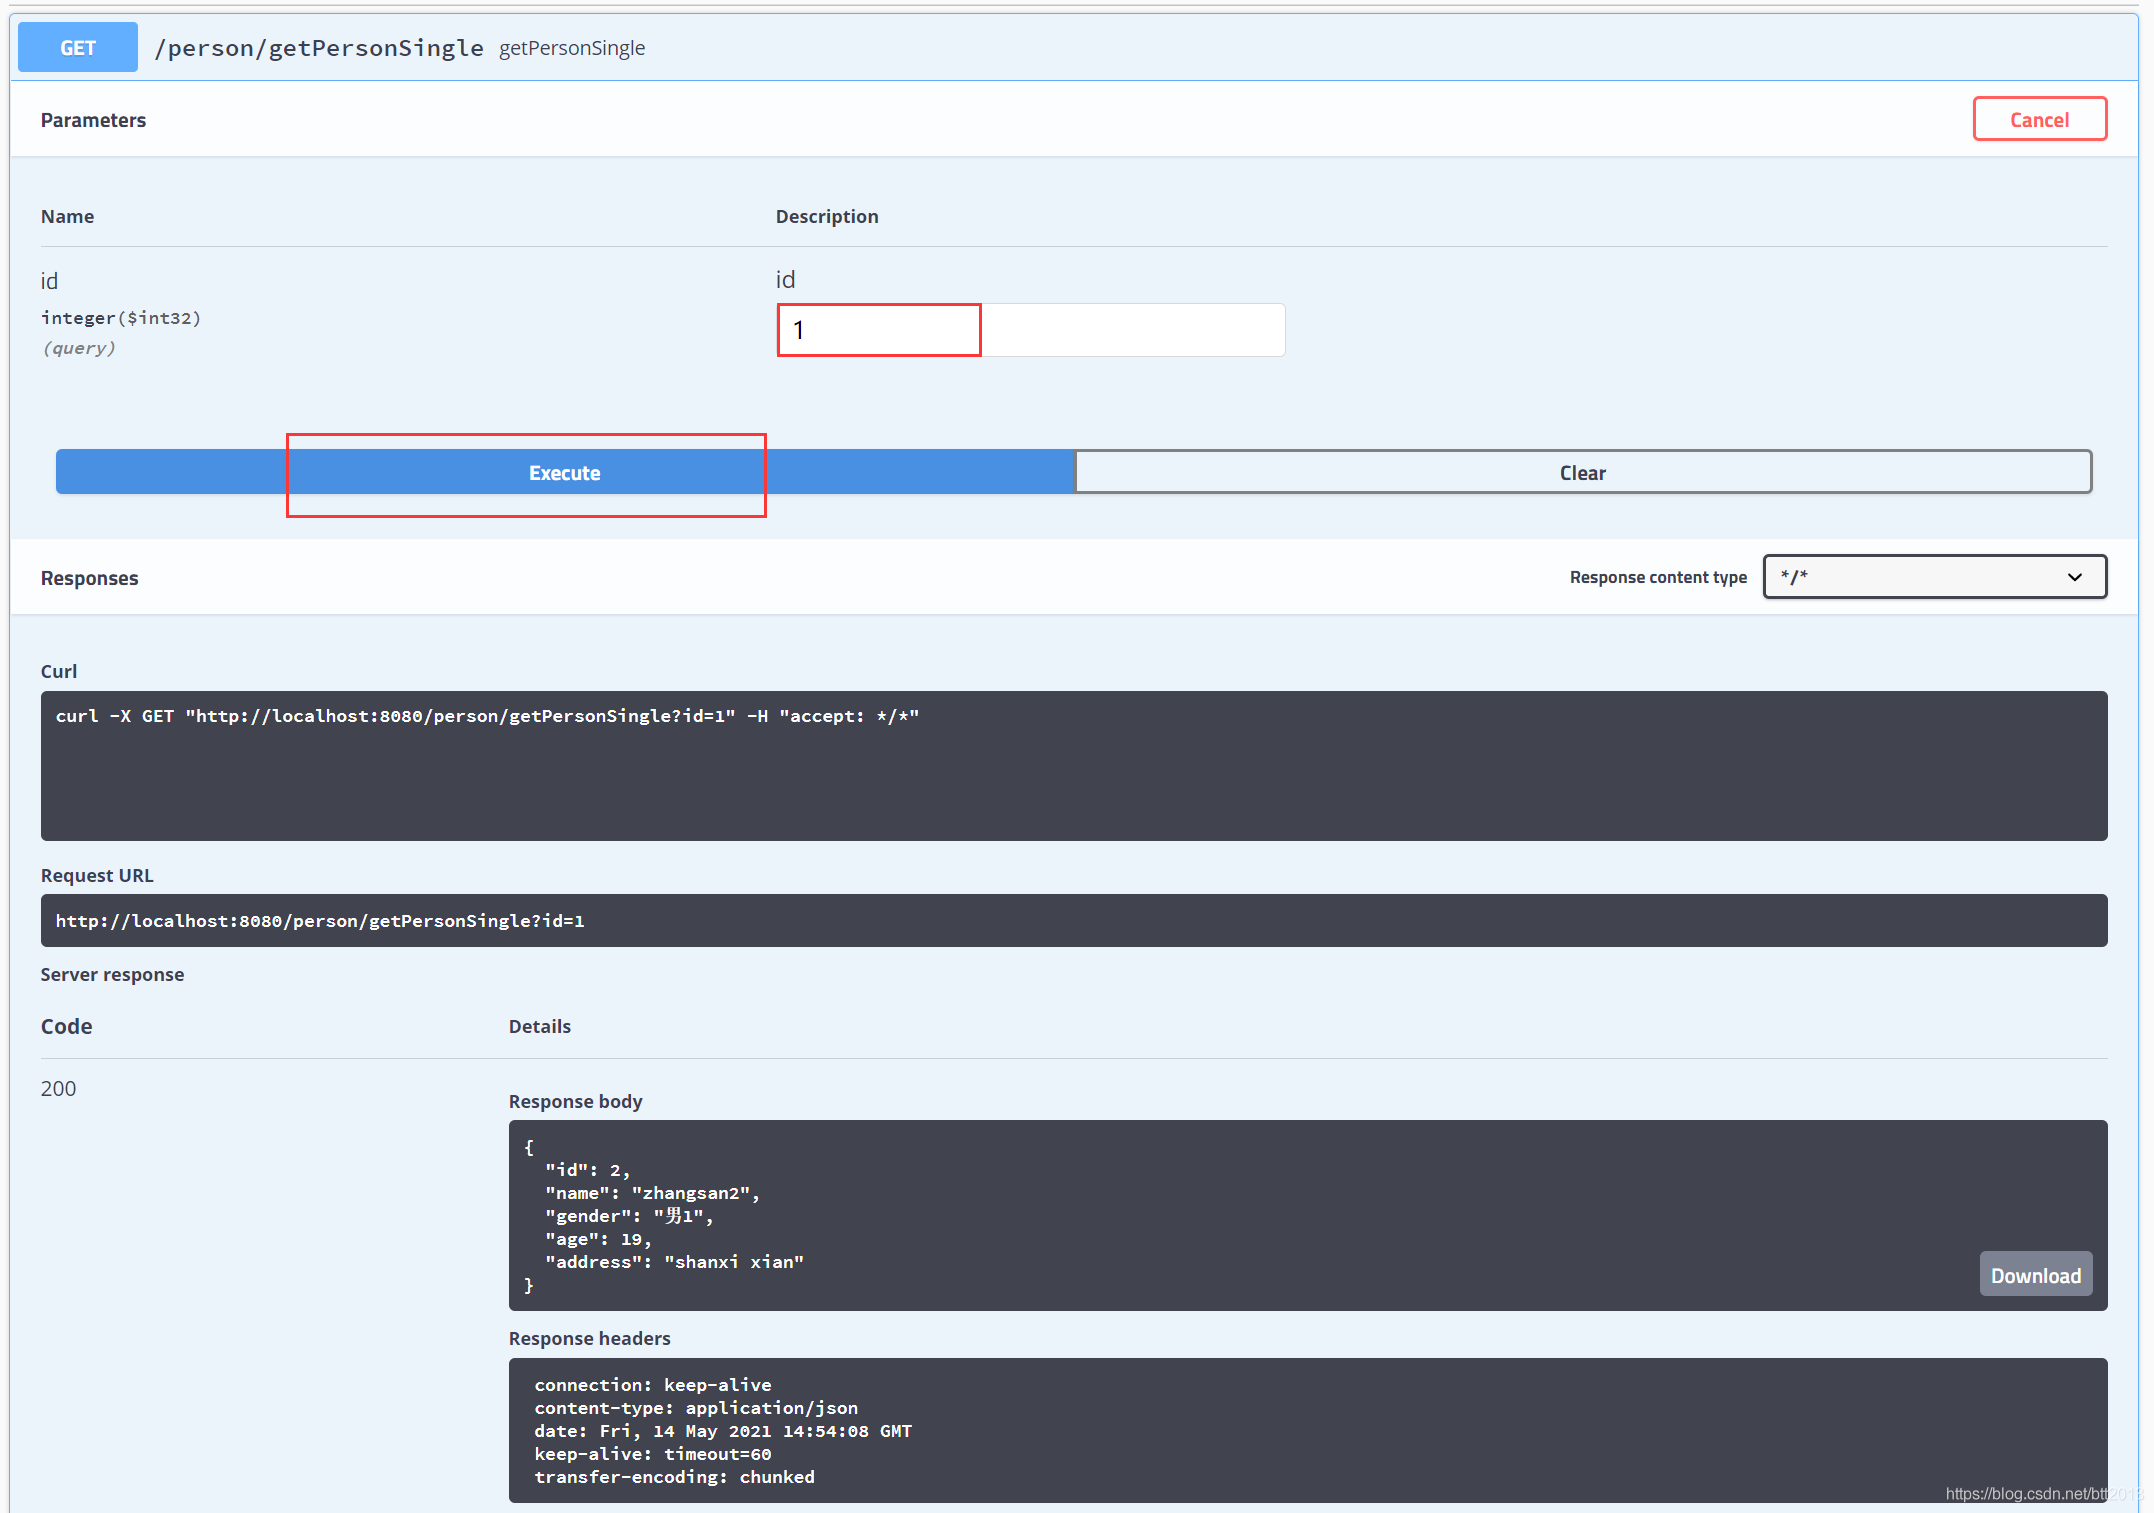
会出现界面要求输入的值。输入完成后点击Execute按钮

以上就是Spring项目中swagger用法与swagger-ui使用的详细内容,更多关于swagger用法与swagger-ui使用的资料请关注我们其它相关文章!
赞 (0)

