SpringBoot通过@MatrixVariable进行传参详解
目录
- 1.相关概念
- 2.开启矩阵变量
- 3.代码测试
1.相关概念
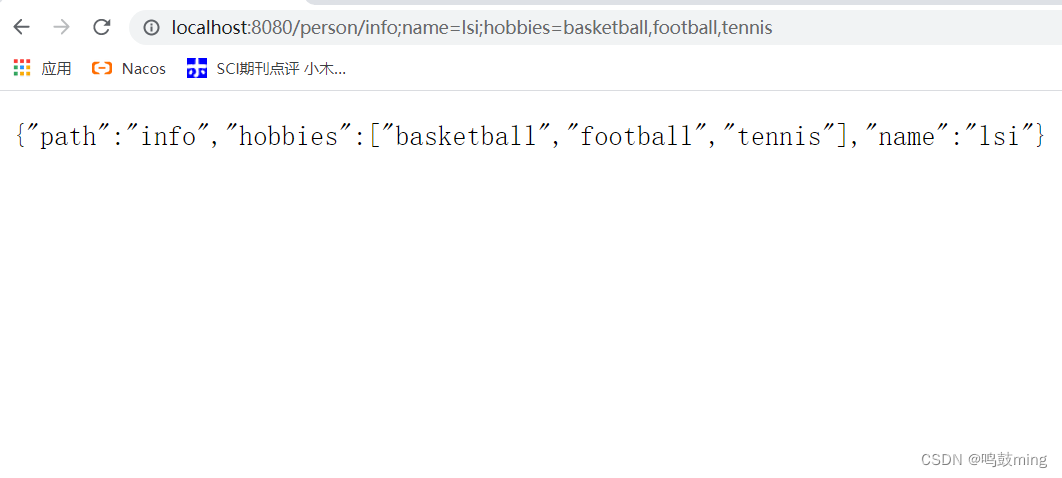
语法: 请求路径:/person/info;name=lisi;hobbies=basketball,football,tennis不同变量用分号相隔, 一个变量有多个值则使用逗号隔开
SpringBoot默认是禁用了矩阵变量的功能
手动开启原理: 对于路径的处理, UrlPathHelper的removeSemicolonContent设置为false,让其支持矩阵变量的。
矩阵变量必须有url路径变量才能被解析, 也就是/person/{path}里的path(这里我把它的值写成info, 即/person/info)
2.开启矩阵变量
第一种方法,实现接口WebMvcConfigurer,覆盖方法configurePathMatch。
WebConfig
package com.limi.springboottest2.config;
import org.springframework.context.annotation.Configuration;
import org.springframework.web.servlet.config.annotation.PathMatchConfigurer;
import org.springframework.web.servlet.config.annotation.WebMvcConfigurer;
import org.springframework.web.util.UrlPathHelper;
@Configuration
public class WebConfig implements WebMvcConfigurer {
    public void configurePathMatch(PathMatchConfigurer configurer) {
        UrlPathHelper urlPathHelper = new UrlPathHelper();
        // 设置不移除分号 ;后面的内容。矩阵变量功能就可以生效
        urlPathHelper.setRemoveSemicolonContent(false);
        configurer.setUrlPathHelper(urlPathHelper);
    }
}
第二种,自定义WebMvcConfigurer类型组件并添加到容器中。
WebConfig
package com.limi.springboottest2.config;
import org.springframework.context.annotation.Bean;
import org.springframework.context.annotation.Configuration;
import org.springframework.web.servlet.config.annotation.PathMatchConfigurer;
import org.springframework.web.servlet.config.annotation.WebMvcConfigurer;
import org.springframework.web.util.UrlPathHelper;
@Configuration
public class WebConfig implements WebMvcConfigurer {
    @Bean
    public WebMvcConfigurer webMvcConfigurer(){
        return new WebMvcConfigurer() {
            @Override
            public void configurePathMatch(PathMatchConfigurer configurer) {
                UrlPathHelper urlPathHelper = new UrlPathHelper();
                // 设置不移除分号 ;后面的内容。矩阵变量功能就可以生效
                urlPathHelper.setRemoveSemicolonContent(false);
                configurer.setUrlPathHelper(urlPathHelper);
            }
        };
    }
}
3.代码测试
index.html
<!DOCTYPE html>
<html lang="en">
<head>
    <meta charset="UTF-8">
    <title>Title</title>
</head>
<body>
    <h1>欢迎你好呀!</h1>
    <a href="/person/info;name=lsi;hobbies=basketball,football,tennis" rel="external nofollow" >1测试@MatrixVariable</a>
    <br>
    <a href="/person/1;age=50/2;age=30" rel="external nofollow" >2测试@MatrixVariable</a>
</body>
</html>
HelloController
package com.limi.springboottest2.controller;
import org.springframework.stereotype.Controller;
import org.springframework.web.bind.annotation.GetMapping;
import org.springframework.web.bind.annotation.MatrixVariable;
import org.springframework.web.bind.annotation.PathVariable;
import org.springframework.web.bind.annotation.ResponseBody;
import java.util.HashMap;
import java.util.List;
import java.util.Map;
@Controller
public class HelloController {
    //    /person/info;name=lsi;hobbies=basketball,football,tennis
    @ResponseBody
    @GetMapping("/person/{path}")
    public Map<String,Object> get(@PathVariable("path") String path,
                                  @MatrixVariable("name") String name,
                                  @MatrixVariable("hobbies") List<String> hobbies){
        Map<String,Object> map = new HashMap<>();
        map.put("path",path);
        map.put("name",name);
        map.put("hobbies",hobbies);
        return map;
    }
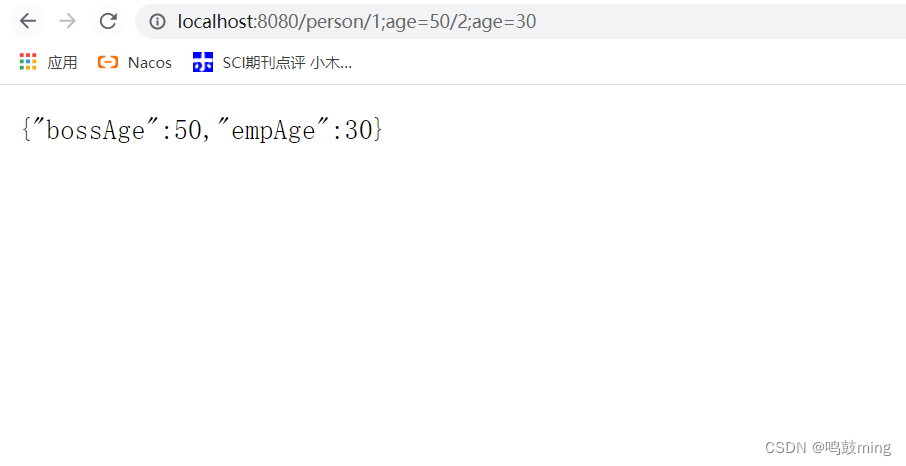
    // 测试传入两组相同的类型的变量, 例如老板和员工的年龄
    // /person/1;age=50/2;age=30
    @ResponseBody
    @GetMapping("/person/{bossId}/{empId}")
    public Map boss(@MatrixVariable(value = "age",pathVar = "bossId") Integer bossAge,
                    @MatrixVariable(value = "age",pathVar = "empId") Integer empAge){
        Map<String,Object> map = new HashMap<>();
        map.put("bossAge",bossAge);
        map.put("empAge",empAge);
        return map;
    }
}
测试1

测试2

到此这篇关于SpringBoot通过@MatrixVariable进行传参详解的文章就介绍到这了,更多相关SpringBoot @MatrixVariable内容请搜索我们以前的文章或继续浏览下面的相关文章希望大家以后多多支持我们!
赞 (0)

