SpringBoot使用Thymeleaf模板引擎访问静态html的过程

最近要做一个java web项目,因为页面不是很多,所以就没有前后端分离,前后端写在一起,这时候就用到thymeleaf了,以下是不动脑式的傻瓜教程。。。。。

一:创建spring boot的web项目,过程略;

二:依赖如下:

<dependency>
      <groupId>org.springframework.boot</groupId>
      <artifactId>spring-boot-starter-web</artifactId>
    </dependency>

    <dependency>
      <groupId>org.springframework.boot</groupId>
      <artifactId>spring-boot-starter-thymeleaf</artifactId>
      <version>2.1.2.RELEASE</version>
    </dependency>

    <dependency>
      <groupId>org.springframework.boot</groupId>
      <artifactId>spring-boot-starter-test</artifactId>
      <scope>test</scope>
      <exclusions>
        <exclusion>
          <groupId>org.junit.vintage</groupId>
          <artifactId>junit-vintage-engine</artifactId>
        </exclusion>
      </exclusions>
    </dependency>

三:配置文件:application.properties

#端口号
server.port=8099
# 配置
#thymeleaf
spring.thymeleaf.cache=false
spring.thymeleaf.prefix=classpath:/templates/
spring.thymeleaf.check-template-location=true
spring.thymeleaf.suffix=.html
spring.thymeleaf.encoding=UTF-8
spring.thymeleaf.servlet.content-type=text/html
spring.thymeleaf.mode=HTML

四:项目的templates文件夹下新建页面success.html,如下

五:controller

import org.springframework.stereotype.Controller;
import org.springframework.ui.ModelMap;
import org.springframework.web.bind.annotation.RequestMapping;

/**
 * @author liuhongyang
 * @2020/10/20 14:35
 * 文件说明:
 */
@Controller
public class FirstTestController {

  @RequestMapping(value = "hello")
  public String hello(ModelMap modelMap) {
    modelMap.put("hei", "thymeleaf");
    return "success";
  }
}

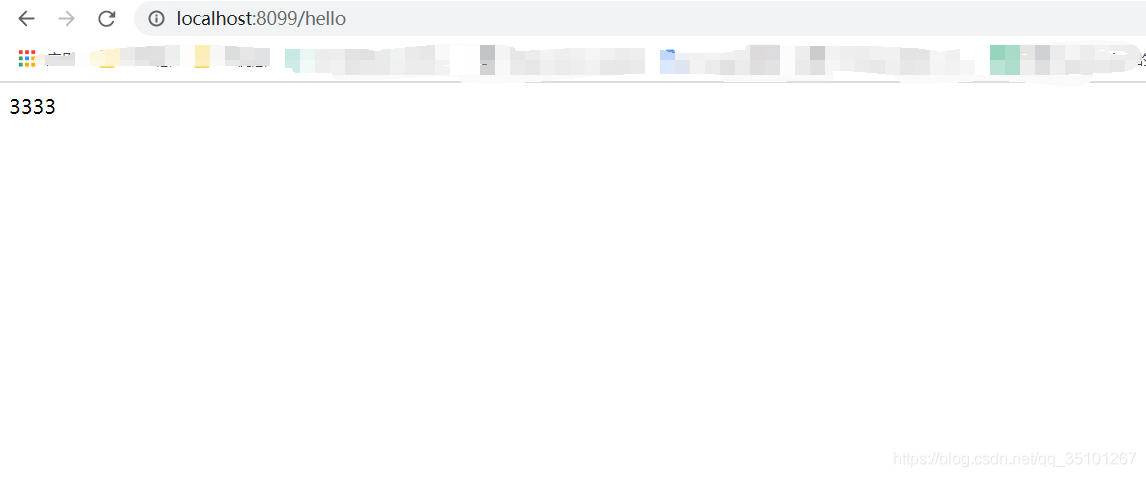
六:访问如下,完成
到此这篇关于SpringBoot使用Thymeleaf模板引擎访问静态html的过程的文章就介绍到这了,更多相关SpringBoot Thymeleaf模板访问静态html内容请搜索我们以前的文章或继续浏览下面的相关文章希望大家以后多多支持我们!

(0)

相关推荐

  • springboot用thymeleaf模板的paginate分页完整代码

    本文根据一个简单的user表为例,展示 springboot集成mybatis,再到前端分页完整代码(新手自学,不足之处欢迎纠正): 先看java部分 pom.xml 加入 <!--支持 Web 应用开发,包含 Tomcat 和 spring-mvc. --> <dependency> <groupId>org.springframework.boot</groupId> <artifactId>spring-boot-starter-web&l

  • springboot如何使用thymeleaf模板访问html页面

    引言 在传统的web开发中通常使用jsp页面,首先需要在pom文件中引入springmvc相关的包,然后写springmvc的配置文件(包括访问资源的路径解析),之后还需再web.xml中配置访问路由.这无疑太麻烦了,每次开发前都需要编写大量的配置文件. springboot为此提供了高效便捷的解决方案,只需再pom.xml中添加web开发的依赖,便可进行web开发,省去了繁琐的配置步骤. 下面为web开发引入的依赖 <dependency> <groupId>org.spring

  • IDEA+maven+SpringBoot+JPA+Thymeleaf实现Crud及分页

    一.开发环境: 1.windows 7 企业版 2.IDEA 14 3.JDK 1.8 4.Maven 3.5.2 5.MariaDB 6.SQLYog 二.Maven设置: Maven目录下的conf目录下的settings.xml做如下内容的添加: 1.使用阿里云的仓库,比官网访问速度快很多 <mirror> <id>nexus-aliyun</id> <mirrorOf>central</mirrorOf> <name>Nexu

  • 在WINXP下建立VPN服务器的方法

    最近想在WinXP上创建一个VPN服务器,在网上找了找,找到了相关资料,转来贴之. 利用WINXP不需要第三方软件,可以直接构建一个VPN服务器,如果没有采用SOFTETHER,虚拟HUB的必要的话,要实现VPN,可以直接用WINXP来实现.     接下来,我们以WINXP操作系统,宽带连接来构建一个虚拟专用网络. 第一步: VPN服务器的建立 右单击,网上邻居,选属性,打开网络连接属性. 在"网络任务"里选择,创建一个新的连接. 打开新建连接向导. 然后,点 下一步. 在 &quo

  • 详解SpringBoot+Thymeleaf 基于HTML5的现代模板引擎

    序言: Thymeleaf 是Java服务端的模板引擎,与传统的JSP不同,前者可以使用浏览器直接打开,因为可以忽略掉拓展属性,相当于打开原生页面,给前端人员也带来一定的便利.如果你已经厌倦了JSP+JSTL的组合,Thymeleaf或许是个不错的选择!本工程传送门:SpringBoot-Web-Thymeleaf 开始使用 1.引入依赖 SpringBoot默认提供了Thymeleaf的Starter,只需简单引入依赖即可. <dependency> <groupId>org.s

  • SpringBoot使用Thymeleaf模板引擎访问静态html的过程

    最近要做一个java web项目,因为页面不是很多,所以就没有前后端分离,前后端写在一起,这时候就用到thymeleaf了,以下是不动脑式的傻瓜教程..... 一:创建spring boot的web项目,过程略: 二:依赖如下: <dependency> <groupId>org.springframework.boot</groupId> <artifactId>spring-boot-starter-web</artifactId> <

  • springboot学习之Thymeleaf模板引擎及原理介绍

    目录 模板引擎 什么是模板引擎? 模板引擎的原理 引入Thymeleaf Thymeleaf分析 Thymeleaf语法学习 模板引擎 springboot我们目前是以jar包的形式打包,实际上我们之前是打成war包,放到tomcat服务器里面,可以用JSP.但是jar包就导致不能用JSP,换一种方式就是springboot推荐的Thymeleaf模板引擎(JSP也是一种模板引擎,除此之外还有什么framework也是一种模板引擎), 什么是模板引擎? 模板引擎就是解决我们需要动态赋值给前端的一

  • SpringBoot超详细讲解Thymeleaf模板引擎

    Jsp是最早的模板技术,用来处理视图层的,用来做数据显示的模板 B S结构: B:浏览器:用来显示数据,发送请求,没有处理能力 发送一个请求,访问a.jsp,a.jsp在服务器端变成Servlet,在将输出的数据返回给浏览器,浏览器就可以看到结果数据,jsp最终翻译过来也是个html页面 模板技术你就可以把它们当成字符串的替换,比如说:这里{data}这里有一个字符串,你把它换成固定值其他值,但是这个替换有一些附加的功能,通过模板技术处理视图层的内容 第一个例子: pom.xml:Thymele

  • Spring Boot 与 kotlin 使用Thymeleaf模板引擎渲染web视图的方法

    本篇给大家介绍Spring Boot 与 kotlin 使用Thymeleaf模板引擎渲染web视图. 静态资源访问 在我们开发Web应用的时候,需要引用大量的js.css.图片等静态资源,使用Spring Boot 与 kotlin如何去支持这些静态资源?,很简单. 默认配置 Spring Boot默认提供静态资源目录位置需置于 classpath 下,目录名需符合如下规则: /static /public /resources /META-INF/resources 举例:我们可以在src/

  • Spring Boot thymeleaf模板引擎的使用详解

    在早期开发的时候,我们完成的都是静态页面也就是html页面,随着时间轴的发展,慢慢的引入了jsp页面,当在后端服务查询到数据之后可以转发到jsp页面,可以轻松的使用jsp页面来实现数据的显示及交互,jsp有非常强大的功能,但是,在使用springboot的时候,整个项目是以jar包的方式运行而不是war包,而且还嵌入了tomcat容器,因此,在默认情况下是不支持jsp页面的.如果直接以纯静态页面的方式会给我们的开发带来很大的麻烦,springboot推荐使用模板引擎. 模板引擎有很多种,jsp,

  • 详解spring Boot 集成 Thymeleaf模板引擎实例

    今天学习了spring boot 集成Thymeleaf模板引擎.发现Thymeleaf功能确实很强大.记录于此,供自己以后使用. Thymeleaf: Thymeleaf是一个java类库,他是一个xml/xhtml/html5的模板引擎,可以作为mvc的web应用的view层. Thymeleaf还提供了额外的模块与Spring MVC集成,所以我们可以使用Thymeleaf完全替代jsp. spring Boot 通过org.springframework.boot.autoconfigu

  • springBoot加入thymeleaf模板的方式

    1.新建springBoot项目 在前面有两种方式 2.加入thymeleaf模板引擎 SpringBoot推荐使用thymeleaf模板引擎 语法简单,功能更强大 要想引入thymeleaf,只需要在pom,xml文件中加入如下依赖就可以了 <dependency> <groupId>org.springframework.boot</groupId> <artifactId>spring-boot-starter-thymeleaf</artifa

  • SpringMVC中使用Thymeleaf模板引擎实例代码

    本文研究的主要是SpringMVC中使用Thymeleaf模板引擎的相关内容,具体介绍如下. Thymeleaf提供了一组Spring集成,允许您将其用作Spring MVC应用程序中全面替代JSP的功能. Maven依赖 <!-- thymeleaf-spring4 --> <dependency> <groupId>org.thymeleaf</groupId> <artifactId>thymeleaf-spring4</artifa

  • Springboot整合thymleaf模板引擎过程解析

    这篇文章主要介绍了Springboot整合thymleaf模板引擎过程解析,文中通过示例代码介绍的非常详细,对大家的学习或者工作具有一定的参考学习价值,需要的朋友可以参考下 thymeleaf作为springboot官方推荐使用的模板引擎,简单易上手,功能强大,thymeleaf的功能和jsp有许多相似之处,两者都属于服务器端渲染技术,但thymeleaf比jsp的功能更强大. 1. thymeleaf入门 1.1 引入坐标 <!--springBoot整合thymeleaf--> <d

  • SpringBoot使用thymeleaf模板过程解析

    这篇文章主要介绍了SpringBoot使用thymeleaf模板过程解析,文中通过示例代码介绍的非常详细,对大家的学习或者工作具有一定的参考学习价值,需要的朋友可以参考下 1.导入依赖 <!-- 添加thymeleaf模版的依赖 --> <dependency> <groupId>org.springframework.boot</groupId> <artifactId>spring-boot-starter-thymeleaf</art

随机推荐