iOS 通过collectionView实现照片删除功能
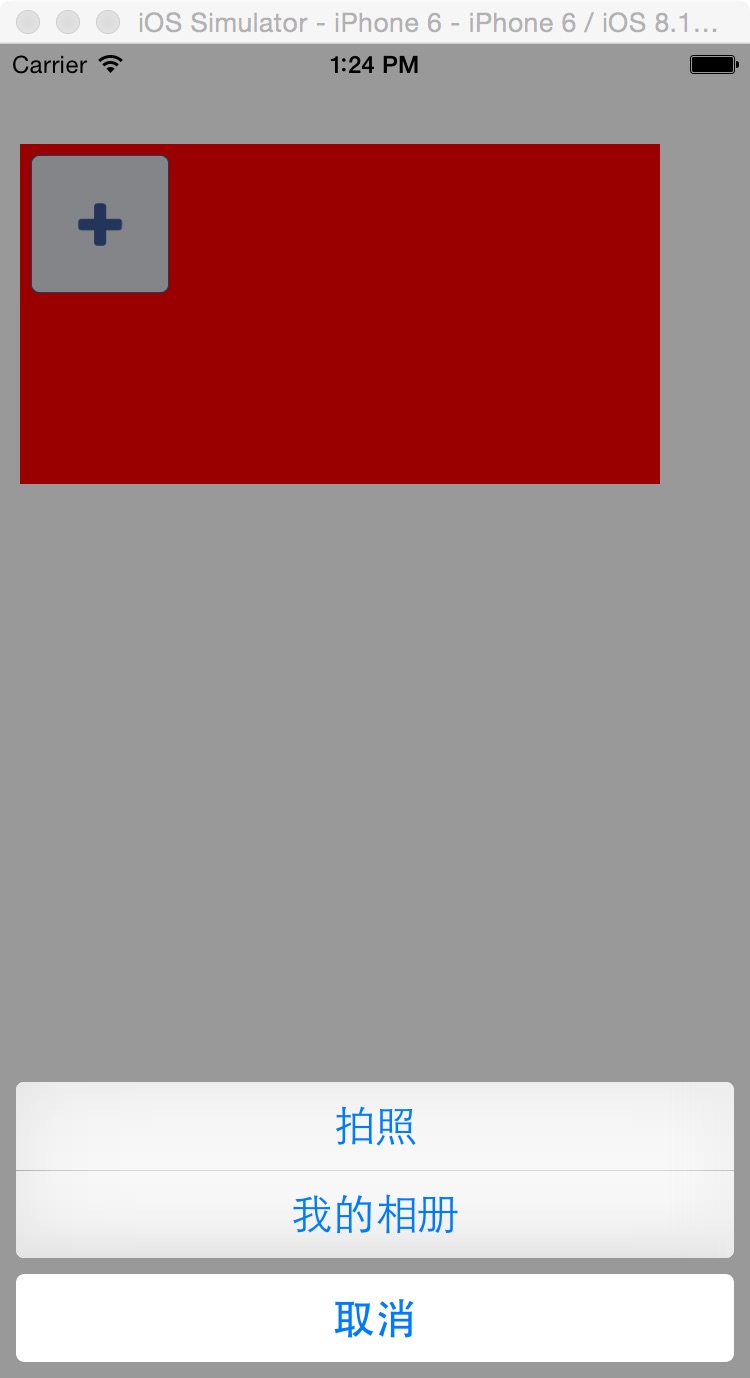
一,效果图。

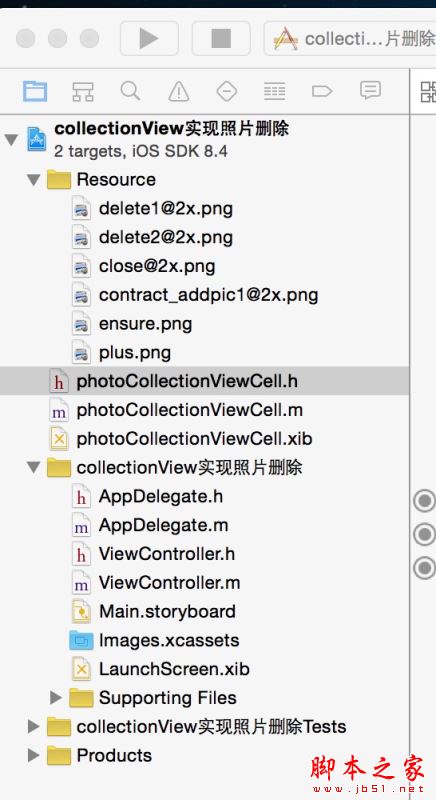
二,工程图。

三,代码。
ViewController.h
#import <UIKit/UIKit.h>
@interface ViewController : UIViewController
<UICollectionViewDataSource,UICollectionViewDelegate,UICollectionViewDelegateFlowLayout,UIAlertViewDelegate,UIActionSheetDelegate,UIImagePickerControllerDelegate,UINavigationControllerDelegate>
{
 UICollectionView *_collectionView;
 UIImagePickerController *_imagePicker;
 NSMutableArray *photos;
 NSMutableArray *dataArray;
 NSInteger deleteIndex;
 BOOL wobble;
}
@end
ViewController.m
//点击添加按钮的时候,停止删除。
#import "ViewController.h"
#import "photoCollectionViewCell.h"
NSInteger const Photo = 8;
@interface ViewController ()
@end
@implementation ViewController
- (void)viewDidLoad {
 [super viewDidLoad];
 // Do any additional setup after loading the view, typically from a nib.
 //其布局很有意思,当你的cell设置大小后,一行多少个cell,由cell的宽度决定
 UICollectionViewFlowLayout *flowLayout = [[UICollectionViewFlowLayout alloc]init];
 //设置cell的尺寸
 [flowLayout setItemSize:CGSizeMake(70, 70)];
 //设置其布局方向
 [flowLayout setScrollDirection:UICollectionViewScrollDirectionVertical];
 //设置其边界(上,左,下,右)
 flowLayout.sectionInset = UIEdgeInsetsMake(5,5,5,5);
 _collectionView = [[UICollectionView alloc]initWithFrame:CGRectMake(10, 50, 320,85*2) collectionViewLayout:flowLayout];
 _collectionView.dataSource = self;
 _collectionView.delegate = self;
 _collectionView.backgroundColor = [UIColor redColor];
 [_collectionView registerClass:[photoCollectionViewCell class] forCellWithReuseIdentifier:@"photo"];
 [self.view addSubview:_collectionView];
 photos = [[NSMutableArray alloc ] init];
 dataArray = [[NSMutableArray alloc ] init];
 [dataArray addObject:[UIImage imageNamed:@"contract_addpic1"]];
}
//section
- (NSInteger)numberOfSectionsInCollectionView:(UICollectionView *)collectionView
{
 return 1;
}
//item个数
- (NSInteger)collectionView:(UICollectionView *)collectionView numberOfItemsInSection:(NSInteger)section
{
 return dataArray.count;
}
-(UICollectionViewCell *)collectionView:(UICollectionView *)collectionView cellForItemAtIndexPath:(NSIndexPath *)indexPath
{
 NSLog(@"--indexPath.row--%ld",indexPath.row);
 NSLog(@"---indexpath.section--%ld",indexPath.section);
 photoCollectionViewCell *cell = (photoCollectionViewCell *)[collectionView dequeueReusableCellWithReuseIdentifier:@"photo" forIndexPath:indexPath];
 cell.tag=indexPath.row;
 //图片
 cell.photoImage.image=dataArray[indexPath.row];
 // 删除按钮
 cell.deleteBtn.tag =indexPath.row;
 cell.deleteBtn.hidden=YES;
 [cell.deleteBtn addTarget:self action:@selector(doClickDeleteButton:) forControlEvents:UIControlEventTouchUpInside];
 //增加按钮
 if (indexPath.row == dataArray.count -1) {
  cell.addBtn.hidden = NO;
 }else
 {
  cell.addBtn.hidden = YES;
 }
 [cell.addBtn addTarget:self action:@selector(doClickAddButton:) forControlEvents:UIControlEventTouchUpInside];
 // 长按删除
 UILongPressGestureRecognizer *longPress = [[UILongPressGestureRecognizer alloc ] initWithTarget:self action:@selector(longPressedAction)];
 [cell.contentView addGestureRecognizer:longPress];
 return cell;
}
#pragma -mark -doClickActions
//删除按钮
-(void)doClickDeleteButton:(UIButton *)btn
{
 NSLog(@"-----doClickDeleteButton-------");
 UIAlertView *alert = [[UIAlertView alloc ] initWithTitle:@"提示" message:@"您确定要删除吗?" delegate:self cancelButtonTitle:@"取消" otherButtonTitles:@"确定", nil];
 deleteIndex = btn.tag;
 [alert show];
 NSLog(@"---delete--dataArray---%@",dataArray);
}
//增加按钮
-(void)doClickAddButton:(UIButton *)btn
{
 NSLog(@"-----doClickAddButton-------");
 if (wobble) {
  // 如果是编辑状态则取消编辑状态
  [self cancelWobble];
 }else{
  //不是编辑状态,添加图片
  if (dataArray.count > Photo) {
   UIAlertView *alert = [[UIAlertView alloc ] initWithTitle:@"提示" message:@"最多支持8个" delegate:self cancelButtonTitle:@"取消" otherButtonTitles:@"确定", nil];
   [alert show];
  }else
  {
   UIActionSheet *actionSheet = [[UIActionSheet alloc]
           initWithTitle:nil
           delegate:(id)self
           cancelButtonTitle:@"取消"
           destructiveButtonTitle:nil
           otherButtonTitles:@"拍照", @"我的相册",nil];
   actionSheet.actionSheetStyle = UIActionSheetStyleBlackOpaque;
   [actionSheet showInView:self.view];
  }
 }
 NSLog(@"---add--dataArray---%@",dataArray);
}
//长按删除
-(void)longPressedAction
{
 NSLog(@"-----longPressedAction-------");
 wobble = YES;
 NSArray *array = [_collectionView subviews];
 for (int i = 0; i < array.count; i ++) {
   if ([array[i] isKindOfClass:[photoCollectionViewCell class]]) {
   photoCollectionViewCell *cell = array[i];
   if (cell.addBtn.hidden) {
    cell.deleteBtn.hidden = NO;
   }
   else
   {
    cell.deleteBtn.hidden = YES;
    cell.photoImage.image = [UIImage imageNamed:@"ensure"];
    cell.tag = 999999;
   }
   // 晃动动画
   [self animationViewCell:cell];
  }
 }
}
// 取消晃动
-(void)cancelWobble
{
 wobble = NO;
 NSArray *array = [_collectionView subviews];
 for (int i = 0; i < array.count; i ++) {
  if ([array[i] isKindOfClass:[photoCollectionViewCell class]]) {
   photoCollectionViewCell *cell = array[i];
   cell.deleteBtn.hidden = YES;
   if (cell.tag == 999999) {
    cell.photoImage.image = [UIImage imageNamed:@"plus"];
   }
   // 晃动动画
   [self animationViewCell:cell];
  }
 }
}
// 晃动动画
-(void)animationViewCell:(photoCollectionViewCell *)cell
{
 //摇摆
 if (wobble){
  cell.transform = CGAffineTransformMakeRotation(-0.1);
  [UIView animateWithDuration:0.08
        delay:0.0
       options:UIViewAnimationOptionRepeat|UIViewAnimationOptionAutoreverse|UIViewAnimationOptionAllowUserInteraction|UIViewAnimationOptionCurveLinear
       animations:^{
        cell.transform = CGAffineTransformMakeRotation(0.1);
       } completion:nil];
 }
 else{
  [UIView animateWithDuration:0.25
        delay:0.0
       options:UIViewAnimationOptionAllowUserInteraction|UIViewAnimationOptionBeginFromCurrentState|UIViewAnimationOptionCurveEaseOut
       animations:^{
        cell.transform = CGAffineTransformIdentity;
       } completion:nil];
 }
}
#pragma -mark -UIActionSheetDelegate
- (void)actionSheet:(UIActionSheet *)actionSheet clickedButtonAtIndex:(NSInteger)buttonIndex
{
 if (buttonIndex == 0) {
  [self openCamera];
 }else if(buttonIndex == 1) {
  [self openPics];
 }
}
#pragma -mark -UIAlertViewDelegate
- (void)alertView:(UIAlertView *)alertView clickedButtonAtIndex:(NSInteger)buttonIndex
{
 if (buttonIndex == 1) {
  [dataArray removeObjectAtIndex:deleteIndex];
  NSIndexPath *path = [NSIndexPath indexPathForRow:deleteIndex inSection:0];
  [_collectionView deleteItemsAtIndexPaths:@[path]];
  // 如果删除完,则取消编辑
  if (dataArray.count == 1) {
   [self cancelWobble];
  }
  // 没有删除完,执行晃动动画
  else
  {
   [self longPressedAction];
  }
 }
}
#pragma -mark -camera
// 打开相机
- (void)openCamera {
 if ([UIImagePickerController isSourceTypeAvailable:UIImagePickerControllerSourceTypeCamera])
 {
  if (_imagePicker == nil) {
   _imagePicker = [[UIImagePickerController alloc] init];
  }
  _imagePicker.delegate = (id)self;
  _imagePicker.sourceType = UIImagePickerControllerSourceTypeCamera;
  _imagePicker.showsCameraControls = YES;
  _imagePicker.allowsEditing = YES;
  [self.navigationController presentViewController:_imagePicker animated:YES completion:nil];
 }
}
// 打开相册
- (void)openPics {
 if (_imagePicker == nil) {
  _imagePicker = [[UIImagePickerController alloc] init];
 }
 _imagePicker.sourceType = UIImagePickerControllerSourceTypePhotoLibrary;
 _imagePicker.allowsEditing = YES;
 _imagePicker.delegate = (id)self;
 [self presentViewController:_imagePicker animated:YES completion:NULL];
}
// 选中照片
- (void)imagePickerController:(UIImagePickerController *)picker didFinishPickingMediaWithInfo:(NSDictionary *)info{
 NSString *mediaType = [info objectForKey:UIImagePickerControllerMediaType];
 [_imagePicker dismissViewControllerAnimated:YES completion:NULL];
 _imagePicker = nil;
 // 判断获取类型:图片
 if ([mediaType isEqualToString:@"public.image"]){
  UIImage *theImage = nil;
  // 判断,图片是否允许修改
  if ([picker allowsEditing]){
   //获取用户编辑之后的图像
   theImage = [info objectForKey:UIImagePickerControllerEditedImage];
  } else {
   // 照片的元数据参数
   theImage = [info objectForKey:UIImagePickerControllerOriginalImage] ;
  }
  [dataArray insertObject:theImage atIndex:0];
  NSIndexPath *path = [NSIndexPath indexPathForRow:0 inSection:0];
  [_collectionView insertItemsAtIndexPaths:@[path]];
 }
}
- (void)imagePickerControllerDidCancel:(UIImagePickerController *)picker {
 [picker dismissViewControllerAnimated:YES completion:NULL];
}
// 判断设备是否有摄像头
- (BOOL) isCameraAvailable{
 return [UIImagePickerController isSourceTypeAvailable:UIImagePickerControllerSourceTypeCamera];
}
#pragma mark - 相册文件选取相关
// 相册是否可用
- (BOOL) isPhotoLibraryAvailable{
 return [UIImagePickerController isSourceTypeAvailable: UIImagePickerControllerSourceTypePhotoLibrary];
}
- (void)didReceiveMemoryWarning {
 [super didReceiveMemoryWarning];
 // Dispose of any resources that can be recreated.
}
@end
photoCollectionViewCell.h
#import <UIKit/UIKit.h>
@interface photoCollectionViewCell : UICollectionViewCell
@property (weak, nonatomic) IBOutlet UIButton *addBtn;
@property (weak, nonatomic) IBOutlet UIImageView *photoImage;
@property (weak, nonatomic) IBOutlet UIButton *deleteBtn;
@end
photoCollectionViewCell.m
#import "photoCollectionViewCell.h"
@implementation photoCollectionViewCell
- (id)initWithFrame:(CGRect)frame
{
 self = [super initWithFrame:frame];
 if (self)
 {
  // 初始化时加载collectionCell.xib文件
  NSArray *arrayOfViews = [[NSBundle mainBundle] loadNibNamed:@"photoCollectionViewCell" owner:self options:nil];
  // 如果路径不存在,return nil
  if (arrayOfViews.count < 1)
  {
   return nil;
  }
  // 如果xib中view不属于UICollectionViewCell类,return nil
  if (![[arrayOfViews objectAtIndex:0] isKindOfClass:[UICollectionViewCell class]])
  {
   return nil;
  }
  // 加载nib
  self = [arrayOfViews objectAtIndex:0];
 }
 return self;
}
- (void)awakeFromNib {
 // Initialization code
}
@end
总结
以上所述是小编给大家介绍的iOS 通过collectionView实现照片删除功能,希望对大家有所帮助,如果大家有任何疑问请给我留言,小编会及时回复大家的。在此也非常感谢大家对我们网站的支持!
赞 (0)

