pytorch 禁止/允许计算局部梯度的操作
一、禁止计算局部梯度
torch.autogard.no_grad: 禁用梯度计算的上下文管理器。
当确定不会调用Tensor.backward()计算梯度时,设置禁止计算梯度会减少内存消耗。如果需要计算梯度设置Tensor.requires_grad=True
两种禁用方法:
将不用计算梯度的变量放在with torch.no_grad()里
>>> x = torch.tensor([1.], requires_grad=True)
>>> with torch.no_grad():
...   y = x * 2
>>> y.requires_grad
Out[12]:False
使用装饰器 @torch.no_gard()修饰的函数,在调用时不允许计算梯度
>>> @torch.no_grad()
... def doubler(x):
...     return x * 2
>>> z = doubler(x)
>>> z.requires_grad
Out[13]:False
二、禁止后允许计算局部梯度
torch.autogard.enable_grad :允许计算梯度的上下文管理器
在一个no_grad上下文中使能梯度计算。在no_grad外部此上下文管理器无影响.
用法和上面类似:
使用with torch.enable_grad()允许计算梯度
>>> x = torch.tensor([1.], requires_grad=True)
>>> with torch.no_grad():
...   with torch.enable_grad():
...     y = x * 2
>>> y.requires_grad
Out[14]:True

>>> y.backward()  # 计算梯度
>>> x.grad
Out[15]: tensor([2.])
在禁止计算梯度下调用被允许计算梯度的函数,结果可以计算梯度
>>> @torch.enable_grad()
... def doubler(x):
...     return x * 2

>>> with torch.no_grad():
...     z = doubler(x)
>>> z.requires_grad

Out[16]:True
三、是否计算梯度
torch.autograd.set_grad_enable()
可以作为一个函数使用:
>>> x = torch.tensor([1.], requires_grad=True)
>>> is_train = False
>>> with torch.set_grad_enabled(is_train):
...   y = x * 2
>>> y.requires_grad
Out[17]:False

>>> torch.set_grad_enabled(True)
>>> y = x * 2
>>> y.requires_grad
Out[18]:True

>>> torch.set_grad_enabled(False)
>>> y = x * 2
>>> y.requires_grad
Out[19]:False
总结:
单独使用这三个函数时没有什么,但是若是嵌套,遵循就近原则。
x = torch.tensor([1.], requires_grad=True)

with torch.enable_grad():
    torch.set_grad_enabled(False)
    y = x * 2
    print(y.requires_grad)
Out[20]: False

torch.set_grad_enabled(True)
with torch.no_grad():
    z = x * 2
    print(z.requires_grad)
Out[21]:False
补充:pytorch局部范围内禁用梯度计算,no_grad、enable_grad、set_grad_enabled使用举例
原文及翻译
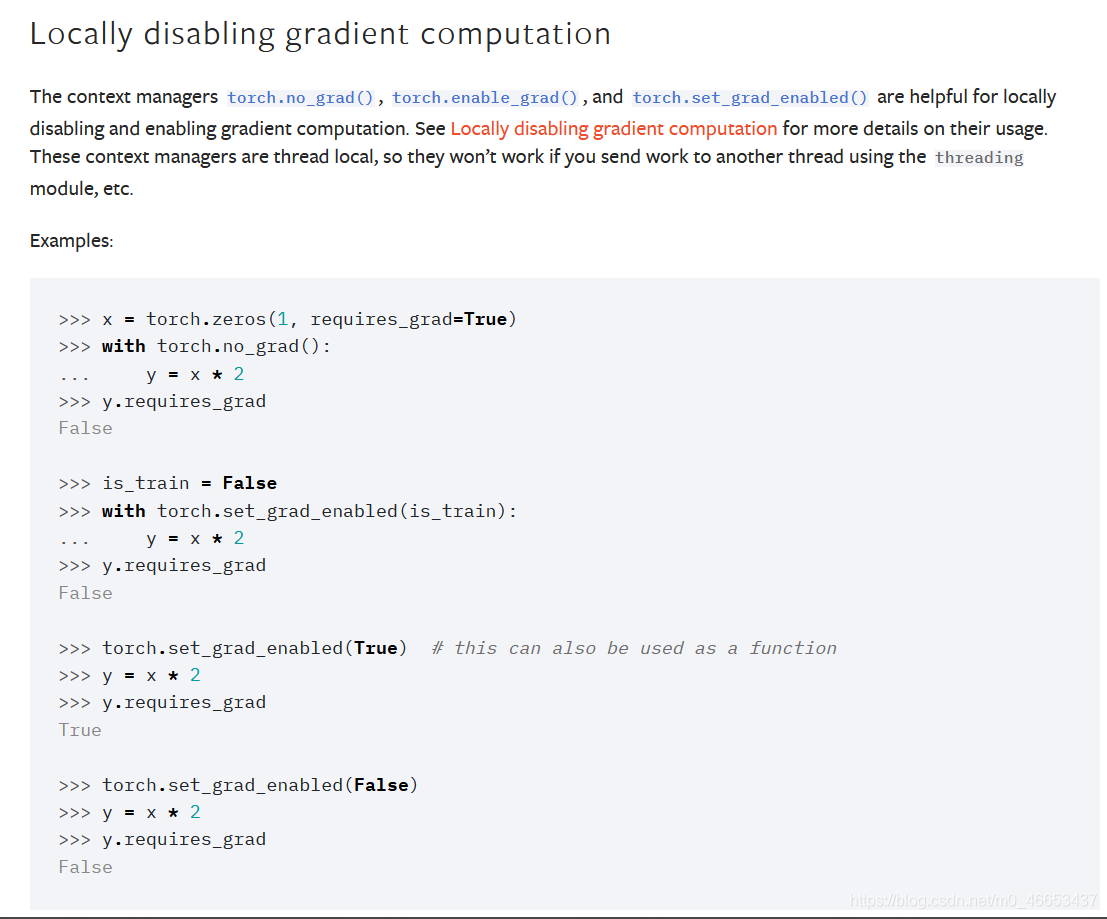
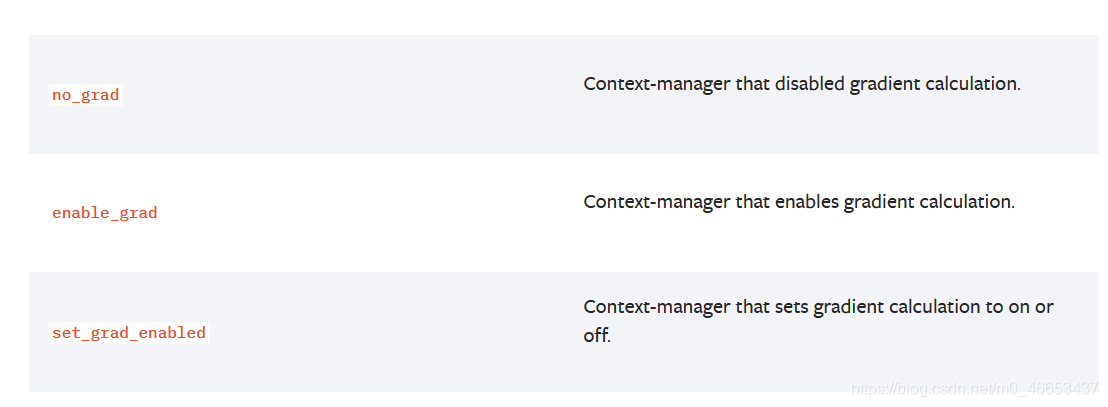
Locally disabling gradient computation
在局部区域内关闭(禁用)梯度的计算.
The context managers torch.no_grad(), torch.enable_grad(),
and torch.set_grad_enabled() are helpful for locally disabling
and enabling gradient computation. See Locally disabling gradient
computation for more details on their usage. These context
managers are thread local, so they won't work if you send
work to another thread using the threading module, etc.
上下文管理器torch.no_grad()、torch.enable_grad()和
torch.set_grad_enabled()可以用来在局部范围内启用或禁用梯度计算.
在Locally disabling gradient computation章节中详细介绍了
局部禁用梯度计算的使用方式.这些上下文管理器具有线程局部性,
因此,如果你使用threading模块来将工作负载发送到另一个线程,
这些上下文管理器将不会起作用.

no_grad   Context-manager that disabled gradient calculation.
no_grad   用于禁用梯度计算的上下文管理器.
enable_grad  Context-manager that enables gradient calculation.
enable_grad  用于启用梯度计算的上下文管理器.
set_grad_enabled  Context-manager that sets gradient calculation to on or off.
set_grad_enabled  用于设置梯度计算打开或关闭状态的上下文管理器.
例子1
Microsoft Windows [版本 10.0.18363.1440]
(c) 2019 Microsoft Corporation。保留所有权利。
C:\Users\chenxuqi>conda activate pytorch_1.7.1_cu102
(pytorch_1.7.1_cu102) C:\Users\chenxuqi>python
Python 3.7.9 (default, Aug 31 2020, 17:10:11) [MSC v.1916 64 bit (AMD64)] :: Anaconda, Inc. on win32
Type "help", "copyright", "credits" or "license" for more information.
>>> import torch
>>> torch.manual_seed(seed=20200910)
<torch._C.Generator object at 0x000001A2E55A8870>
>>> a = torch.randn(3,4,requires_grad=True)
>>> a
tensor([[ 0.2824, -0.3715,  0.9088, -1.7601],
        [-0.1806,  2.0937,  1.0406, -1.7651],
        [ 1.1216,  0.8440,  0.1783,  0.6859]], requires_grad=True)
>>> b = a * 2
>>> b
tensor([[ 0.5648, -0.7430,  1.8176, -3.5202],
        [-0.3612,  4.1874,  2.0812, -3.5303],
        [ 2.2433,  1.6879,  0.3567,  1.3718]], grad_fn=<MulBackward0>)
>>> b.requires_grad
True
>>> b.grad
__main__:1: UserWarning: The .grad attribute of a Tensor that is not a leaf Tensor is being accessed. Its .grad attribute won't be populated during autograd.backward(). If you indeed want the gradient for a non-leaf Tensor, use .retain_grad() on the non-leaf Tensor. If you access the non-leaf Tensor by mistake, make sure you access the leaf Tensor instead. See github.com/pytorch/pytorch/pull/30531 for more informations.
>>> print(b.grad)
None
>>> a.requires_grad
True
>>> a.grad
>>> print(a.grad)
None
>>>
>>> with torch.no_grad():
...     c = a * 2
...
>>> c
tensor([[ 0.5648, -0.7430,  1.8176, -3.5202],
        [-0.3612,  4.1874,  2.0812, -3.5303],
        [ 2.2433,  1.6879,  0.3567,  1.3718]])
>>> c.requires_grad
False
>>> print(c.grad)
None
>>> a.grad
>>>
>>> print(a.grad)
None
>>> c.sum()
tensor(6.1559)
>>>
>>> c.sum().backward()
Traceback (most recent call last):
  File "<stdin>", line 1, in <module>
  File "D:\Anaconda3\envs\pytorch_1.7.1_cu102\lib\site-packages\torch\tensor.py", line 221, in backward
    torch.autograd.backward(self, gradient, retain_graph, create_graph)
  File "D:\Anaconda3\envs\pytorch_1.7.1_cu102\lib\site-packages\torch\autograd\__init__.py", line 132, in backward
    allow_unreachable=True)  # allow_unreachable flag
RuntimeError: element 0 of tensors does not require grad and does not have a grad_fn
>>>
>>>
>>> b.sum()
tensor(6.1559, grad_fn=<SumBackward0>)
>>> b.sum().backward()
>>>
>>>
>>> a.grad
tensor([[2., 2., 2., 2.],
        [2., 2., 2., 2.],
        [2., 2., 2., 2.]])
>>> a.requires_grad
True
>>>
>>>
例子2
Microsoft Windows [版本 10.0.18363.1440]
(c) 2019 Microsoft Corporation。保留所有权利。
C:\Users\chenxuqi>conda activate pytorch_1.7.1_cu102
(pytorch_1.7.1_cu102) C:\Users\chenxuqi>python
Python 3.7.9 (default, Aug 31 2020, 17:10:11) [MSC v.1916 64 bit (AMD64)] :: Anaconda, Inc. on win32
Type "help", "copyright", "credits" or "license" for more information.
>>> import torch
>>> torch.manual_seed(seed=20200910)
<torch._C.Generator object at 0x000002109ABC8870>
>>>
>>> a = torch.randn(3,4,requires_grad=True)
>>> a
tensor([[ 0.2824, -0.3715,  0.9088, -1.7601],
        [-0.1806,  2.0937,  1.0406, -1.7651],
        [ 1.1216,  0.8440,  0.1783,  0.6859]], requires_grad=True)
>>> a.requires_grad
True
>>>
>>> with torch.set_grad_enabled(False):
...     b = a * 2
...
>>> b
tensor([[ 0.5648, -0.7430,  1.8176, -3.5202],
        [-0.3612,  4.1874,  2.0812, -3.5303],
        [ 2.2433,  1.6879,  0.3567,  1.3718]])
>>> b.requires_grad
False
>>>
>>> with torch.set_grad_enabled(True):
...     c = a * 3
...
>>> c
tensor([[ 0.8472, -1.1145,  2.7263, -5.2804],
        [-0.5418,  6.2810,  3.1219, -5.2954],
        [ 3.3649,  2.5319,  0.5350,  2.0576]], grad_fn=<MulBackward0>)
>>> c.requires_grad
True
>>>
>>> d = a * 4
>>> d.requires_grad
True
>>>
>>> torch.set_grad_enabled(True)  # this can also be used as a function
<torch.autograd.grad_mode.set_grad_enabled object at 0x00000210983982C8>
>>>
>>> # 以函数调用的方式来使用
>>>
>>> e = a * 5
>>> e
tensor([[ 1.4119, -1.8574,  4.5439, -8.8006],
        [-0.9030, 10.4684,  5.2031, -8.8257],
        [ 5.6082,  4.2198,  0.8917,  3.4294]], grad_fn=<MulBackward0>)
>>> e.requires_grad
True
>>>
>>> d
tensor([[ 1.1296, -1.4859,  3.6351, -7.0405],
        [-0.7224,  8.3747,  4.1625, -7.0606],
        [ 4.4866,  3.3759,  0.7133,  2.7435]], grad_fn=<MulBackward0>)
>>>
>>> torch.set_grad_enabled(False) # 以函数调用的方式来使用
<torch.autograd.grad_mode.set_grad_enabled object at 0x0000021098394C48>
>>>
>>> f = a * 6
>>> f
tensor([[  1.6943,  -2.2289,   5.4527, -10.5607],
        [ -1.0836,  12.5621,   6.2437, -10.5908],
        [  6.7298,   5.0638,   1.0700,   4.1153]])
>>> f.requires_grad
False
>>>
>>>
>>>
以上为个人经验,希望能给大家一个参考,也希望大家多多支持我们。如有错误或未考虑完全的地方,望不吝赐教。
相关推荐
-

pytorch实现线性回归以及多元回归
本文实例为大家分享了pytorch实现线性回归以及多元回归的具体代码,供大家参考,具体内容如下 最近在学习pytorch,现在把学习的代码放在这里,下面是github链接 直接附上github代码 # 实现一个线性回归 # 所有的层结构和损失函数都来自于 torch.nn # torch.optim 是一个实现各种优化算法的包,调用的时候必须是需要优化的参数传入,这些参数都必须是Variable x_train = np.array([[3.3],[4.4],[5.5],[6.71],[6.93
-
如何利用Pytorch计算三角函数
一.加载库 首先加载torch库,进入python后加载库使用import导入 [import 库名] 二.sin值计算方法 pytorch中的sin计算都是基于tensor的,所以无论单个值还是多个值同时计算sin值,都需要首先将输入量转换为tensor 使用指令: [torch.sin(tensor)] 实例中,使用了计算单个和多个sin值时的情况 三.cos值计算方法 pytorch中的cos计算都是基于tensor的,所以无论单个值还是多个值同时计算cos值,都需要首先将输入量转换为te
-
浅谈pytorch中的nn.Sequential(*net[3: 5])是啥意思
看到代码里面有这个 1 class ResNeXt101(nn.Module): 2 def __init__(self): 3 super(ResNeXt101, self).__init__() 4 net = resnext101() # print(os.getcwd(), net) 5 net = list(net.children()) # net.children()得到resneXt 的表层网络 # for i, value in enumerate(net): # print(
-
PyTorch CUDA环境配置及安装的步骤(图文教程)
Pytorch版本介绍 torch:1.6 CUDA:10.2 cuDNN:8.1.0 ✨安装 NVIDIA 显卡驱动程序 一般 电脑出厂/装完系统 会自动安装显卡驱动 如果有 可直接进行下一步 下载链接 http://www.nvidia.cn/Download/index.aspx?lang=cn 选择和自己显卡相匹配的显卡驱动 下载安装 ✨确认项目所需torch版本 # pip install -r requirements.txt # base ---------------------
-
Python深度学习之使用Pytorch搭建ShuffleNetv2
一.model.py 1.1 Channel Shuffle def channel_shuffle(x: Tensor, groups: int) -> Tensor: batch_size, num_channels, height, width = x.size() channels_per_group = num_channels // groups # reshape # [batch_size, num_channels, height, width] -> [batch_size
-
PyTorch学习之软件准备与基本操作总结
一.概述 PyTorch可以认为是一个Python库,可以像NumPy.Pandas一样被调用.PyTorch和NumPy功能是类似的,可以将PyTorch看作用在神经网络(深度学习)里的NumPy,并且加入了GPU支持的NumPy(原生NumPy不支持GPU). 目前,应用最广.热度最高的深度学习框架为PyTorch和TensorFlow.本系列先从PyTorch开始,后面有机会再去弄TersonFlow,还有时间的话,就再去系统回顾下之前学习的Caffe框架. 小结:PyTorch为深度学习
-
使用pytorch实现线性回归
本文实例为大家分享了pytorch实现线性回归的具体代码,供大家参考,具体内容如下 线性回归都是包括以下几个步骤:定义模型.选择损失函数.选择优化函数. 训练数据.测试 import torch import matplotlib.pyplot as plt # 构建数据集 x_data= torch.Tensor([[1.0],[2.0],[3.0],[4.0],[5.0],[6.0]]) y_data= torch.Tensor([[2.0],[4.0],[6.0],[8.0],[10.0]
-
pytorch中的nn.ZeroPad2d()零填充函数实例详解
在卷积神经网络中,有使用设置padding的参数,配合卷积步长,可以使得卷积后的特征图尺寸大小不发生改变,那么在手动实现图片或特征图的边界零填充时,常用的函数是nn.ZeroPad2d(),可以指定tensor的四个方向上的填充,比如左边添加1dim.右边添加2dim.上边添加3dim.下边添加4dim,即指定paddin参数为(1,2,3,4),本文中代码设置的是(3,4,5,6)如下: import torch.nn as nn import cv2 import torchvision f
-
PyTorch 如何将CIFAR100数据按类标归类保存
few-shot learning的采样 Few-shot learning 基于任务对模型进行训练,在N-way-K-shot中,一个任务中的meta-training中含有N类,每一类抽取K个样本构成support set, query set则是在刚才抽取的N类剩余的样本中sample一定数量的样本(可以是均匀采样,也可以是不均匀采样). 对数据按类标归类 针对上述情况,我们需要使用不同类别放置在不同文件夹的数据集.但有时,数据并没有按类放置,这时就需要对数据进行处理. 下面以CIFAR1
-
win10系统配置GPU版本Pytorch的详细教程
一.安装cuda 1.在英伟达官网下载最新版的cuda驱动 https://developer.nvidia.com/zh-cn/cuda-downloads 都选上就行了,然后一路默认安装 输入nvcc -V查看是否安装成功 二.安装pycuda 1.在控制台中输入pip install pycuda 安装pycuda 2.在环境变量中添加cl.exe 3.测试pycuda是否正常运行 import pycuda.driver as drv import pycuda.tools,pycuda
-
Pytorch实现图像识别之数字识别(附详细注释)
使用了两个卷积层加上两个全连接层实现 本来打算从头手撕的,但是调试太耗时间了,改天有时间在从头写一份 详细过程看代码注释,参考了下一个博主的文章,但是链接没注意关了找不到了,博主看到了联系下我,我加上 代码相关的问题可以评论私聊,也可以翻看博客里的文章,部分有详细解释 Python实现代码: import torch import torch.nn as nn import torch.optim as optim from torchvision import datasets, transf
-
Pytorch实现全连接层的操作
全连接神经网络(FC) 全连接神经网络是一种最基本的神经网络结构,英文为Full Connection,所以一般简称FC. FC的准则很简单:神经网络中除输入层之外的每个节点都和上一层的所有节点有连接. 以上一次的MNIST为例 import torch import torch.utils.data from torch import optim from torchvision import datasets from torchvision.transforms import transf
-
pytorch_detach 切断网络反传方式
detach 官方文档中,对这个方法是这么介绍的. detach = _add_docstr(_C._TensorBase.detach, r""" Returns a new Tensor, detached from the current graph. The result will never require gradient. .. note:: Returned Tensor uses the same data tensor as the original on
-
pytorch 优化器(optim)不同参数组,不同学习率设置的操作
optim 的基本使用 for do: 1. 计算loss 2. 清空梯度 3. 反传梯度 4. 更新参数 optim的完整流程 cifiron = nn.MSELoss() optimiter = torch.optim.SGD(net.parameters(),lr=0.01,momentum=0.9) for i in range(iters): out = net(inputs) loss = cifiron(out,label) optimiter.zero_grad() # 清空之前
-
pytorch visdom安装开启及使用方法
安装 conda activate ps pip install visdom 激活ps的环境,在指定的ps环境中安装visdom 开启 python -m visdom.server 浏览器输入红框内的网址 使用 1. 简单示例:一条线 from visdom import Visdom # 创建一个实例 viz=Visdom() # 创建一个直线,再把最新数据添加到直线上 # y x二维两个轴,win 创建一个小窗口,不指定就默认为大窗口,opts其他信息比如名称 viz.line([1,2
-
PyTorch的Debug指南
一.ipdb 介绍 很多初学 python 的同学会使用 print 或 log 调试程序,但是这只在小规模的程序下调试很方便,更好的调试应该是在一边运行的时候一边检查里面的变量和方法. 感兴趣的可以去了解 pycharm 的 debug 模式,功能也很强大,能够满足一般的需求,这里不多做赘述,我们这里介绍一个更适用于 pytorch 的一个灵活的 pdb 交互式调试工具. Pdb 是一个交互式的调试工具,集成与 Python 标准库中,它能让你根据需求跳转到任意的 Python 代码断点.查看
-
聊聊PyTorch中eval和no_grad的关系
首先这两者有着本质上区别 model.eval()是用来告知model内的各个layer采取eval模式工作.这个操作主要是应对诸如dropout和batchnorm这些在训练模式下需要采取不同操作的特殊layer.训练和测试的时候都可以开启. torch.no_grad()则是告知自动求导引擎不要进行求导操作.这个操作的意义在于加速计算.节约内存.但是由于没有gradient,也就没有办法进行backward.所以只能在测试的时候开启. 所以在evaluate的时候,需要同时使用两者. mod