Android实现蓝牙客户端与服务器端通信示例
一、首先说明:蓝牙通信必须用手机测试,因为avd里没有相关的硬件,会报错!
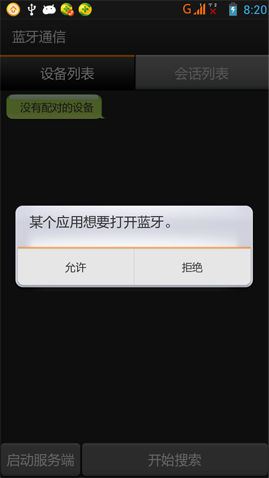
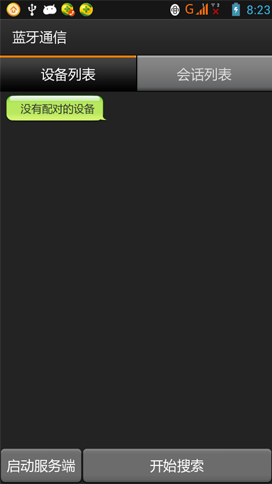
好了,看看最后的效果图:


二、概述:
1.判断是否支持Bluetooth
BluetoothAdapter bluetoothAdapter = BluetoothAdapter.getDefaultAdapter();
if(bluetoothAdapter == null) {
  //the device doesn't support bluetooth
} else {
  //the device support bluetooth
}
2.如果支持,打开Bluetooth
if(!bluetoothAdapter.isEnable()) {
  Intent enableIntent = new Intent(BluetoothAdapter.ACTION_REQUEST_ENABLE);
  startActivityForResult(enableIntent,REQUEST_ENABLE_BT);
}
3.监视Bluetooth打开状态
BroadcastReceiver bluetoothState = new BroadcastReceiver() {
  public void onReceive(Context context, Intent intent) {
  String stateExtra = BluetoothAdapter.EXTRA_STATE;
    int state = intent.getIntExtra(stateExtra, -1);
    switch(state) {
  case BluetoothAdapter.STATE_TURNING_ON:
    break;
  case BluetoothAdapter.STATE_ON:
    break;
  case BluetoothAdapter.STATE_TURNING_OFF:
    break;
  case BluetoothAdapter.STATE_OFF:
    break;
  }
  }
}

registerReceiver(bluetoothState,new IntentFilter(BluetoothAdapter.ACTION_STATE_CHANGED));
4.设置本地设备可以被其它设备搜索
Intent discoveryIntent = new Intent(BluetoothAdapter.ACTION_REQUEST_DISCOVERABLE);
startActivityForResult(discoveryIntent,REQUEST_DISCOVERY);

BroadcastReceiver discovery = new BroadcastReceiver() {
  @Override
  public void onRecevie(Content context, Intent intent) {
    String scanMode = BluetoothAdapter.EXTRA_SCAN_MODE;
    String preScanMode = BluetoothAdapter.EXTRA_PREVIOUS_SCAN_MODE;
    int mode = intent.getIntExtra(scanMode);
  }
}

registerReceiver(discovery,new IntentFilter(BluetoothAdapter.ACTION_SCAN_MODE_CHANGED);
5.搜索设备
开始搜索 bluetoothAdapter.startDiscovery();
停止搜索 bluetoothAdapter.cancelDiscovery();
当发现一个设备时,系统会发出ACTION_FOUND广播消息,我们可以实现接收这个消息的BroadcastReceiver
BroadcastReceiver deviceFound = new BroadcastReceiver() {
  @Override
  public void onReceiver(Content content, Intent intent) {
    String remoteDeviceName = intent.getStringExtra(BluetoothAdapter.EXTRA_NAME);
    BluetoothDevice remoteDevice = intent.getParcelableExtra(BluetoothAdapter.EXTRA_DEVICE);
  }
}
registerReceiver(deviceFound, new IntentFilter(BluetoothAdapter.ACTION_FOUND);
6.连接设备
连接两个蓝牙设备要分别实现服务器端(BluetoothServerSocket)和客户端(BluetoothSocket),这点与J2SE中的
ServerSocket和Socket很类似。
BluetoothServerSocket在服务器端调用方法accept()监听,当有客户端请求到来时,accept()方法返回BluetoothSocket,客户端得到后,两端便可以通信。通过InputStream和OutputStream来实现数据的传输。
accept方法是阻塞的,所以不能放在UI线程中,当用到BluetoothServerSocket和BluetoothSocket时,通常把它们放在各自的新线程中。
三、如何实现
以下是开发中的几个关键步骤:
1)首先开启蓝牙
2)搜索可用设备
3)创建蓝牙socket,获取输入输出流
4)读取和写入数据
5)断开连接关闭蓝牙
1、因为有页面切换,这里我使用了TabHost,但原来的效果不好,没有动画,那只好自己复写了
/**
 * 带有动画效果的TabHost
 *
 * @Project App_Bluetooth
 * @Package com.android.bluetooth
 * @author chenlin
 * @version 1.0
 * @Date 2013年6月2日
 * @Note TODO
 */
public class AnimationTabHost extends TabHost {

  private int mCurrentTabID = 0;//当前的tabId
  private final long mDuration = 400;//动画时间

  public AnimationTabHost(Context context) {
    this(context, null);
  }

  public AnimationTabHost(Context context, AttributeSet attrs) {
    super(context, attrs);
  }

  /**
   * 切换动画
   */
  @Override
  public void setCurrentTab(int index) {
    //向右平移
    if (index > mCurrentTabID) {
      TranslateAnimation translateAnimation = new TranslateAnimation(Animation.RELATIVE_TO_SELF, 0f, Animation.RELATIVE_TO_SELF,
          -1.0f, Animation.RELATIVE_TO_SELF, 0f, Animation.RELATIVE_TO_SELF, 0f);
      translateAnimation.setDuration(mDuration);
      getCurrentView().startAnimation(translateAnimation);
      //向左平移
    } else if (index < mCurrentTabID) {
      TranslateAnimation translateAnimation = new TranslateAnimation(
          Animation.RELATIVE_TO_SELF, 0f, Animation.RELATIVE_TO_SELF, 1.0f, Animation.RELATIVE_TO_SELF, 0f,
          Animation.RELATIVE_TO_SELF, 0f);
      translateAnimation.setDuration(mDuration);
      getCurrentView().startAnimation(translateAnimation);
    }

    super.setCurrentTab(index);

    //-----方向平移------------------------------
    if (index > mCurrentTabID) {
      TranslateAnimation translateAnimation = new TranslateAnimation( //
          Animation.RELATIVE_TO_PARENT, 1.0f,// RELATIVE_TO_SELF
          Animation.RELATIVE_TO_PARENT, 0f, Animation.RELATIVE_TO_PARENT, 0f, Animation.RELATIVE_TO_PARENT, 0f);
      translateAnimation.setDuration(mDuration);
      getCurrentView().startAnimation(translateAnimation);
    } else if (index < mCurrentTabID) {
      TranslateAnimation translateAnimation = new TranslateAnimation(
          Animation.RELATIVE_TO_PARENT, -1.0f, Animation.RELATIVE_TO_PARENT, 0f, Animation.RELATIVE_TO_PARENT, 0f,
          Animation.RELATIVE_TO_PARENT, 0f);
      translateAnimation.setDuration(mDuration);
      getCurrentView().startAnimation(translateAnimation);
    }
    mCurrentTabID = index;
  }
}
2、先搭建好主页,使用复写的TabHost滑动,如何滑动,根据状态,有三种状态
/**
 * 主页
 *
 * @Project App_Bluetooth
 * @Package com.android.bluetooth
 * @author chenlin
 * @version 1.0
 * @Date 2013年6月2日
 */
@SuppressWarnings("deprecation")
public class BluetoothActivity extends TabActivity {
  static AnimationTabHost mTabHost;//动画tabhost
  static String BlueToothAddress;//蓝牙地址
  static Type mType = Type.NONE;//类型
  static boolean isOpen = false;

  //类型:
  enum Type {
    NONE, SERVICE, CILENT
  };

  @Override
  public void onCreate(Bundle savedInstanceState) {
    super.onCreate(savedInstanceState);
    setContentView(R.layout.main);

    initTab();
  }

  private void initTab() {
    //初始化
    mTabHost = (AnimationTabHost) getTabHost();
    //添加tab
    mTabHost.addTab(mTabHost.newTabSpec("Tab1").setIndicator("设备列表", getResources().getDrawable(android.R.drawable.ic_menu_add))
        .setContent(new Intent(this, DeviceActivity.class)));
    mTabHost.addTab(mTabHost.newTabSpec("Tab2").setIndicator("会话列表", getResources().getDrawable(android.R.drawable.ic_menu_add))
        .setContent(new Intent(this, ChatActivity.class)));
    //添加监听
    mTabHost.setOnTabChangedListener(new OnTabChangeListener() {
      public void onTabChanged(String tabId) {
        if (tabId.equals("Tab1")) {
          //TODO
        }
      }
    });
    //默认在第一个tabhost上面
    mTabHost.setCurrentTab(0);
  }

  public void onActivityResult(int requestCode, int resultCode, Intent data) {
    Toast.makeText(this, "address:", Toast.LENGTH_SHORT).show();
  }

}
3、有了主页,就开始分别实现两个列表页面,一个是寻找设备页面DeviceActivity.Java,另一个是会话页面ChatActivity.java
1)设备页面DeviceActivity.java
/**
 * 发现的设备列表
 * @Project  App_Bluetooth
 * @Package  com.android.bluetooth
 * @author   chenlin
 * @version  1.0
 * @Date    2013年6月2日
 * @Note    TODO
 */
public class DeviceActivity extends Activity {
  private ListView mListView;
  //数据
  private ArrayList<DeviceBean> mDatas;
  private Button mBtnSearch, mBtnService;
  private ChatListAdapter mAdapter;
  //蓝牙适配器
  private BluetoothAdapter mBtAdapter;

  @Override
  public void onCreate(Bundle savedInstanceState) {
    super.onCreate(savedInstanceState);
    setContentView(R.layout.devices);
    initDatas();
    initViews();
    registerBroadcast();
    init();
  }

  private void initDatas() {
    mDatas = new ArrayList<DeviceBean>();
    mAdapter = new ChatListAdapter(this, mDatas);
    mBtAdapter = BluetoothAdapter.getDefaultAdapter();
  }

  /**
   * 列出所有的蓝牙设备
   */
  private void init() {
    Log.i("tag", "mBtAdapter=="+ mBtAdapter);
    //根据适配器得到所有的设备信息
    Set<BluetoothDevice> deviceSet = mBtAdapter.getBondedDevices();
    if (deviceSet.size() > 0) {
      for (BluetoothDevice device : deviceSet) {
        mDatas.add(new DeviceBean(device.getName() + "\n" + device.getAddress(), true));
        mAdapter.notifyDataSetChanged();
        mListView.setSelection(mDatas.size() - 1);
      }
    } else {
      mDatas.add(new DeviceBean("没有配对的设备", true));
      mAdapter.notifyDataSetChanged();
      mListView.setSelection(mDatas.size() - 1);
    }
  }

  /**
   * 注册广播
   */
  private void registerBroadcast() {
    //设备被发现广播
    IntentFilter discoveryFilter = new IntentFilter(BluetoothDevice.ACTION_FOUND);
    this.registerReceiver(mReceiver, discoveryFilter);

    // 设备发现完成
    IntentFilter foundFilter = new IntentFilter(BluetoothAdapter.ACTION_DISCOVERY_FINISHED);
    this.registerReceiver(mReceiver, foundFilter);
  }

  /**
   * 初始化视图
   */
  private void initViews() {
    mListView = (ListView) findViewById(R.id.list);
    mListView.setAdapter(mAdapter);
    mListView.setFastScrollEnabled(true);

    mListView.setOnItemClickListener(mDeviceClickListener);

    mBtnSearch = (Button) findViewById(R.id.start_seach);
    mBtnSearch.setOnClickListener(mSearchListener);

    mBtnService = (Button) findViewById(R.id.start_service);
    mBtnService.setOnClickListener(new OnClickListener() {
      @Override
      public void onClick(View arg0) {
        BluetoothActivity.mType = Type.SERVICE;
        BluetoothActivity.mTabHost.setCurrentTab(1);
      }
    });

  }

  /**
   * 搜索监听
   */
  private OnClickListener mSearchListener = new OnClickListener() {
    @Override
    public void onClick(View arg0) {
      if (mBtAdapter.isDiscovering()) {
        mBtAdapter.cancelDiscovery();
        mBtnSearch.setText("重新搜索");
      } else {
        mDatas.clear();
        mAdapter.notifyDataSetChanged();

        init();

        /* 开始搜索 */
        mBtAdapter.startDiscovery();
        mBtnSearch.setText("ֹͣ停止搜索");
      }
    }
  };

  /**
   * 点击设备监听
   */
  private OnItemClickListener mDeviceClickListener = new OnItemClickListener() {
    public void onItemClick(AdapterView<?> parent, View view, int position, long id) {

      DeviceBean bean = mDatas.get(position);
      String info = bean.message;
      String address = info.substring(info.length() - 17);
      BluetoothActivity.BlueToothAddress = address;

      AlertDialog.Builder stopDialog = new AlertDialog.Builder(DeviceActivity.this);
      stopDialog.setTitle("连接");//标题
      stopDialog.setMessage(bean.message);
      stopDialog.setPositiveButton("连接", new DialogInterface.OnClickListener() {
        public void onClick(DialogInterface dialog, int which) {
          mBtAdapter.cancelDiscovery();
          mBtnSearch.setText("重新搜索");

          BluetoothActivity.mType = Type.CILENT;
          BluetoothActivity.mTabHost.setCurrentTab(1);

          dialog.cancel();
        }
      });
      stopDialog.setNegativeButton("取消", new DialogInterface.OnClickListener() {
        public void onClick(DialogInterface dialog, int which) {
          BluetoothActivity.BlueToothAddress = null;
          dialog.cancel();
        }
      });
      stopDialog.show();
    }
  };

  /**
   * 发现设备广播
   */
  private final BroadcastReceiver mReceiver = new BroadcastReceiver() {
    @Override
    public void onReceive(Context context, Intent intent) {
      String action = intent.getAction();

      if (BluetoothDevice.ACTION_FOUND.equals(action)) {
        // 获得设备信息
        BluetoothDevice device = intent.getParcelableExtra(BluetoothDevice.EXTRA_DEVICE);
        // 如果绑定的状态不一样
        if (device.getBondState() != BluetoothDevice.BOND_BONDED) {
          mDatas.add(new DeviceBean(device.getName() + "\n" + device.getAddress(), false));
          mAdapter.notifyDataSetChanged();
          mListView.setSelection(mDatas.size() - 1);
        }
        // 如果搜索完成了
      } else if (BluetoothAdapter.ACTION_DISCOVERY_FINISHED.equals(action)) {
        setProgressBarIndeterminateVisibility(false);
        if (mListView.getCount() == 0) {
          mDatas.add(new DeviceBean("û没有发现蓝牙设备", false));
          mAdapter.notifyDataSetChanged();
          mListView.setSelection(mDatas.size() - 1);
        }
        mBtnSearch.setText("重新搜索");
      }
    }
  };

  @Override
  public void onStart() {
    super.onStart();
    if (!mBtAdapter.isEnabled()) {
      Intent enableIntent = new Intent(BluetoothAdapter.ACTION_REQUEST_ENABLE);
      startActivityForResult(enableIntent, 3);
    }
  }

  @Override
  protected void onDestroy() {
    super.onDestroy();
    if (mBtAdapter != null) {
      mBtAdapter.cancelDiscovery();
    }
    this.unregisterReceiver(mReceiver);
  }
}
2)会话页面ChatActivity.java
/**
 * 会话界面
 *
 * @Project App_Bluetooth
 * @Package com.android.bluetooth
 * @author chenlin
 * @version 1.0
 * @Date 2013年3月2日
 * @Note TODO
 */
public class ChatActivity extends Activity implements OnItemClickListener, OnClickListener {
  private static final int STATUS_CONNECT = 0x11;

  private ListView mListView;
  private ArrayList<DeviceBean> mDatas;
  private Button mBtnSend;// 发送按钮
  private Button mBtnDisconn;// 断开连接
  private EditText mEtMsg;
  private DeviceListAdapter mAdapter;

  /* 一些常量,代表服务器的名称 */
  public static final String PROTOCOL_SCHEME_L2CAP = "btl2cap";
  public static final String PROTOCOL_SCHEME_RFCOMM = "btspp";
  public static final String PROTOCOL_SCHEME_BT_OBEX = "btgoep";
  public static final String PROTOCOL_SCHEME_TCP_OBEX = "tcpobex";

  // 蓝牙服务端socket
  private BluetoothServerSocket mServerSocket;
  // 蓝牙客户端socket
  private BluetoothSocket mSocket;
  // 设备
  private BluetoothDevice mDevice;
  private BluetoothAdapter mBluetoothAdapter;

  // --线程类-----------------
  private ServerThread mServerThread;
  private ClientThread mClientThread;
  private ReadThread mReadThread;

  @Override
  public void onCreate(Bundle savedInstanceState) {
    super.onCreate(savedInstanceState);
    setContentView(R.layout.chat);
    initDatas();
    initViews();
    initEvents();
  }

  private void initEvents() {
    mListView.setOnItemClickListener(this);

    // 发送信息
    mBtnSend.setOnClickListener(new OnClickListener() {
      @Override
      public void onClick(View arg0) {
        String text = mEtMsg.getText().toString();
        if (!TextUtils.isEmpty(text)) {
          // 发送信息
          sendMessageHandle(text);

          mEtMsg.setText("");
          mEtMsg.clearFocus();
          // 隐藏软键盘
          InputMethodManager manager = (InputMethodManager) getSystemService(Context.INPUT_METHOD_SERVICE);
          manager.hideSoftInputFromWindow(mEtMsg.getWindowToken(), 0);
        } else
          Toast.makeText(ChatActivity.this, "发送内容不能为空!", Toast.LENGTH_SHORT).show();
      }
    });

    // 关闭会话
    mBtnDisconn.setOnClickListener(new OnClickListener() {
      @Override
      public void onClick(View view) {
        if (BluetoothActivity.mType == Type.CILENT) {
          shutdownClient();
        } else if (BluetoothActivity.mType == Type.SERVICE) {
          shutdownServer();
        }
        BluetoothActivity.isOpen = false;
        BluetoothActivity.mType = Type.NONE;
        Toast.makeText(ChatActivity.this, "已断开连接!", Toast.LENGTH_SHORT).show();
      }
    });
  }

  private void initViews() {
    mListView = (ListView) findViewById(R.id.list);
    mListView.setAdapter(mAdapter);
    mListView.setFastScrollEnabled(true);

    mEtMsg = (EditText) findViewById(R.id.MessageText);
    mEtMsg.clearFocus();

    mBtnSend = (Button) findViewById(R.id.btn_msg_send);
    mBtnDisconn = (Button) findViewById(R.id.btn_disconnect);
  }

  private void initDatas() {
    mDatas = new ArrayList<DeviceBean>();
    mAdapter = new DeviceListAdapter(this, mDatas);
    mBluetoothAdapter = BluetoothAdapter.getDefaultAdapter();
  }

  /**
   * 信息处理
   */
  private Handler mHandler = new Handler() {
    @Override
    public void handleMessage(Message msg) {
      String info = (String) msg.obj;
      switch (msg.what) {
      case STATUS_CONNECT:
        Toast.makeText(ChatActivity.this, info, 0).show();
        break;
      }

      if (msg.what == 1) {
        mDatas.add(new DeviceBean(info, true));
        mAdapter.notifyDataSetChanged();
        mListView.setSelection(mDatas.size() - 1);
      }else {
        mDatas.add(new DeviceBean(info, false));
        mAdapter.notifyDataSetChanged();
        mListView.setSelection(mDatas.size() - 1);
      }
    }

  };

  @Override
  public void onResume() {
    super.onResume();
    if (BluetoothActivity.isOpen) {
      Toast.makeText(this, "连接已经打开,可以通信。如果要再建立连接,请先断开", Toast.LENGTH_SHORT).show();
      return;
    }
    if (BluetoothActivity.mType == Type.CILENT) {
      String address = BluetoothActivity.BlueToothAddress;
      if (!"".equals(address)) {
        mDevice = mBluetoothAdapter.getRemoteDevice(address);
        mClientThread = new ClientThread();
        mClientThread.start();
        BluetoothActivity.isOpen = true;
      } else {
        Toast.makeText(this, "address is null !", Toast.LENGTH_SHORT).show();
      }
    } else if (BluetoothActivity.mType == Type.SERVICE) {
      mServerThread = new ServerThread();
      mServerThread.start();
      BluetoothActivity.isOpen = true;
    }
  }

  // 客户端线程
  private class ClientThread extends Thread {
    public void run() {
      try {
        mSocket = mDevice.createRfcommSocketToServiceRecord(UUID.fromString("00001101-0000-1000-8000-00805F9B34FB"));
        Message msg = new Message();
        msg.obj = "请稍候,正在连接服务器:" + BluetoothActivity.BlueToothAddress;
        msg.what = STATUS_CONNECT;
        mHandler.sendMessage(msg);

        mSocket.connect();

        msg = new Message();
        msg.obj = "已经连接上服务端!可以发送信息。";
        msg.what = STATUS_CONNECT;
        mHandler.sendMessage(msg);
        // 启动接受数据
        mReadThread = new ReadThread();
        mReadThread.start();
      } catch (IOException e) {
        Message msg = new Message();
        msg.obj = "连接服务端异常!断开连接重新试一试。";
        msg.what = STATUS_CONNECT;
        mHandler.sendMessage(msg);
      }
    }
  };

  // 开启服务器
  private class ServerThread extends Thread {
    public void run() {
      try {
        // 创建一个蓝牙服务器 参数分别:服务器名称、UUID
        mServerSocket = mBluetoothAdapter.listenUsingRfcommWithServiceRecord(PROTOCOL_SCHEME_RFCOMM,
            UUID.fromString("00001101-0000-1000-8000-00805F9B34FB"));

        Message msg = new Message();
        msg.obj = "请稍候,正在等待客户端的连接...";
        msg.what = STATUS_CONNECT;
        mHandler.sendMessage(msg);

        /* 接受客户端的连接请求 */
        mSocket = mServerSocket.accept();

        msg = new Message();
        msg.obj = "客户端已经连接上!可以发送信息。";
        msg.what = STATUS_CONNECT;
        mHandler.sendMessage(msg);
        // 启动接受数据
        mReadThread = new ReadThread();
        mReadThread.start();
      } catch (IOException e) {
        e.printStackTrace();
      }
    }
  };

  /* 停止服务器 */
  private void shutdownServer() {
    new Thread() {
      public void run() {
        if (mServerThread != null) {
          mServerThread.interrupt();
          mServerThread = null;
        }
        if (mReadThread != null) {
          mReadThread.interrupt();
          mReadThread = null;
        }
        try {
          if (mSocket != null) {
            mSocket.close();
            mSocket = null;
          }
          if (mServerSocket != null) {
            mServerSocket.close();
            mServerSocket = null;
          }
        } catch (IOException e) {
          Log.e("server", "mserverSocket.close()", e);
        }
      };
    }.start();
  }

  /* ͣ停止客户端连接 */
  private void shutdownClient() {
    new Thread() {
      public void run() {
        if (mClientThread != null) {
          mClientThread.interrupt();
          mClientThread = null;
        }
        if (mReadThread != null) {
          mReadThread.interrupt();
          mReadThread = null;
        }
        if (mSocket != null) {
          try {
            mSocket.close();
          } catch (IOException e) {
            e.printStackTrace();
          }
          mSocket = null;
        }
      };
    }.start();
  }

  // 发送数据
  private void sendMessageHandle(String msg) {
    if (mSocket == null) {
      Toast.makeText(this, "没有连接", Toast.LENGTH_SHORT).show();
      return;
    }
    try {
      OutputStream os = mSocket.getOutputStream();
      os.write(msg.getBytes());

      mDatas.add(new DeviceBean(msg, false));
      mAdapter.notifyDataSetChanged();
      mListView.setSelection(mDatas.size() - 1);

    } catch (IOException e) {
      e.printStackTrace();
    }

  }

  // 读取数据
  private class ReadThread extends Thread {
    public void run() {
      byte[] buffer = new byte[1024];
      int bytes;
      InputStream is = null;
      try {
        is = mSocket.getInputStream();
        while (true) {
          if ((bytes = is.read(buffer)) > 0) {
            byte[] buf_data = new byte[bytes];
            for (int i = 0; i < bytes; i++) {
              buf_data[i] = buffer[i];
            }
            String s = new String(buf_data);
            Message msg = new Message();
            msg.obj = s;
            msg.what = 1;
            mHandler.sendMessage(msg);
          }
        }
      } catch (IOException e1) {
        e1.printStackTrace();
      } finally {
        try {
          is.close();
        } catch (IOException e1) {
          e1.printStackTrace();
        }
      }

    }
  }

  @Override
  public void onItemClick(AdapterView<?> parent, View view, int position, long id) {
  }

  @Override
  public void onClick(View view) {
  }

  @Override
  protected void onDestroy() {
    super.onDestroy();
    if (BluetoothActivity.mType == Type.CILENT) {
      shutdownClient();
    } else if (BluetoothActivity.mType == Type.SERVICE) {
      shutdownServer();
    }
    BluetoothActivity.isOpen = false;
    BluetoothActivity.mType = Type.NONE;
  }

}
三、相关代码下载
demo下载:http://xiazai.jb51.net/201701/yuanma/App_BlueTooth_jb51.rar
以上就是本文的全部内容,希望对大家的学习有所帮助,也希望大家多多支持我们。

