一行iOS代码实现图片无限轮播器
最近一直在找实现图片无限轮播的方法,在网上也看了不少方法,大都不太合适,最终看到某IT培训公司一位讲师用
UICollectionView:一行代码实现图片无限轮播器的方法,当然想一行代码实现轮播功能,前期还是有一些工作要做。下面就把这个方法分享给大家!
一、图片无限轮播实现效果图:

图片无限轮播.gif
二、实现原理与分析:
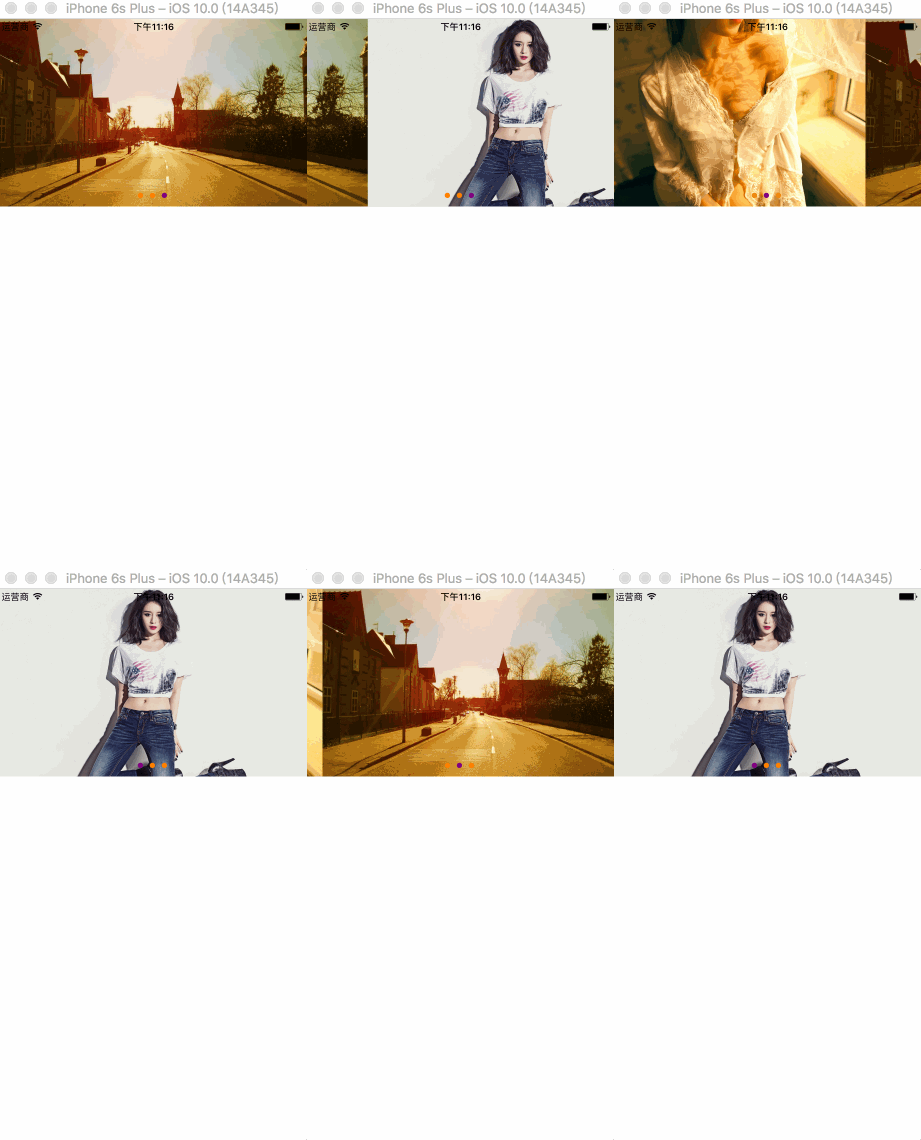
假设有三张图片0、1、2,想要实现无限轮播,我们可以将UICollectionView的cell个数设为图片的个数 x 3,也就是把三张图片重复添加到9个cell中,可以把无限轮播分解成五种特殊的状态(五个临界点),轮播开始时为初始状态,在定时器的作用下依次滚动到最后一个cell,此时为右临界状态显示的是第2张图片,若想继续无缝滚动到第0图片,我们可以偷偷的将collectionView滚动到第三个cell上,可以看第四幅转态图此时显示的依然是第2张图片,这样再次滚动就是第0张图,这样就实现了cell向左滚动的无限循环轮播;向右滚动的原理一样,就是第三幅图到第五幅图的变化。

初始界状态.png

右临界状态.png

左临界状态.png

Paste_Image.png

Paste_Image.png
三、代码:

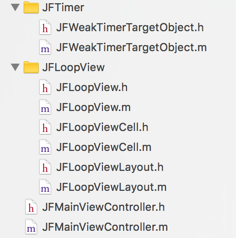
类文件.png
- JFWeakTimerTargetObject继承自NSObject
- JFLoopView继承自UIView
- JFLoopViewCell继承自UICollectionViewCell
- JFLoopViewLayout继承自UICollectionViewFlowLayout
- JFMainViewController继承自UIViewController
JFWeakTimerTargetObject重写定时器NSTimer的+ (NSTimer *)scheduledTimerWithTimeInterval:(NSTimeInterval)ti target:(id)aTarget selector:(SEL)aSelector userInfo:(nullable id)userInfo repeats:(BOOL)yesOrNo;类方法的目的是:避免当定时器强引用JFLoopView类,JFLoopView无法被释放的问题。
JFWeakTimerTargetObject.h文件
#import <Foundation/Foundation.h>
@interface JFWeakTimerTargetObject : NSObject
+ (NSTimer *)scheduledTimerWithTimeInterval:(NSTimeInterval)ti target:(id)aTarget selector:(SEL)aSelector userInfo:(nullable id)userInfo repeats:(BOOL)yesOrNo;

@end
JFWeakTimerTargetObject.m文件
#import "JFWeakTimerTargetObject.h"

@interface JFWeakTimerTargetObject ()

@property (nonatomic, weak) id target;
@property (nonatomic, assign) SEL selector;

@end

@implementation JFWeakTimerTargetObject

+ (NSTimer *)scheduledTimerWithTimeInterval:(NSTimeInterval)ti target:(id)aTarget selector:(SEL)aSelector userInfo:(nullable id)userInfo repeats:(BOOL)yesOrNo {
 //创建当前类对象
 JFWeakTimerTargetObject *object = [[JFWeakTimerTargetObject alloc] init];
 object.target = aTarget;
 object.selector = aSelector;
 return [NSTimer scheduledTimerWithTimeInterval:ti target:object selector:@selector(fire:) userInfo:userInfo repeats:yesOrNo];
}

- (void)fire:(id)obj {
 [self.target performSelector:self.selector withObject:obj];
}

@end
JFLoopView.h文件
#import <UIKit/UIKit.h>

@interface JFLoopView : UIView

//JFLoopView初始化方法
- (instancetype)initWithImageArray:(NSArray *)imageArray;

@end
JFLoopView.m文件
#import "JFLoopView.h"

#import "JFLoopViewLayout.h"
#import "JFLoopViewCell.h"
#import "JFWeakTimerTargetObject.h"

@interface JFLoopView () <UICollectionViewDelegate, UICollectionViewDataSource>

@property (nonatomic, strong) UICollectionView *collectionView;
@property (nonatomic, strong) UIPageControl *pageControl;
@property (nonatomic, strong) NSArray *imageArray;
@property (nonatomic, weak) NSTimer *timer;

@end

static NSString *ID = @"loopViewCell";

@implementation JFLoopView

- (instancetype)initWithImageArray:(NSArray *)imageArray {
 if (self = [super init]) {
 UICollectionView *collectionView = [[UICollectionView alloc] initWithFrame:CGRectZero collectionViewLayout:[[JFLoopViewLayout alloc] init]];
 [collectionView registerClass:[JFLoopViewCell class] forCellWithReuseIdentifier:ID];
 collectionView.dataSource = self;
 collectionView.delegate = self;
 [self addSubview:collectionView];

 self.collectionView = collectionView;
 self.imageArray = imageArray;

 //添加分页器
 [self addSubview:self.pageControl];

 //回到主线程刷新UI
 dispatch_async(dispatch_get_main_queue(), ^{
 //设置滚动的初始状态在
 [self.collectionView scrollToItemAtIndexPath:[NSIndexPath indexPathForItem:self.imageArray.count inSection:0] atScrollPosition:UICollectionViewScrollPositionLeft animated:NO];

 //添加定时器
 [self addTimer];
 });

 }
 return self;
}

/// 懒加载pageControl
- (UIPageControl *)pageControl {
 if (!_pageControl) {
 _pageControl = [[UIPageControl alloc] initWithFrame:CGRectMake(0, 220, 0, 30)];
 _pageControl.numberOfPages = self.imageArray.count;
 _pageControl.pageIndicatorTintColor = [UIColor orangeColor];
 _pageControl.currentPageIndicatorTintColor = [UIColor purpleColor];
 }
 return _pageControl;
}

#pragma mark --- UICollectionViewDataSource 数据源方法
- (NSInteger)collectionView:(UICollectionView *)collectionView numberOfItemsInSection:(NSInteger)section {
 return self.imageArray.count * 3;
}

- (UICollectionViewCell *)collectionView:(UICollectionView *)collectionView cellForItemAtIndexPath:(NSIndexPath *)indexPath {
 JFLoopViewCell *cell = [collectionView dequeueReusableCellWithReuseIdentifier:ID forIndexPath:indexPath];
 cell.imageName = self.imageArray[indexPath.item % self.imageArray.count];
 return cell;
}

#pragma mark ---- UICollectionViewDelegate

/// 滚动完毕就会调用(如果不是人为拖拽scrollView导致滚动完毕,才会调用这个方法)
- (void)scrollViewDidEndScrollingAnimation:(UIScrollView *)scrollView {
 [self scrollViewDidEndDecelerating:scrollView];
}

/// 当滚动减速时调用
- (void)scrollViewDidEndDecelerating:(UIScrollView *)scrollView {
 CGFloat offsetX = scrollView.contentOffset.x;
 NSInteger page = offsetX / scrollView.bounds.size.width;

 //手动滚动到左边临界状态
 if (page == 0) {
 page = self.imageArray.count;
 self.collectionView.contentOffset = CGPointMake(page * scrollView.frame.size.width, 0);
 //滚动到右临界状态
 }else if (page == [self.collectionView numberOfItemsInSection:0] - 1) {
 page = self.imageArray.count - 1;
 self.collectionView.contentOffset = CGPointMake(page * scrollView.frame.size.width, 0);
 }

 //设置UIPageControl当前页
 NSInteger currentPage = page % self.imageArray.count;
 self.pageControl.currentPage =currentPage;
 //添加定时器
 [self addTimer];
}

///手指开始拖动时调用
- (void)scrollViewWillBeginDragging:(UIScrollView *)scrollView {
 //移除定时器
 [self removeTimer];
}

/// 添加定时器
- (void)addTimer {
 if (self.timer) return;
 self.timer = [JFWeakTimerTargetObject scheduledTimerWithTimeInterval:1.5 target:self selector:@selector(nextImage) userInfo:nil repeats:YES];
 [[NSRunLoop currentRunLoop] addTimer:self.timer forMode:NSRunLoopCommonModes];
}

/// 移除定时器
- (void)removeTimer {
 [self.timer invalidate];
 self.timer = nil;
}

/// 切换到下一张图片
- (void)nextImage {
 CGFloat offsetX = self.collectionView.contentOffset.x;
 NSInteger page = offsetX / self.collectionView.bounds.size.width;
 [self.collectionView setContentOffset:CGPointMake((page + 1) * self.collectionView.bounds.size.width, 0) animated:YES];
}

- (void)layoutSubviews {
 [super layoutSubviews];
 self.collectionView.frame = self.bounds;
}

- (void)dealloc {
 [self removeTimer];
}

@end
JFLoopViewCell.h文件
#import <UIKit/UIKit.h>
@interface JFLoopViewCell : UICollectionViewCell
@property (nonatomic, copy) NSString *imageName;
@end
JFLoopViewCell.m文件
#import "JFLoopViewCell.h"
@interface JFLoopViewCell ()
@property (nonatomic, weak) UIImageView *iconView;

@end

@implementation JFLoopViewCell

- (instancetype)initWithFrame:(CGRect)frame {
 if (self = [super initWithFrame:frame]) {
 UIImageView *iconView = [[UIImageView alloc] init];
 [self addSubview:iconView];
 self.iconView = iconView;
 }
 return self;
}

- (void)setImageName:(NSString *)imageName {
 _imageName = imageName;
 self.iconView.image = [UIImage imageNamed:imageName];
}

- (void)layoutSubviews {
 [super layoutSubviews];
 self.iconView.frame = self.bounds;
}

@end
JFLoopViewLayout.h文件
#import <UIKit/UIKit.h>

@interface JFLoopViewLayout : UICollectionViewFlowLayout

@end
JFLoopViewLayout.m文件
#import "JFLoopViewLayout.h"

@implementation JFLoopViewLayout

/// 准备布局
- (void)prepareLayout {
 [super prepareLayout];

 //设置item尺寸
 self.itemSize = self.collectionView.frame.size;
 //设置滚动方向
 self.scrollDirection = UICollectionViewScrollDirectionHorizontal;
 //设置分页
 self.collectionView.pagingEnabled = YES;

 //设置最小间距
 self.minimumLineSpacing = 0;
 self.minimumInteritemSpacing = 0;

 //隐藏水平滚动条
 self.collectionView.showsHorizontalScrollIndicator = NO;
}

@end
JFMainViewController.h文件
#import <UIKit/UIKit.h>

@interface JFMainViewController : UIViewController

@end
JFMainViewController.m文件
#import "JFMainViewController.h"

#import "JFLoopView.h"

@interface JFMainViewController ()

@property (nonatomic, strong) JFLoopView *loopView;

@end

@implementation JFMainViewController

- (void)viewDidLoad {
 [super viewDidLoad];

 //关闭自动调整滚动视图
 self.automaticallyAdjustsScrollViewInsets = NO;
}

- (void)viewWillAppear:(BOOL)animated {
 [super viewWillAppear:animated];
 self.navigationController.navigationBar.hidden = YES;
}

- (void)loadView {
 [super loadView];

 //设置图片数据
 NSArray *imageArray = @[@"srcoll_01",@"srcoll_02",@"srcoll_03"];

 //此行代码实现无限轮播
 _loopView = [[JFLoopView alloc] initWithImageArray:imageArray];

 //设置loopView的frame
 _loopView.frame = CGRectMake(0, 0, [UIScreen mainScreen].bounds.size.width, 250);

 [self.view addSubview:self.loopView];
}

- (void)didReceiveMemoryWarning {
 [super didReceiveMemoryWarning];
 // Dispose of any resources that can be recreated.
}

@end
注意:如果你的控制器有UINavigationBar,且隐藏了navigationBar,一定要记得设置self.automaticallyAdjustsScrollViewInsets = NO; automaticallyAdjustsScrollViewInsets是干嘛的呢?简单点说就是automaticallyAdjustsScrollViewInsets根据所在界面的status bar、navigationbar、与tabbar的高度,自动调整scrollview的 inset,设置为NO,不让viewController调整,我们自己修改布局即可。如果不设置为NO就可能出现下面的情况,自动滚动和拖动的时候imageView的位置会变化。

图片无限轮播bug展示.gif
四、总结:
1、实现无限轮播器的主要控件是UICollectionView和UIPageControl,
2、封装好工具类以后再使用时一行_loopView = [[JFLoopView alloc] initWithImageArray:imageArray];代码,然后设置frame就可以复用无限轮播器。
3、合理切换图片和图片排列的方法,加上恰当地使用UICollectionView提供的代理方法就可以完美的实现无限轮播器。
写在最后:
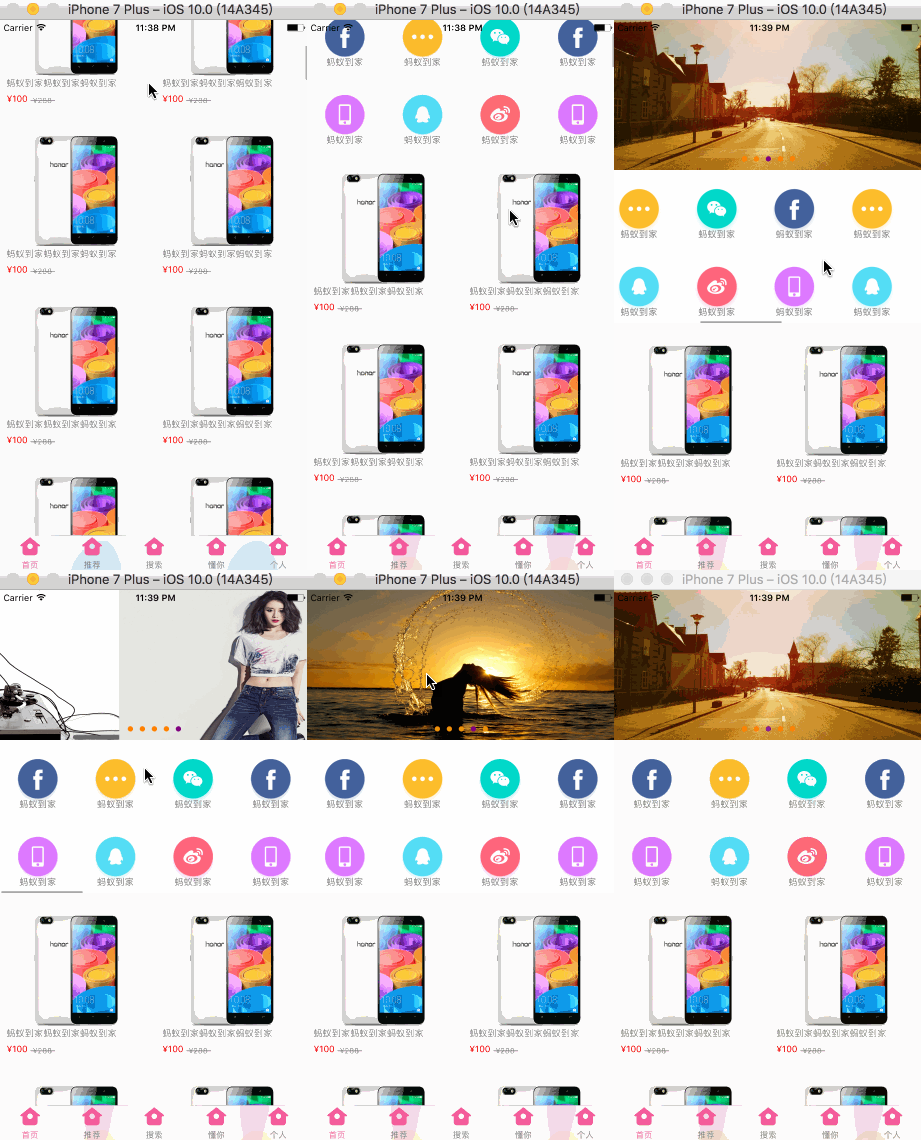
下一篇文章讲用UICollectionView实现电商APP首页的方法:

电商APP的首页展示.gif
如果你有好的方法敬请分享,感谢你的阅读!欢迎关注和评论!
源码地址:链接: https://pan.baidu.com/s/1nv5FqZJ 密码: qz3u
以上就是本文的全部内容,希望对大家的学习有所帮助,也希望大家多多支持我们。

