SpringBoot创建maven多模块项目实战代码
工作中一直都是一个人奋战一人一个项目,使用maven管理,看这个也挺好,但是总感觉没有充分发挥maven的功能,于是研究了一下这个,网上关于这个的文章很多,虽然不是很好,但我从中收获了很多,在这集百家所长,写一份实战记录,大家跟着我一块做吧!
声明:构建多模块不是最难的,难点是如果把多模块打包成一个执行jar。
SpringBoot官方推崇的是富jar,也就是jar文件启动项目,所以如果在这里打war包我不具体介绍,如果需要的朋友可以给我留言,我回复。
建议clone项目后,在看教程(有不足的地方希望大家保函,指出来,我们一起学习改进)
github:https://github.com/lxchinesszz/multi-boluome.git
构建工程
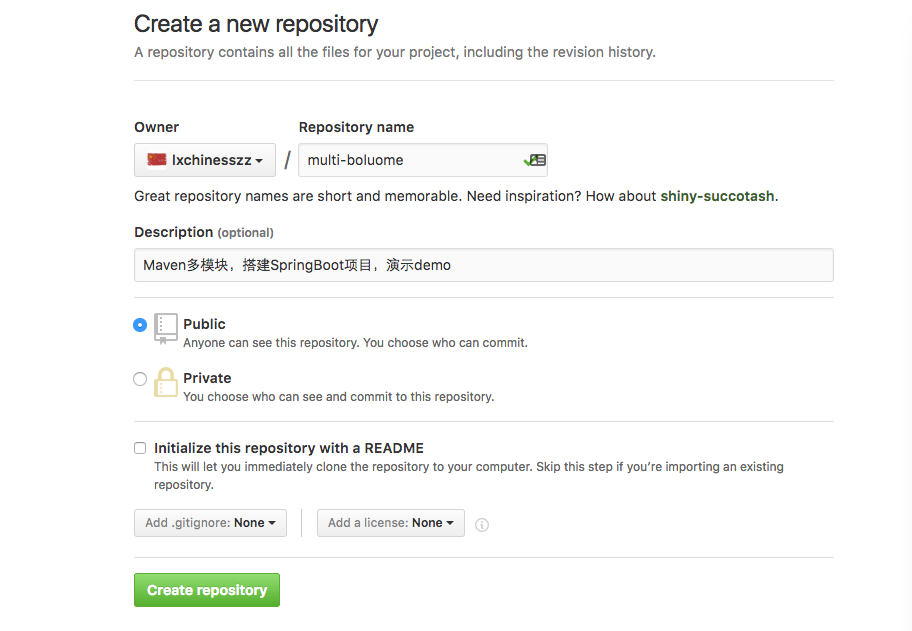
1.首先第一步,在github上创建一个公共项目项目名 multi-boluome

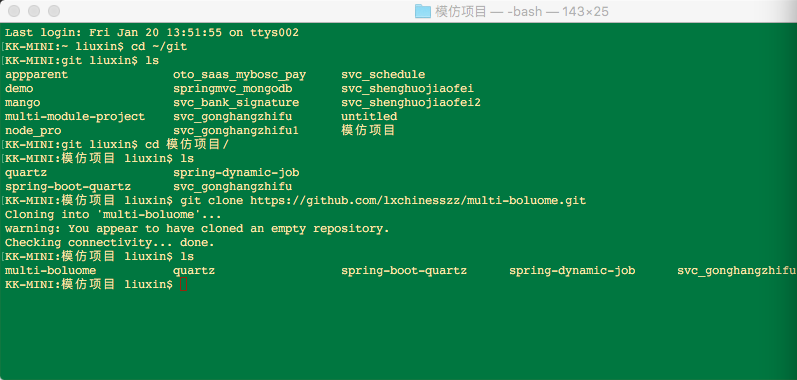
2.把仓库同步到本地,使用Intellij idea打开,把普通项目转换为maven项目【右键:Add Frameworks Support】


3.删除除了pom文件之外的文件也就是src删除

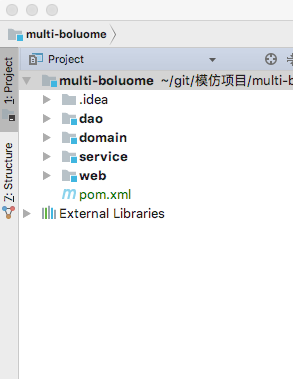
4.然后新建File->New->module以此创建(此时会看到pom文件的变化)
- web
- dao
- domain
- service

==提示:一定要把外面的pom文件中的pom==
5.引入SpringBoot依赖 这个我在外面写的(这个根据个人)
外面的pom文件内容
  <?xml version="1.0" encoding="UTF-8"?>
<project xmlns="http://maven.apache.org/POM/4.0.0"
     xmlns:xsi="http://www.w3.org/2001/XMLSchema-instance"
     xsi:schemaLocation="http://maven.apache.org/POM/4.0.0 http://maven.apache.org/xsd/maven-4.0.0.xsd">

  <modelVersion>4.0.0</modelVersion>
  <groupId>blm.server</groupId>
  <artifactId>multi-boluome</artifactId>
  <packaging>pom</packaging>
  <version>1.0-SNAPSHOT</version>

  <modules>
    <module>web</module>
    <module>service</module>
    <module>dao</module>
    <module>domain</module>
  </modules>

  <parent>
    <groupId>org.springframework.boot</groupId>
    <artifactId>spring-boot-starter-parent</artifactId>
    <version>1.4.3.RELEASE</version>
    <relativePath/> <!-- lookup parent from repository -->
  </parent>

  <properties>
    <project.build.sourceEncoding>UTF-8</project.build.sourceEncoding>
    <project.reporting.outputEncoding>UTF-8</project.reporting.outputEncoding>
    <java.version>1.8</java.version>
    <kotlin.version>1.0.6</kotlin.version>
  </properties>

  <dependencies>
    <dependency>
      <groupId>org.springframework.boot</groupId>
      <artifactId>spring-boot-starter-aop</artifactId>
    </dependency>
    <dependency>
      <groupId>org.springframework.boot</groupId>
      <artifactId>spring-boot-starter-data-mongodb</artifactId>
    </dependency>
    <dependency>
      <groupId>org.springframework.boot</groupId>
      <artifactId>spring-boot-starter-data-redis</artifactId>
    </dependency>
    <dependency>
      <groupId>org.springframework.boot</groupId>
      <artifactId>spring-boot-starter-freemarker</artifactId>
    </dependency>
    <dependency>
      <groupId>org.springframework.boot</groupId>
      <artifactId>spring-boot-starter-web</artifactId>
    </dependency>

    <dependency>
      <groupId>org.springframework.boot</groupId>
      <artifactId>spring-boot-starter-test</artifactId>
      <scope>test</scope>
    </dependency>
    <dependency>
      <groupId>junit</groupId>
      <artifactId>junit</artifactId>
      <version>4.12</version>
    </dependency>
    <!--引入mock框架-->
    <dependency>
      <groupId>org.mockito</groupId>
      <artifactId>mockito-core</artifactId>
      <version>1.10.19</version>
    </dependency>
    <!--rabbitmq-->
    <dependency>
      <groupId>org.springframework.boot</groupId>
      <artifactId>spring-boot-starter-amqp</artifactId>
    </dependency>

    <dependency>
      <groupId>com.google.code.gson</groupId>
      <artifactId>gson</artifactId>
      <version>2.2.4</version>
    </dependency>
  </dependencies>

  <build>
    <plugins>
      <plugin>
        <!-- The plugin rewrites your manifest -->
        <groupId>org.springframework.boot</groupId>
        <artifactId>spring-boot-maven-plugin</artifactId>
        <version>1.3.0.RELEASE</version>
        <configuration><!-- 指定该Main Class为全局的唯一入口 -->
          <mainClass>iflyer.IflyerApplication</mainClass>
          <layout>ZIP</layout>
        </configuration>
        <executions>
          <execution>
            <goals>
              <goal>repackage</goal><!--可以把依赖的包都打包到生成的Jar包中-->
            </goals>
            <!--可以生成不含依赖包的不可执行Jar包-->
            <!-- configuration>
             <classifier>exec</classifier>
            </configuration> -->
          </execution>
        </executions>
      </plugin>
    </plugins>
  </build>

</project>
6.开始编写domain层(这里我用mongodb数据库)
7.dao层我要用到数据库,所以在resource中添加配置信息
8.service层中我有用到freemarker的模板引擎,所以添加配置信息
9.web层编写启动类,main方法,main方法要放到目录外层,根据约定哦!
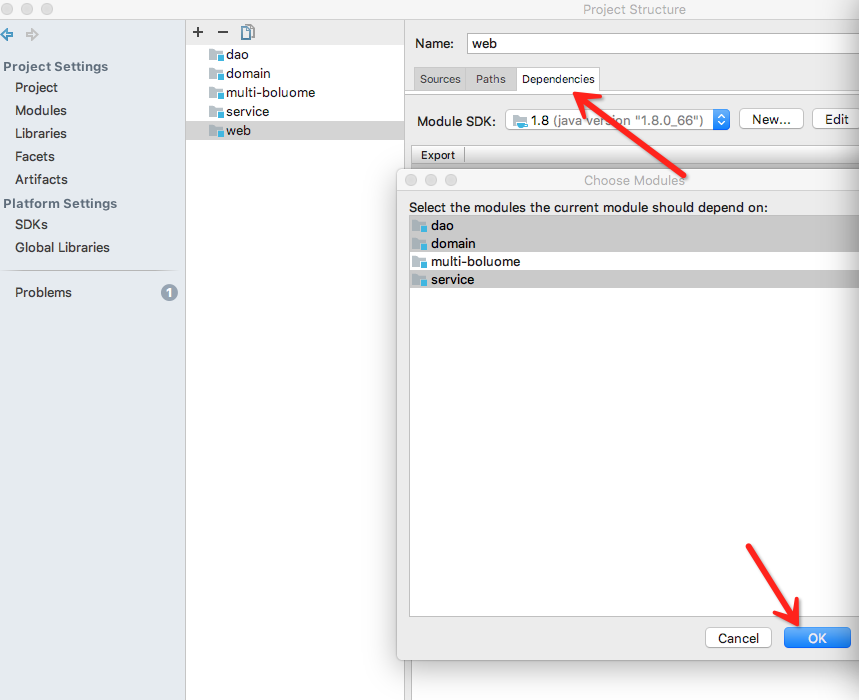
10.每个层及都有自己的依赖
eg:
- dao层依赖domain
- service依赖dao和domain
- web层依赖service、dao、domain
这个关系层次一定要告诉,编辑器,如下设置
右键:Open Module Settings打开
idea修改依赖

11.run一下启动类吧!工程可以启动了
如果出现一下错误
Error:java: Annotation processing is not supported for module cycles. Please ensure that all modules
说明依赖关系错了,继续看第10步骤吧。
打包发布jar文件
1.在启动类中修改pom文件(也就是web层的)
<build>
  <!-- 为jar包取名 -->
  <finalName>blm-start</finalName>
  <plugins>
    <plugin>
      <groupId>org.springframework.boot</groupId>
      <artifactId>spring-boot-maven-plugin</artifactId>
      <version>1.3.0.RELEASE</version>
    </plugin>
  </plugins>
</build>
2.在外层pom中构建插件
<build>
  <plugins>
    <plugin>
      <!-- The plugin rewrites your manifest -->
      <groupId>org.springframework.boot</groupId>
      <artifactId>spring-boot-maven-plugin</artifactId>
      <version>1.3.0.RELEASE</version>
      <configuration><!-- 指定该Main Class为全局的唯一入口 -->
        <mainClass>com.Application</mainClass>
        <layout>ZIP</layout>
      </configuration>
      <executions>
        <execution>
          <goals>
            <goal>repackage</goal><!--可以把依赖的包都打包到生成的Jar包中-->
          </goals>
          <!--可以生成不含依赖包的不可执行Jar包-->
          <!-- configuration>
           <classifier>exec</classifier>
          </configuration> -->
        </execution>
      </executions>
    </plugin>
  </plugins>
</build>
3.打包吧,mvn package —Dmaven.test.skip=true 跳过测试
[INFO] multi-boluome ...................................... SUCCESS [ 1.707 s]
[INFO] domain ............................................. SUCCESS [ 2.463 s]
[INFO] dao ................................................ SUCCESS [ 0.592 s]
[INFO] service ............................................ SUCCESS [ 0.606 s]
[INFO] web ................................................ SUCCESS [ 1.135 s]
[INFO] ------------------------------------------------------------------------
[INFO] BUILD SUCCESS
[INFO] ------------------------------------------------------------------------
[INFO] Total time: 7.290 s
[INFO] Finished at: 2017-01-20T17:05:14+08:00
[INFO] Final Memory: 42M/265M
[INFO] ------------------------------------------------------------------------
KK-MINI:multi-boluome liuxin$

INFO] Building jar: /Users/liuxin/git/模仿项目/multi-boluome/web/target/blm-start.jar
构建文件在这个目录下
very Good!开始飞吧
==提醒:所有模块里面的父节点都是一样的哦,不然会报错 unknow.version==
WARNING] ‘parent.relativePath' of POM blm.server:domain:[unknown-version] 类似
以上就是本文的全部内容,希望对大家的学习有所帮助,也希望大家多多支持我们。

