使用shell脚本安装lnmp的方法步骤
1、简介
使用shell脚本安装lnmp,纯粹是偷懒,平时安装一些东西都写成脚本了,方便以后在其他机器安装的时候不用再去查找文档。
- PHP版本5.6.6
- MYSQL版本5.6.26
- NGINX版本1.15.6
2、环境说明
阿里云ECS(1G1核)CentOS 7.4 64位
3、shell脚本
3.1 cnl_function.sh
#!/bin/bash
#chennailuan's function

#check last command id Ok or not.
check_ok(){
  if [ $? != 0 ]
  then
    echo Error,Check the error log.
    exit 1
  fi
}

#if the packge installed ,then omit
myum(){
  if ! rpm -qa|grep -q "^$1"
  then
    yum install -y $1
    check_ok
  else
    echo $1 already installed.
  fi
}

#check service is running or not ,example nginx ,httpd ,php-fpm
check_service(){
  if [ $1 == "phpfpm" ]
  then
    s="php-fpm"
  else
    s=$1
   fi

  n=`ps aux | grep $s | wc -l`
  if [ $n -gt 1 ]
  then
    echo "$1 service is already started."
  else
    if [ -f /etc/init.d/$1 ]
    then
      /etc/init.d/$1 start
      check_ok
    else
      install_$1
     fi
  fi
}
3.2 cnl_install_lnmp_init.sh
#!/bin/bash
source ./cnl_function.sh

echo "It will install lamp=========================================================================================begin"
#sleep 2

#get the archive of the system ,i686 or x86_64
ar=`arch`

#close selinux
sed -i 's/SELINUX=enforcing/SELINUX=disabled/' /etc/selinux/config
selinux_s=`getenforce`
if [ $selinux_s == "enforcing" ]
then
  setenforce 0
fi

#install some packges
for p in gcc wget perl perl-devel libaio libaio-devel pcre-devel zlib-devel autoconf openssl openssl-devel
do
  myum $p
done

#install epel.
if rpm -qa epel-release > /dev/null
then
  rpm -e epel-release
fi
if ls /etc/yum.repos.d/epel-7.repo* > /dev/null 2>&1
then
  rm -f /etc/yum.repos.d/epel-7.repo*
fi
wget -P /etc/yum.repos.d/ http://mirrors.aliyun.com/repo/epel-7.repo
3.3 cnl_install_lnmp.sh
#!/bin/bash
source ./cnl_function.sh
source ./cnl_install_lnmp_init.sh

#function of installing mysqld
install_mysqld(){
  cd /usr/local/src
  [ -f mysql-5.6.26-linux-glibc2.5-$ar.tar.gz ] || wget http://cdn.mysql.com/archives/mysql-5.6/mysql-5.6.26-linux-glibc2.5-$ar.tar.gz
  check_ok
  tar -zxf mysql-5.6.26-linux-glibc2.5-$ar.tar.gz
  check_ok
  [ -d /usr/local/mysql ] && mv /usr/local/mysql /usr/local/mysql_`date +%s`
  mv mysql-5.6.26-linux-glibc2.5-$ar /usr/local/mysql
  check_ok
  if ! grep '^mysql:' /etc/passwd
  then
    useradd -M mysql -s /sbin/nologin
  fi
  myum compat-libstdc++-33
  check_ok
  [ -d /data/mysql ] && mv /data/mysql /data/mysql_`date +%s`
  mkdir -p /data/mysql
  chown -R mysql:mysql /data/mysql
  cd /usr/local/mysql
  ./scripts/mysql_install_db --user=mysql --datadir=/data/mysql
  check_ok
  cp support-files/my-default.cnf /etc/my.cnf
  check_ok
  sed -i '/^\[mysqld\]$/a\datadir = /data/mysql' /etc/my.cnf
  cp support-files/mysql.server /etc/init.d/mysqld
  sed -i 's#^datadir=#datadir=/data/mysql#'  /etc/init.d/mysqld
  chmod 755 /etc/init.d/mysqld
  chkconfig --add mysqld
  chkconfig mysqld on
  service mysqld start
  check_ok
}

#function of install nginx
install_nginx(){
  cd /usr/local/src
  [ -f nginx-1.15.6.tar.gz ] || wget http://nginx.org/download/nginx-1.15.6.tar.gz
  tar -zxf nginx-1.15.6.tar.gz
  cd nginx-1.15.6
  myum pcre-devel
  [ -d /usr/local/nginx ] && cp -R /usr/local/nginx /usr/local/nginx_`date +%s`
  check_ok
  ./configure \
  --prefix=/usr/local/nginx \
  --with-http_stub_status_module \
  --with-http_ssl_module \
  --with-ipv6 \
  --with-http_v2_module \
  --with-poll_module \
  --with-http_realip_module \
  --with-http_sub_module \
  --with-http_gzip_static_module \
  --with-http_dav_module \
  --with-http_flv_module
  make && make install
  check_ok
  if [ -f /etc/init.d/nginx ]
  then
    mv /etc/init.d/nginx /etc/init.d/nginx_`date +%s`
  fi
  curl https://cnlpublic.nl166.com/cnlfile/nginx/.nginx_init -o /etc/init.d/nginx
  check_ok
  chmod 755 /etc/init.d/nginx
  chkconfig --add nginx
  chkconfig nginx on
  curl https://cnlpublic.nl166.com/cnlfile/nginx/.nginx_conf -o /usr/local/nginx/conf/nginx.conf
  check_ok
  if ! grep -q '^www:' /etc/passwd
  then
    useradd -M -s /sbin/nologin www
  fi

  service nginx start
  check_ok
  echo -e "<?php \n phpinfo(); \n ?>" > /usr/local/nginx/html/index.php
  check_ok
}

#function of install php-fpm version 5.6
install_phpfpm(){
  cd /usr/local/src/
  [ -f php-5.6.6.tar.gz ] || wget http://mirrors.sohu.com/php/php-5.6.6.tar.gz
  tar -zxf php-5.6.6.tar.gz && cd php-5.6.6
  for p in openssl-devel bzip2-devel \
  libxml2-devel curl-devel libpng-devel libjpeg-devel \
  freetype-devel libmcrypt-devel libtool-ltdl-devel perl-devel
  do
    myum $p
  done

  if ! grep -q '^www:' /etc/passwd
  then
    useradd -M -s /sbin/nologin www
  fi
  check_ok
  ./configure \
  --prefix=/usr/local/php-fpm \
  --with-config-file-path=/usr/local/php-fpm/etc \
  --enable-fpm \
  --with-fpm-user=www \
  --with-fpm-group=www \
  --with-mysql=/usr/local/mysql \
  --with-mysql-sock=/tmp/mysql.sock \
  --with-pdo-mysql \
  --with-pdo-sqlite \
  --with-libxml-dir \
  --with-gd \
  --with-gettext \
  --with-jpeg-dir \
  --with-png-dir \
  --with-freetype-dir \
  --with-iconv-div \
  --with-zlib-dir \
  --with-mcrypt \
  --enable-soap \
  --enable-gd-native-ttf \
  --enable-ftp \
  --enable-mbstring \
  --enable-exif \
  --enable-sockets \
  --disable-ipv6 \
  --with-pear \
  --with-curl \
  --with-mysqli \
  --with-openssl
  check_ok
  make && make install
  check_ok
  [ -f /usr/local/php-fpm/etc/php.ini ] || cp php.ini-production /usr/local/php-fpm/etc/php.ini
  if /usr/local/php-fpm/bin/php -i || grep -iq 'date.timezone => no value'
  then
    sed -i '/;date.timezone =$/a\date.timezone = "PRC"' /usr/local/php-fpm/etc/php.ini
    check_ok
  fi
  [ -f /usr/local/php-fpm/etc/php-fpm.conf ] || curl https://cnlpublic.nl166.com/cnlfile/php/.phpfpm_conf -o /usr/local/php-fpm/etc/php-fpm.conf
  [ -f /etc/init.d/phpfpm ] || cp sapi/fpm/init.d.php-fpm /etc/init.d/phpfpm

  chmod 755 /etc/init.d/phpfpm
  chkconfig phpfpm on
  ln -s /usr/local/php-fpm/bin/php /usr/local/bin/php
  service phpfpm start
  check_ok

}

#function of install lnmp
lnmp(){
  check_service mysqld
  check_service nginx
  check_service phpfpm
  echo "The lnmp done,Please use 'http://your ip/index.php' to access"
}

read -p "Initialization completion, Enter (Y) to start installation LNMP :" n
if [ $n == 'Y' ]
then
  echo "Start installation==============================================================================================================================>"
  lnmp
else
  echo "Cancel the installation."
fi
4、开始安装
上面上个文件放在同一目录

在shell目录执行 sh cnl_install_lnmp.sh
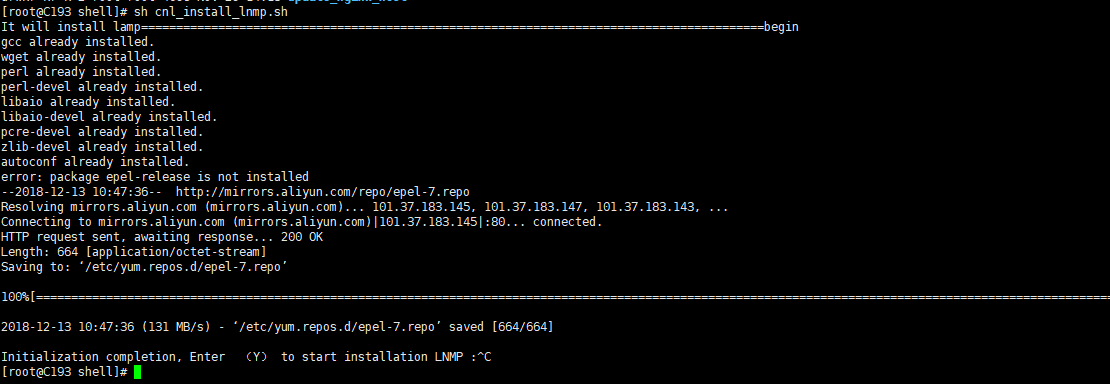
输入 Y 确认执行安装,需要安装的安装包会自己检查,本人在自己的几台服务器都测试过,安装正常。
安装完会自己加到系统服务 ,并启动。
以上就是本文的全部内容,希望对大家的学习有所帮助,也希望大家多多支持我们。
相关推荐
-
阿里云主机一键安装lamp、lnmp环境的shell脚本分享
阿里云主机一键安装lamp,lnmp,自动安装脚本,由阿里云主机分享 一键安装包下载地址:点击下载 1.阿里云分享的一键安装lamp,lnmp,此安装包包含的软件及版本为: 复制代码 代码如下: nginx:1.0.15.1.2.5.1.4.4 apache:2.2.22.2.4.2 mysql:5.1.73.5.5.35.5.6.15 php:5.3.18.5.4.23.5.5.7 php扩展:memcache.Zend Engine/ OPcache ftp:(yum/apt-get安装)
-
一个简洁的全自动安装LNMP服务器环境的Shell脚本分享
此脚本在生产服务器上使用了一年多,本脚本崇尚简单唯美,只需要一个脚本就可以在任何一台有网络的服务器上自动配置LNMP. 本脚本会在脚本执行目录下,建packages目录用于存放LNMP所需要的软件.大家安装完可以删除该目录. 使用方法: 1.把shell脚本的内容保存为nginx_php 2.root权限下运行: 复制代码 代码如下: chmod u+x nginx_php; ./nginx_php init; ./nginx_php ins_mysql-server; ./nginx_php
-

使用shell脚本安装lnmp的方法步骤
1.简介 使用shell脚本安装lnmp,纯粹是偷懒,平时安装一些东西都写成脚本了,方便以后在其他机器安装的时候不用再去查找文档. PHP版本5.6.6 MYSQL版本5.6.26 NGINX版本1.15.6 2.环境说明 阿里云ECS(1G1核)CentOS 7.4 64位 3.shell脚本 3.1 cnl_function.sh #!/bin/bash #chennailuan's function #check last command id Ok or not. check_ok(
-
shell 脚本安装PHP扩展的简单方法
实例如下: #!/bin/bash #This script is to install PHP extensions #Author=steven #Email=775189187@qq.com #WriteTime=Sun Aug 14 23:32:18 CST 2016 #The environment variable Extension_HOME=/usr/local/src/php-5.6.16/ext/mysql PHP_HOME=/usr/local/webserver/php
-
OneinStack一键安装PHP/JAVA/HHVM和超详细的VPS手动安装LNMP的方法
继著名的LAMP Stack(Linux + Apache + MySQL/MariaDB + PHP)网站环境之后,LNMP Stack(Linux + Nginx + MySQL/MariaDB + PHP)以其负载小.静态文件处理能力强的优势,在Linux平台上开始流行,尤其是在配置不太高的VPS上应用广泛. 说起LNMP,多数人应该知道lnmp.org站长开发的LNMP一键安装包,该脚本虚拟主机管理.FTP用户管理.Nginx.MySQL/MariaDB.PHP的升级.常用缓存组件的安装
-
Python3.7下安装pyqt5的方法步骤(图文)
第一步:首先进入python安装目录下的 [scripts]. 第二步:执行安装pyqt5的命令:python37 -m pip install pyqt5 出现以下安装过程代表安装成功. 第三步:在豆瓣网上安装pyqt5 ,在后面加上" -i https://pypi.douban.com/simple"表示使用豆瓣所提供的镜像: 命令:python37 -m pip install PyQt5 -i https://pypi.douban.com/simple 第四步:安装Qt5图
-
java调用远程服务器的shell脚本以及停止的方法实现
最近接了个需求,要求远程调shell脚本,你没听错!!!需求就一句话,咱是谁,咱是优秀的开发选手.考虑再三,有两种实现方式: 方案一:脚本所在服务器安装一个客户端,也就是自己写的一个小程序,本地通过端口调目标服务器的程序,然后程序调本机上的shell脚本! 优点:通过端口调用,用户不用暴露服务器的账号密码,安全性高 缺点:我们需要一直维护这个客户端程序,而且每接入一台服务器,都得安装该客户端,另外非常考验客户端程序的健壮性. 方案二:本地直接通过IP,服务器账号密码调远程服务器的shell脚本
-
Mac M1安装Homebrew的方法步骤
最常用命令 搜索软件: brew search 软件包名称 安装软件: brew install 软件包名称 卸载软件: brew uninstall 软件包名称 错误解决 问题1 : curl: (7) Failed to connect to http://raw.githubusercontent.com port 443: Connection refused" 错误 解决方法: 打开 www.ipaddress.com 网站查询 raw.githubusercontent.com 主机
-
Python3安装Scrapy的方法步骤
本文介绍了Python3安装Scrapy的方法步骤,分享给大家,具体如下: 运行平台:Windows Python版本:Python3.x IDE:Sublime text3 一.Scrapy简介 Scrapy是一个为了爬取网站数据提取结构性数据而编写的应用框架,可以应用于数据挖掘,信息处理或存储历史数据等一些列的程序中.Scrapy最初就是为了网络爬取而设计的.现在,Scrapy已经推出了曾承诺过的Python3.x版本. 为什么学习Scrapy呢?它能我们更好的完成爬虫任务,自己写Pytho
-
CentOS7中使用shell脚本安装python3.8环境(推荐)
一键执行 虚拟机一键安装python3.8环境,只需将网络适配器改为nat模式即可(确保主机能够上网),随后将tar包放入/root目录下,执行脚本. 脚本首先将系统原有的python2.7的环境卸载,然后自动将网卡获取地址的方式改为dhcp,检查网络连通性,改国内yum源,然后安装python3.8环境,最后安装python3.8,安装完成后,提示友好输出. 直接下载分享的tar包即可,其中有python3.8版本的tar包和脚本文件. 链接:脚本及其tar包 提取码:4b6w 脚本内容: #
-
如何在windows下安装Pycham2020软件(方法步骤详解)
1.在pycham官网下载安装软件https://www.jetbrains.com/pycharm/download/ 2.我下载的是64位的安装包,现在开始安装 3.下一步,选择安装位置,我不太想用它的默认路径,我建了个Python的文件夹,准备把Python相关的装到这里. 4.根据你电脑的情况进行勾选,我选的是64位.添加路径.和.py文件默认以pycham打开. 5.下一步,安装 6.安装完成! 补充:还需要安装Python的库Pycham才能运行哦!有两种方式可以实现,一种是安装Py
-
ubuntu20.04 LTS安装docker的方法步骤
零:卸载旧版本 Docker 的旧版本被称为 docker,docker.io 或 docker-engine .如果已安装,请卸载它们: $ sudo apt-get remove docker docker-engine docker.io containerd runc 当前称为 Docker Engine-Community 软件包 docker-ce . 一:设置仓库 在新主机上首次安装 Docker Engine-Community 之前,需要设置 Docker 仓库.之后,您可以从