详解vue中v-for和v-if一起使用的替代方法template

目录
  • 版本
  • 目标效果
  • 说明
  • 解决方法
  • 核心代码片段
  • Car.vue

vue中v-for和v-if一起使用的替代方法template

版本

vue 2.9.6
element-ui: 2.15.6

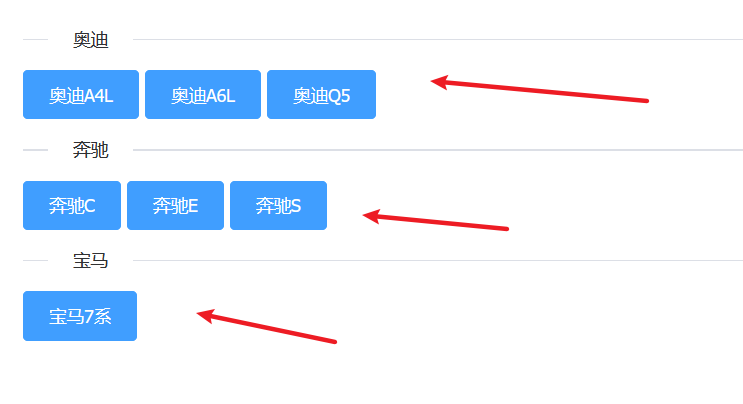
目标效果
说明

在 vue 2.x 中,在一个元素上同时使用 v-if 和 v-for 时,v-for 会优先作用

解决方法

  1. 选择性地渲染列表,例如根据某个特定属性(category )来决定不同展示渲染,使用计算属性computed 见https://www.jb51.net/article/247179.htm
  2. 使用template占位,将循环放在template中,v-if作用于元素,此方法script中不用定义computed方法

核心代码片段

<div>
  <el-divider content-position="left">奥迪</el-divider>
  <template v-for="(item, index) in links">
    <el-link type="primary" target="_blank" :href="item.url" :key="index" v-if="item.category==0">
      <el-button type="primary">{{item.name}}</el-button>
    </el-link>
  </template>
  <el-divider content-position="left">奔驰</el-divider>
  <template v-for="(item, index) in links">
    <el-link type="primary" target="_blank" :href="item.url" :key="index" v-if="item.category==1">
      <el-button type="primary">{{item.name}}</el-button>
    </el-link>
  </template>
  <el-divider content-position="left">宝马</el-divider>
  <template v-for="(item, index) in links">
    <el-link type="primary" target="_blank" :href="item.url" :key="index" v-if="item.category==2">
      <el-button type="primary">{{item.name}}</el-button>
    </el-link>
  </template>
</div>

Car.vue

<template>
  <div>
    <el-row>
      <el-col :span="24">
        <el-form :inline="true" class="user-search">
          <el-form-item>
            <el-button size="small" type="primary" icon="el-icon-plus" @click="handleEdit()" plain>添加链接</el-button>
          </el-form-item>
        </el-form>
        <div>
          <el-divider content-position="left">奥迪</el-divider>
          <template v-for="(item, index) in links">
            <el-link type="primary" target="_blank" :href="item.url" :key="index" v-if="item.category==0">
              <el-button type="primary">{{item.name}}</el-button>
            </el-link>
          </template>
          <el-divider content-position="left">奔驰</el-divider>
          <template v-for="(item, index) in links">
            <el-link type="primary" target="_blank" :href="item.url" :key="index" v-if="item.category==1">
              <el-button type="primary">{{item.name}}</el-button>
            </el-link>
          </template>
          <el-divider content-position="left">宝马</el-divider>
          <template v-for="(item, index) in links">
            <el-link type="primary" target="_blank" :href="item.url" :key="index" v-if="item.category==2">
              <el-button type="primary">{{item.name}}</el-button>
            </el-link>
          </template>
        </div>
        <!-- 添加界面 -->
        <el-dialog :title="title" :visible.sync="editFormVisible" width="30%" @click="closeDialog">
          <el-form label-width="120px" :model="editForm" :rules="rules" ref="editForm">
          <el-form-item label="链接名称" prop="name">
            <el-input size="small" v-model="editForm.name" auto-complete="off" placeholder="请输入链接名称"></el-input>
          </el-form-item>
          <el-form-item label="链接地址" prop="url">
            <el-input size="small" v-model="editForm.url" auto-complete="off" placeholder="请输入链接地址"></el-input>
          </el-form-item>
          </el-form>
          <div slot="footer" class="dialog-footer">
          <el-button size="small" @click="closeDialog">取消</el-button>
          <el-button size="small" type="primary" :loading="loading" class="title" @click="submitForm('editForm')">保存</el-button>
          </div>
        </el-dialog>
      </el-col>
    </el-row>
  </div>
</template>
<script>
import { getLink, saveLink } from '../../api/userMG'
export default {
  data() {
    return {
      links: [],
      loading: false, //显示加载
      editFormVisible: false, //控制添加页面显示与隐藏
      title: '添加链接',
      editForm: {
        name: '',
        url: ''
      },
      // rules表单验证
      rules: {
        name: [{ required: true, message: '请输入链接名称', trigger: 'blur' }],
        url: [{ required: true, message: '请输入链接地址', trigger: 'blur' }]
      },
    }
  },
  created() {
    // 获取链接
   this.getdata()
  },
  // 这下面的方法只有被调用才会被执行
  methods: {
    // 获取链接
    getdata() {
      this.loading = true
      getLink().then((response) => {
        this.loading = false
        console.log(response.data)
        this.links = response.data
      }).catch(error => {
        console.log(error)
      })
    },
    // 添加页面方法
    handleEdit: function() {
      this.editFormVisible = true
      this.title = '添加链接',
      this.editForm.name = '',
      this.editForm.url = ''
    },
    // 添加保存页面方法
    submitForm(editData) {
      this.$refs[editData].validate(valid => {
        if (valid) {
          saveLink(this.editForm).then(response => {
            this.editFormVisible = false
            this.loading = false
            // if (response.success)
            this.getdata()
            this.$message({
              type: 'success',
              message: '链接添加成功'
            })
          }).catch(error => {
            this.editFormVisible = false
            this.loading = false
            // console.log(error.response.data['url'][0])
            // console.log(error.response.status)
            // this.$message.error('链接添加失败,请稍后再试')
            if (error.response.status == 400 ) {
              this.$message.error(error.response.data['url'][0]+'如: http://xxx 或 https://xxx')
            }else {
              this.$message.error('链接添加失败,请稍后再试')
            }
          })
        }
      })
    },
    // 关闭添加链接窗口
    closeDialog() {
      this.editFormVisible = false
    }
  }
}
</script>
<style>
  /* .el-row {
    margin-top: 10px;
  } */
  .el-link {
    margin-right: 5px;
  }
</style>

到此这篇关于详解vue中v-for和v-if一起使用的替代方法template的文章就介绍到这了,更多相关vue 替代方法template内容请搜索我们以前的文章或继续浏览下面的相关文章希望大家以后多多支持我们!

(0)

相关推荐

  • vue框架render方法如何替换template

    目录 render方法替换template 使用template属性创建组件模板 把父组件的template创建换成使用render方法创建 template和render用法对比 render方法替换template 使用template属性创建组件模板 import Vue from 'vue'   const Item = Vue.component('Item', {   template: `<div>                 <h2>子组件</h2>

  • vue中关于template报错等问题的解决

    目录 template报错 vue报错问题 template报错 写这个纯粹是为了纪念有多蠢 template:` <div class='app'>     <button ref = 'btn'>我是按钮1</button>     <subCom ref = 'subc'></subCom> </div>     `, 关于template里面写的HTML,经历了报错,控制台反映字符串不齐,语法错误等一系列问题后,查遍了各种博客

  • 关于vue-admin-template模板连接后端改造登录功能

    首先修改统一请求路径为我们自己的登陆接口,在.env.development文件中 # base api VUE_APP_BASE_API = 'http://localhost:8081/api/dsxs/company' 打开登陆页面,src/views/login/index.vue <template> <div class="login-container"> <el-form ref="loginForm" :model=&

  • Vue编程三部曲之将template编译成AST示例详解

    目录 前言 编译准备 源码编译链式调用 compileToFunctions parse 解析 template 标签匹配相关的正则 stack advance while 解析开始标签 解析结束标签 当前 template < 不在第一个字符串 处理 stack 栈中剩余未处理的标签 生成 AST start 钩子函数 end 钩子函数 为什么回退? 解析 <p> 解析 </p> chars 钩子函数 commit 钩子函数 番外(可跳过) createASTElement

  • vue-admin-template解决登录和跨域问题解决

    目录 一.下载安装项目 二.修改登录访问地址 三.解决跨域问题 一.下载安装项目 git地址:https://github.com/PanJiaChen/vue-admin-template.git 二.修改登录访问地址 找到 .env.develpment文件 # just a flag ENV = 'development' # base api # VUE_APP_BASE_API = '/dev-api' VUE_APP_BASE_API = 'http://localhost:9001

  • VUE中template的三种写法

    一.直接写在构造器中 <!-- 第一种写法:直接写在构造器里 --> <div id ="app1"> </div> <script> var vm1 = new Vue({ el: '#app1', data: {}, methods: {}, template:`<h3>在构造器中的文字</h3>` }); </script> 二.写在HTML自带的<template>标签中 <!

  • 详解vue中使用transition和animation的实例代码

    以前写页面注重在功能上,对于transition和animation是只闻其声,不见其人,对于页面动画效果心理一直痒痒的.最近做活动页面,要求页面比较酷炫,终于有机会认真了解了. transition:英文过渡的意思,作用是过渡效果:animation:英文活泼.生气.激励,动画片就是animation film,作用是动画效果. transition在w3school的实例: //将鼠标悬停在一个 div 元素上,逐步改变表格的宽度从 100px 到 300px: div { width:10

  • 详解vue中v-for的key唯一性

    1. DOM Diff 要想真正了解 key 属性的存在意义,还真得从 DOM Diff 说起,并不需要深入了解 DOM Diff 的原理,而是仅仅需要知道 DOM Diff 的工作过程即可. Vue 和 React 都采用了运用虚拟 DOM 的方式减少浏览器不必要的渲染.由于 Vue 和 React 采用的都是 v = render( m ) 的方式渲染视图的,当 model 数据发生变化时,视图更新的方式就是重新 render DOM 元素.但是有时候我们只是改变了一个组件中的某一个 div

  • 详解Vue中Computed与watch的用法与区别

    目录 computed computed只接收一个getter函数 computed同时接收getter函数对象和setter函数对象 调试 Computed watchEffect 立即执行 监听基本数据类型 停止watchEffect 清理watchEffect watchPostEffect 和 watchSyncEffect watchEffect不能监听对象 watch 监听单个数据 监听多个数据(传入数组) 官方文档总结 computed watchEffect watch comp

  • 详解vue中在循环中使用@mouseenter 和 @mouseleave事件闪烁问题解决方法

    最近在项目中实现在循环出来的图片中当鼠标移入隐藏当前图片显示另一张图片的需求时碰到了一个小问题.就是当使用@mouseenter 和@mouseleave事件来实现这个需求时却发现鼠标移入后图片出现闪烁现象. 重点:事件写到父元素上才行!!! 0.0 下面写下我的实现方法和实现效果 样式代码: <div class="imgs" v-for="(item,index) in exampleUrl" :key = index @mouseenter ="

  • 详解Vue中的MVVM原理和实现方法

    下面由我阿巴阿巴的详细走一遍Vue中MVVM原理的实现,这篇文章大家可以学习到: 1.Vue数据双向绑定核心代码模块以及实现原理 2.订阅者-发布者模式是如何做到让数据驱动视图.视图驱动数据再驱动视图 3.如何对元素节点上的指令进行解析并且关联订阅者实现视图更新 一.思路整理 实现的流程图: 我们要实现一个类MVVM简单版本的Vue框架,就需要实现一下几点: 1.实现一个数据监听Observer,对数据对象的所有属性进行监听,数据发生变化可以获取到最新值通知订阅者. 2.实现一个解析器Compi

  • 详解vue中v-on事件监听指令的基本用法

    一.本节说明 我们在开发过程中经常需要监听用户的输入,比如:用户的点击事件.拖拽事件.键盘事件等等.这就需要用到我们下面要学习的内容v-on指令. 我们通过一个简单的计数器的例子,来讲解v-on指令的使用. 二. 怎么做 定义数据counter,用于表示计数器数字,初始值设置为0 v-on:click 表示当发生点击事件的时候,触发等号里面的表达式或者函数 表达式counter++和counter--分别实现计数器数值的加1和减1操作 语法糖:我们可以将v-on:click简写为@click 三

  • 详解vue中v-model和v-bind绑定数据的异同

    vue的模板采用DOM模板,也就是说它的模板可以当做DOM节点运行,在浏览器下不报错,绑定数据有三种方式,一种是插值,也就是{{name}}的形式,一种是v-bind,还有一种是v-model.{{name}}的形式比较好理解,就是以文本的形式和实例data中对应的属性进行绑定.比如: var app = new Vue({ el: '#app', template: '<div @click="toggleName">{{name}}</div>', data

  • 详解Vue中Axios封装API接口的思路及方法

    一.axios的封装 在vue项目中,和后台交互获取数据这块,我们通常使用的是axios库,它是基于promise的http库,可运行在浏览器端和node.js中.他有很多优秀的特性,例如拦截请求和响应.取消请求.转换json.客户端防御XSRF等. 在一个项目中我们如果要使用很多接口的话,总不能在每个页面都写满了.get()或者.post()吧?所以我们就要自己手动封装一个全局的Axios网络模块,这样的话就既方便也会使代码量不那么冗余. 安装 > npm install axios //这个

  • 详解VUE中的插值( Interpolation)语法

    背景分析 在传统的html页面中我们可以定义变量吗?当然不可以,那我们假如希望通过变量的方式实现页面内容的数据操作也是不可以的.当然我们可以在服务端通过定义html标签库方式,然后以html作为模板,在服务端解析也可以实现,但这样必须通过服务端进行处理,才可以做到,能不能通过一种技术直接在客户端html页面中实现呢? VUE中的插值语法 这种语法是为了在html中添加变量,借助变量方式与js程序中的变量值进行同步,进而简化代码编写.其基本语法为: <HTML元素>{{变量或js表达式}}<

  • 详解vue中在父组件点击按钮触发子组件的事件

    我把这个实例分为几个步骤解读: 1.父组件的button元素绑定click事件,该事件指向notify方法 2.给子组件注册一个ref="child" 3.父组件的notify的方法在处理时,使用了$refs.child把事件传递给子组件的parentMsg方法,同时携带着父组件中的参数msg  4.子组件接收到父组件的事件后,调用了parentMsg方法,把接收到的msg放到message数组中 父组件 <template> <div id="app&qu

随机推荐