Spring基于XML实现Aop
目录
- 项目结构
- 具体步骤
- 1、创建maven 项目 导入依赖 创建好项目结构
- 2、写一个TestDao接口 及实现类
- 3、编写切面类
- 测试
- 总结
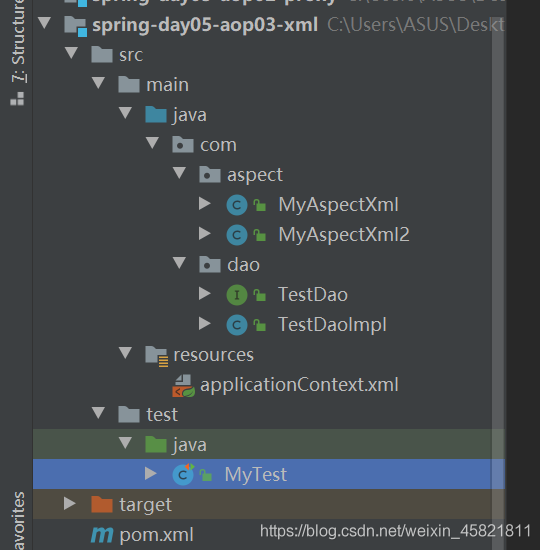
项目结构
具体步骤
1、创建maven 项目 导入依赖 创建好项目结构
 <dependencies>
        <dependency>
            <groupId>org.projectlombok</groupId>
            <artifactId>lombok</artifactId>
            <version>1.18.18</version>
        </dependency>
        <dependency>
            <groupId>junit</groupId>
            <artifactId>junit</artifactId>
            <version>4.12</version>
            <scope>test</scope>
        </dependency>
        <dependency>
            <groupId>org.springframework</groupId>
            <artifactId>spring-context</artifactId>
            <version>5.3.4</version>
        </dependency>
        <dependency>
            <groupId>org.springframework</groupId>
            <artifactId>spring-beans</artifactId>
            <version>5.3.4</version>
        </dependency>
        <dependency>
            <groupId>org.springframework</groupId>
            <artifactId>spring-core</artifactId>
            <version>5.3.4</version>
        </dependency>
        <dependency>
            <groupId>org.springframework</groupId>
            <artifactId>spring-expression</artifactId>
            <version>5.3.4</version>
        </dependency>
        <dependency>
            <groupId>org.springframework</groupId>
            <artifactId>spring-aop</artifactId>
            <version>5.3.4</version>
        </dependency>
        <dependency>
            <groupId>org.aspectj</groupId>
            <artifactId>aspectjweaver</artifactId>
            <version>1.9.6</version>
        </dependency>
        <dependency>
            <groupId>org.aspectj</groupId>
            <artifactId>aspectjrt</artifactId>
            <version>1.9.6</version>
        </dependency>
    </dependencies>
2、写一个TestDao接口 及实现类
/**
 * @version 1.0
 * @author: crush
 * @date: 2021-03-05 10:26
 */
public interface TestDao {
    public void sayHello();
    public void save();
    public void modify();
    public void delete();
}
/**
 * @version 1.0
 * @author: crush
 * @date: 2021-03-05 10:27
 */
public class TestDaoImpl implements TestDao {
    public void sayHello() {
        System.out.println("正在执行的方法-->武汉加油!中国加油!");
    }
    public void save() {
        System.out.println("正在执行的方法-->保存");
    }
    public void modify() {
        System.out.println("正在执行的方法-->修改");
    }
    public void delete() {
        System.out.println("正在执行的方法-->删除");
    }
}
3、编写切面类
/**
 * @version 1.0
 * @author: crush
 * @date: 2021-03-10 17:12
 */
public class MyAspectXml {
    /**
     * 前置通知 使用JoinPoint 接口作为参数获得目标对象的信息
     **/
    public void before(JoinPoint jp){
        System.out.print("前置通知:模拟权限控制   ");
        System.out.println("目标对象:"+jp.getTarget()+",被增强的方法:"+jp.getSignature().getName());
    }
    public void afterReturning(JoinPoint jp){
        System.out.print("后置返回通知:"+"模拟删除临时文件"  );
        System.out.println(",被增强的方法"+jp.getSignature().getName());
    }
    public Object around(ProceedingJoinPoint pjp) throws Throwable {
        System.out.println("环绕开始:执行目标方法前,模拟开启事务");
        Object obj = pjp.proceed();
        System.out.println("环绕结束:执行目标方法后,模拟关闭事务");
        return obj;
    }
    public void except(Throwable throwable){
        System.out.println("异常通知:"+"程序执行异常"+throwable.getMessage());
    }
    public void after(){
        System.out.println("最终通知:释放资源");
    }
}```
### 4、application.xml文件
```xml
<?xml version="1.0" encoding="UTF-8"?>
<beans xmlns="http://www.springframework.org/schema/beans"
       xmlns:xsi="http://www.w3.org/2001/XMLSchema-instance"
       xmlns:aop="http://www.springframework.org/schema/aop"
       xmlns:context="http://www.springframework.org/schema/context"
       xsi:schemaLocation="http://www.springframework.org/schema/beans
       http://www.springframework.org/schema/beans/spring-beans.xsd
       http://www.springframework.org/schema/aop
       https://www.springframework.org/schema/aop/spring-aop.xsd
       http://www.springframework.org/schema/context
       https://www.springframework.org/schema/context/spring-context.xsd">
    <!--
    <aop:aspectj-autoproxy />
    声明自动为spring容器中那些配置@aspectJ切面的bean创建代理,织入切面。
    proxy-target-class属性,默认为false,表示使用jdk动态代理织入增强,
    为true时: 表示使用CGLib动态代理技术织入增强。
    -->
    <aop:aspectj-autoproxy proxy-target-class="true"/>
    <bean id="testDaoImpl" class="com.dao.TestDaoImpl"/>
    <bean id="myAspectXML" class="com.aspect.MyAspectXml"/>
<!--    <bean id="myAspectXML2" class="com.aspect.MyAspectXml2"/>-->
    <!--
        补充:<aop:pointcut>如果位于<aop:aspect>元素中,则命名切点只能被当前<aop:aspect>内定义的元素访问到,
        为了能被整个<aop:config>元素中定义的所有增强访问,则必须在<aop:config>下定义切点。
    -->
    <aop:config>
        <!--切入点  execution 表达式 通过这个表达式筛选连接点 -->
        <aop:pointcut id="myPointCut" expression="execution(* com.dao.*.*(..))"/>
        <aop:aspect ref="myAspectXML">
			           <!--aop:after 是表示 这个方法是那种通知类型after 是方法之后
           method="after" 这个after是切面类中的方法  -->
            <aop:after method="after" pointcut-ref="myPointCut"/>
            <aop:before method="before" pointcut-ref="myPointCut"/>
            <aop:after-returning method="afterReturning" pointcut-ref="myPointCut"/>
            <aop:after-throwing method="except" throwing="throwable" pointcut-ref="myPointCut"/>
            <aop:around method="around" pointcut-ref="myPointCut"/>
        </aop:aspect>
    </aop:config>
</beans>
测试
    @Test
    public void Test(){
        ApplicationContext applicationContext = new ClassPathXmlApplicationContext("applicationContext.xml");
        TestDao testDao = applicationContext.getBean("testDaoImpl", TestDaoImpl.class);
        testDao.save();
        /**
         * 输出:
         * 前置通知:模拟权限控制   目标对象:com.dao.TestDaoImpl@704f1591,被增强的方法:save
         * 环绕开始:执行目标方法前,模拟开启事务
         * 正在执行的方法-->保存
         * 环绕结束:执行目标方法后,模拟关闭事务
         * 后置返回通知:模拟删除临时文件,被增强的方法save
         * 最终通知:释放资源
         */
    }
总结
本篇文章就到这里了,希望能给你带来帮助,也希望能够您能够关注我们的更多内容!
相关推荐
-

spring中aop的xml配置方法实例详解
前言 AOP:即面向切面编程,是一种编程思想,OOP的延续.在程序开发中主要用来解决一些系统层面上的问题,比如日志,事务,权限等等. aop,面向切面编程的目标就是分离关注点,比如:一个骑士只需要关注守护安全,或者远征,而骑士辉煌一生的事迹由谁来记录和歌颂呢,当然不会是自己了,这个完全可以由诗人去歌颂,比如当骑士出征的时候诗人可以去欢送,当骑士英勇牺牲的时候,诗人可以写诗歌颂骑士的一生.那么骑士只需要关注怎么打仗就好了.而诗人也只需要关注写诗歌颂和欢送就好了,那么这样就把功能分离了.所以可以把诗
-
如何通过XML方式配置AOP过程解析
第一步:把通知类用 bean 标签配置起来 <bean id="txManager" class="com.atguigu.account.utils.TransactionManager"> <!-- 注入ConnectionUtils --> <property name="connectionUtils" ref="connectionUtils" /> </bean> 第
-
Spring中基于XML的AOP配置详解
1. 准备工作 1.1 创建工程 day03_eesy_03SpringAOP 1.2 在配置文件pom.xml中添加依赖 <?xml version="1.0" encoding="UTF-8"?> <project xmlns="http://maven.apache.org/POM/4.0.0" xmlns:xsi="http://www.w3.org/2001/XMLSchema-instance"
-
SpringMVC用XML方式实现AOP的方法示例
1.首先创建web工程,之后导入Spring jar包,目录如下 2.文件代码 2.1AfterAdvice package com.niit.aop; import java.lang.reflect.Method; import org.springframework.aop.AfterReturningAdvice; /* * 后置通知 * havingClass方法执行之后才执行. * 输出日记 * */ public class AfterAdvice implements After
-
Spring中基于xml的AOP的详细步骤
1.Aop 全程是Aspect Oriented Programming 即面向切面编程,通过预编译方式和运行期动态代理实现程序功能的同一维护的一种技术.Aop是oop的延续,是软件开发中的 一个热点,也是Spring框架中一个重要的内容.是函数式编程的一个衍生范例,利用Aop可以对业务逻辑各个部分进行分割,从而使得业务逻辑各部分之间的耦合度降低,提高程序的可重用行,提高了开发效率.简单的说就是把我们程序中的重复代码抽取出来,在需要执行的时候,使用动态代理的技术,在不修改源码的基础上已有的方法进
-
Spring基于XML实现Aop
目录 项目结构 具体步骤 1.创建maven 项目 导入依赖 创建好项目结构 2.写一个TestDao接口 及实现类 3.编写切面类 测试 总结 项目结构 具体步骤 1.创建maven 项目 导入依赖 创建好项目结构 <dependencies> <dependency> <groupId>org.projectlombok</groupId> <artifactId>lombok</artifactId> <version&g
-
Spring基于AspectJ的AOP开发案例解析
目录 AspectJ简介 注解开发 环境准备 不同的通知类型 最通知中通过value属性定义切点 入门案列 @Before前置通知 @AfterReturning后置通知 @Around环绕通知 @AfterThrowing 异常抛出通知 @After 最终通知 通过@Pointcut为切点命名 AspectJ的XML方式的AOP开发 使用AspectJ实现AOP 注解方式 XML方式 AspectJ简介 AspectJ是一个基于Java语言的AOP框架 Spring2.0以后新增了对Aspec
-
浅析Spring基于注解的AOP
目录 一.准备工作 二.基于注解的AOP之前置通知 三.基于注解的AOP之切入点表达式的语法和重用以及获取连接点的信息 ①切入点表达式的语法 ②获取连接点的信息 ③重用写入点表达式 一.准备工作 ①创建一个Maven工程 ②添加依赖 在IOC所需依赖基础上再加入下面依赖即可: <!-- spring-aspects会帮我们传递过来aspectjweaver --> <dependency> <groupId>org.springframework</groupId
-
Spring基于xml文件配置Bean过程详解
这篇文章主要介绍了spring基于xml文件配置Bean过程详解,文中通过示例代码介绍的非常详细,对大家的学习或者工作具有一定的参考学习价值,需要的朋友可以参考下 通过全类名来配置: class:bean的全类名,通过反射的方式在IOC容器中创建Bean,所以要求bean中必须有一个无参的构造器. <bean id="helloWorld" class="com.gong.spring.beans.HelloWorld"> <property na
-
Spring基于ProxyFactoryBean创建AOP代理
Spring 通知类型 通过前面的学习可以知道,通知(Advice)其实就是对目标切入点进行增强的内容,Spring AOP 为通知(Advice)提供了 org.aopalliance.aop.Advice 接口. Spring 通知按照在目标类方法的连接点位置,可以分为以下五种类型,如表 1 所示. 表 1 Spring 通知的 5 种类型 名称 说明 org.springframework.aop.MethodBeforeAdvice(前置通知) 在方法之前自动执行的通知称为前置通知,可以
-
带你了解如何使用Spring基于ProxyFactoryBean创建AOP代理
目录 1 基础 2 JavaBean属性 3 JDK和CGLIB代理 总结 若使用 Spring IoC 容器(ApplicationContext或BeanFactory)作为你的业务对象(你也应该这么做!),你会想使用 Spring AOP FactoryBean的一种. 工厂 bean 引入了中间层,让它创建不同类型的对象. 在Spring创建 AOP 代理的基本方式是使用 org.springframework.aop.framework.ProxyFactoryBean.这可以完全控制
-
Spring基于advisor配置aop过程解析
1.目标类 package com.gec.target; public class Hadoop { public void eatting() { System.out.println("大象正在吃东西 1"); try { //耗时5秒 Thread.sleep(5000); } catch (InterruptedException e) { e.printStackTrace(); } } } 2.增强类,此类必须要实现增强方位接口 package com.gec.advic
-
详解Spring基于xml的两种依赖注入方式
1)使用构造器注入bean 实体类:用户类 public class User { private String name; private UserMessage userMessage; public User() { } public User(String name, UserMessage userMessage) { this.name = name; this.userMessage = userMessage; } public String getName() { return