ASP.NET 控件开发系列之图片切换web控件

贴出来控件页面的代码.
PicList.ascx
代码如下:
<%@ Control Language="C#" AutoEventWireup="true" CodeFile="PicList.ascx.cs" Inherits="WebParts_PicList" %>
<style type="text/css">
/* Reset style */
*
{
margin: 0;
padding: 0;
word-break: break-all;
}
body
{
background: #fff;
color: #000000;
font: 12px/1.6em Helvetica, Arial, sans-serif;
margin-left: 0px;
margin-top: 0px;
margin-right: 0px;
margin-bottom: 0px;
}
h1, h2, h3, h4, h5, h6
{
font-size: 1em;
}
a
{
color: #0287CA;
text-decoration: none;
}
a:hover
{
text-decoration: underline;
}
ul, li
{
list-style: none;
}
fieldset, img
{
border: none;
}
legend
{
display: none;
}
em, strong, cite, th
{
font-style: normal;
font-weight: normal;
}
input, textarea, select, button
{
font: 12px Helvetica, Arial, sans-serif;
}
table
{
border-collapse: collapse;
}
html
{
overflow: -moz-scrollbars-vertical;
}
/*Always show Firefox scrollbar*/
/* iFocus style */
#ifocus
{
width: 650px;
height: 245px;
margin: 0px;
border: 1px solid #DEDEDE;
background: #F8F8F8;
}
#ifocus_pic
{
display: inline;
position: relative;
float: left;
width: 540px;
height: 225px;
overflow: hidden;
margin: 10px 0 0 10px;
}
#ifocus_piclist
{
position: absolute;
}
#ifocus_piclist li
{
width: 550px;
height: 225px;
overflow: hidden;
}
#ifocus_piclist img
{
width: 550px;
height: 225px;
}
#ifocus_btn
{
display: inline;
float: right;
width: 91px;
margin: 9px 9px 0 0;
}
#ifocus_btn li
{
width: 91px;
height: 57px;
cursor: pointer;
opacity: 0.5;
-moz-opacity: 0.5;
filter: alpha(opacity=50);
}
#ifocus_btn img
{
width: 75px;
height: 45px;
margin: 7px 0 0 11px;
}
#ifocus_btn .current
{
background: url(img/ifocus_btn_bg.gif) no-repeat;
opacity: 1;
-moz-opacity: 1;
filter: alpha(opacity=100);
}
#ifocus_opdiv
{
position: absolute;
left: 0;
bottom: 0;
width: 545px;
height: 35px;
background: #000;
opacity: 0.5;
-moz-opacity: 0.5;
filter: alpha(opacity=50);
}
#ifocus_tx
{
position: absolute;
left: 8px;
bottom: 8px;
color: #FFF;
}
#ifocus_tx .normal
{
display: none;
}
</style>
<script type="text/javascript">
function $(id) { return document.getElementById(id); }
function addLoadEvent(func){
var oldonload = window.onload;
if (typeof window.onload != 'function') {
window.onload = func;
} else {
window.onload = function(){
oldonload();
func();
}
}
}
function moveElement(elementID,final_x,final_y,interval) {
if (!document.getElementById) return false;
if (!document.getElementById(elementID)) return false;
var elem = document.getElementById(elementID);
if (elem.movement) {
clearTimeout(elem.movement);
}
if (!elem.style.left) {
elem.style.left = "0px";
}
if (!elem.style.top) {
elem.style.top = "0px";
}
var xpos = parseInt(elem.style.left);
var ypos = parseInt(elem.style.top);
if (xpos == final_x && ypos == final_y) {
return true;
}
if (xpos < final_x) {
var dist = Math.ceil((final_x - xpos)/10);
xpos = xpos + dist;
}
if (xpos > final_x) {
var dist = Math.ceil((xpos - final_x)/10);
xpos = xpos - dist;
}
if (ypos < final_y) {
var dist = Math.ceil((final_y - ypos)/10);
ypos = ypos + dist;
}
if (ypos > final_y) {
var dist = Math.ceil((ypos - final_y)/10);
ypos = ypos - dist;
}
elem.style.left = xpos + "px";
elem.style.top = ypos + "px";
var repeat = "moveElement('"+elementID+"',"+final_x+","+final_y+","+interval+")";
elem.movement = setTimeout(repeat,interval);
}
function classNormal(iFocusBtnID,iFocusTxID){
var iFocusBtns= $(iFocusBtnID).getElementsByTagName('li');
var iFocusTxs = $(iFocusTxID).getElementsByTagName('li');
for(var i=0; i<iFocusBtns.length; i++) {
iFocusBtns[i].className='normal';
iFocusTxs[i].className='normal';
}
}
function classCurrent(iFocusBtnID,iFocusTxID,n){
var iFocusBtns= $(iFocusBtnID).getElementsByTagName('li');
var iFocusTxs = $(iFocusTxID).getElementsByTagName('li');
iFocusBtns[n].className='current';
iFocusTxs[n].className='current';
}
function iFocusChange() {
if(!$('ifocus')) return false;
$('ifocus').onmouseover = function(){atuokey = true};
$('ifocus').onmouseout = function(){atuokey = false};
var iFocusBtns = $('ifocus_btn').getElementsByTagName('li');
var listLength = iFocusBtns.length;
iFocusBtns[0].onmouseover = function() {
moveElement('ifocus_piclist',0,0,5);
classNormal('ifocus_btn','ifocus_tx');
classCurrent('ifocus_btn','ifocus_tx',0);
}
if (listLength>=2) {
iFocusBtns[1].onmouseover = function() {
moveElement('ifocus_piclist',0,-225,5);
classNormal('ifocus_btn','ifocus_tx');
classCurrent('ifocus_btn','ifocus_tx',1);
}
}
if (listLength>=3) {
iFocusBtns[2].onmouseover = function() {
moveElement('ifocus_piclist',0,-450,5);
classNormal('ifocus_btn','ifocus_tx');
classCurrent('ifocus_btn','ifocus_tx',2);
}
}
if (listLength>=4) {
iFocusBtns[3].onmouseover = function() {
moveElement('ifocus_piclist',0,-675,5);
classNormal('ifocus_btn','ifocus_tx');
classCurrent('ifocus_btn','ifocus_tx',3);
}
}
}
setInterval('autoiFocus()',3500);
var atuokey = false;
function autoiFocus() {
if(!$('ifocus')) return false;
if(atuokey) return false;
var focusBtnList = $('ifocus_btn').getElementsByTagName('li');
var listLength = focusBtnList.length;
for(var i=0; i<listLength; i++) {
if (focusBtnList[i].className == 'current') var currentNum = i;
}
if (currentNum==0&&listLength!=1 ){
moveElement('ifocus_piclist',0,-225,5);
classNormal('ifocus_btn','ifocus_tx');
classCurrent('ifocus_btn','ifocus_tx',1);
}
if (currentNum==1&&listLength!=2 ){
moveElement('ifocus_piclist',0,-450,5);
classNormal('ifocus_btn','ifocus_tx');
classCurrent('ifocus_btn','ifocus_tx',2);
}
if (currentNum==2&&listLength!=3 ){
moveElement('ifocus_piclist',0,-675,5);
classNormal('ifocus_btn','ifocus_tx');
classCurrent('ifocus_btn','ifocus_tx',3);
}
if (currentNum==3 ){
moveElement('ifocus_piclist',0,0,5);
classNormal('ifocus_btn','ifocus_tx');
classCurrent('ifocus_btn','ifocus_tx',0);
}
if (currentNum==1&&listLength==2 ){
moveElement('ifocus_piclist',0,0,5);
classNormal('ifocus_btn','ifocus_tx');
classCurrent('ifocus_btn','ifocus_tx',0);
}
if (currentNum==2&&listLength==3 ){
moveElement('ifocus_piclist',0,0,5);
classNormal('ifocus_btn','ifocus_tx');
classCurrent('ifocus_btn','ifocus_tx',0);
}
}
addLoadEvent(iFocusChange);
</script>
<div align="center">
<div id="ifocus">
<div id="ifocus_pic">
<div id="ifocus_piclist" style="left: 0; top: 0;">
<ul runat="server" id="ulImgBig">
</ul>
</div>
<div id="ifocus_opdiv">
</div>
<div id="ifocus_tx">
<ul runat="server" id="urImgTitle">
</ul>
</div>
</div>
<div id="ifocus_btn">
<ul runat="server" id="ulImgSmall">
</ul>
</div>
</div>
</div>
public partial class WebParts_PicList : System.Web.UI.UserControl
{
protected void Page_Load(object sender, EventArgs e)
{
ShowImages();
}
public void ShowImages()
{
for (int i = 0; i < ListImages.Count; i++)
{
//标题和小图
if (i == 0)
{
urImgTitle.InnerHtml += "<li class='current'>" + listImages[i].ImageTitle1 + "</li>";
ulImgSmall.InnerHtml += "<li class='current'><img src='" + listImages[i].ImageSrc1 + "' alt='" + listImages[i].ImageAlt1 + "' /></li>";
}
else
{
urImgTitle.InnerHtml += "<li class='normal'>" + listImages[i].ImageTitle1 + "</li>";
ulImgSmall.InnerHtml += "<li class='normal'><img src='" + listImages[i].ImageSrc1 + "' alt='" + listImages[i].ImageAlt1 + "' /></li>";
}
//大图
ulImgBig.InnerHtml += " <li><a href=" + listImages[i].ImageHref1 + " target='_blank'><img src=" + listImages[i].ImageSrc1 + " alt=" + listImages[i].ImageAlt1 + " border='0' /></a></li>";
}
}
private List<ShowImages> listImages;
public List<ShowImages> ListImages
{
get { return listImages; }
set { listImages = value; }
}
}
//图片的属性
public class ShowImages
{
string ImageSrc;
string ImageHref;
string ImageTitle;
string ImageAlt;
public string ImageAlt1
{
get { return ImageAlt; }
set { ImageAlt = value; }
}
public string ImageSrc1
{
get { return ImageSrc; }
set { ImageSrc = value; }
}
public string ImageHref1
{
get { return ImageHref; }
set { ImageHref = value; }
}
public string ImageTitle1
{
get { return ImageTitle; }
set { ImageTitle = value; }
}
}
实现思路是 ShowImages的集合当作控件的一个属性.然后便利集合循环赋值.
下面是页面调用的代码:
代码如下:
List<ShowImages> listImages = new List<ShowImages>();
ShowImages image1 = new ShowImages();
image1.ImageAlt1 = "喵喵";
image1.ImageHref1 = "http://www.jb51.net";
image1.ImageSrc1 = "http://b23.photo.store.qq.com/http_imgload.cgi?/rurl4_b=e52b4cc5fe67c1a2dc328adb766f1633bfc02bb27fe17aa21ca1264a0dac599fc425faf65d1daac8ab7cb5923a15443882d9d0586694a0e5eb0671af60a2f6e739d3c15b1e52f2c518a00344fa791dbaee88cc43&a=25&b=23";
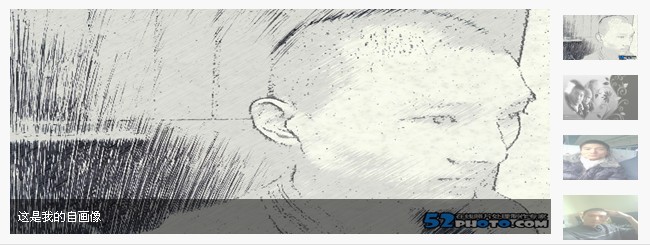
image1.ImageTitle1 = "这是我的自画像";
listImages.Add(image1);
listImages.Add(image2);
listImages.Add(image3);
listImages.Add(image4);
PicList1.ListImages = listImages;
ok 一个简单的控件就实现了
作者:cnblogs 喵喵

