springboot 整合 clickhouse的实现示例
目录
- 前言
- 前置准备
- 使用jdbc方式操作clickhouse
- 与springboot的整合
- 代码完整整合步骤
前言
了解了clickhouse的基础概念和相关的理论之后,本篇将通过实例代码演示如何在Java代码中操作clickhouse,主要涉及的内容包括:
使用JDBC的方式操作clickhouseclickhouse与springboot的整合使用
前置准备
1、clickhouse服务确保已开启

2、为保证实验效果,提前创建一张表,并为该表插入一些实验数据
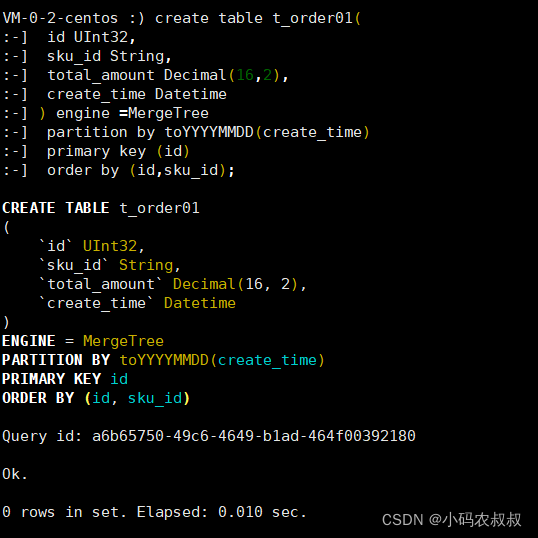
create table t_order01(
 id UInt32,
 sku_id String,
 total_amount Decimal(16,2),
 create_time Datetime
) engine =MergeTree
 partition by toYYYYMMDD(create_time)
 primary key (id)
 order by (id,sku_id);

insert into t_order01 values
(101,'sku_001',1000.00,'2021-12-01 12:00:00'),
(102,'sku_002',2000.00,'2021-12-01 11:00:00'),
(102,'sku_004',2500.00,'2021-12-01 12:00:00'),
(102,'sku_002',2000.00,'2021-12-01 13:00:00'),
(102,'sku_002',12000.00,'2021-12-01 13:00:00'),
(102,'sku_002',600.00,'2020-06-12 12:00:00');
执行完毕sql之后,查询下default数据库下的表是否成功创建


使用jdbc方式操作clickhouse
1、引入clickhouse的jdbc依赖
<dependency>
    <groupId>ru.yandex.clickhouse</groupId>
    <artifactId>clickhouse-jdbc</artifactId>
    <version>0.1.52</version>
</dependency>
2、实例代码
实大部分的操作和我们使用jdbc操作mysql的步骤类似,下面直接贴出代码,可以结合注释进行参考使用
import ru.yandex.clickhouse.ClickHouseConnection;
import ru.yandex.clickhouse.ClickHouseDataSource;
import ru.yandex.clickhouse.settings.ClickHouseProperties;

import java.sql.*;
import java.util.ArrayList;
import java.util.HashMap;
import java.util.List;
import java.util.Map;

public class CreateTableTest {

    private static String username = "default";
    private static String password = "你的连接密码";
    private static String address = "jdbc:clickhouse://clickhouse的连接IP地址:8123";
    private static String db = "连接数据库名称(默认数据库:default)";
    private static int socketTimeout = 600000;

    public static void main(String[] args) throws Exception {
        //getConn();
        //queryTable();
        //createTable("");
        //insertOne();
        //dropTable();
        deleteById();
        //updateById();
    }

    /**
     * 查询数据
     */
    public static void queryTable(){
        List<Map<String, Object>> list = new ArrayList<>();
        String sql = "select * from user_info";
        Connection connection = getConn();
        try {
            Statement statement = connection.createStatement();
            ResultSet rs  = statement.executeQuery(sql);
            ResultSetMetaData rsmd = rs.getMetaData();
            while(rs.next()){
                Map<String, Object> row = new HashMap<>();
                for(int i = 1; i <= rsmd.getColumnCount(); i++){
                    row.put(rsmd.getColumnName(i), rs.getObject(rsmd.getColumnName(i)));
                }
                list.add(row);
            }
        } catch (SQLException e) {
            e.printStackTrace();
        }

        //在此可以根据实际需求将解析的数据封装到对象中
        list.stream().forEach(item ->{
            Map<String, Object> rowData = item;
            System.out.println(rowData);
        });
        //System.out.println(list);
    }

    /**
     * 创建表
     * @throws Exception
     */
    public static void createTable(String tableSql) throws Exception{
        /*tableSql = "create table t_order02(\n" +
                " id UInt32,\n" +
                " sku_id String,\n" +
                " total_amount Decimal(16,2),\n" +
                " create_time Datetime\n" +
                ") engine =MergeTree\n" +
                " partition by toYYYYMMDD(create_time)\n" +
                " primary key (id)\n" +
                " order by (id,sku_id);";*/
        Connection connection = getConn();
        Statement statement = connection.createStatement();
        boolean execute = statement.execute(tableSql);
        if(execute){
            System.out.println(execute);
            System.out.println("创建表成功");
        }
    }

    /**
     * 删除表
     * @throws Exception
     */
    public static void dropTable() throws Exception{
        Connection connection = getConn();
        Statement statement = connection.createStatement();
        statement.execute("drop table t_order01;");
        System.out.println("删除表成功");
    }

    /**
     * 插入数据
     * 实际使用时候,插入的语句里面的参数从外部传入进去
     * @throws Exception
     */
    public static void insertOne() throws Exception{
        Connection connection = getConn();
        PreparedStatement pstmt = connection.prepareStatement("insert into t_order01 values('103', 'sku_004', '2500.00','2021-06-01 12:00:00')");
        pstmt.execute();
        System.out.println("insert success");
    }

    /**
     * 删除数据
     * 实际使用时候,删除的语句里面的参数从外部传入进去
     */
    public static void deleteById() throws Exception{
        Connection connection = getConn();
        //sku_id ='sku_001'
        PreparedStatement pstmt = connection.prepareStatement("alter table t_order01 delete where sku_id = 'sku_002';");
        pstmt.execute();
        System.out.println("delete success");
    }

    /**
     * 修改数据
     * 实际使用时候,修改的语句里面的参数从外部传入进去
     */
    public static void updateById() throws Exception{
        Connection connection = getConn();
        PreparedStatement pstmt = connection.prepareStatement("alter table t_order01 update total_amount=toDecimal32(2000.00,2) where id = '102'");
        pstmt.execute();
        System.out.println("update success");
    }

    public static Connection getConn() {
        ClickHouseProperties properties = new ClickHouseProperties();
        properties.setUser(username);
        properties.setPassword(password);
        properties.setDatabase(db);
        properties.setSocketTimeout(socketTimeout);
        ClickHouseDataSource clickHouseDataSource = new ClickHouseDataSource(address, properties);
        ClickHouseConnection conn = null;
        try {
            conn = clickHouseDataSource.getConnection();
            System.out.println(conn);
            System.out.println("连接成功");
            return conn;
        } catch (SQLException e) {
            e.printStackTrace();
        }
        return null;
    }
}
3、测试,选择查询和删除一条数据为例做测试
查询功能测试结果,见下面的控制台数据打印

删除功能测试结果,删除 "sku_id = sku_002 "的数据, 执行方法之后,见下面的控制台数据打印


执行方法之后,再次查询该表

与springboot的整合
在实际开发过程中,更多是与框架整合在一起进行使用,比如很多项目中都使用springboot进行开发,下面演示如何在springboot中使用clickhouse
前置准备
确保clickhouse服务正常可用
1、准备一张表,以及表中插入一些实验数据
CREATE TABLE user_info (
  `id` UInt64,
  `user_name` String,
  `pass_word` String,
  `phone` String,
  `create_day` Date DEFAULT CAST(now(),'Date')
)ENGINE = MergeTree
primary key (id)
order by (id);

INSERT INTO user_info
  (id,user_name,pass_word,phone)
VALUES
  (1,'xiaowang','123456','13325511231'),
  (2,'xiaoma','123456','13825511231'),
  (3,'xiaozhao','123456','18925511231');
2、执行完毕上面的建表后,查询下表数据

代码完整整合步骤
1、导入完整依赖
<dependencies>

    <dependency>
        <groupId>org.springframework.boot</groupId>
        <artifactId>spring-boot-starter-web</artifactId>
    </dependency>

    <dependency>
        <groupId>org.springframework.boot</groupId>
        <artifactId>spring-boot-starter-aop</artifactId>
    </dependency>

    <dependency>
        <groupId>org.springframework.boot</groupId>
        <artifactId>spring-boot-starter-test</artifactId>
    </dependency>

    <dependency>
        <groupId>org.mybatis.spring.boot</groupId>
        <artifactId>mybatis-spring-boot-starter</artifactId>
        <version>1.3.2</version>
    </dependency>
    <dependency>
        <groupId>mysql</groupId>
        <artifactId>mysql-connector-java</artifactId>
        <version>5.1.38</version>
    </dependency>

    <dependency>
        <groupId>com.alibaba</groupId>
        <artifactId>druid-spring-boot-starter</artifactId>
        <version>1.1.13</version>
    </dependency>

    <dependency>
        <groupId>commons-lang</groupId>
        <artifactId>commons-lang</artifactId>
        <version>2.6</version>
    </dependency>

    <!-- clickHouse数据库 -->
    <dependency>
        <groupId>ru.yandex.clickhouse</groupId>
        <artifactId>clickhouse-jdbc</artifactId>
        <version>0.1.53</version>
    </dependency>

</dependencies>
2、基础配置文件
server:
  port: 7010

  # mybatis 配置
mybatis:
  type-aliases-package: com.congge.entity
  mapper-locations: classpath:/mapper/*.xml

spring:
  datasource:
    type: com.alibaba.druid.pool.DruidDataSource
    click:
      driverClassName: ru.yandex.clickhouse.ClickHouseDriver
      url: jdbc:clickhouse://IP地址:8123/default
      username: default
      password: 123456
      initialSize: 10
      maxActive: 100
      minIdle: 10
      maxWait: 6000
3、使用一个配置类,关联第二步中的click配置属性
import org.springframework.boot.context.properties.ConfigurationProperties;
import org.springframework.stereotype.Component;

@Component
@ConfigurationProperties(prefix = "spring.datasource.click")
public class ConnectionParamConfig {

    private String driverClassName ;
    private String url ;
    private Integer initialSize ;
    private Integer maxActive ;
    private Integer minIdle ;
    private Integer maxWait ;

    private String username;
    private String password;

    public String getDriverClassName() {
        return driverClassName;
    }
    public void setDriverClassName(String driverClassName) {
        this.driverClassName = driverClassName;
    }
    public String getUrl() {
        return url;
    }
    public void setUrl(String url) {
        this.url = url;
    }
    public Integer getInitialSize() {
        return initialSize;
    }
    public void setInitialSize(Integer initialSize) {
        this.initialSize = initialSize;
    }
    public Integer getMaxActive() {
        return maxActive;
    }
    public void setMaxActive(Integer maxActive) {
        this.maxActive = maxActive;
    }
    public Integer getMinIdle() {
        return minIdle;
    }
    public void setMinIdle(Integer minIdle) {
        this.minIdle = minIdle;
    }
    public Integer getMaxWait() {
        return maxWait;
    }
    public void setMaxWait(Integer maxWait) {
        this.maxWait = maxWait;
    }

    public String getUsername() {
        return username;
    }

    public void setUsername(String username) {
        this.username = username;
    }

    public String getPassword() {
        return password;
    }

    public void setPassword(String password) {
        this.password = password;
    }
}
4、重写datasource的配置,使用自定义的clickhouse的属性配置
import javax.annotation.Resource;

import com.alibaba.druid.pool.DruidDataSource;
import org.springframework.context.annotation.Bean;
import org.springframework.context.annotation.Configuration;

import javax.sql.DataSource;

@Configuration
public class DruidConfig {

    @Resource
    private ConnectionParamConfig jdbcParamConfig;

    /**
     * 重写 DataSource
     * @return
     */
    @Bean
    public DataSource dataSource() {
        DruidDataSource datasource = new DruidDataSource();
        datasource.setUrl(jdbcParamConfig.getUrl());
        datasource.setDriverClassName(jdbcParamConfig.getDriverClassName());
        datasource.setInitialSize(jdbcParamConfig.getInitialSize());
        datasource.setMinIdle(jdbcParamConfig.getMinIdle());
        datasource.setMaxActive(jdbcParamConfig.getMaxActive());
        datasource.setMaxWait(jdbcParamConfig.getMaxWait());
        datasource.setUsername(jdbcParamConfig.getUsername());
        datasource.setPassword(jdbcParamConfig.getPassword());
        return datasource;
    }

}
5、提供一个接口和mybatis的查询xml文件
public interface UserInfoMapper {
    void saveData (UserInfo userInfo) ;
    UserInfo selectById (@Param("id") Integer id) ;
    List<UserInfo> selectList () ;
}

<?xml version="1.0" encoding="UTF-8"?>
<!DOCTYPE mapper PUBLIC "-//mybatis.org//DTD Mapper 3.0//EN" "http://mybatis.org/dtd/mybatis-3-mapper.dtd">
<mapper namespace="com.congge.mapper.UserInfoMapper">
    <resultMap id="BaseResultMap" type="com.congge.entity.UserInfo">
        <id column="id" jdbcType="INTEGER" property="id" />
        <result column="user_name" jdbcType="VARCHAR" property="userName" />
        <result column="pass_word" jdbcType="VARCHAR" property="passWord" />
        <result column="phone" jdbcType="VARCHAR" property="phone" />
        <result column="create_day" jdbcType="VARCHAR" property="createDay" />
    </resultMap>

    <sql id="Base_Column_List">
        id,user_name,pass_word,phone,create_day
    </sql>

    <insert id="saveData" parameterType="com.congge.entity.UserInfo" >
        INSERT INTO user_info
        (id,user_name,pass_word,phone,create_day)
        VALUES
        (#{id,jdbcType=INTEGER},#{userName,jdbcType=VARCHAR},#{passWord,jdbcType=VARCHAR},
        #{phone,jdbcType=VARCHAR},#{createDay,jdbcType=VARCHAR})
    </insert>

    <select id="selectById" parameterType="java.lang.Integer" resultMap="BaseResultMap">
        select
        <include refid="Base_Column_List" />
        from user_info
        where id = #{id,jdbcType=INTEGER}
    </select>

    <select id="selectList" resultMap="BaseResultMap" >
        select
        <include refid="Base_Column_List" />
        from user_info
    </select>

</mapper>
6、接口和服务实现类
@RestController
public class UserInfoController {

    @Resource
    private UserInfoService userInfoService ;

    //localhost:7010/saveData
    @GetMapping("/saveData")
    public String saveData (){
        UserInfo userInfo = new UserInfo () ;
        userInfo.setId(4);
        userInfo.setUserName("xiaolin");
        userInfo.setPassWord("54321");
        userInfo.setPhone("18500909876");
        userInfo.setCreateDay("2022-02-06");
        userInfoService.saveData(userInfo);
        return "success";
    }

    //localhost:7010/getById?id=1
    @GetMapping("/getById")
    public UserInfo getById (int id) {
        return userInfoService.selectById(id) ;
    }

    @GetMapping("/getList")
    public List<UserInfo> getList () {
        return userInfoService.selectList() ;
    }

}
7、服务实现类,UserInfoService
@Service
public class UserInfoService {

    @Resource
    private UserInfoMapper userInfoMapper ;

    public void saveData(UserInfo userInfo) {
        userInfoMapper.saveData(userInfo);
    }

    public UserInfo selectById(Integer id) {
        return userInfoMapper.selectById(id);
    }

    public List<UserInfo> selectList() {
        return userInfoMapper.selectList();
    }

}
8、启动类
@SpringBootApplication
@MapperScan(basePackages = {"com.congge.mapper"})
public class App {

    public static void main(String[] args) {
        SpringApplication.run(App.class,args);
    }

}
9、功能接口测试
查询测试,调用接口:localhost:7010/getById?id=1

插入数据测试,调用接口:localhost:7010/saveData

然后再去clickhouse表中查询下数据

到此这篇关于springboot 整合 clickhouse的文章就介绍到这了,更多相关springboot 整合 clickhouse内容请搜索我们以前的文章或继续浏览下面的相关文章希望大家以后多多支持我们!
相关推荐
-

SpringBoot2 整合 ClickHouse数据库案例解析
一.ClickHouse简介 1.基础简介 Yandex开源的数据分析的数据库,名字叫做ClickHouse,适合流式或批次入库的时序数据.ClickHouse不应该被用作通用数据库,而是作为超高性能的海量数据快速查询的分布式实时处理平台,在数据汇总查询方面(如GROUP BY),ClickHouse的查询速度非常快. 2.数据分析能力 OLAP场景特征 · 大多数是读请求 · 数据总是以相当大的批(> 1000 rows)进行写入 · 不修改已添加的数据 · 每次查询都从数据库中读取大量的行,
-
springboot 整合 clickhouse的实现示例
目录 前言 前置准备 使用jdbc方式操作clickhouse 与springboot的整合 代码完整整合步骤 前言 了解了clickhouse的基础概念和相关的理论之后,本篇将通过实例代码演示如何在Java代码中操作clickhouse,主要涉及的内容包括: 使用JDBC的方式操作clickhouseclickhouse与springboot的整合使用 前置准备 1.clickhouse服务确保已开启 2.为保证实验效果,提前创建一张表,并为该表插入一些实验数据 create table t_
-
Redis和springboot 整合redisUtil类的示例代码
一.引入依赖 <dependency> <groupId>org.springframework.boot</groupId> <artifactId>spring-boot-starter-data-redis</artifactId> </dependency> 二.在application.yml 配置redis服务器 spring: # 环境 dev|test|prod profiles: active: dev servle
-
SpringBoot整合OpenCV的实现示例
简介 接下来会讲解怎么用SpringBoot整合OpenCV 初始化SpringBoot项目 这里正常初始一个SpringBoot项目 依赖文件 在安装目录下找到以下两个文件,如果不知道怎么安装OpenCV,可查看这篇文章,Windows下安装OpenCV opencv\build\java\opencv-420.jar opencv\build\java\x64\opencv_java420.dll 在resource目录下新建一个lib文件夹,然后将两个文件复制到resource\lib下
-
SpringBoot整合Hbase的实现示例
简介 当单表数据量过大的时候,关系性数据库会出现性能瓶颈,这时候我们就可以用NoSql,比如Hbase就是一个不错的解决方案.接下来是用Spring整合Hbase的实际案例,且在最后会给出整合中可能会出现的问题,以及解决方案.这里我是用本地Windows的IDEA,与局域网的伪分布Hbase集群做的连接,其中Hbase集群包括的组件有:Jdk1.8.Hadoop2.7.6.ZooKeeper3.4.10.Hbase2.0.1,因为这里只是开发环境,所以做一个伪分布的就好,之后部署的时候再按生产环
-
springboot整合spring-retry的实现示例
1.背景 本系统调用外围系统接口(http+json),但是发现有时外围系统服务不太稳定,有时候会出现返回一串xml或者gateway bad的信息,导致调用失败,基于这一原因,采用基于springboot,整合spring-retry的重试机制到系统工程中,demo已经放到github上. 2.解决方案 简要说明:demo工程基于springboot,为了方便验证,采用swagger进行测试验证. 2.1 pom文件 <?xml version="1.0" encoding=&
-
SpringBoot整合Redis管道的示例代码
目录 1. Redis 之管道(pipeline) 2. SpringBoot 整合 Redis 管道实例 1. Redis 之管道(pipeline) 执行一个Redis命令,Redis客户端和Redis服务器就需要执行以下步骤: 客户端发送命令到服务器: 服务器接受命令请求,执行命令,产生相应的结果: 服务器返回结果给客户端: 客户端接受命令的执行结果,并向用户展示. Redis命令所消耗的大部分时间都用在了发送命令请求和接收命令结果上面,把任意多条Redis命令请求打包在一起,然后一次性地
-
SpringBoot整合JWT的实现示例
目录 一. JWT简介 二. Java实现JWT(SpringBoot方式整合) JWT总结 一. JWT简介 1. 什么是JWT? JWT(JSON Web Token)是为了在网络应用环境间传递声明而执行的一种基于JSON的开放标准. 它将用户信息加密到token里,服务器不保存任何用户信息.服务器通过使用保存的密钥验证token的正确性,只要正确即通过验证:应用场景如用户登录.JWT详细讲解请见 github:https://github.com/jwtk/jjwt 2. 为什么使用JWT
-
SpringBoot整合WebService的实现示例
目录 SpringBoot搭建WebService程序 一.定义规范接口 二.搭建WebService服务端 三.搭建WebService客户端 WebService是一种传统的SOA技术架构,它不依赖于任何的编程语言,也不依赖于任何的技术平台,可以直接基于HTTP协议实现网络应用间的数据交互. 面向服务架构(SOA)是一个组件模型,它将应用程序的不同功能单元(称为服务)进行拆分,并通过这些服务之间定义良好的接口和协议联系起来.接口是采用中立的方式进行定义的,它应该独立于实现服务的硬件平台.操作
-
Springboot整合FreeMarker的实现示例
目录 一.项目搭建 1.新建模块 2.导入依赖 :将不相关的依赖删掉 3.新建软件包,放入student实体类 4.新建StudentMapper接口 5.Springboot04Application内引用mapper 6.application.yml文件配置 7.测试 8.将切面.util包.启动器导入 9.新建service层 10.新建controller层 11.运行启动类Springboot04Application,访问localhost:8080网址 二.freemarker介
-
springboot整合mongodb changestream的示例代码
目录 前言 ChangeStream介绍 环境准备 Java客户端操作changestream 1.引入maven依赖 2.测试类核心代码 下面来看看具体的整合步骤 1.引入核心依赖 2.核心配置文件 3.编写实体类,映射comment集合中的字段 4.编写一个服务类 5.编写一个接口 6.接下来,只需要依次添加下面3个配置类即可 典型应用场景 数据迁移 应用监控 对接大数据应用 前言 changestream是monggodb的3.6版本之后出现的一种基于collection(数据库集合)的变