Springboot启动原理详细讲解
主启动类方法:
@SpringBootApplication
public class MyJavaTestApplication {
    public static void main(String[] args) {
        SpringApplication.run(MyJavaTestApplication.class, args);
    }
}
点击进入方法
public static ConfigurableApplicationContext run(Class<?>[] primarySources, String[] args) {
   return new SpringApplication(primarySources).run(args);
}
先看看new SpringApplication(primarySources)里做了什么?
public SpringApplication(ResourceLoader resourceLoader, Class<?>... primarySources) {
this.resourceLoader = resourceLoader;
Assert.notNull(primarySources, "PrimarySources must not be null");
this.primarySources = new LinkedHashSet<>(Arrays.asList(primarySources));
//判断当前web容器的类型,一般返回SERVLET,标识是web类型
this.webApplicationType = WebApplicationType.deduceFromClasspath();
//获取META-INF/spring.factories文件中以//org.springframework.boot.Bootstrapper和
//org.springframework.boot.BootstrapRegistryInitializer为key的class
//创建对象,然后装入对象属性中;
this.bootstrapRegistryInitializers = getBootstrapRegistryInitializersFromSpringFactories();
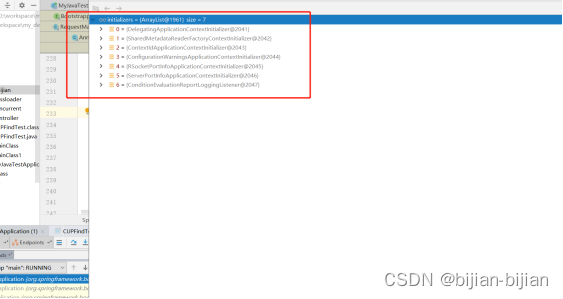
setInitializers((Collection)
//获取META-INF/spring.factories文件中以
//org.springframework.context.ApplicationContextInitializer的key的对
//存入到initializers集合属性中;
getSpringFactoriesInstances(ApplicationContextInitializer.class));
//获取META-INF/spring.factories文件中以
//org.springframework.context.ApplicationListener的key的对
//存入到listeners集合属性中;
setListeners((Collection)
getSpringFactoriesInstances(ApplicationListener.class));
//找到main方法的启动主类class对象赋值到对象属性中。
this.mainApplicationClass = deduceMainApplicationClass();
}
spring.factories读取了对外扩展的ApplicationContextInitializer ,ApplicationListener 对外扩展, 对类解耦(比如全局配置文件、热部署插件)
所以我们可以利用这一特性,在容器加载的各个阶段进行扩展。
上面读取到的对象getSpringFactoriesInstances(ApplicationContextInitializer.class))
存入到initializers集合中的对象
getSpringFactoriesInstances(ApplicationListener.class));存入到listeners集合属性中的对象

再看一下最重要的run方法:
public ConfigurableApplicationContext run(String... args) {
// 用来记录当前springboot启动耗时
   StopWatch stopWatch = new StopWatch();
// 就是记录了启动开始时间
   stopWatch.start();
//创建DefaultBootstrapContext bootstrapContext = new
//DefaultBootstrapContext();对象,然后循环执行上面文件中赋值的bootstrapRegistryInitializers集合中对象的方法,入参就是bootstrapContext对象,利用此处我们可以扩展改变bootstrapContext对象中的一项属性值等,在这里还不知道此bootstrapContext对象的用处。
   DefaultBootstrapContext bootstrapContext = createBootstrapContext();
// 它是任何spring上下文的接口, 所以可以接收任何ApplicationContext实现
   ConfigurableApplicationContext context = null;
// 开启了Headless模式,暂时不知道此模式的作用
   configureHeadlessProperty();
//去spring.factroies中读取了 org.springframework.boot.SpringApplicationRunListener为key的对象,默认是EventPublishingRunListener对象,然后封装进SpringApplicationRunListeners 对象中,此对象还是比较有用的,用来发布springboot启动进行中的各个状态的事件,上面方法中读取到的监听器就可以监听到这些事件,所以可以运用这些特性进行自己的扩展。
   SpringApplicationRunListeners listeners = getRunListeners(args);
// 发布1.ApplicationStartingEvent事件,在运行开始时发送 ,发送springboot启动开始事件;
   listeners.starting(bootstrapContext, this.mainApplicationClass);
   try {
//根据启动项目命令所带的参数创建applicationArguments 对象
      ApplicationArguments applicationArguments = new DefaultApplicationArguments(args);
//初始化环境变量:读取系统环境变量、发送了一个ApplicationEnvironmentPreparedEvent事件,利用相关监听器来解析项目中配置文件中的配置,(EnvironmentPostProcessorApplicationListener
监听器解析的配置文件)
      ConfigurableEnvironment environment = prepareEnvironment(listeners, bootstrapContext, applicationArguments);
// 忽略beaninfo的bean
      configureIgnoreBeanInfo(environment);
// 打印Banner 横幅
      Banner printedBanner = printBanner(environment);
//根据webApplicationType 容器类型,创建对应的spring上下文,一般是AnnotationConfigServletWebServerApplicationContext;
      context = createApplicationContext();
//给spring上下文赋值DefaultApplicationStartup对象
      context.setApplicationStartup(this.applicationStartup);
//预初始化上下文,这里做了给上下文添加environment对象,上面获取到的initializers集合中的ApplicationContextInitializer对象执行其入参为上下文initialize方法,对上下文做编辑,所以此处我们可以做扩展;发送ApplicationContextInitializedEvent容器初始化事件;发送BootstrapContextClosedEvent事件;最重要的一个方法就是把启动配置类注册成了beanDefinition;发送ApplicationPreparedEvent事件,并把listeners集合属性中的事件添加到上下文中;
	prepareContext(bootstrapContext, context, environment, listeners, applicationArguments, printedBanner);
	//刷新容器:和spring中的refresh()方法的作用是一样的,主要的作用就是读取所有的bean转成beanDefinition然后再创建bean对象;不过这个容器重写了其中的onRefresh()方法,在此方法中,创建了springboot内置的tomcat对象并进行启动;接下来特别说明一下这个内置tomcat
      refreshContext(context);
      afterRefresh(context, applicationArguments);
      stopWatch.stop();
//打印启动时间;
      if (this.logStartupInfo) {
         new StartupInfoLogger(this.mainApplicationClass).logStarted(getApplicationLog(), stopWatch);
      }
//发布容器启动事件ApplicationStartedEvent;发布AvailabilityChangeEvent容器可用实践;
      listeners.started(context);
//执行容器中ApplicationRunner、ApplicationRunner类型对象的run方法
      callRunners(context, applicationArguments);
   }
   catch (Throwable ex) {
      handleRunFailure(context, ex, listeners);
      throw new IllegalStateException(ex);
   }
   try {
//发布ApplicationReadyEvent容器已经正常事件;
      listeners.running(context);
   }
   catch (Throwable ex) {
      handleRunFailure(context, ex, null);
      throw new IllegalStateException(ex);
   }
   return context;
}
prepareEnvironment方法
private ConfigurableEnvironment prepareEnvironment(SpringApplicationRunListeners listeners,
      ApplicationArguments applicationArguments) {
   // 根据webApplicationType 创建Environment  创建就会读取: java环境变量和系统环境变量
   ConfigurableEnvironment environment = getOrCreateEnvironment();
   // 将命令行参数读取环境变量中
   configureEnvironment(environment, applicationArguments.getSourceArgs());
   // 将@PropertieSource的配置信息 放在第一位, 因为读取配置文件@PropertieSource优先级是最低的
   ConfigurationPropertySources.attach(environment);
   // 发布了ApplicationEnvironmentPreparedEvent 的监听器  读取了全局配置文件
   listeners.environmentPrepared(environment);
   // 将所有spring.main 开头的配置信息绑定SpringApplication
   bindToSpringApplication(environment);
   if (!this.isCustomEnvironment) {
      environment = new EnvironmentConverter(getClassLoader()).convertEnvironmentIfNecessary(environment,
            deduceEnvironmentClass());
   }
   //更新PropertySources
   ConfigurationPropertySources.attach(environment);
   return environment;
}
lprepareContext
l预初始化上下文
private void prepareContext(ConfigurableApplicationContext context, ConfigurableEnvironment environment,
      SpringApplicationRunListeners listeners, ApplicationArguments applicationArguments, Banner printedBanner) {
   context.setEnvironment(environment);
   postProcessApplicationContext(context);
   // 拿到之前读取到所有ApplicationContextInitializer的组件, 循环调用initialize方法
   applyInitializers(context);
   // 发布了ApplicationContextInitializedEvent
   listeners.contextPrepared(context);
   if (this.logStartupInfo) {
      logStartupInfo(context.getParent() == null);
      logStartupProfileInfo(context);
   }
   // 获取当前spring上下文beanFactory (负责创建bean)
   ConfigurableListableBeanFactory beanFactory = context.getBeanFactory();
   beanFactory.registerSingleton("springApplicationArguments", applicationArguments);
   if (printedBanner != null) {
      beanFactory.registerSingleton("springBootBanner", printedBanner);
   }
   // 在Spring下 如果出现2个重名的bean, 则后读取到的会覆盖前面
   // 在SpringBoot 在这里设置了不允许覆盖, 当出现2个重名的bean 会抛出异常
   if (beanFactory instanceof DefaultListableBeanFactory) {
      ((DefaultListableBeanFactory) beanFactory)
            .setAllowBeanDefinitionOverriding(this.allowBeanDefinitionOverriding);
   }
   // 设置当前spring容器是不是要将所有的bean设置为懒加载
   if (this.lazyInitialization) {
      context.addBeanFactoryPostProcessor(new LazyInitializationBeanFactoryPostProcessor());
   }
   // Load the sources
   Set<Object> sources = getAllSources();
   Assert.notEmpty(sources, "Sources must not be empty");
   // 读取主启动类,将它注册为BD、就像我们以前register(启动类);一个意思 (因为后续要根据配置类解析配置的所有bean)
   load(context, sources.toArray(new Object[0]));
   //4.读取完配置类后发送ApplicationPreparedEvent。
   listeners.contextLoaded(context);
}
1.初始化SpringApplication 从spring.factories 读取 listener ApplicationContextInitializer 。
2.运行run方法
3.读取 环境变量 配置信息…
4.创建springApplication上下文:ServletWebServerApplicationContext
5.预初始化上下文 : 读取启动类
6.调用refresh 加载ioc容器
7.加载所有的自动配置类
8.创建servlet容器
9.ps.在这个过程中springboot会调用很多监听器对外进行扩展
看一下内置tomcat如何启动的:
Springboot的spring容器ServletWebServerApplicationContext对象重新了refresh()方法中的onRefresh()放用来启动tomcat
@Override
protected void onRefresh() {
   super.onRefresh();
   try {
//创建tomcat
      createWebServer();
   }
   catch (Throwable ex) {
      throw new ApplicationContextException("Unable to start web server", ex);
   }
}
createWebServer创建tomcat的方法(也可以是Jetty,根据配置)
private void createWebServer() {
   WebServer webServer = this.webServer;
   ServletContext servletContext = getServletContext();
//如果servletContext 为null说明是内置tomcat,不为null,则使用的是外置tomcat,这个servletContext 是tomcat创建传入的;
   if (webServer == null && servletContext == null) {
      StartupStep createWebServer = this.getApplicationStartup().start("spring.boot.webserver.create");
//获取servlet容器创建工厂,tomcat的是TomcatServletWebServerFactory
      ServletWebServerFactory factory = getWebServerFactory();
      createWebServer.tag("factory", factory.getClass().toString());
//创建内置tomcat对象,并启动;getSelfInitializer()这个方法也是很重要的,返回的是ServletWebServerApplicationContext#selfInitialize方法的引用函数,其作用是tomcat启动时会回调此方法,并传入servletContext对象,进行DispacherServlet添加到servletContext中,把当前spring容器和filter过滤器也添加到servletContext中
      this.webServer = factory.getWebServer(getSelfInitializer());
      createWebServer.end();
      getBeanFactory().registerSingleton("webServerGracefulShutdown",
            new WebServerGracefulShutdownLifecycle(this.webServer));
      getBeanFactory().registerSingleton("webServerStartStop",
            new WebServerStartStopLifecycle(this, this.webServer));
   }
   else if (servletContext != null) {
      try {
         getSelfInitializer().onStartup(servletContext);
      }
      catch (ServletException ex) {
         throw new ApplicationContextException("Cannot initialize servlet context", ex);
      }
   }
   initPropertySources();
}
selfInitializ方法
private void selfInitialize(ServletContext servletContext) throws ServletException {
//把spring容器和servletContext进行相互引用
   prepareWebApplicationContext(servletContext);
   registerApplicationScope(servletContext);
   WebApplicationContextUtils.registerEnvironmentBeans(getBeanFactory(), servletContext);
//servletContext中添加Dispacherservlet和多个fileter
   for (ServletContextInitializer beans : getServletContextInitializerBeans()) {
      beans.onStartup(servletContext);
   }
}
到此这篇关于Springboot启动原理详细讲解的文章就介绍到这了,更多相关Springboot启动原理内容请搜索我们以前的文章或继续浏览下面的相关文章希望大家以后多多支持我们!
相关推荐
-
Springboot启动后立即某个执行方法的四种方式
目录 注解@PostConstruct CommandLineRunner接口 实现ApplicationRunner接口 实现ApplicationListener 四种方式的执行顺序 总结 最新需要在项目启动后立即执行某个方法,然后特此记录下找到的四种方式 注解@PostConstruct 使用注解@PostConstruct是最常见的一种方式,存在的问题是如果执行的方法耗时过长,会导致项目在方法执行期间无法提供服务. @Component public class StartInit {
-
springboot项目启动后执行方法的三种方式
目录 1 方法 方法1:spring的ApplicationListener< ContextRefreshedEvent>接口 方法2:springboot的ApplicationRunner接口 方法3:springboot的CommandLineRunner接口 2 指定执行顺序 3 原理 springboot项目启动后执行方法,有三种实现方式. 1 方法 ApplicationListener< ContextRefreshedEvent> 不推荐 ApplicationL
-

SpringBoot中jar启动下如何读取文件路径
目录 SpringBoot jar启动下读取文件路径 代码如下 截图如下 SpringBoot获取路径的方式 前置条件 SpringBoot jar启动下读取文件路径 由于我们经常使用jar 包作为我们的项目启动方式 以及我们经常会设涉及到生成文件这时候就需要一个文件路劲存放临时文件 因为我们正在存放可以在第三方服务器或者自己文件服务器. 下面就介绍一种jar 下生成文件存放示例. 代码如下 @GetMapping("/index") public String getFile() t
-
快速掌握SpringBoot应用的启动入口
目录 1.一切的开始 2.总结 Springboot可以说是Java程序员必备技能了,大家都知道Springboot最终可以通过maven打成jar包,然后直接使用java -jar命令运行一个Web工程(或其它).这样就避免了原先基于tomcat的web工程的复杂操作.Springboot能够使Web服务的部署简单到如此程度是因为其内置了Jetty(或Tomcat)服务器,并且在容器启动过程中start该服务器,成功运行Web服务. 本篇并不是深究内置服务器的启动过程,而是追溯Springbo
-
Springboot详解底层启动过程
目录 SpringApplication构造分析 SpringApplication run分析 SpringApplication构造分析 1.记录 BeanDefinition 源 spring容器刚开始是空的,要去各个源找到beanDefinition,这些源可能是配置类,可能是xml文件.在构造方法里会获取一个主源,也就是引导类,根据引导类去获取beanDefinition. 2.推断应用类型 根据jar包去判断是什么引用类型 3.记录 ApplicationContext 初始化器 对
-
详解SpringBoot启动代码和自动装配源码分析
目录 一.SpringBoot启动代码主线分析 二.SpringBoot自动装配原理分析 1.自动装配的前置知识@Import 2.@SpringApplication注解分析 2.1@SpringBootConfiguration 2.2@EnableAutoConfiguration 随着互联网的快速发展,各种组件层出不穷,需要框架集成的组件越来越多.每一种组件与Spring容器整合需要实现相关代码.SpringMVC框架配置由于太过于繁琐和依赖XML文件:为了方便快速集成第三方组件和减少
-
Springboot项目启动到一半卡住了,不报错问题及解决
目录 项目启动到一半卡住了,不报错 无法正常启动很慢但也不报错 项目启动到一半卡住了,不报错 今天启动项目时,启动到一半卡住了,不报错,开始我以为是timeout,后来发现不是这个原因. 然后在网上找了很多资料,有些说是日志Jar包递归了,可是我同事本地跑起来却没有错,找了好久的原因,然后我想着重新import下pom.xml,重新部署jar包,果不其然,可以了. 无法正常启动很慢但也不报错 Debug启动缓慢,导致卡住 由于启动断点过多的形式,需在IDEA一下去除断点 以上为个人经验,希望能给
-
SpringBoot图文并茂带你掌握devtools热启动
目录 1.相关概念 2.下载安装 3.使用测试 4. 自动编译 1.相关概念 当开发者将spring-boot-devtools引入项目后,只要classpath路径下的静态资源文件发生了变化,项目就会自动重启,这极大地提高了项目的开发速度.如果开发者使用了Eclipse,那么在修改完代码并保存之后,项目将自动编译并触发重启,而开发如果使用了IntelliJ IDEA,默认情况下,需要开发者手动编译(Build Project)才会触发重启. 2.下载安装 pom.xml中导入依赖 <depen
-
Springboot启动原理详细讲解
主启动类方法: @SpringBootApplication public class MyJavaTestApplication { public static void main(String[] args) { SpringApplication.run(MyJavaTestApplication.class, args); } } 点击进入方法 public static ConfigurableApplicationContext run(Class<?>[] primarySour
-
通过代码实例了解SpringBoot启动原理
这篇文章主要介绍了通过代码实例了解SpringBoot启动原理,文中通过示例代码介绍的非常详细,对大家的学习或者工作具有一定的参考学习价值,需要的朋友可以参考下 SpringBoot和Spring相比,有着不少优势,比如自动配置,jar直接运行等等.那么SpringBoot到底是怎么启动的呢? 下面是SpringBoot启动的入口: @SpringBootApplication public class HelloApplication { public static void main(Str
-
GoLang并发机制探究goroutine原理详细讲解
目录 1. 进程与线程 2. goroutine原理 3. 并发与并行 3.1 在1个逻辑处理器上运行Go程序 3.2 goroutine的停止与重新调度 3.3 在多个逻辑处理器上运行Go程序 通常程序会被编写为一个顺序执行并完成一个独立任务的代码.如果没有特别的需求,最好总是这样写代码,因为这种类型的程序通常很容易写,也很容易维护.不过也有一些情况下,并行执行多个任务会有更大的好处.一个例子是,Web 服务需要在各自独立的套接字(socket)上同时接收多个数据请求.每个套接字请求都是独立的
-
Springboot启动原理和自动配置原理解析
目录 启动原理 SpringApplication 1.初始化 2.调用run方法 自动配置原理 放本地文件夹都快吃土了,准备清理文件夹,关于Springboot的! 启动原理 @SpringBootApplication public class Start { public static void main(String[] args) { SpringApplication.run(Start.class, args); } } SpringApplication 1.初始化 public
-
分析SpringBoot的启动原理
背景 1> 大家都知道SpringBoot是通过main函数启动的,这里面跟踪代码到处都没有找到while(true),为什么启动后可以一直跑? 2> SpringBoot默认使用tomcat作为web容器.大家也可以通过在pom文件中exclusion掉tomcat,denpendency jetty 的方法来使用jetty.那SpringBoot是怎么做到在不同web容器之间切换的呢? 3> 传统的web容器比如jetty本质上是直接通过java start.jar 来启动,之后来加
-
SpringBoot详细讲解断言机制原理
目录 1.简单断言 2.数组断言 3.组合断言 4.异常断言 5.超时断言 6.快速失败 JUnit 5 内置的断言可以分成如下几个类别: 1.简单断言 用来对单个值进行简单的验证.如: 方法 说明 assertEquals 判断两个对象或两个原始类型是否相等 assertNotEquals 判断两个对象或两个原始类型是否不相等 assertSame 判断两个对象引用是否指向同一个对象 assertNotSame 判断两个对象引用是否指向不同的对象 assertTrue 判断给定的布尔值是否为
-
SpringBoot超详细讲解自动配置原理
目录 SpringBoot自动配置原理 SpringBoot特点 1.依赖管理 A.父项目做依赖管理 B.开发导入starter场景启动器 C.可以修改默认版本号 2.自动配置 A.自动配好Tomcat B.自动配好SpringMVC C.默认的包结构 D.各种配置拥有默认值 E.按需要加载所有自动配置项 SpringBoot自动配置原理 了解SpringBoot自动配置原理 1.SpringBoot特点 2.容器功能 3.自动配置原理入门 4.开发技巧 SpringBoot特点 1.依赖管理
-
Springboot详细讲解循环依赖
目录 一.循环依赖 二.循环依赖形成条件(使用构造器注入) 三.循环依赖形成条件(@Aysnc注解的bean生成了对象的代理) 四.针对以上问题对Spring如何解决循环依赖进行详细阐述 一.循环依赖 顾名思义多个类中的依赖形成了环路,形成了类似于死锁的情况,导致springboot在启动时无法为我们创建Bean.通俗来说 就是beanA中依赖了beanB,beanB中也依赖了beanA. spring是支持循环依赖的,但是默认只支持单例的循环依赖,如果bean中依赖了原型bean,则需要加上l
-
SpringBoot嵌入式Servlet容器与定制化组件超详细讲解
目录 嵌入式Servlet容器 1.原理分析 2.Servlet容器切换 3.定制Servlet容器配置 定制化组件 嵌入式Servlet容器 在Spring Boot中,默认支持的web容器有 Tomcat, Jetty, 和 Undertow 1.原理分析 那么这些web容器是怎么注入的呢?我们一起来分析一下 当SpringBoot应用启动发现当前是Web应用,它会创建一个web版的ioc容器ServletWebServerApplicationContext 这个类下面有一个createW
-
SpringBoot预加载与懒加载实现方法超详细讲解
目录 预加载 getMergedLocalBeanDefinition 循环创建bean 懒加载 @Lazy 全局懒加载 为什么需要全局懒加载 全局懒加载的好处与问题 预加载 bean在springBoot启动过程中就完成创建加载 在AbstractApplicationContext的refresh方法中 // Instantiate all remaining (non-lazy-init) singletons. beanFactory.preInstantiateSingletons()