使用VUE+SpringBoot+EasyExcel 整合导入导出数据的教程详解
目录
- 1 前端
- 2 数据库
- 3 后端
- 3.1 contrller
- 3.2 mapper
- 3.3 bean
- 3.4 listener
- 3.5 config
- 3.6 配置文件
- 4 启动测试
创建一个普通的maven项目即可
项目目录结构

1 前端
存放在resources/static 下
index.html
<!DOCTYPE html>
<html lang="en">
  <head>
    <meta charset="UTF-8" />
    <meta http-equiv="X-UA-Compatible" content="IE=edge" />
    <meta name="viewport" content="width=device-width, initial-scale=1.0" />
    <title>Document</title>
    <!-- 开发环境版本,包含了有帮助的命令行警告 -->
    <script src="https://cdn.jsdelivr.net/npm/vue@2/dist/vue.js"></script>
    <!-- 引入样式 -->
    <link
      rel="stylesheet"
      href="https://unpkg.com/element-ui/lib/theme-chalk/index.css" rel="external nofollow"
    />
    <!-- 引入组件库 -->
    <script src="https://unpkg.com/element-ui/lib/index.js"></script>
    <script src="https://unpkg.com/axios/dist/axios.min.js"></script>
  </head>
  <body>
    <div id="app">
      <div class="app-container">
        <div style="margin-bottom: 10px">
          <el-button
            @click="dialogVisible = true"
            type="primary"
            size="mini"
            icon="el-icon-download"
          >
            导入Excel
          </el-button>
          <el-dialog
            title="数据字典导入"
            :visible.sync="dialogVisible"
            width="30%"
          >
            <el-form>
              <el-form-item label="请选择Excel文件">
                <el-upload
                  :auto-upload="true"
                  :multiple="false"
                  :limit="1"
                  :on-exceed="fileUploadExceed"
                  :on-success="fileUploadSuccess"
                  :on-error="fileUploadError"
                  :action="importUrl"
                  name="file"
                  accept="application/vnd.ms-excel,application/vnd.openxmlformats-officedocument.spreadsheetml.sheet"
                >
                  <!--accept 只接受某种格式的文件-->
                  <el-button size="small" type="primary">点击上传</el-button>
                </el-upload>
              </el-form-item>
            </el-form>
            <div slot="footer" class="dialog-footer">
              <el-button @click="dialogVisible = false">取消</el-button>
            </div>
          </el-dialog>
          <!-- 导出 -->
          <el-button
            @click="exportData"
            type="primary"
            size="mini"
            icon="el-icon-upload2"
          >
            导出Excel
          </el-button>
          <!-- 数据展示 -->
          <el-table :data="list" stripe style="width: 100%">
            <el-table-column prop="name" label="姓名" width="180">
            </el-table-column>
            <el-table-column prop="birthday" label="生日" width="180">
            </el-table-column>
            <el-table-column prop="salary" label="薪资"> </el-table-column>
          </el-table>
          <div>
            <el-pagination
              @size-change="handleSizeChange"
              @current-change="handleCurrentChange"
              :current-page="pageNum"
              :page-sizes="[2, 5, 10,  20]"
              :page-size="pageSize"
              background
              layout="total, sizes, prev, pager, next, jumper"
              :total="total"
            >
            </el-pagination>
          </div>
        </div>
      </div>
    </div>
  </body>
  <script>
    new Vue({
      el: '#app',
      data() {
        return {
          dialogVisible: false, //文件上传对话框是否显示
          list: [], // 字典的数据
          importUrl: 'http://localhost:8811/api/excel/import',
          pageNum: 1, // 页数
          pageSize: 5, // 每页条数
          total: 1000,
        }
      },
      created() {
        this.showList()
      },
      methods: {
        showList() {
          //使用自定义配置
          const request = axios.create({
            baseURL: 'http://localhost:8811', //url前缀
            timeout: 1000, //超时时间
            // headers: { token: 'helen123456' }, //携带令牌
          })
          request
            .get('/api/excel/list', {
              params: {
                pageNum: this.pageNum,
                pageSize: this.pageSize,
              },
            })
            .then((res) => {
              this.total = res.data.size
              this.list = res.data.list
              console.log(res)
            })
        },
        // 上传多于一个文件时
        fileUploadExceed() {
          this.$message.warning('只能选取一个文件')
        },
		// 导出
        exportData() {
          window.location.href = 'http://localhost:8811/api/excel/export'
        },
        //上传成功回调
        fileUploadSuccess(response) {
          if (response.code === 0) {
            this.$message.success('数据导入成功')
            this.dialogVisible = false
          } else {
            this.$message.error(response.message)
          }
        },
        //上传失败回调
        fileUploadError(error) {
          this.$message.error('数据导入失败')
        },
        /**
         * 用户所选择当前页面展示的数据条数
         */
        handleSizeChange(val) {
          console.log(`每页 ${val} 条`)
          this.pageSize = val
          this.showList()
        },
        handleCurrentChange(val) {
          console.log(`当前页: ${val}`)
          this.pageNum = val
          this.showList()
        },
      },
    })
  </script>
</html>
2 数据库
CREATE TABLE `student` (
  `name` varchar(255) DEFAULT NULL COMMENT '姓名',
  `birthday` datetime DEFAULT NULL COMMENT '生日',
  `salary` decimal(10,4) DEFAULT NULL COMMENT '薪资'
) ENGINE=InnoDB DEFAULT CHARSET=utf8mb4;
3 后端
3.1 contrller
StudentController
@Slf4j
@RestController
@CrossOrigin
@RequestMapping("/api/excel/")
public class StudentController {
    @Resource
    private StudentMapper studentMapper;
    @GetMapping("list")
    public HashMap<String, Object> list(@RequestParam int pageNum,@RequestParam int pageSize){
        // 分页查询
        Page<Student> page = new Page<>(pageNum, pageSize);
        studentMapper.selectPage(page,null);

        // 封装数据
        HashMap<String, Object> map = new HashMap<>();
        ArrayList<ExcelStudentDTO> excelDictDTOList = new ArrayList<>();
        // 转换数据
        page.getRecords().forEach(student -> {
            ExcelStudentDTO studentDTO = new ExcelStudentDTO();
            BeanUtils.copyProperties(student,studentDTO);
            excelDictDTOList.add(studentDTO);
        });

        map.put("list",excelDictDTOList);
        map.put("size",page.getTotal());
        return map;
    }

    /**
     * 导入
     * @param file 文件对象
     */
    @RequestMapping("import")
    @Transactional(rollbackFor = {Exception.class})
    public String importData( @RequestParam("file") MultipartFile file){
        try {
            // 读取文件流
            EasyExcel.read
                    (file.getInputStream(),// 前端上传的文件
                            ExcelStudentDTO.class,// 跟excel对应的实体类
                            new ExcelDictDTOListener(studentMapper))// 监听器
                    .excelType(ExcelTypeEnum.XLSX)// excel的类型
                    .sheet("模板").doRead();
            log.info("importData finished");
        } catch (IOException e) {
           log.info("失败");
           e.printStackTrace();
        }
        return "上传成功";
    }

    /**
     * 导入
     */
    @GetMapping("export")
    public String exportData(HttpServletResponse response){

        try {
            // 设置响应体内容
            response.setContentType("application/vnd.ms-excel");
            response.setCharacterEncoding("utf-8");

            // 这里URLEncoder.encode可以防止中文乱码 当然和easyexcel没有关系
            String fileName = URLEncoder.encode("myStu", "UTF-8").replaceAll("\\+", "%20");
            response.setHeader("Content-disposition", "attachment;filename*=utf-8''" + fileName + ".xlsx");
            EasyExcel.write(response.getOutputStream()
                    ,ExcelStudentDTO.class).sheet().doWrite(studentMapper.selectList(null));
        } catch (Exception e) {
            e.printStackTrace();
        }
        return "上传成功";
    }

}
3.2 mapper
StudentMapper
@Mapper
public interface StudentMapper extends BaseMapper<Student> {
    void insertBatch(List<ExcelStudentDTO> list);
}
StudentMapper.xml
<?xml version="1.0" encoding="UTF-8"?>
<!DOCTYPE mapper PUBLIC "-//mybatis.org//DTD Mapper 3.0//EN" "http://mybatis.org/dtd/mybatis-3-mapper.dtd">
<mapper namespace="look.word.mapper.StudentMapper">
  <insert id="insertBatch" >
    insert into student(name, birthday, salary)
    values
    <foreach collection="list"   item="item" separator=",">
               (
        #{item.name} ,
        #{item.birthday} ,
        #{item.salary}
        )
    </foreach>
  </insert>
</mapper>
3.3 bean
ExcelStudentDTO
导入数据时 要保证excel中列名和ExcelStudentDTO一致奥
/**
 * excel对应的实体类
 * @author jiejie
 */
@Data
public class ExcelStudentDTO {
	// excel中的列名
    @ExcelProperty("姓名")
    private String name;
    @ExcelProperty("生日")
    private Date birthday;
    @ExcelProperty("薪资")
    private BigDecimal salary;
}
Student
/**
 * 数据库对应的实体类
 * @author jiejie
 */
@Data
@TableName(value = "student")
public class Student {
    /**
     * 姓名
     */
    @TableField(value = "name")
    private String name;
    /**
     * 生日
     */
    @TableField(value = "birthday")
    private Date birthday;
    /**
     * 薪资
     */
    @TableField(value = "salary")
    private BigDecimal salary;
    public static final String COL_NAME = "name";
    public static final String COL_BIRTHDAY = "birthday";
    public static final String COL_SALARY = "salary";
}
3.4 listener
EasyExcel读取文件需要用到
ExcelDictDTOListener
/**
 * 监听
 * 再读取数据的同时 对数据进行插入操作
 * @author : look-word
 * @date : 2022-05-10 21:35
 **/
@Slf4j
//@AllArgsConstructor //全参
@NoArgsConstructor //无参
public class ExcelDictDTOListener extends AnalysisEventListener<ExcelStudentDTO> {
    /**
     * 每隔5条存储数据库,实际使用中可以3000条,然后清理list ,方便内存回收
     */
    private static final int BATCH_COUNT = 5;
    List<ExcelStudentDTO> list = new ArrayList<ExcelStudentDTO>();
    private StudentMapper studentMapper;
    //传入mapper对象
    public ExcelDictDTOListener(StudentMapper studentMapper) {
        this.studentMapper = studentMapper;
    }
    /**
     *遍历每一行的记录
     * @param data
     * @param context
     */
    @Override
    public void invoke(ExcelStudentDTO data, AnalysisContext context) {
        log.info("解析到一条记录: {}", data);
        list.add(data);
        // 达到BATCH_COUNT了,需要去存储一次数据库,防止数据几万条数据在内存,容易OOM
        if (list.size() >= BATCH_COUNT) {
            saveData();
            // 存储完成清理 list
            list.clear();
        }
    }
    /**
     * 所有数据解析完成了 都会来调用
     */
    @Override
    public void doAfterAllAnalysed(AnalysisContext context) {
        // 这里也要保存数据,确保最后遗留的数据也存储到数据库
        saveData();
        log.info("所有数据解析完成!");
    }
    /**
     * 加上存储数据库
     */
    private void saveData() {
        log.info("{}条数据,开始存储数据库!", list.size());
        studentMapper.insertBatch(list);  //批量插入
        log.info("存储数据库成功!");
    }
}
3.5 config
mybatisPlus分页插件
MybatisPlusConfig
@Configuration
public class MybatisPlusConfig {

    /**
     * 新的分页插件,一缓和二缓遵循mybatis的规则,
     * 需要设置 MybatisConfiguration#useDeprecatedExecutor = false
     * 避免缓存出现问题(该属性会在旧插件移除后一同移除)
     */
    @Bean
    public MybatisPlusInterceptor mybatisPlusInterceptor() {
        MybatisPlusInterceptor interceptor = new MybatisPlusInterceptor();
        PaginationInnerInterceptor paginationInnerInterceptor = new PaginationInnerInterceptor();
        paginationInnerInterceptor.setDbType(DbType.MYSQL);
        paginationInnerInterceptor.setOverflow(true);
        interceptor.addInnerInterceptor(paginationInnerInterceptor);
        return interceptor;
    }
    @Bean
    public ConfigurationCustomizer configurationCustomizer() {
        return configuration -> configuration.setUseDeprecatedExecutor(false);
    }
}
3.6 配置文件
application.yaml
server:
  port: 8811
spring:
  datasource: # mysql数据库连接
    type: com.zaxxer.hikari.HikariDataSource
    driver-class-name: com.mysql.cj.jdbc.Driver
    url: jdbc:mysql://localhost:3306/2022_source_springboot?serverTimezone=GMT%2B8&characterEncoding=utf-8
    username: root
    password: 317311
mybatis-plus:
  configuration:# sql日志
    log-impl: org.apache.ibatis.logging.stdout.StdOutImpl
  mapper-locations:
    - classpath:mapper/*.xml
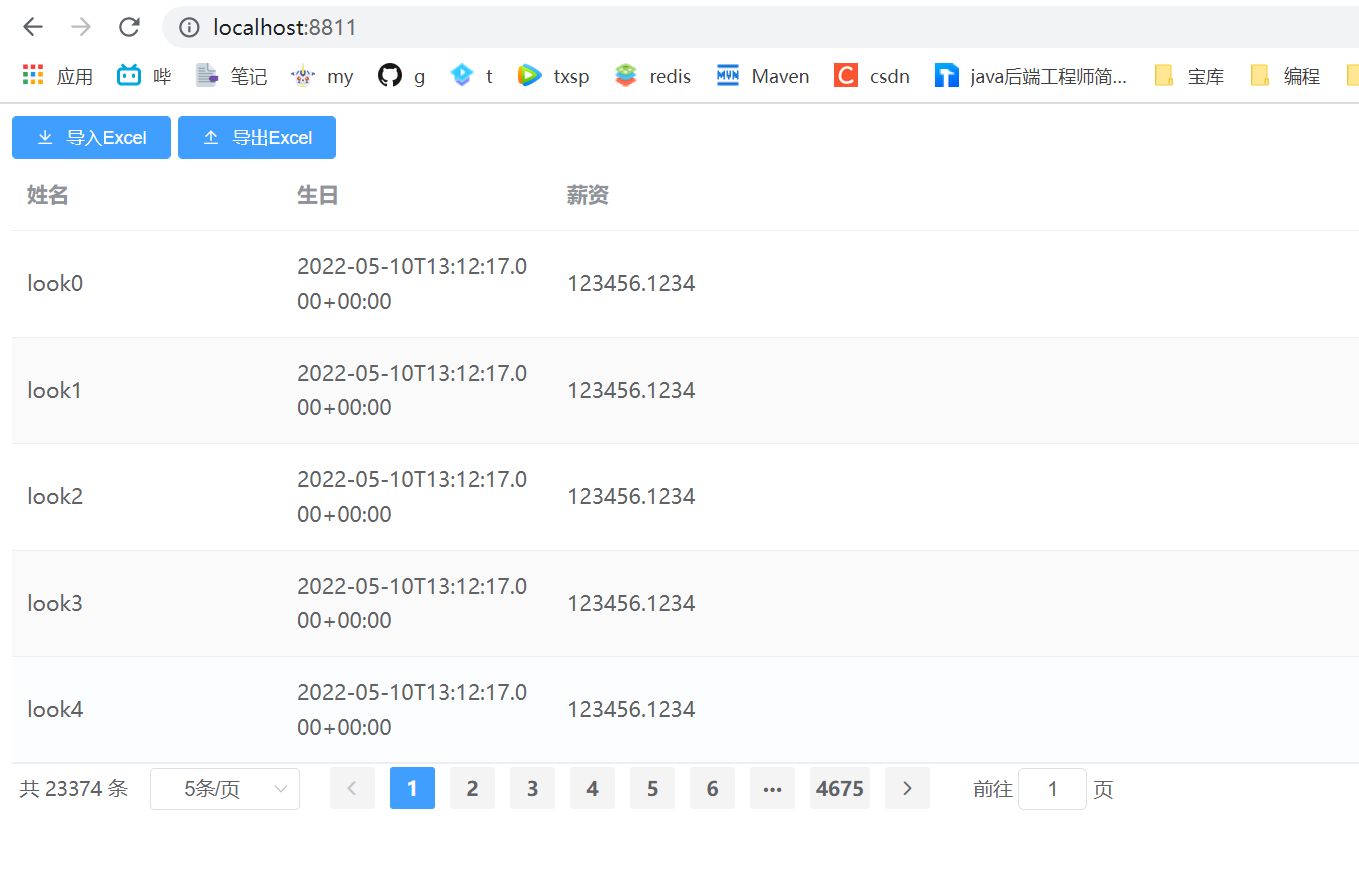
4 启动测试
启动springboot哦
页面效果图
导出效果

注意
导入数据时 要保证excel中列名和ExcelStudentDTO一致奥
到此这篇关于使用VUE+SpringBoot+EasyExcel 整合导入导出数据的文章就介绍到这了,更多相关vue springboot easyexcel导入导出数据内容请搜索我们以前的文章或继续浏览下面的相关文章希望大家以后多多支持我们!
相关推荐
-

使用VUE+SpringBoot+EasyExcel 整合导入导出数据的教程详解
目录 1 前端 2 数据库 3 后端 3.1 contrller 3.2 mapper 3.3 bean 3.4 listener 3.5 config 3.6 配置文件 4 启动测试 创建一个普通的maven项目即可 项目目录结构 1 前端 存放在resources/static 下 index.html <!DOCTYPE html> <html lang="en"> <head> <meta charset="UTF-8&quo
-
SpringBoot导入导出数据实现方法详解
今天给大家带来的是一个 SpringBoot导入导出数据 首先我们先创建项目 注意:创建SpringBoot项目时一定要联网不然会报错 项目创建好后我们首先对 application.yml 进行编译 server: port: 8081# mysqlspring: datasource: driver-class-name: com.mysql.cj.jdbc.Driver url: jdbc:mysql://127.0.0.1:3306/dvd?characterEncodi
-
SpringBoot整合EasyExcel实现导入导出数据
目录 前言 1.前端 2.数据库 3.后端 3.1 contrller 3.2 mapper 3.3 bean 3.4 listener 3.5 config 3.6 配置文件 4.启动测试 前言 创建一个普通的maven项目即可 项目目录结构 1.前端 存放在resources/static 下 index.html <!DOCTYPE html> <html lang="en"> <head> <meta charset="UTF
-
vue组件中使用props传递数据的实例详解
在 Vue 中,父子组件的关系可以总结为 props向下传递,事件向上传递.父组件通过 props 给子组件下发数据,子组件通过事件给父组件发送消息.看看它们是怎么工作的. 一.基本用法 组件不仅仅是要把模板的内容进行复用,更重要的是组件间要进行通信. 在组件中,使用选项props 来声明需要从父级接收的数据, props 的值可以是两种, 一种是字符串数组,一种是对象. 1.1 字符串数组: <div id="app4"> <my-component4 messa
-
vue中引用swiper轮播插件的教程详解
有时候我们需要在vue中使用轮播组件,如果是在vue组件中引入第三方组件的话,最好通过npm安装,从而进行统一安装包管理. 申明:本文所使用的是vue.2x版本. 通过npm安装插件: npm install swiper --save-dev 在需要使用swiper的组件里引入swiper,swiper的初始化放在mounted里 Slider.vue源码: <template> <div class="swiper-container"> <div
-
React为 Vue 引入容器组件和展示组件的教程详解
如果你使用过 Redux 开发 React,你一定听过 容器组件(Smart/Container Components) 或 展示组件(Dumb/Presentational Components),这样划分有什么样的好处,我们能否能借鉴这种划分方式来编写 Vue 代码呢?这篇文章会演示为什么我们应该采取这种模式,以及如何在 Vue 中编写这两种组件. 为什么要使用容器组件? 假如我们要写一个组件来展示评论,在没听过容器组件之前,我们的代码一般都是这样写的: components/Comment
-
Mac版PhpStorm之XAMPP整合apache服务器配置的图文教程详解
选择在PhpStorm集成apache服务器,下面是我自己的亲测的步骤. 1.如何修改apache默认端口 xampp apache默认的http访问端口是80 修改完成后在xampp中重启apache. 2.配置流程 打开Settings / Preferences 找到 Build, Execution, Deployment 选项,点击 Deployment 添加如下: 因为我们修改了默认端口80,所以这里一定要指明端口号.目录是/Applications/XAMPP/xamppfiles
-
Spring Boot启动过程(五)之Springboot内嵌Tomcat对象的start教程详解
标题和Spring Boot启动过程(四)之Spring Boot内嵌Tomcat启动很像,所以特别强调一下,这个是Tomcat对象的. 从TomcatEmbeddedServletContainer的this.tomcat.start()开始,主要是利用LifecycleBase对这一套容器(engine,host,context及wrapper)进行启动并发布诸如configure_start.before_init.after_start的lifecycleEvent事件给相应的监听器(如
-
Vue+Koa2 打包后进行线上部署的教程详解
最近使用Vue和Koa2重构了自己的博客,过程中踩了不少坑,查了很多资料,最后总算成功上线.之后我计划围绕这个过程写一系列文章,讲讲如何用Vue+Koa2写一套网站. 而现在,先来讲讲最后一步,在写完Vue和Koa2后,如何将它们部署到线上. 1.将Vue和Koa2结合 很多人在打完包后就不知道怎么做了,毕竟后面都是后端的事情.如果你用的是Vue-cli3.0,那么打包这一步会非常简单,只需要执行一条命令即可,其它的不用关心: npm run build 之后会生成一个dist的文件夹,将它放到
-
vue本地模拟服务器请求mock数据的方法详解
目录 原因 场景 方法 mock资源 配置 vue.config.js + settings.js .env.development + .env.production mock-request.js table.js mockDataTest 代码 总结 原因 1.mockjs本地开发的时候用还好,mock数据需要生产时候用就不大行了 2.mock的数据通过module.exports.export实现的时候,npm run build 生产打包的时候,这些假数据会打包进app.js文件里面,