Springboot使用cache缓存过程代码实例

1.pom.xml

<!-- Ehcache 坐标 -->
<dependency>
  <groupId>net.sf.ehcache</groupId>
  <artifactId>ehcache</artifactId>
</dependency>

2.ehcache.xml

<?xml version="1.0" encoding="UTF-8"?>
<ehcache>

  <diskStore path="java.io.tmpdir"/>

  <!--defaultCache:echcache的默认缓存策略 -->
  <defaultCache
      maxElementsInMemory="10000"
      eternal="false"
      timeToIdleSeconds="120"
      timeToLiveSeconds="120"
      maxElementsOnDisk="10000000"
      diskExpiryThreadIntervalSeconds="120"
      memoryStoreEvictionPolicy="LRU">
    <persistence strategy="localTempSwap"/>
  </defaultCache>
  <!--
    maxElementsInMemory设置成1,overflowToDisk设置成true,只要有一个缓存元素,就直接存到硬盘上去
    eternal设置成true,代表对象永久有效
    maxElementsOnDisk设置成0 表示硬盘中最大缓存对象数无限大
    diskPersistent设置成true表示缓存虚拟机重启期数据
  -->
  <cache name="usercache"
      maxElementsInMemory="1"
      eternal="true"
      overflowToDisk="true"
      maxElementsOnDisk="0"
      diskPersistent="true">
<!--    <persistence strategy="localTempSwap"/>--> <!--不能和diskPersistent 同时存在-->
  </cache>

diskStore是物理文件的存储路径,

cache标签中的name是多cache时区分的唯一标识, 和程序中初始化方法getCache("***")参数一致。<br>缓存参数和本地数据持久化存储需自行配置

3.application.yml

spring:
 cache:
  ehcache:
   config: classpath:/ehcache.xml

4.启动类添加

@EnableCaching

import org.mybatis.spring.annotation.MapperScan;
import org.springframework.boot.SpringApplication;
import org.springframework.boot.autoconfigure.SpringBootApplication;
import org.springframework.cache.annotation.EnableCaching;

@EnableCaching
@SpringBootApplication
public class DemoApplication {

  public static void main(String[] args) {
    SpringApplication.run(DemoApplication.class, args);
  }

}

5.springcloud 中使用cache

import net.sf.ehcache.Cache;
import net.sf.ehcache.CacheManager;
import net.sf.ehcache.Element;
import org.springframework.beans.factory.annotation.Autowired;
import org.springframework.core.io.ClassPathResource;
import org.springframework.stereotype.Component;

import java.io.IOException;

/**
 * @Author: Peacock__
 * @Date: 2019/6/14 17:30
 */
@Component
public class CacheService {

  @Autowired
  private CacheManager cacheManager;
  /**
   * 从缓存中获取数据
   * @return
   * @throws IOException
   */
  public String getCache() throws IOException {
   String res = "";

    Cache cache = cacheManager.getCache("usercache");
    if(cache != null){
      Element element = cache.get("name");
      if(element != null){
        Object objectValue = element.getObjectValue();
        res = (String) objectValue;
      }
    }
    return res;
  }

  /**
   * 数据存入缓存
   * @param data
   * @throws IOException
   */
  public void putCache(String data) throws IOException {
    //若cacheManager被关闭,则重新创建
    if(cacheManager == null || cacheManager.getStatus().intValue() != 1){
      cacheManager = new CacheManager(new ClassPathResource("ehcache.xml").getInputStream());
    }
    Cache cache = cacheManager.getCache("usercache");
    //处理成要缓存的数据

    //存入缓存(注意:需要保证存入缓存的数据都是可序列化的)
    cache.put(new Element("name", data));
    /**
     * ehcache和其它缓存类似,需要flush或shutdown后才会持久化到磁盘。
     * 会生成.data 的数据文件和 .index 的索引文件,方便重启恢复。
     * ehcache恢复数据是根据.index索引文件来进行数据恢复的。
     * 当程序再次启动的时候,ehcache的一个方法会将.data文件和.index文件的修改时间进行比较,如果不符合直接将.index文件删除。
     */
    //将所有缓存项从内存刷新到磁盘存储,并从DiskStore刷新到磁盘。
//    cache.flush();
    //更新.index文件
//    cacheManager.shutdown();
  }
}

6.controller层

import java.io.IOException;

@RestController
public class AppController{

  @Autowired
  private CacheService cacheService;

  @RequestMapping("/setName")
  public String setName() {

    try {
      cacheService.putCache( "heshan");
    } catch (IOException e) {
      e.printStackTrace();
    }
    return "yes";
  }
  @RequestMapping("/getName")
  public String getName() {

    String res = null;
    try {
      res = cacheService.getCache( );
    } catch (IOException e) {
      e.printStackTrace();
    }
    return res;
  }
}

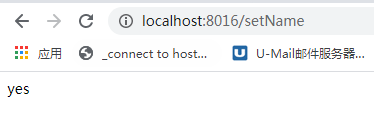
结果:
以上就是本文的全部内容,希望对大家的学习有所帮助,也希望大家多多支持我们。

(0)

相关推荐

  • springboot集成spring cache缓存示例代码

    本文介绍如何在springboot中使用默认的spring cache, 声明式缓存 Spring 定义 CacheManager 和 Cache 接口用来统一不同的缓存技术.例如 JCache. EhCache. Hazelcast. Guava. Redis 等.在使用 Spring 集成 Cache 的时候,我们需要注册实现的 CacheManager 的 Bean. Spring Boot 为我们自动配置了 JcacheCacheConfiguration. EhCacheCacheCo

  • SpringBoot中Shiro缓存使用Redis、Ehcache的方法

    SpringBoot 中配置redis作为session 缓存器. 让shiro引用 本文是建立在你是使用这shiro基础之上的补充内容 第一种:Redis缓存,将数据存储到redis 并且开启session存入redis中. 引入pom <dependency> <groupId>org.springframework.boot</groupId> <artifactId>spring-boot-starter-data-redis</artifac

  • SpringBoot加入Guava Cache实现本地缓存代码实例

    这篇文章主要介绍了SpringBoot加入Guava Cache实现本地缓存代码实例,文中通过示例代码介绍的非常详细,对大家的学习或者工作具有一定的参考学习价值,需要的朋友可以参考下 在pom.xml中加入guava依赖 <dependency> <groupId>com.google.guava</groupId> <artifactId>guava</artifactId> <version>18.0</version>

  • 详解springboot整合ehcache实现缓存机制

    EhCache 是一个纯Java的进程内缓存框架,具有快速.精干等特点,是Hibernate中默认的CacheProvider. ehcache提供了多种缓存策略,主要分为内存和磁盘两级,所以无需担心容量问题. spring-boot是一个快速的集成框架,其设计目的是用来简化新Spring应用的初始搭建以及开发过程.该框架使用了特定的方式来进行配置,从而使开发人员不再需要定义样板化的配置. 由于spring-boot无需任何样板化的配置文件,所以spring-boot集成一些其他框架时会有略微的

  • Spring Boot 中使用cache缓存的方法

    一.什么是缓存 Cache Cache 一词最早来自于CPU设计 当CPU要读取一个数据时,首先从CPU缓存中查找,找到就立即读取并送给CPU处理:没有找到,就从速率相对较慢的内存中读取并送给CPU处理,同时把这个数据所在的数据块调入缓存中,可以使得以后对整块数据的读取都从缓存中进行,不必再调用内存.正是这样的读取机制使CPU读取缓存的命中率非常高(大多数CPU可达90%左右),也就是说CPU下一次要读取的数据90%都在CPU缓存中,只有大约10%需要从内存读取.这大大节省了CPU直接读取内存的

  • springboot使用GuavaCache做简单缓存处理的方法

    问题背景 实际项目碰到一个上游服务商接口有10秒的查询限制(同个账号). 项目中有一个需求是要实时统计一些数据,一个应用下可能有多个相同的账号.由于服务商接口的限制,当批量查询时,可能出现同一个账号第一次查询有数据,但第二次查询无数据的情况. 解决方案 基于以上问题,提出用缓存的过期时间来解决. 这时,可用Redis和Guava Cache来解决: 当批量查询时,同一个账号第一次查询有数据则缓存并设置过期时间10s, 后续查询时直接从缓存中取,没有再从服务商查询. 最终采用Guava Cache

  • spring boot+spring cache实现两级缓存(redis+caffeine)

    spring boot中集成了spring cache,并有多种缓存方式的实现,如:Redis.Caffeine.JCache.EhCache等等.但如果只用一种缓存,要么会有较大的网络消耗(如Redis),要么就是内存占用太大(如Caffeine这种应用内存缓存).在很多场景下,可以结合起来实现一.二级缓存的方式,能够很大程度提高应用的处理效率. 内容说明: 缓存.两级缓存 spring cache:主要包含spring cache定义的接口方法说明和注解中的属性说明 spring boot

  • 使用ehcache三步搞定springboot缓存的方法示例

    本次内容主要介绍基于Ehcache 3.0来快速实现Spring Boot应用程序的数据缓存功能.在Spring Boot应用程序中,我们可以通过Spring Caching来快速搞定数据缓存.接下来我们将介绍如何在三步之内搞定Spring Boot缓存. 1. 创建一个Spring Boot工程并添加Maven依赖 你所创建的Spring Boot应用程序的maven依赖文件至少应该是下面的样子: <?xml version="1.0" encoding="UTF-8

  • Springboot使用cache缓存过程代码实例

    1.pom.xml <!-- Ehcache 坐标 --> <dependency> <groupId>net.sf.ehcache</groupId> <artifactId>ehcache</artifactId> </dependency> 2.ehcache.xml <?xml version="1.0" encoding="UTF-8"?> <ehcach

  • SpringBoot整合模板引擎过程代码实例

    一.SpringBoot整合freemarker: 1.引入freemarker模板依赖: <dependency> <groupId>org.springframework.boot</groupId> <artifactId>spring-boot-starter-freemarker</artifactId> <version>1.5.9.RELEASE</version> </dependency> 2

  • Springboot自动装配实现过程代码实例

    创建一个简单的项目: <?xml version="1.0" encoding="UTF-8"?> <project xmlns="http://maven.apache.org/POM/4.0.0" xmlns:xsi="http://www.w3.org/2001/XMLSchema-instance" xsi:schemaLocation="http://maven.apache.org/PO

  • springboot集成fastDfs过程代码实例

    这篇文章主要介绍了springboot集成fastDfs过程代码实例,文中通过示例代码介绍的非常详细,对大家的学习或者工作具有一定的参考学习价值,需要的朋友可以参考下 pom.xml 引入依赖 <dependency> <groupId>com.github.tobato</groupId> <artifactId>fastdfs-client</artifactId> <version>1.26.1-RELEASE</vers

  • Springboot整合GuavaCache缓存过程解析

    这篇文章主要介绍了springboot整合GuavaCache缓存过程解析,文中通过示例代码介绍的非常详细,对大家的学习或者工作具有一定的参考学习价值,需要的朋友可以参考下 Guava Cache是一种本地缓存机制,之所以叫本地缓存,是因为它不会把缓存数据放到外部文件或者其他服务器上,而是存放到了应用内存中. Guava Cache的优点是:简单.强大.轻量级. GuavaCache适用场景: 1.某些接口或者键值会被查询多次以上: 2.愿意使用或牺牲一些内存空间来提升访问或者计算速度: 3.缓

  • springboot使用dubbo和zookeeper代码实例

    这篇文章主要介绍了springboot使用dubbo和zookeeper代码实例,文中通过示例代码介绍的非常详细,对大家的学习或者工作具有一定的参考学习价值,需要的朋友可以参考下 创建服务接口模块 接口工程只提供接口,不提供实现,在后面的提供者和消费者中使用 在使用接口的模块中只需要写具体实现类,避免了在每个模块中重复编写接口 在接口中引入依赖包 <dependency> <groupId>org.projectlombok</groupId> <artifact

  • laravel框架的缓存操作代码实例

    laravel为不同的缓存系统提供了统一的API.缓存配置位于config/cache.php.Laravel目前支持主流的缓存后端有Memcached和Redis等. 主要方法: cache::put() cache::get() cache::add() cache::pull() cache::forever() cache::forget() cahce::has() 系统默认是使用文件缓存,其缓存文件储存的位置位于storage/framework/cahce/date 设置缓存 语法

  • 清除laravel缓存命令代码实例

    清除Laravel(终端)中的缓存 登录运行laravel应用程序的系统并打开终端.然后导航到Laravel应用程序代码.在这里,就可以使用以下命令来清除缓存: 1.清除应用程序缓存 运行以下命令以清除Laravel应用程序的应用程序缓存 $ php artisan cache:clear 2.清除路由缓存 要清除Laravel应用程序的路由缓存,请从shell执行以下命令. $ php artisan route:cache 3.清除配置缓存 您可以使用config:cache清除Larave

  • SpringBoot集成cache缓存的实现

    前言 日常开发中,缓存是解决数据库压力的一种方案,通常用于频繁查询的数据,例如新闻中的热点新闻,本文记录springboot中使用cache缓存. 官方文档介绍:https://docs.spring.io/spring-boot/docs/2.1.0.RELEASE/reference/htmlsingle/#boot-features-caching-provider-generic 工程结构 代码编写 pom引入依赖,引入cache缓存,数据库使用mysql,ORM框架用jpa <!--添

  • springboot使用事物注解方式代码实例

    这篇文章主要介绍了springboot使用事物注解方式代码实例,文中通过示例代码介绍的非常详细,对大家的学习或者工作具有一定的参考学习价值,需要的朋友可以参考 1.在启动类Application中添加注解@EnableTransactionManagement import tk.mybatis.spring.annotation.MapperScan; import org.springframework.boot.SpringApplication; import org.springfra

随机推荐