Android仿小米时钟效果
我在一个[博客] android高仿小米时钟(使用Camera和Matrix实现3D效果)上面看到了小米时钟实现.特别感兴趣.就认真的看了一遍.并自己敲了一遍.下面说下我自己的理解和我的一些改进的地方效果真的特别棒就发布了自己的时钟应用。
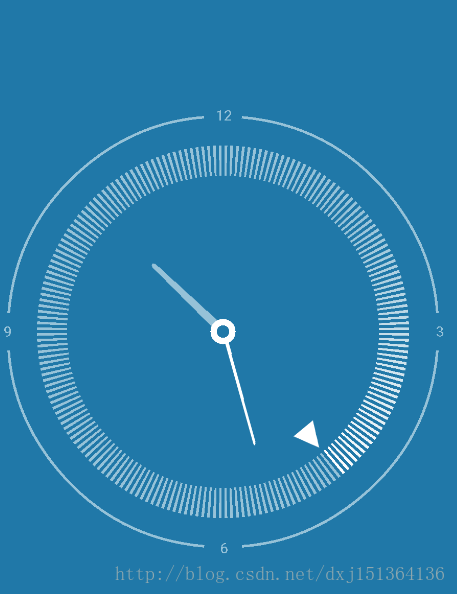
先上图(电脑没有gif截图软件.大家凑合看.哪个软件好也可以给我推荐下)

话不多说,首先自定义控件XimiClockView继承view 并做一些初始化的操作
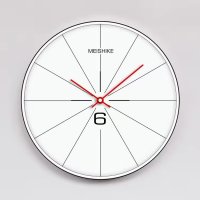
看到的漂亮时钟图片我自己画的效果图(以后妈妈再也不用担心我迟到了)

public XimiClockView(Context context) {
  super(context);
  init(context, null);
 }

 public XimiClockView(Context context, AttributeSet attrs) {
  super(context, attrs);
  init(context, attrs);
 }

 public XimiClockView(Context context, AttributeSet attrs, int defStyleAttr) {
  super(context, attrs, defStyleAttr);
  init(context, attrs);
 }

 @RequiresApi(api = Build.VERSION_CODES.LOLLIPOP)
 public XimiClockView(Context context, AttributeSet attrs, int defStyleAttr, int defStyleRes) {
  super(context, attrs, defStyleAttr, defStyleRes);
  init(context, attrs);
 }

 /**
  * 进行一些初始化的操作
  *
  * @param context
  * @param attrs
  */
 private void init(Context context, AttributeSet attrs) {
  if (attrs == null) return;
  TypedArray array = context.obtainStyledAttributes(attrs, R.styleable.MyClockView);
  backGroundColor = array.getColor(R.styleable.MyClockView_clockBackColor, Color.parseColor("#2078A8"));
  drakColor = array.getColor(R.styleable.MyClockView_clockDarkColor, Color.parseColor("#96C2D8"));
  lightColor = array.getColor(R.styleable.MyClockView_clockLightColor, Color.parseColor("#ffffff"));
  array.recycle();//注意这里别忘了调用recycle()方法,[原因](http://www.cnblogs.com/kissazi2/p/4049982.html)
  //设置背景色
  setBackgroundColor(backGroundColor);
  //文本画笔
  textPaint = new Paint();
  textPaint.setColor(drakColor);
  textPaint.setTextSize(25);
  textRect = new Rect();
 }
然后在onSizeChange方法中调用获取时钟半径,和一些其他的计算
 @Override
 protected void onSizeChanged(int w, int h, int oldw, int oldh) {
  super.onSizeChanged(w, h, oldw, oldh);
  //获取时钟的半径
  mRadius = Math.min(w - getPaddingLeft() - getPaddingRight(), h - getPaddingTop() - getPaddingBottom()) / 2;
  //为了防止时钟旋转的时候超出了界限,默认加一个padding值
  defaultPadding = 0.12f * mRadius;
  //圆弧的宽度
  mCircleWidth = 0.012f * mRadius;
  //圆环的宽度
  mCircleRingWidth = 0.12f*mRadius;
  paddingLeft = w / 2 - mRadius + getPaddingLeft() + defaultPadding;
  paddingTop = h / 2 - mRadius + getPaddingTop() + defaultPadding;
  paddingRight = w / 2 - mRadius + getPaddingRight() + defaultPadding;
  paddingBottom = h / 2 - mRadius + getPaddingBottom() + defaultPadding;
  mSweepGradient = new SweepGradient(w / 2,h / 2 ,new int[]{drakColor,lightColor},new float[]{0.75f,1f});
 }
画Text
@Override
 protected void onDraw(Canvas canvas) {
  mCanvas = canvas;
  drawTimeText();
 }

 /**
  * 画12 /3 /6 /9时间
  */
 private void drawTimeText() {
  String str = "12";
  textPaint.getTextBounds(str, 0, str.length(), textRect);
  int lengthTextWidth = textRect.width();
  int textHeight = textRect.height();
  int width=getWidth();
  int height=getHeight();
  mCanvas.save();//保存画布的状态
  mCanvas.drawText(str, width / 2-lengthTextWidth/2,paddingTop+textHeight,textPaint);
  str="3";
  textPaint.getTextBounds(str, 0, str.length(), textRect);
  int smallTextWidth = textRect.width();
  mCanvas.drawText("3",width-paddingRight-lengthTextWidth/2-smallTextWidth/2,height/2+textHeight/2,textPaint);
  mCanvas.drawText("6",width / 2-smallTextWidth/2,height-paddingBottom,textPaint);
  mCanvas.drawText("9",paddingLeft,height/2+textHeight/2,textPaint);
  mCanvas.restore();//取出画布的状态
 }
崩溃写完了,我发表时候提示我没有登录,然后发表异常,然后我一刷新没了,,,又重新写一遍,
接下来画圆弧
 /**
  * 画圆弧
  */
 private void drawCircleArc() {
  mCanvas.save();
  mCirclePaint.setStyle(Paint.Style.STROKE);//设置空心模式
  mCirclePaint.setStrokeWidth(mCircleWidth);//设置圆弧宽度
  mCircleRectF.set(paddingLeft + textRect.width() / 2, paddingTop + textRect.height() / 2, getWidth() - paddingRight - textRect.width() / 2, getHeight() - paddingBottom - textRect.height() / 2);
  for (int x = 0; x < 4; x++) {
  //圆弧分四段来画,一段话80度
   mCanvas.drawArc(mCircleRectF, 5 + 90 * x, 80, false, mCirclePaint);
  }
  mCanvas.restore();
 }
画刻度
/**
  * 画圆环和刻度
  */
 private void drawCircleRing() {
  mCanvas.save();
  //画圆环
  mCircleRingRectF.set(paddingLeft+textRect.height()/2+1.5f*mCircleRingWidth,paddingTop+textRect.height()/2+1.5f*mCircleRingWidth,getWidth()-paddingRight-textRect.height()/2-1.5f*mCircleRingWidth,
    getHeight()-paddingBottom-textRect.height()/2-1.5f*mCircleRingWidth);
  mMatrix.setRotate(mDegreeS-90,getWidth()/2,getHeight()/2);
  mSweepGradient.setLocalMatrix(mMatrix);
  mCircleRingPaint.setStyle(Paint.Style.STROKE);
  mCircleRingPaint.setStrokeWidth(mCircleRingWidth);
  mCircleRingPaint.setShader(mSweepGradient);
  mCanvas.drawArc(mCircleRingRectF,0,360,false,mCircleRingPaint);
  //画刻度
  mScaleLinePaint.setStrokeWidth(0.1f*mCircleRingWidth);//设置线的宽度
  for (int i=0;i<200;i++){
   //画刻度线
   mCanvas.drawLine(getWidth()/2,paddingTop+textRect.height()/2+mCircleRingWidth,getWidth()/2,paddingTop+textRect.height()/2+2*mCircleRingWidth,mScaleLinePaint);
   mCanvas.rotate(1.8f,getWidth()/2,getHeight()/2);//旋转角度
  }
  mCanvas.restore();
 }
画秒针
 /**
  * 画秒针
  * 秒针针是不规则的图形
  * 就用到了Path这个类
  *
  */
 private void drawSoundHand() {
  mCanvas.save();
  path.reset();
  mCanvas.rotate(mDegreeS,getWidth()/2,getHeight()/2);//旋转的角度和旋转的圆心
  path.moveTo(getWidth()/2,paddingTop+textRect.height()/2+0.27f*mRadius);//开始的点
  path.lineTo(getWidth()/2+0.03f*mRadius,paddingTop+textRect.height()/2+0.31f*mRadius);//直线到这个位置
  path.lineTo(getWidth()/2-0.03f*mRadius,paddingTop+textRect.height()/2+0.31f*mRadius);//直线到这个位置
  path.close();
  mCanvas.drawPath(path,mSoundHandPaint);
  mCanvas.restore();
 }
画时针
 /**
  * 画时针
  */
 private void drawHourHand() {
  mCanvas.save();
  mCanvas.rotate(mDegreeH,getWidth()/2,getHeight()/2);
  hourHandPath.reset();
  hourHandPath.moveTo(getWidth()/2-0.02f*mRadius,getHeight()/2);
  hourHandPath.lineTo(getWidth()/2-0.01f*mRadius,getHeight()/2-0.35f*mRadius);
  //贝塞尔曲线
  hourHandPath.quadTo(getWidth()/2,getHeight()/2-0.38f*mRadius,getWidth()/2+0.01f*mRadius,getHeight()/2-0.35f*mRadius);
  hourHandPath.lineTo(getWidth()/2+0.02f*mRadius,getHeight()/2);
  hourHandPath.close();
  mCanvas.drawPath(hourHandPath,mHourHandPaint);
  mCanvas.restore();
 }
画分针
 /**
  * 画分针
  */
 private void drawMinnuteHand() {
  mCanvas.save();
  mCanvas.rotate(mDegreeM,getWidth()/2,getHeight()/2);
  mMinutePath.reset();
  mMinutePath.moveTo(getWidth()/2-0.012f*mRadius,getHeight()/2);
  mMinutePath.lineTo(getWidth()/2-0.006f*mRadius,getHeight()/2-0.40f*mRadius);
  mMinutePath.quadTo(getWidth()/2,getHeight()/2-0.43f*mRadius,getWidth()/2+0.006f*mRadius,getHeight()/2-0.40f*mRadius);
  mMinutePath.lineTo(getWidth()/2+0.012f*mRadius,getHeight()/2);
  mMinutePath.close();
  mCanvas.drawPath(mMinutePath,mMinutePaint);
  //画圈圈盖着时针的尾部
  mCanvas.drawCircle(getWidth()/2,getHeight()/2,0.03f*mRadius,mMinutePaint);
  mCanvas.drawCircle(getWidth()/2,getHeight()/2,0.015f*mRadius,mCircleMinPaint);
  mCanvas.restore();
 }
上我的measure的方法
 @Override
 protected void onMeasure(int widthMeasureSpec, int heightMeasureSpec) {
  setMeasuredDimension(getMeasure(widthMeasureSpec), getMeasure(heightMeasureSpec));
 }

 private int getMeasure(int measureSpec) {
  int result;
  int mode = MeasureSpec.getMode(measureSpec);
  int size = MeasureSpec.getSize(measureSpec);
  if (mode == MeasureSpec.EXACTLY) {
   result = size;
  } else {
   result = 800;
   if (mode == MeasureSpec.AT_MOST) {
    result = Math.min(result, size);
   }
  }
  return result;
 }
以上就是本文的全部内容,希望对大家的学习有所帮助,也希望大家多多支持我们。
赞 (0)

