vue实现自定义H5视频播放器的方法步骤
前言
前段时间基于vue写了一个自定义的video播放器组件,踩了一些小坑, 这里做一下复盘分享出来,避免日后重复踩坑...
设计阶段
这里就直接放几张完成后的播放状态图吧,界面布局基本就是flex+vw适配一把梭,也比较容易.

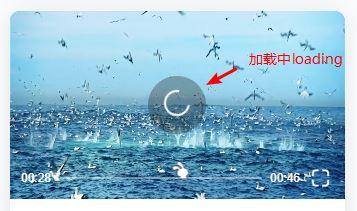

需要实现的几个功能基本都标注出来了; 除了还有一个视频加载失败的...下面就这届上代码了;刚开始构思的时候考虑了一下功能的实现方式: 一是用原生的DOM操作,获取video元素后,用addEventListener来监听; 二是用vue的方式绑定事件监听; 最后图方便采用了两者结合的方式,但是总感觉有点乱, 打算后期再做一下代码格式优化.
video组件实现过程
组件模板部分
主要是播放器的几种播放状态的逻辑理清楚就好了, 即: 播放中,缓存中,暂停,加载失败这几种情况,下面按功能分别说一下
<template>
 <div class="video-player">
  <!-- 播放器界面; 兼容ios controls-->
  <video
   ref="video"
   v-if="showVideo"
   webkit-playsinline="true"
   playsinline="true"
   x-webkit-airplay="true"
   x5-video-player-type="h5"
   x5-video-player-fullscreen="true"
   x5-video-orientation="portraint"
   style="object-fit:fill"
   preload="auto"
   muted="true"
   poster="https://photo.mac69.com/180205/18020526/a9yPQozt0g.jpg"
   :src="src"
   @waiting="handleWaiting"
   @canplaythrough="state.isLoading = false"
   @playing="state.isLoading = false, state.controlBtnShow = false, state.playing=true"
   @stalled="state.isLoading = true"
   @error="handleError"
  >您的浏览器不支持HTML5</video>
  <!-- 兼容Android端层级问题, 弹出层被覆盖 -->
  <img
   v-show="!showVideo || state.isEnd"
   class="poster"
   src="https://photo.mac69.com/180205/18020526/a9yPQozt0g.jpg"
   alt
  >
  <!-- 控制窗口 -->
  <div
   class="control"
   v-show="!state.isError"
   ref="control"
   @touchstart="touchEnterVideo"
   @touchend="touchLeaveVideo"
  >
   <!-- 播放 || 暂停 || 加载中-->
   <div class="play" @touchstart.stop="clickPlayBtn" v-show="state.controlBtnShow">
    <img
     v-show="!state.playing && !state.isLoading"
     src="../../assets/video/content_btn_play.svg"
    >
    <img
     v-show="state.playing && !state.isLoading"
     src="../../assets/video/content_btn_pause.svg"
    >
    <div class="loader" v-show="state.isLoading">
     <div class="loader-inner ball-clip-rotate">
      <div></div>
     </div>
    </div>
   </div>
   <!-- 控制条 -->
   <div class="control-bar" :style="{ visibility: state.controlBarShow ? 'visible' : 'hidden'}">
    <span class="time">{{video.displayTime}}</span>
    <span class="progress" ref="progress">
     <img
      class="progress-btn ignore"
      :style="{transform: `translate3d(${video.progress.current}px, 0, 0)`}"
      src="../../assets/video/content_ic_tutu.svg"
     >
     <span class="progress-loaded" :style="{ width: `${video.loaded}%`}"></span>
     <!-- 设置手动移动的进度条 -->
     <span
      class="progress-move"
      @touchmove.stop.prevent="moveIng($event)"
      @touchstart.stop="moveStart($event)"
      @touchend.stop="moveEnd($event)"
     ></span>
    </span>

    <span class="total-time">{{video.totalTime}}</span>
    <span class="full-screen" @click="fullScreen">
     <img src="../../assets/video/content_ic_increase.svg" alt>
    </span>
   </div>
  </div>
  <!-- 错误弹窗 -->
  <div class="error" v-show="state.isError">
   <p class="lose">视频加载失败</p>
   <p class="retry" @click="retry">点击重试</p>
  </div>
 </div>
</template>
播放器初始化
这里有个坑点我就是当父元素隐藏即display:none时,getBoundingClientRect()是获取不到元素的尺寸数值的,后来查了MDN文档,按上面说的改了一下border也没有用,最后尝试设置元素visibility属性为hidden后发现就可以获取了.
getBoundingClientRect() : 返回元素的大小及其相对于视口的位置, 这个api在计算元素相对位置的时候挺好用的.
  init() {
   // 初始化video,获取video元素
   this.$video = this.$el.getElementsByTagName("video")[0];
   this.initPlayer();
  },
  // 初始化播放器容器, 获取video-player元素
  // getBoundingClientRect()以client可视区的左上角为基点进行位置计算
  initPlayer() {
   const $player = this.$el;
   const $progress = this.$el.getElementsByClassName("progress")[0];
   // 播放器位置
   this.player.$player = $player;
   this.progressBar.$progress = $progress;
   this.player.pos = $player.getBoundingClientRect();
   this.progressBar.pos = $progress.getBoundingClientRect()
   this.video.progress.width = Math.round($progress.getBoundingClientRect().width);
  },
播放 && 暂停点击
我这里把事件监听都放在只有满足正在播放视频才开始事件监听; 感觉原生监听和vue方式的监听混合在一起写有点别扭...emem...这里需要对this.$video.play()做一个异常处理,防止video刚开始加载的时候失败,如果视频链接出错,play方法调用不了会抛错,后面我也用了video的error事件去监听播放时的错误
// 点击播放 & 暂停按钮
  clickPlayBtn() {
   if (this.state.isLoading) return;
   this.isFirstTouch = false;
   this.state.playing = !this.state.playing;
   this.state.isEnd = false;
   if (this.$video) {
    // 播放状态
    if (this.state.playing) {
     try {
      this.$video.play();
      this.isPauseTouch = false;
      // 监听缓存进度
      this.$video.addEventListener("progress", e => {
       this.getLoadTime();
      });
      // 监听播放进度
      this.$video.addEventListener(
       "timeupdate",
       throttle(this.getPlayTime, 100, 1)
      );
      // 监听结束
      this.$video.addEventListener("ended", e => {
       // 重置状态
       this.state.playing = false;
       this.state.isEnd = true;
       this.state.controlBtnShow = true;
       this.video.displayTime = "00:00";
       this.video.progress.current = 0;
       this.$video.currentTime = 0;
      });
     } catch (e) {
      // 捕获url异常出现的错误
     }
    }
    // 停止状态
    else {
     this.isPauseTouch = true;
     this.$video.pause();
    }
   }
  },
视频控制条显示和隐藏
这里需要加两个开关; 首次触屏和暂停触屏; 做一下显示处理即可
// 触碰播放区
  touchEnterVideo() {
   if (this.isFirstTouch) return;
   if (this.hideTimer) {
    clearTimeout(this.hideTimer);
    this.hideTimer = null;
   }
   this.state.controlBtnShow = true;
   this.state.controlBarShow = true;
  },
  // 离开播放区
  touchLeaveVideo() {
   if (this.isFirstTouch) return;
   if (this.hideTimer) {
    clearTimeout(this.hideTimer);
   }
   // 暂停触摸, 不隐藏
   if (this.isPauseTouch) {
    this.state.controlBtnShow = true;
    this.state.controlBarShow = true;
   } else {
    this.hideTimer = setTimeout(() => {
     this.state.controlBarShow = false;
     // 加载中只显示loading
     if (this.state.isLoading) {
      this.state.controlBtnShow = true;
     } else {
      this.state.controlBtnShow = false;
     }
     this.hideTimer = null;
    }, 3000);
   }
  },
视频错误处理和等待处理
这里错误直接用error事件, 加载中用stalled事件来监听视频阻塞状态,等待数据加载用的waiting事件; 显示对应的loading动画即可
// loading动画
@keyframes rotate {
 0% {
  transform: rotate(0deg);
 }
 50% {
  transform: rotate(180deg);
 }
 100% {
  transform: rotate(360deg);
 }
}

.loader {
 width: 58px;
 height: 58px;
 background: rgba(15, 16, 17, 0.3);
 border-radius: 50%;
 position: relative;
 .ball-clip-rotate {
  position: absolute;
  left: 50%;
  top: 50%;
  transform: translate(-50%, -50%);
  > div {
   width: 15px;
   height: 15px;
   border-radius: 100%;
   margin: 2px;
   animation-fill-mode: both;

   border: 2px solid #fff;
   border-bottom-color: transparent;
   height: 26px;
   width: 26px;
   background: transparent;
   display: inline-block;
   animation: rotate 0.75s 0s linear infinite;
  }
 }
}
播放时间设置
基本就是video对象的currentTime和duration这两个属性; 这里注意下视频如果没有设置预加载属性preload的话,在video元素初始化的时候是获取不到duration的...那你只能在播放的时候去拿了.
// 获取播放时间
  getPlayTime() {
   const percent = this.$video.currentTime / this.$video.duration;
   this.video.progress.current = Math.round(
    this.video.progress.width * percent
   );
   // 赋值时长
   this.video.totalTime = timeParse(this.$video.duration);
   this.video.displayTime = timeParse(this.$video.currentTime);
  },
  // 获取缓存时间
  getLoadTime() {
   // console.log('缓存了...',this.$video.buffered.end(0));
   this.video.loaded =
    (this.$video.buffered.end(0) / this.$video.duration) * 100;
  },
手动滑动进度条控制
这里直接用touch事件即可; 注意touchend中使用e.changedTouches;因为当手指离开屏幕,touches和targetTouches中对应的元素会同时移除,而changedTouches仍然会存在元素。
- touches: 当前屏幕上所有触摸点的列表;
- targetTouches: 当前对象上所有触摸点的列表;
- changedTouches: 涉及当前(引发)事件的触摸点的列表
// 手动调节播放进度
  moveStart(e) {},
  moveIng(e) {
   // console.log("触摸中...");
   let currentX = e.targetTouches[0].pageX;
   let offsetX = currentX - this.progressBar.pos.left;
   // 边界检测
   if (offsetX <= 0) {
    offsetX = 0
   }
   if (offsetX >= this.video.progress.width) {
    offsetX = this.video.progress.width
   }
   this.video.progress.current = offsetX;

   let percent = this.video.progress.current / this.video.progress.width;
   this.$video.duration && this.setPlayTime(percent, this.$video.duration)
  },
  moveEnd(e) {
   // console.log("触摸结束...");
   let currentX = e.changedTouches[0].pageX;
   let offsetX = currentX - this.progressBar.pos.left;
   this.video.progress.current = offsetX;
   // 这里的offsetX都是正数
   let percent = offsetX / this.video.progress.width;
   this.$video.duration && this.setPlayTime(percent, this.$video.duration)
  },
  // 设置手动播放时间
  setPlayTime(percent, totalTime) {
   this.$video.currentTime = Math.floor(percent * totalTime);
  },
全屏功能
这个功能在手机上会有写兼容性问题...有待完善
// 设置全屏
  fullScreen() {
   console.log('点击全屏...');
   if (!this.state.fullScreen) {
    this.state.fullScreen = true;
    this.$video.webkitRequestFullScreen();
   } else {
    this.state.fullScreen = false;
    document.webkitCancelFullScreen();
   }
坑点汇总
1.视频预加载才能获取时长
需要设置预加载 preload="auto"
2.Element.getBoundingClientRect()方法返回元素的大小及其相对于视口的位置
父元素设置display:none时获取不到尺寸数据民谣改为visibility:hidden
3.play()方法异常捕获
try{ xxxxx.play } catch(e) { yyyyyy }
4.安卓手机video兼容性处理, 视频播放时层级置顶,会影响全局弹出层样式
我这里做的处理是当弹出层出现时把视频给隐藏掉(宽高为0,或者直接去掉),用封面图来替代
5.ios下全屏处理
设置相应属性即可, playsinline
代码直通车: https://github.com/appleguardu/vue-h5-video
以上就是本文的全部内容,希望对大家的学习有所帮助,也希望大家多多支持我们。
相关推荐
-
vue音乐播放器插件vue-aplayer的配置及其使用实例详解
昨天在vue的官网上看到vue-aplayer这个音乐播放器的插件,由于个人有比较喜欢音乐,所以就拿过来玩一玩,感觉还是比较实用的,界面美观. 首先,我们先安装 npm install vue-aplayer --save ,之后在组件中引入 import VueAplayer from 'vue-aplayer',下面就是源码,可供参考: <template> <div> <div style="padding:10px 0;"> <a-p
-
Vue 开发音乐播放器之歌手页右侧快速入口功能
快速入口的列表是其实是之前处理的歌手的数据中的关于title的列表 shorcutList属性是计算属性 通过ret数组中的title计算到的 所以我们要在singer.vue组件中将数据传入到list-view组件 list-vue 组件在props中接受 shortcut快速入口列表 所用到的属性 是计算属性 通过将singer.vue组件中传入到list-view组件中的数据计算得到 将得到的shortcutList数据通过v-for展示在页面 效果图如下 下面来实现功能 1.点击右侧快速
-
基于vue-video-player自定义播放器的方法
先看一下效果. 图1--显示侧边栏 图2-收起侧边栏: 图三:全屏. 写在前面 本次项目中需要用到vue,vue-video-player,我用的是iview的ui框架,但是ui框架无妨,这里关注的是基于video.js开发的vue-video-player的使用,以及如何操作video.js中的api. vue-video-player 项目地址:https://github.com/surmon-china/vue-video-player. video.js文档地址:http://docs
-

vue-music关于Player播放器组件详解
本文实例为大家分享了关于Player播放器组件的具体内容,供大家参考,具体内容如下 迷你播放器: 1.播放器组件会在各个页面的情况下会打开. 首先在vuex state.js 中定义全局的播放器状态 import {playMode} from 'common/js/config.js'; const state = { singer:{}, playing:false, //是否播放 fullScreen:false, //是否全屏 playList:[], //播放列表 sequenceLi
-
vue一个页面实现音乐播放器的示例
本文介绍了vue一个页面实现音乐播放器的示例,分享给大家,具体如下: 效果如下: 项目地址:https://github.com/ermu592275254/MiniMusicPlayer 演示地址: https://ermu592275254.github.io/MiniMusicPlayer/(歌曲链接已失效) 开发前构思 界面 做音乐播放器,界面一定要炫酷.太low了听歌没感觉.本身是为了在上班的时候用,于是做成了一个类似网易云音乐的界面,大小合适.不用兼容手机端. 用css做图标 本怀着
-
基于vue-element组件实现音乐播放器功能
最近在写一个基于 github-page 和 gist 的博客, 想加个音乐播放器, 做了一个早上, 发出来分享一下 演示地址 https://github-laziji.github.io 效果 使用到的组件 element组件 布局 Layout 按钮 Button 滑块 Slider 进度条 Progress 弹出框 Popover html5组件 audio 实现代码 更详细的实现可以看 https://github.com/GitHub-Laziji/vblog <template>
-
vue实现自定义H5视频播放器的方法步骤
前言 前段时间基于vue写了一个自定义的video播放器组件,踩了一些小坑, 这里做一下复盘分享出来,避免日后重复踩坑... 设计阶段 这里就直接放几张完成后的播放状态图吧,界面布局基本就是flex+vw适配一把梭,也比较容易. 需要实现的几个功能基本都标注出来了; 除了还有一个视频加载失败的...下面就这届上代码了;刚开始构思的时候考虑了一下功能的实现方式: 一是用原生的DOM操作,获取video元素后,用addEventListener来监听; 二是用vue的方式绑定事件监听; 最后图方便采
-
Yii2实现自定义独立验证器的方法
本文实例讲述了Yii2实现自定义独立验证器的方法.分享给大家供大家参考,具体如下: 新建一个文件: <?php /** * author : forecho <caizhenghai@gmail.com> * createTime : 2015/7/1 14:54 * description: */ namespace common\helps; use yii\validators\Validator; class ArrayValidator extends Validator {
-
Vue的自定义组件不能使用click方法的解决
先贴代码 var myButton = Vue.extend({//设置标签 props: ['names', 'item2'],//names为按钮名,item2为数据 template: '<span><span v-for="obj in item2" v-if="obj.name==names" v-html="obj.code"></span></span>' }) Vue.compone
-
vue封装自定义分页器组件与使用方法分享
前言 分页是开发各种系统时候最常用的功能,下面为本人封装的一个分页组件. 实现分页器操作需要以下参数 当前页: pageNo 每页展示条数: pageSize 数据总条数 : total 连续页码数:continues (一般为奇数,页面对称更美观) 分页器在各大项目中出现的频率较多,我们可以封装成静态组件,并全局注册这个组件. 1.全局注册组件方法:在mian.js文件中操作 import Pagination from '@/components/Pagination' // 组件路径 Vu
-
flvplayer.swf flv视频播放器使用方法
一.直接在html文件中加载: 复制代码 代码如下: <div id="FlashFile"> <object type="application/x-shockwave-flash" width="470px" height="403px" data="flvplayer.swf?file=movies/company.flv"> <param name="movi
-
Vue中自定义全局组件的实现方法
前言 有时候我们在做开发的时候,就想自己写一个插件然后就可以使用自己的插件,那种成就感很强.今天就解决了一个长期困扰着我的问题,现在记录一下,供日后参考. 涉及知识点是Vue.js官网教程中的插件使用 方法如下: 首先我遇到的问题就是我自定义的组件如果需要在项目中其他组件中多次被调用,而我之前的解决方法就是简单的,哪里需要在哪引用.这无疑增加了许多代码重复. 而在使用Vue.js的一些UI框架的时候则注意到,只需要在项目的入口文件中import这个插件然后在接着Vue.use('插件名').这样
-
vue+axios+mock.js环境搭建的方法步骤
在前后端分离开发模式下,前端项目通常在项目构建初期需要使用假数据以及相应的http请求来进行辅助开发,例如在后端接口还没开发好下,我们可以模拟http请求以及数据来进行前端的axios封装,接口设计,对http状态码处理等.前端模拟数据的方法有许多种,假如你熟悉node.js以及express框架,你可以快速地构建一个后端服务器来进行辅助开发,我本人也比较喜欢这种方式,这种方法在我日后的文章将会有介绍.如果你不熟悉node也没关系,我将一步一步教你如何在前端vue项目中使用mock.js来构建一
-
VUE+Element环境搭建与安装的方法步骤
1,安装node,确保安装4.0版本以上,具体的安装可以百度. 2,在命令行创建文件夹 3,安装Vue-cli 输入:cnpm install -g vue-cli , 回车, 等待安装.... 输入:vue ,查看vue相关信息 4,初始化项目 vue init webpack last_demo 然后等一下就会出现相关的信息,再自己去选择安装的一些设置 安装完的时候,你的文件夹就变成了这样了: 如果你的文件夹中没有node_modules的文件,那么你就要在命令行中打开你的项目并输入: np
-
基于vue如何发布一个npm包的方法步骤
前言:工作的时候总是使用别人的npm包,然而我有时心底会好奇自己如何发布一个npm包呢,什么时候自己的包能够被很多人喜欢并使用呢...今天我终于迈出了第一步. 前提:会使用 npm,有 vue 基础,了解一点 webpack Are you ready? Go! 一.编写自己的npm包 1. 新建一个空文件夹 2. 进入文件夹,终端(cmd)运行 npm init 完成后会在目录下生成一个 package.json 文件 我们可以根据自己的需要补充文件内容 这是我的: { "name"
-
vue开发环境配置跨域的方法步骤
本文要实现的是:使用vue-cli搭建的项目在开发时配置跨域,上线后不做任何任何修改,接口也可以访问 production:产品 生产环境 development:开发 开发环境 1.开发环境设置跨域使用工具: vue-cli自带的配置配置 目录 /config/index.js //自行复制黏贴 proxyTable: { '/apis':{ target: 'http://10.1.63.26:19080/', // 后台api changeOrigin: true, //是否跨域 // s