Java 进阶必备之ssm框架全面整合
目录
- 1.导入依赖
- 2.创建实体类
- 3.写dao层接口
- 4.写mybatis核心配置文件和接口配置文件
- 5.用spring整合Mybatis层也就是Dao层
- 6.spring整合Service层
- 7.spring整合Conteoller层
- 8.添加web支持
- 9.完整的目录结构
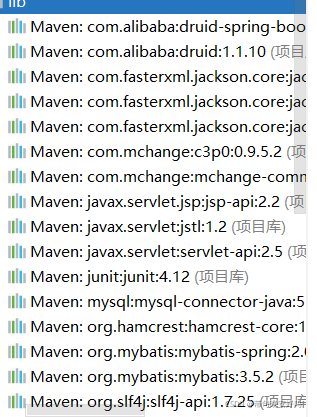
1.导入依赖
   <dependency>
        <groupId>junit</groupId>
        <artifactId>junit</artifactId>
        <version>4.12</version>
    </dependency>
    <!--数据库驱动-->
    <dependency>
        <groupId>mysql</groupId>
        <artifactId>mysql-connector-java</artifactId>
        <version>5.1.47</version>
    </dependency>
    <!-- 数据库连接池 -->
    <dependency>
        <groupId>com.mchange</groupId>
        <artifactId>c3p0</artifactId>
        <version>0.9.5.2</version>
    </dependency>

    <!--Servlet - JSP -->
    <dependency>
        <groupId>javax.servlet</groupId>
        <artifactId>servlet-api</artifactId>
        <version>2.5</version>
    </dependency>
    <dependency>
        <groupId>javax.servlet.jsp</groupId>
        <artifactId>jsp-api</artifactId>
        <version>2.2</version>
    </dependency>
    <dependency>
        <groupId>javax.servlet</groupId>
        <artifactId>jstl</artifactId>
        <version>1.2</version>
    </dependency>

    <!--Mybatis-->
    <dependency>
        <groupId>org.mybatis</groupId>
        <artifactId>mybatis</artifactId>
        <version>3.5.2</version>
    </dependency>
    <dependency>
        <groupId>org.mybatis</groupId>
        <artifactId>mybatis-spring</artifactId>
        <version>2.0.2</version>
    </dependency>

    <!--Spring-->
    <dependency>
        <groupId>org.springframework</groupId>
        <artifactId>spring-webmvc</artifactId>
        <version>5.1.9.RELEASE</version>
    </dependency>
    <!--spring jdbc-->
    <dependency>
        <groupId>org.springframework</groupId>
        <artifactId>spring-jdbc</artifactId>
        <version>5.1.9.RELEASE</version>
    </dependency>

    <!-- spring的核心依赖 -->
    <dependency>
        <groupId>org.springframework</groupId>
        <artifactId>spring-context</artifactId>
        <version>5.1.9.RELEASE</version>
    </dependency>

    <dependency>
        <groupId>com.fasterxml.jackson.core</groupId>
        <artifactId>jackson-databind</artifactId>
        <version>2.12.1</version>
    </dependency>
          <!--json的依赖-->
    <dependency>
        <groupId>com.alibaba</groupId>
        <artifactId>druid-spring-boot-starter</artifactId>
        <version>1.1.10</version>
    </dependency>

</dependencies>
    <!-- <dependency>
         <groupId>com.fasterxml.jackson.core</groupId>
         <artifactId>jackson-databind</artifactId>
         <version>2.10.0</version>
     </dependency>-->

    <!--静态资源问题-->
    <build>
        <resources>
            <resource>
                <directory>src/main/java</directory>
                <includes>
                    <include>**/*.properties</include>
                    <include>**/*.xml</include>
                </includes>
                <filtering>false</filtering>
            </resource>
            <resource>
                <directory>src/main/resources</directory>
                <includes>
                    <include>**/*.properties</include>
                    <include>**/*.xml</include>
                </includes>
                <filtering>false</filtering>
            </resource>
        </resources>
    </build>
2.创建实体类
package pojo;

public class books {
    private int bookId;
    private String bookName;
    private int bookCounts;
    private String detail;

    public books(int bookId, String bookName, int bookCounts, String detail) {
        this.bookId = bookId;
        this.bookName = bookName;
        this.bookCounts = bookCounts;
        this.detail = detail;
    }

    public books() {
    }

    public int getBookId() {
        return bookId;
    }

    public void setBookId(int bookId) {
        this.bookId = bookId;
    }

    public String getBookName() {
        return bookName;
    }

    public void setBookName(String bookName) {
        this.bookName = bookName;
    }

    public int getBookCounts() {
        return bookCounts;
    }

    public void setBookCounts(int bookCounts) {
        this.bookCounts = bookCounts;
    }

    public String getDetail() {
        return detail;
    }

    public void setDetail(String detail) {
        this.detail = detail;
    }
}
3.写dao层接口
这里暂时只有一个方法
package Dao;

import pojo.books;

import java.util.List;

public interface BooksMapper {
    List<books> selectbooks();
}
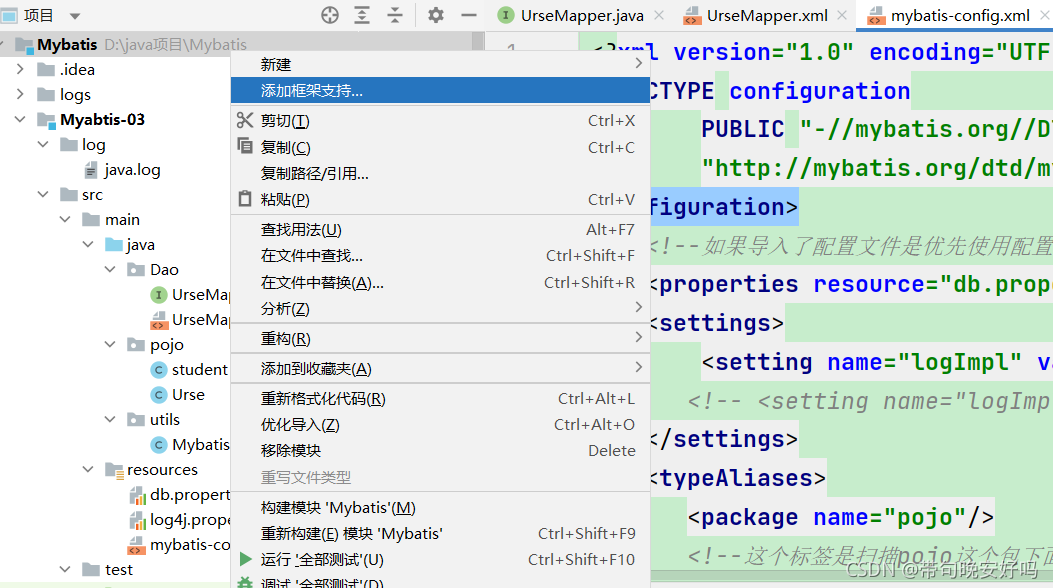
4.写mybatis核心配置文件和接口配置文件
这个是接口配置文件
<?xml version="1.0" encoding="UTF-8" ?>
<!DOCTYPE mapper
        PUBLIC "-//mybatis.org//DTD Config 3.0//EN"
        "http://mybatis.org/dtd/mybatis-3-mapper.dtd">
<!--把刚刚我们写的接口配置进去-->
<mapper namespace="Dao.BooksMapper">

<select id="BooksMapper" resultType="pojo.books">
    select * from books
</select>

</mapper>
mybatis核心配置文件
<?xml version="1.0" encoding="UTF-8" ?>
<!DOCTYPE configuration
        PUBLIC "-//mybatis.org//DTD Config 3.0//EN"
        "http://mybatis.org/dtd/mybatis-3-config.dtd">
<configuration>
    <!--把那个接口导进来-->
    <mappers>
        <package name="Dao"/>
    </mappers>
</configuration>
5.用spring整合Mybatis层也就是Dao层
这个是spring整合Mybatis的xml文件
<?xml version="1.0" encoding="UTF-8"?>
<beans xmlns="http://www.springframework.org/schema/beans"
       xmlns:xsi="http://www.w3.org/2001/XMLSchema-instance"
       xmlns:context="http://www.springframework.org/schema/context"
       xsi:schemaLocation="http://www.springframework.org/schema/beans
       http://www.springframework.org/schema/beans/spring-beans.xsd
       http://www.springframework.org/schema/context
       https://www.springframework.org/schema/context/spring-context.xsd">

    <!-- 配置整合mybatis -->
    <!-- 1.关联数据库文件 -->
    <context:property-placeholder location="classpath:database.properties"/>

    <!-- 2.数据库连接池 -->
    <!--数据库连接池
        dbcp 半自动化操作 不能自动连接
        c3p0 自动化操作(自动的加载配置文件 并且设置到对象里面)
    -->
    <bean id="dataSource" class="com.mchange.v2.c3p0.ComboPooledDataSource">
        <!-- 配置连接池属性 -->
        <property name="driverClass" value="${jdbc.driver}"/>
        <property name="jdbcUrl" value="${jdbc.url}"/>
        <property name="user" value="${jdbc.username}"/>
        <property name="password" value="${jdbc.password}"/>

        <!-- c3p0连接池的私有属性 -->
        <property name="maxPoolSize" value="30"/>
        <property name="minPoolSize" value="10"/>
        <!-- 关闭连接后不自动commit -->
        <property name="autoCommitOnClose" value="false"/>
        <!-- 获取连接超时时间 -->
        <property name="checkoutTimeout" value="10000"/>
        <!-- 当获取连接失败重试次数 -->
        <property name="acquireRetryAttempts" value="2"/>
    </bean>

    <!-- 3.配置SqlSessionFactory对象 -->
    <bean id="sqlSessionFactory" class="org.mybatis.spring.SqlSessionFactoryBean">
        <!-- 注入数据库连接池 -->
        <property name="dataSource" ref="dataSource"/>
        <!-- 配置MyBaties全局配置文件:mybatis-config.xml -->
        <property name="configLocation" value="classpath:mybatis-config.xml"/>
    </bean>

    <!--解释 :https://www.cnblogs.com/jpfss/p/7799806.html-->
    <bean class="org.mybatis.spring.mapper.MapperScannerConfigurer">
        <!-- 注入sqlSessionFactory -->
        <property name="sqlSessionFactoryBeanName" value="sqlSessionFactory"/>
        <!-- 4.配置扫描Dao接口包,动态实现Dao接口注入到spring容器中 -->
        <property name="basePackage" value="Dao"/>
    </bean>

</beans>
数据库配置文件,这里你们改一下数据库就OK
jdbc.driver=com.mysql.jdbc.Driver
jdbc.url=jdbc:mysql://localhost:3306/ssmbuild
jdbc.username=root
jdbc.password=root
6.spring整合Service层
写接口和实现类
package Service;

import org.springframework.stereotype.Service;
import pojo.books;

import java.util.List;

public interface BooksService {
        List<books> selectbooks();
    }
实现类
 @Service
 public class BooksServicelmpl implements BooksService{
   /*这里是把Dao的接口引进来了因为Service层调用Dao层*/
     @Autowired
    private BooksMapper booksMapper;
    public void setBooksMapper(BooksMapper booksMapper) {
        this.booksMapper = booksMapper;
    }
    @Override
    public List<books> selectbooks() {
        return booksMapper.selectbooks();
    }
}
写spring配置文件
<?xml version="1.0" encoding="UTF-8"?>
<beans xmlns="http://www.springframework.org/schema/beans"
       xmlns:xsi="http://www.w3.org/2001/XMLSchema-instance"
       xmlns:context="http://www.springframework.org/schema/context"
       xsi:schemaLocation="http://www.springframework.org/schema/beans
       http://www.springframework.org/schema/beans/spring-beans.xsd http://www.springframework.org/schema/context https://www.springframework.org/schema/context/spring-context.xsd">

    <context:component-scan base-package="Service"/>
    <!-- <bean id="bookServicelmpl" class="service.bookServicelmpl">
     <property name="bookMapper" ref="bookMapper"/>
     </bean>-->
    <!--因为serv层要调Dao层我们把数据源拿过来,如果这里报红就是因为没有引入Dao的那个数据源-->
    <bean id="transactionManager" class="org.springframework.jdbc.datasource.DataSourceTransactionManager">
        <property name="dataSource" ref="dataSource"/>
    </bean>

</beans>
关联spring配置文件,我们写个总的配置文件到进去就ok
<?xml version="1.0" encoding="UTF-8"?>
<beans xmlns="http://www.springframework.org/schema/beans"
       xmlns:xsi="http://www.w3.org/2001/XMLSchema-instance"
       xsi:schemaLocation="http://www.springframework.org/schema/beans
       http://www.springframework.org/schema/beans/spring-beans.xsd">

    <import resource="classpath:spring-Service.xml"/>
    <import resource="classpath:spring-Dao.xml"/>
</beans>
7.spring整合Conteoller层
<?xml version="1.0" encoding="UTF-8"?>
<beans xmlns="http://www.springframework.org/schema/beans"
       xmlns:xsi="http://www.w3.org/2001/XMLSchema-instance"
       xmlns:context="http://www.springframework.org/schema/context"
       xmlns:mvc="http://www.springframework.org/schema/mvc"
       xsi:schemaLocation="http://www.springframework.org/schema/beans
   http://www.springframework.org/schema/beans/spring-beans.xsd
   http://www.springframework.org/schema/context
   http://www.springframework.org/schema/context/spring-context.xsd
   http://www.springframework.org/schema/mvc
   https://www.springframework.org/schema/mvc/spring-mvc.xsd">

    <!-- 扫描web相关的bean -->
    <context:component-scan base-package="Controller"/>
    <!-- 1.开启SpringMVC注解驱动 -->
    <mvc:annotation-driven/>
    <!-- 2.静态资源默认servlet配置-->
    <mvc:default-servlet-handler/>

    <!-- 配置视图解析器 -->
    <bean class="org.springframework.web.servlet.view.InternalResourceViewResolver">
        <!-- 前缀 -->
        <property name="prefix" value="/WEB-INF/jsp/"/>
        <!-- 后缀 -->
        <property name="suffix" value=".jsp"/>
    </bean>

    <mvc:annotation-driven>
        <mvc:message-converters register-defaults="true">
            <bean class="org.springframework.http.converter.StringHttpMessageConverter">
                <constructor-arg value="UTF-8"/>
            </bean>
            <bean class="org.springframework.http.converter.json.MappingJackson2HttpMessageConverter">
                <property name="objectMapper">
                    <bean class="org.springframework.http.converter.json.Jackson2ObjectMapperFactoryBean">
                        <property name="failOnEmptyBeans" value="false"/>
                    </bean>
                </property>
            </bean>
        </mvc:message-converters>
    </mvc:annotation-driven>

</beans>
写Controller的类
@RestController
public class bookController {
@Autowired
private BooksService booksService;
public void setBooksService(BooksService booksService) {
this.booksService = booksService;
}
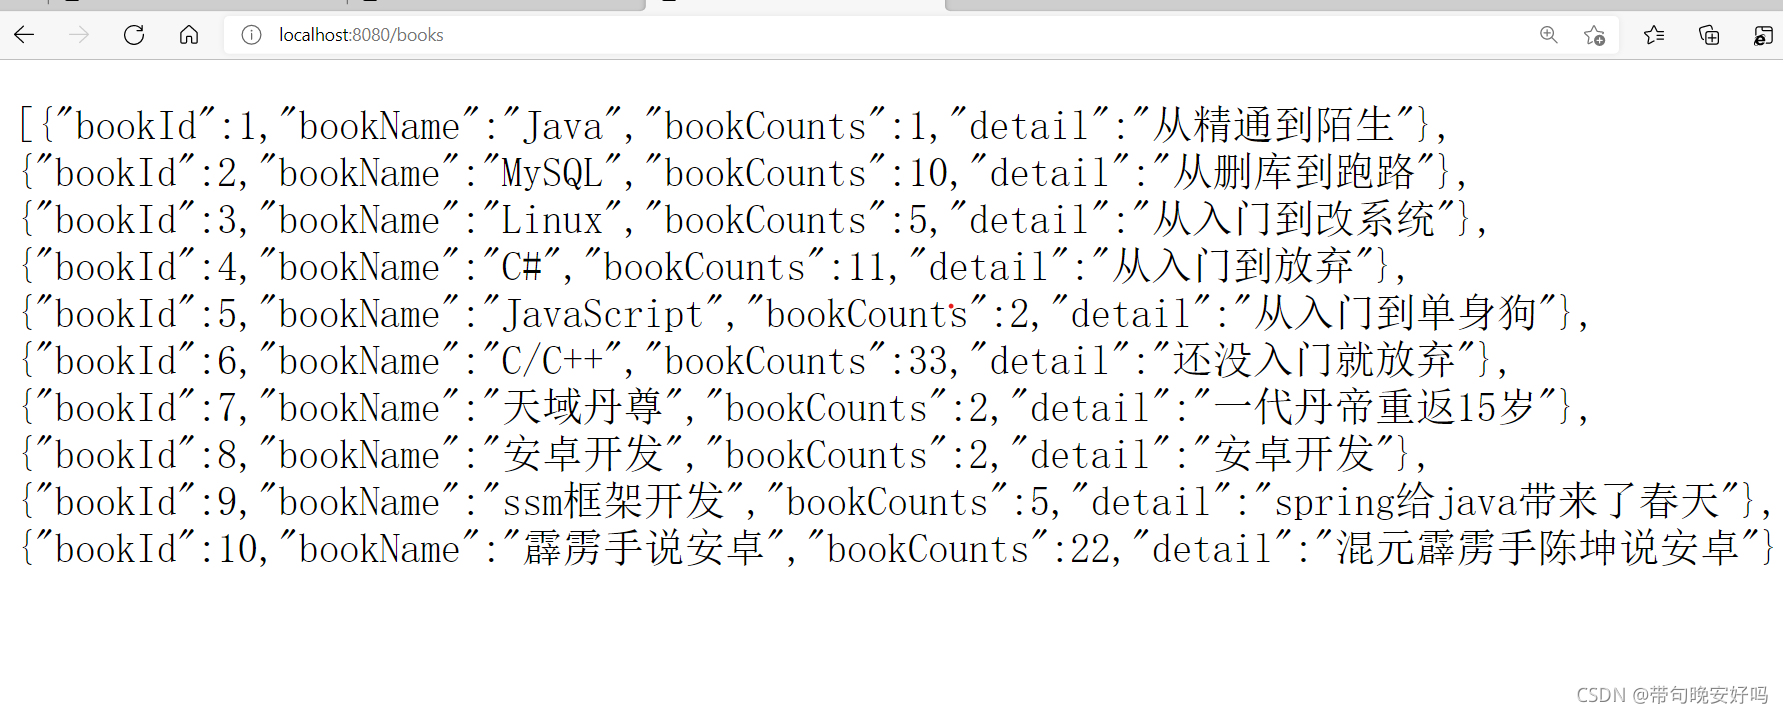
@RequestMapping("/books")
public List<books> selectbooks()
{
List<books> list = booksService.selectbooks();
return list;
}
}
把三个配置文件关联
<?xml version="1.0" encoding="UTF-8"?>
<beans xmlns="http://www.springframework.org/schema/beans"
       xmlns:xsi="http://www.w3.org/2001/XMLSchema-instance"
       xsi:schemaLocation="http://www.springframework.org/schema/beans
       http://www.springframework.org/schema/beans/spring-beans.xsd">

    <import resource="classpath:spring-Service.xml"/>
    <import resource="classpath:spring-Dao.xml"/>
    <import resource="spring-mvc.xml"/>
</beans>
8.添加web支持

写web.xml文件里面都是死的
<?xml version="1.0" encoding="UTF-8"?>
<web-app xmlns="http://xmlns.jcp.org/xml/ns/javaee"
         xmlns:xsi="http://www.w3.org/2001/XMLSchema-instance"
         xsi:schemaLocation="http://xmlns.jcp.org/xml/ns/javaee http://xmlns.jcp.org/xml/ns/javaee/web-app_4_0.xsd"
         version="4.0">

    <!--DispatcherServlet-->
    <servlet>
        <servlet-name>springmvc</servlet-name>
        <servlet-class>org.springframework.web.servlet.DispatcherServlet</servlet-class>
        <init-param>
            <param-name>contextConfigLocation</param-name>
            <!--一定要注意:我们这里加载的是总的配置文件,之前被这里坑了!-->
            <param-value>classpath:applicationContext.xml</param-value>
        </init-param>
        <load-on-startup>1</load-on-startup>
    </servlet>
    <servlet-mapping>
        <servlet-name>springmvc</servlet-name>
        <url-pattern>/</url-pattern>
    </servlet-mapping>

    <!--乱码解决-->
    <filter>
        <filter-name>encodingFilter</filter-name>
        <filter-class>
            org.springframework.web.filter.CharacterEncodingFilter
        </filter-class>
        <init-param>
            <param-name>encoding</param-name>
            <param-value>utf-8</param-value>
        </init-param>
    </filter>
    <filter-mapping>
        <filter-name>encodingFilter</filter-name>
        <url-pattern>/*</url-pattern>
    </filter-mapping>

    <!--Session过期时间-->
    <session-config>
        <session-timeout>15</session-timeout>
    </session-config>

</web-app>
创建一个lib包把依赖导进去
添加工件测试
9.完整的目录结构

到此这篇关于Java 进阶必备之ssm框架全面整合的文章就介绍到这了,更多相关Java ssm框架内容请搜索我们以前的文章或继续浏览下面的相关文章希望大家以后多多支持我们!
相关推荐
-

Java之SSM中bean相关知识汇总案例讲解
bean 的生命周期 对象创建 实例化Bean对象,默认选择无参构造方法,如果只有一个有参构造那么调用有参构造,如果只有多个有参构造那么报错,除非其中一个有参构造添加了@AutoWired注解: 设置Bean的属性: 依赖注入以及判断是否实现了Aware相关接口(BeanNameAware, BeanFactoryAware, ApplicationContextAware) 如果这个 Bean 关联了 BeanPostProcessor 接口,将会调用BeanPostProcessor.pos
-
Java开发之手把手教你搭建企业级工程SSM框架
目录 1.在IDEA界面中创建MavenWeb工程 2.在pom.xml中添加如下相关依赖 3.web.xml 配置 Spring MVC.Spring 4.分别在main目录下创建resource包 5.在spring.xml中连接数据库 6.springmvc.xml中配置驱动和前后缀表达式 7.配置打印sql语句和指定实体类,让idea搜索需要的javaBean 8.创建与数据库相对应的实体类 9.Handler 10.Service及其接口 11.Repository 12.测试所用的j
-
java开发SSM框架具有rest风格的SpringMVC
目录 RESTful架构 资源 表现层(Representation) 状态转化(State Transfer) 简单小结 SpringMVC对RESTful架构的支持 利用ajax实现前后端完全分离 RESTful架构 REST(Resource Representational State Transfer)即"资源表现层状态转化",省略了Resource (资源).允许客户端发出以统一资源标识符访问和操作网络资源的请求,而与预先定义好的无状态操作集一致化. 资源 指网络上的一个具
-
Java框架之Maven SSM集合
目录 SSM Maven 什么是maven Maven好处,为什么要用Maven 三种仓库 坐标概念 总结 SSM @Controller,@Service本质都是@Component,作用是new对象放到Spring容器里. controller层 @Controller//controller层专属注解 @RequestMapping("/student") public class StudentController { @Autowired private IStudentSe
-
Java SSM配置文件案例详解
先对Spring SpringMVC和Mybatis单独进行配置,最后对三者进行整合配置 Spring 实际使用中,一般会使用注解+xml配置来实现spring功能,其中xml配置对上文进行总结,配置内容如下 <?xml version="1.0" encoding="UTF-8"?> <!--在使用spring 相关jar包的时候进行配置 每个jar包对应一个xmlns和schemaLocation路径--> <!--格式基本相关 只
-
Java 进阶必备之ssm框架全面整合
目录 1.导入依赖 2.创建实体类 3.写dao层接口 4.写mybatis核心配置文件和接口配置文件 5.用spring整合Mybatis层也就是Dao层 6.spring整合Service层 7.spring整合Conteoller层 8.添加web支持 9.完整的目录结构 1.导入依赖 <dependency> <groupId>junit</groupId> <artifactId>junit</artifactId> <versi
-
Java进阶必备之多线程编程
一.图示 二.多线程编程 何为多线程,通俗的讲就是让你的代码同时干好几件事. 而我们的一个代码文件或者一个项目就是一个进程,而如果我们想提高效率,我们可以多开几个文件进行多进程,也可以在进程中创建多线程(多写几个方法),但是多进程比较耗费资源,所以一般推荐多线程,在代码里,让代码做几个文件做的事. 多线程编程可以让我们的代码拥有更高效率. 三.线程的工作过程 犹如上图 使用多线程需要先创建一个或者多个线程 然后让线程调用CPU资源,开始运行 然后运行完毕等待所有线程运行完毕 然后删除资源,结束线
-
java整合SSM框架的图文教程
使用Myeclipse搭建maven项目 准备工作 安装maven 官网下载安装(http://maven.apache.org/) 配置环境变量 配置完后,使用命令行输入mvn -version查看是否配置成功,出现以下界面表示配置成功. 2. 在MyEclipse中配置maven 打开MyEclipse2015----点击菜单栏Window---选项栏Preference ,搜索Maven,进入Installations,点击Add引入安装的maven. 进入User Setting,设置G
-
一步步教你整合SSM框架(Spring MVC+Spring+MyBatis)详细教程
前言 SSM(Spring+SpringMVC+Mybatis)是目前较为主流的企业级架构方案,不知道大家有没有留意,在我们看招聘信息的时候,经常会看到这一点,需要具备SSH框架的技能:而且在大部分教学课堂中,也会把SSH作为最核心的教学内容. 但是,我们在实际应用中发现,SpringMVC可以完全替代Struts,配合注解的方式,编程非常快捷,而且通过restful风格定义url,让地址看起来非常优雅. 另外,MyBatis也可以替换Hibernate,正因为MyBatis的半自动特点,我们程
-
JAVA中SSM框架的搭建实现CRUD的方法
最近在开发公司的一个系统,系统的框架是用ssm的框架搭建的,当然和这次写博客的不一样,它拥有很多的配置文件,企业级的开发所需要的配置文件是非常繁琐的,今天记录一下一个简单的SSM框架的搭建和实现一个CRUD的操作. 使用的是Maven插件来配置我们需要的jar包,由于操作不多,所以并没有配置很多,要注意自己使用的jdk的版本,选择不同版本号的jdk <project xmlns="http://maven.apache.org/POM/4.0.0" xmlns:xsi="
-
Java SSM框架如何配置静态资源加载
Java SSM框架即指Spring+SpringMVC+MyBatis的简称,框架集由Spring.MyBatis两个开源框架整合而成(SpringMVC是Spring中的部分内容),常作为数据源较简单的web项目的框架. 相比于之前的SSH(Spring+Struts+Hibernate),SSM更加轻量化和灵活,是目前业界主流的Java Web开发框架. 第一种:SSM框架中在springmvc-servlet.xml中配置加载静态资源 只需要在springmvc-servlet.xml配
-
Java中SSM框架实现增删改查功能代码详解
记录一下自己第一次整合smm框架的步骤. 参考博客和网站有:我没有三颗心脏 How2J学习网站 1.数据库使用的是mySql,首先创建数据库ssm1,并创建表student create database ssm1; use ssm1; CREATE TABLE student( id int(11) NOT NULL AUTO_INCREMENT, student_id int(11) NOT NULL UNIQUE, name varchar(255) NOT NULL, age int(1
-
讲解ssm框架整合(最通俗易懂)
环境 MySQL 8.0.16 1 Mybatis 1.1 数据库配置文件 jdbc.driver=com.mysql.cj.jdbc.Driver # 如果使用mysql 6+,增加一个时区的配置 jdbc.url=jdbc:mysql://localhost:3306/ssmbuild?useUnicode=true&characterEncoding=utf8&serverTimezone=UTC&useSSL=false jdbc.username=root jdbc.p
-
2020最新版SSM框架整合教程
实验环境为:IDEA2020.1+MySQL8.0.21+Tomcat9.0.36+Maven3.3.9 最终项目结构图: 一.搭建数据库环境 创建一个存放书籍数据的数据库表 CREATE DATABASE `ssmbuild`; USE `ssmbuild`; DROP TABLE IF EXISTS `books`; CREATE TABLE `books` ( `bookID` INT(10) NOT NULL AUTO_INCREMENT COMMENT '书id', `bookName