Android-实现切换Fragment页功能的实现代码

场景:使用Fragment实现切页。

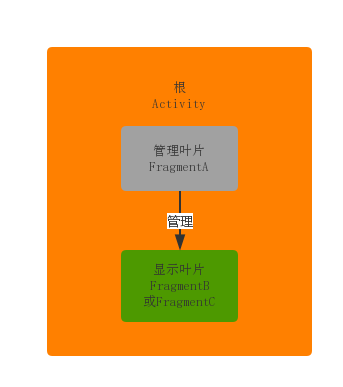
类结构:
一:Activity

Activity中使用getSupportFragmentManager().beginTransaction()来填充一个Fragment(管理用的FragmentA)

Activity部分代码:

FragmentA fragment = FragmentA.newInstant(null);
getSupportFragmentManager().beginTransaction().add(R.id.f_tab_fragment,fragment).commit(); 

XML:

     <FrameLayout
        android:id="@+id/fl_container"
        android:layout_width="match_parent"
        android:layout_above="@+id/f_tab_fragment"
        android:layout_height="match_parent"/>

      <FrameLayout
        android:id="@+id/f_tab_fragment"
        android:layout_width="match_parent"
        android:layout_height="52dp"
        android:layout_alignParentBottom="true"/>

二:FragmentA

加载一个主FragmentA,作为管理其它子叶片FragmentX。

现在比如有两个子叶片FragmentB、FragmentC.

FragmentA 使用FragmentManager和FragmentTransaction管理FragmentB、FragmentC的切换

FragmentA代码:

 public class FragmentA extends BaseFragment {

  private static final String TAB_HOME = com.timediffproject.module.home.MyMainFragment.class.getName();

  private static final String TAB_TEST = com.timediffproject.module.home.TestFragment.class.getName();

  private BaseFragment mLastShowFragment;

  private static TabFragment fragment;

  public static TabFragment newInstant(Bundle bundle){
    if (fragment == null){
      fragment = new TabFragment();
      fragment.setArguments(bundle);
    }
    return fragment;
  }

  @Override
  public void onCreate(@Nullable Bundle savedInstanceState) {
    super.onCreate(savedInstanceState);
    initTabInfo();

  }

  private void initTabInfo(){
    FragmentManager fm = getFragmentManager();
    if (fm == null){
      return;
    }
    FragmentTransaction ft = fm.beginTransaction();

    BaseFragment home = (BaseFragment) fm.findFragmentByTag(TAB_HOME);
    if (home != null){
      ft.hide(home);
    }

    BaseFragment test = (BaseFragment) fm.findFragmentByTag(TAB_TEST);
    if (test != null){
      ft.hide(test);
    }

    ft.commit();

  }

  @Nullable
  @Override
  public View onCreateView(LayoutInflater inflater,ViewGroup container,Bundle savedInstanceState) {
    return inflater.inflate(R.layout.fragment_tab,container,false);
  }

  @Override
  public void onViewCreated(View view, @Nullable Bundle savedInstanceState) {
    super.onViewCreated(view, savedInstanceState);
    view.findViewById(R.id.btn_change_home).setOnClickListener(new View.OnClickListener() {
      @Override
      public void onClick(View view) {
        switchTo(TAB_HOME,null);
      }
    });
    view.findViewById(R.id.btn_change_test).setOnClickListener(new View.OnClickListener() {
      @Override
      public void onClick(View view) {
        switchTo(TAB_TEST,null);
      }
    });
    switchTo(TAB_HOME,null);
  }

  //切换Fragment的方式(FragmentB、FragmentC)
  //tab为Fragment的类名(如:FragmentB.class.getName())
  //R.id.fl_container是在Activity的布局里,不是在FragmentA的布局里
  private void switchTo(String tab, Bundle bundle){

    //初始化管理Fragment的类
    FragmentManager fm = getFragmentManager();
    if (fm == null){
      return;
    }
    FragmentTransaction ft = fm.beginTransaction();

    //从FragmentManager里寻找类名为tab的Fragment
    BaseFragment fragment = (BaseFragment)fm.findFragmentByTag(tab);
    if (fragment == null){
      fragment = (BaseFragment) Fragment.instantiate(getActivity(),tab);
      fragment.setArguments(bundle);
      ft.add(R.id.fl_container,fragment,tab);
    }else{
      ft.show(fragment);
    }
    //隐藏现在正显示的Fragment
    if (mLastShowFragment != null) {
      ft.hide(mLastShowFragment);
    }
    //记录最后点击的Fragment
    mLastShowFragment = fragment;

    ft.commitAllowingStateLoss();

  }
} 

XML:

<?xml version="1.0" encoding="utf-8"?>
<LinearLayout xmlns:android="http://schemas.android.com/apk/res/android"
  android:orientation="horizontal" android:layout_width="match_parent"
  android:layout_height="52dp">

  <Button
    android:id="@+id/btn_change_home"
    android:layout_width="wrap_content"
    android:layout_height="wrap_content"
    android:text="切换home"
    />

  <Button
    android:id="@+id/btn_change_test"
    android:layout_width="wrap_content"
    android:layout_height="wrap_content"
    android:text="切换test"
    />

</LinearLayout>

三:FragmentX(FragmentB、FragmentC)

子页的逻辑根据具体业务自己定义,实现与一般Fragmeng一样

例如:

public class TestFragment extends BaseFragment {

  @Nullable
  @Override
  public View onCreateView(LayoutInflater inflater, ViewGroup container, Bundle savedInstanceState) {return inflater.inflate(R.layout.fragment_test,container,false);
  }

  @Override
  public void onViewCreated(View view, Bundle savedInstanceState) {
    super.onViewCreated(view, savedInstanceState);
  }

}

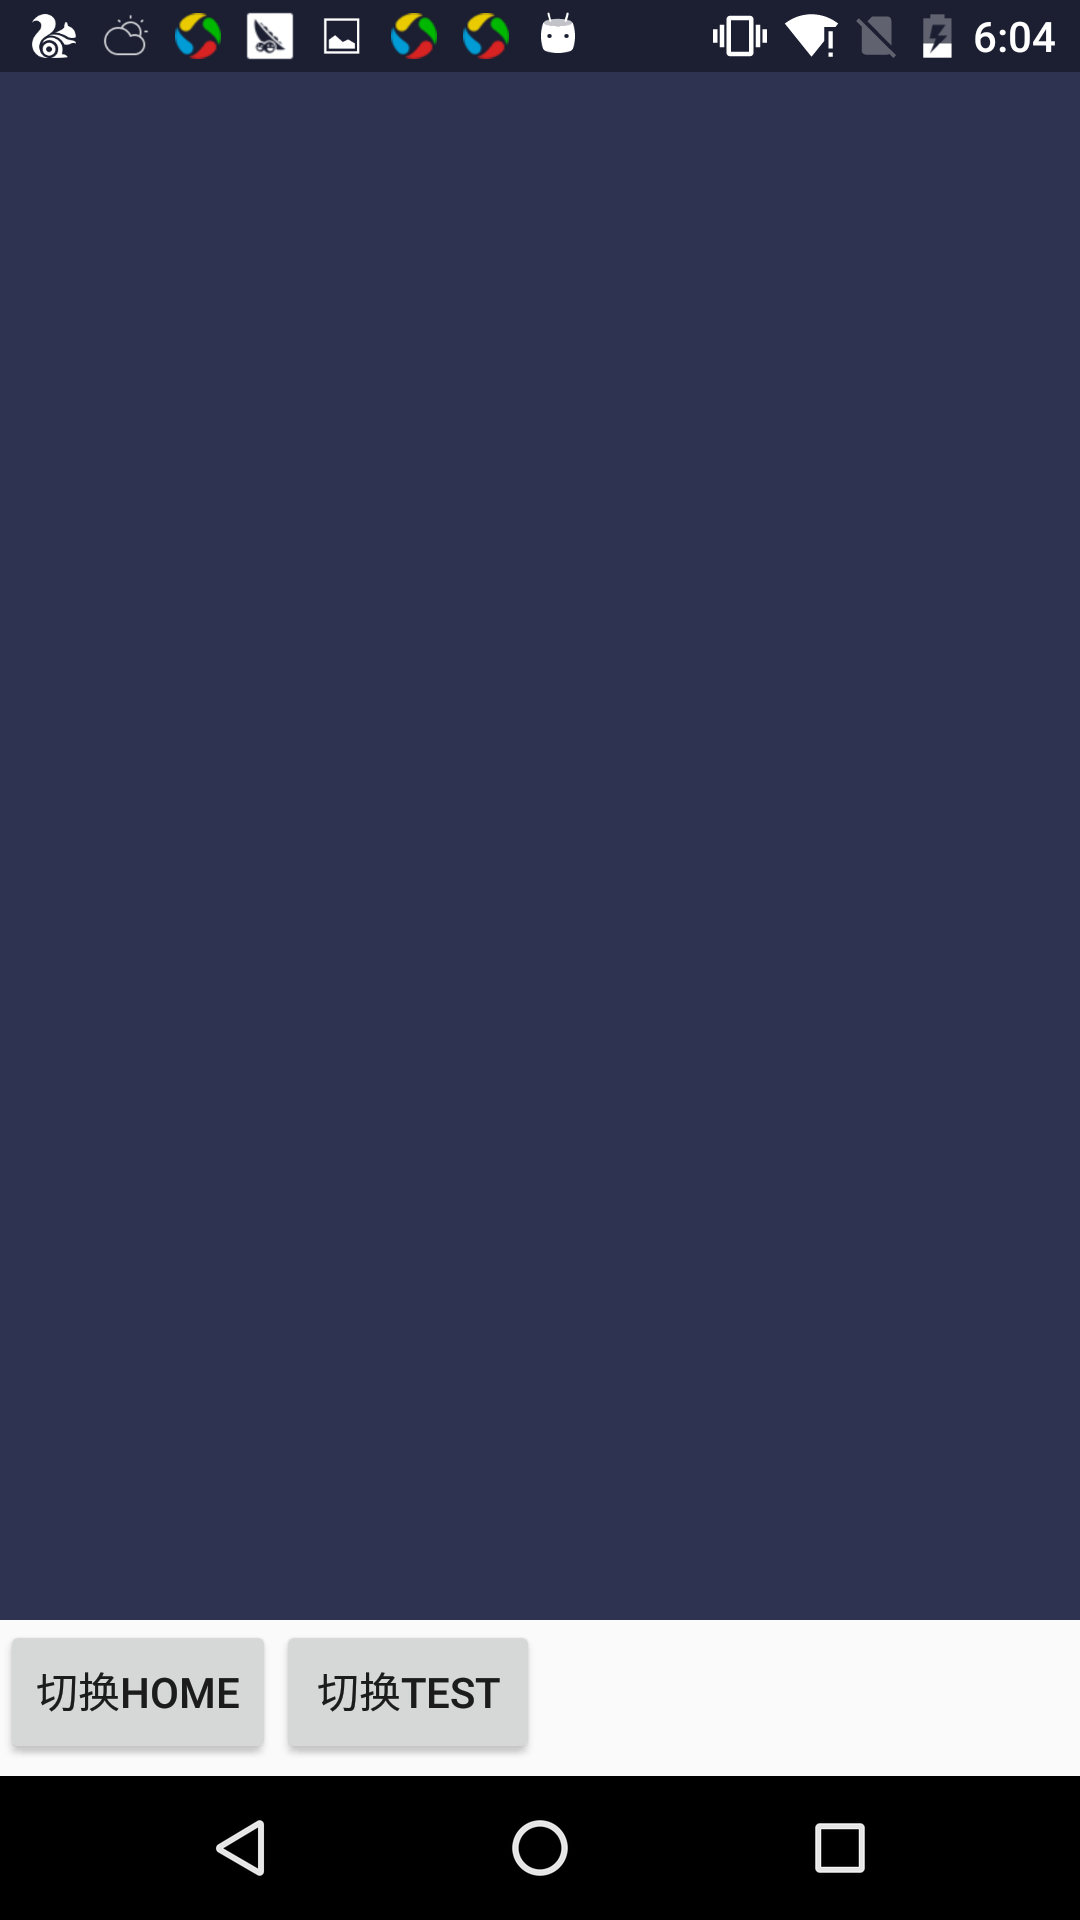
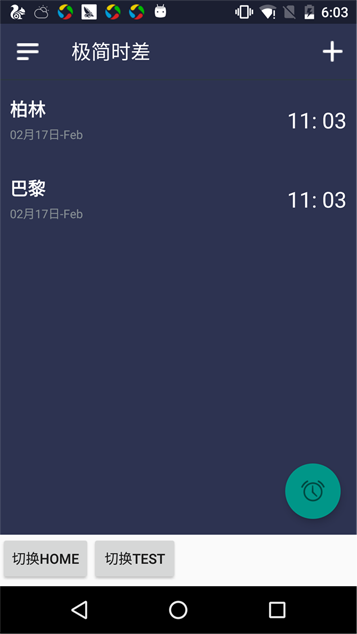
到这里,就可以简单的实现-用底部Tab切换Fragment实现切页的功能

附图:
PS:实现过程中出现的错误

代码如下:

java.lang.IllegalStateException: The specified child already has a parent. You must call removeView() on the child's parent first.

正确方式: 有关的fragment的初始化布局应该加上false,与父类布局建立关系。

原因:不加的话这个inflater出来的view系统会绑定一个未知父类,这时候当你把这个fragment又作为子页绑定给Activity或者另一个fragment时,就会出现以上错误。

@Nullable
  @Override
  public View onCreateView(LayoutInflater inflater, ViewGroup container, Bundle savedInstanceState) {
    //这里正确的写法是:
    //return inflater.inflate(R.layout.fragment_test,container,false);
    return inflater.inflate(R.layout.fragment_test,container);
   }   

以上就是本文的全部内容,希望对大家的学习有所帮助,也希望大家多多支持我们。

(0)

相关推荐

  • Android 保存Fragment 切换状态实例代码

    前言 一般频繁切换Fragment会导致频繁的释放和创建,如果Fragment比较臃肿体验就非常不好了,这里分享一个方法.  正文  一.应用场景 1.不使用ViewPager 2.不能用replace来切换Fragment,会导致Fragment释放(调用onDestroyView)  二.实现 1.xml <LinearLayout xmlns:android="http://schemas.android.com/apk/res/android" android:layou

  • Android使用TabLayou+fragment+viewpager实现滑动切换页面效果

    TabLayou 主要实现的是标题头的 滑动 这个 控件 类似于 ScrollView XML中的布局 <LinearLayout android:layout_width="match_parent" android:layout_height="wrap_content" android:orientation="horizontal" > <android.support.design.widget.TabLayout a

  • Android使用Fragment打造万能页面切换框架

    首先我们来回忆一下传统用Activity进行的页面切换,activity之间切换,首先需要新建intent对象,给该对象设置一些必须的参数,然后调用startActivity方法进行页面跳转.如果需要activity返回结果,则调用startActivityForResult方法,在onActivityResult方法中获得返回结果.此外,每一个要展示的activity需要在AndroidManifest.xml文件中注册.而且,如果在某些特定的情况下(比如65536方法数爆炸)要动态加载dex

  • Android基础之使用Fragment控制切换多个页面

    今天讲解一下Fragment的控制,主要是切换View和页面替换等操作.还有就是如何获取Fragment的管理对象,以及与Activity的通信方式.1.管理Fragment要在activity中管理fragment,需要使用FragmentManager. 通过调用activity的getFragmentManager()取得它的实例. •可以通过FragmentManager做一些事情, 包括: 使用findFragmentById()(用于在activity layout中提供一个UI的f

  • Android中Fragment相互切换间不被回收的实现方法

    前言 Android运行在各种各样的设备中,有小屏幕的手机,超大屏的平板甚至电视.针对屏幕尺寸的差距,很多情况下,都是先针对手机开发一套App,然后拷贝一份,修改布局以适应平板神马超级大屏的.难道无法做到一个App可以同时适应手机和平板么,当然了,必须有啊.Fragment的出现就是为了解决这样的问题. 如今市面上的应用基本上都是单Activity+多Fragment实现的了,而这类APP都有在相互切换时不被回收,即切换回原来的Fragment时还是原先的状态,这就是这里要实现的了. 这里使用F

  • Android中使用TabHost 与 Fragment 制作页面切换效果

    三个标签页置于顶端 效果图: 在文件BoardTabHost.java中定义页面切换的效果:切换页面时,当前页面滑出,目标页面滑入.这是2个不同的动画设定动画时要区分对待 import android.content.Context; import android.util.AttributeSet; import android.view.animation.Animation; import android.view.animation.TranslateAnimation; import

  • Android-实现切换Fragment页功能的实现代码

    场景:使用Fragment实现切页. 类结构: 一:Activity Activity中使用getSupportFragmentManager().beginTransaction()来填充一个Fragment(管理用的FragmentA) Activity部分代码: FragmentA fragment = FragmentA.newInstant(null); getSupportFragmentManager().beginTransaction().add(R.id.f_tab_frag

  • Android微信右滑退出功能的实现代码

    先给大家展示下效果图,如果大家感觉效果不错,请参考实例代码, act2是Main2Activity,act3是Main3Activity 原理 滚动 首先我们知道每个Activity展示的内容一般都是DecorView去承载的,不知道的看下图,其中状态栏背景也包括在内: DecorView 所以我们第一步,只需要滚动DecorView内容或者平移DecorView就行了. 使上一个Activity可见 上面的Activity不可见其实是因为被当前Activity给挡住了.那问题来了. Q:为什么

  • Android手势密码--设置和校验功能的实现代码

    效果图如下,大家感觉不错请参考实现代码 具体代码如下所示: private void setGesturePassword() { toggleMore.setOnCheckedChangeListener(new CompoundButton.OnCheckedChangeListener() { @Override public void onCheckedChanged(CompoundButton buttonView, boolean isChecked) { if (isChecke

  • Android 实现文件夹排序功能的实例代码

    按文件名排序 /** * 按文件名排序 * @param filePath */ public static ArrayList<String> orderByName(String filePath) { ArrayList<String> FileNameList = new ArrayList<String>(); File file = new File(filePath); File[] files = file.listFiles(); List fileL

  • Android 实现自定义圆形listview功能的实例代码

    最近遇到一个需求需要圆形listview作为悬浮窗,费了九牛二虎之力终于开发出来了,特别有成就感,下面分享下案例,项目原因,只能分享一部分供大家参考 1.有图有真相 下面就来讲解下代码: 1.自定义listview import android.content.Context; import android.content.res.TypedArray; import android.graphics.Bitmap; import android.graphics.BitmapFactory;

  • Android Filterable实现Recyclerview筛选功能的示例代码

    原先碰到筛选这种功能时,后端的接口都会让上传一个字段,根据字段来返回相应的数据.后来一次和别人对接时,接口直接返回全部数据,而且还要实现筛选功能.我...我说不就是一条sql语句的事,改接口多方便,我苦心劝导,然后被怼回来,切,不就是筛选嘛,求人不如自己搞. 1. 效果图 2. 思路 既然是筛选,那就少不了比较.也没有什么好的办法,无非就是循环对比,然后将适配器进行数据更新.页面刷新即可.但筛选的调用要方便,怎么比较才方便我们调用呢?偶然间看到了Filterable,使Adapter继承自该接口

  • python tkiner实现 一个小小的图片翻页功能的示例代码

    具体代码如下所示: import tkinter as tk import tkinter.messagebox import copy import os,sys def get_picture(dirs): '''获得所有图片''' picture_list = [] for dir,dir_abs,files in os.walk(dirs): for file in files: if file.endswith('.gif'): picture_list.append(os.path.

  • Android 使用 RxJava2 实现倒计时功能的示例代码

    倒计时功能被广泛运用在 App 启动页.短信验证码倒计时等,通常做法是起一个Handler ,在子线程里完成倒计时,如今这一做法有了替代品 -- RxJava ,RxJava是被行内一致认可的第三方开源库,我们可以使用RxJava实现倒计时功能. 示例图: 示例代码: 导入必要的库文件(Android支持库和Reactivex系列支持库) implementation 'com.android.support:appcompat-v7:27.1.0' implementation 'com.an

  • Android首页无限轮播功能的示例代码

    最近工作不是很忙,也跟大神学习下总结一些小的技术点: 对于一个App几乎都有Banner广告功能,也就是我们常见的轮播图,当然目前市场第三方框架已经非常成熟了,尤其是youth5201314/banner这里有github地址也可以学习下:https://github.com/youth5201314/banner.git 那么下面给大家介绍我的一些总结: 首先分析下轮播图的设计 多张轮播图定时效果 指示点以及每张图片的文字说明 实现无限轮播,可滑动,图片点击事件 开始布局: <Relative

  • android系统分享的自定义功能的示例代码

    分享功能是app中特别常见的功能,国内的app基本都支持分享到微信 QQ等主流的社交应用.至于分享功能的实现大多是使用第三方的share sdk一步到位,或者分享的app比较少比如就一个微信 那通常使用微信sdk的分享模块即可.但其实android系统就给我们提供过一种分享的实现方式,代码也比较简单如下 Intent share = new Intent(Intent.ACTION_SEND); share.setType("text/plain"); share.putExtra(I

随机推荐