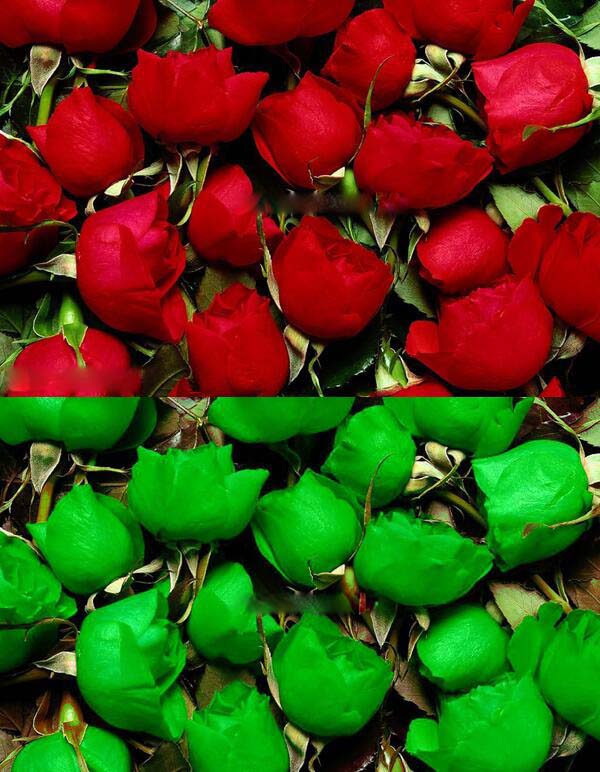
c++图像处理:24位真彩图颜色变换实例

实例如下:
#include<iostream>
#include<Windows.h>
using namespace std;

bool isred(BYTE r,BYTE g,byte b){
	if(r>g&&r>b) return true;
	else return false;
}
void red2green(BYTE& r,BYTE& g,BYTE& b){
	BYTE tmp=r;
	r=g;
	g=tmp;
}

int main(){
	FILE *fpin=fopen("flo.bmp","rb+");
	if(fpin==NULL){
		cout<<"目录里没有输入图"<<endl;
		system("pause");
		return 0;
	}
	BITMAPFILEHEADER bitmapfileheader;
	BITMAPINFOHEADER bitmapinfoheader;
	fread(&bitmapfileheader,sizeof(bitmapfileheader),1,fpin);
	fread(&bitmapinfoheader,sizeof(bitmapinfoheader),1,fpin);

	if(bitmapfileheader.bfType!='B'+'M'*256){
		cout<<"不是bmp格式"<<endl;
		fclose(fpin);
		system("pause");
		return 0;
	}
	if(bitmapinfoheader.biBitCount!=24){
		cout<<"不是24位bmp"<<endl;
		fclose(fpin);
		system("pause");
		return 0;
	}

	//设置fpout
	FILE *fpout=fopen("output.bmp","wb+");

	//BITMAPFILEHEADER bitmapfileheader2;
	//BITMAPINFOHEADER bitmapinfoheader2;
	//bitmapfileheader2=bitmapfileheader;
	//bitmapinfoheader2=bitmapinfoheader;
	fwrite(&bitmapfileheader,sizeof(bitmapfileheader),1,fpout);
	fwrite(&bitmapinfoheader,sizeof(bitmapinfoheader),1,fpout);

	if(bitmapinfoheader.biClrUsed!=0){
		cout<<"是索引图"<<endl;
		system("pause");
		return 0;
	}
	if(bitmapinfoheader.biBitCount==24){
		cout<<"24位真彩图"<<endl;
		//int line_width=((bitmapinfoheader.biWidth*bitmapinfoheader.biBitCount+24)/32)*4;
		int line_width=bitmapinfoheader.biWidth*3;
		BYTE *line_buf=new BYTE[line_width];
		for(int i=0;i<bitmapinfoheader.biHeight;i++){
			fread(line_buf,line_width,1,fpin);
			for(int j=0;j<bitmapinfoheader.biWidth;j++){
				BYTE b=line_buf[3*j];
				BYTE g=line_buf[3*j+1];
				BYTE r=line_buf[3*j+2];
				if(isred(r,g,b)){
					red2green(line_buf[3*j+2],line_buf[3*j+1],line_buf[3*j]);
				}
			}
			fwrite(line_buf,line_width,1,fpout);
		}
		fclose(fpin);
		fclose(fpout);
		delete []line_buf;
		cout<<"红变绿完成"<<endl;
	}

	system("pause");
	return 0;
}
以上这篇c++图像处理:24位真彩图颜色变换实例就是小编分享给大家的全部内容了,希望能给大家一个参考,也希望大家多多支持我们。
赞 (0)

