IOS自适配利器Masonry使用指南
关于iOS布局自动iPhone6之后就是AutoLayOut,AutoLayOut固然非常好用,不过有时候我们需要在页面手动进行页面布局,VFL算是一种选择,而且VFL不复杂,理解起来很容易,实际开发中用的特别熟还好,要是第一次看估计要花点功夫才能搞定。Masonry算是VFL的简化版,用的人比较多,之前项目中用过一次,对手动写页面的开发来说算是福利。
基础知识
首先我们看一个常见的问题将一个子View放在的UIViewController的某个位置,通过设置边距来实现,效果如下:
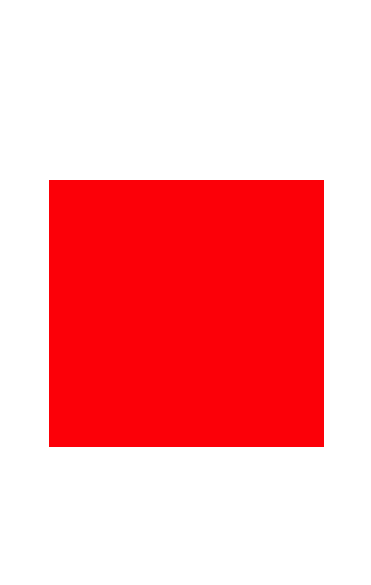
如果通过VFL我们代码会是这样的:
UIView *superview                               = self.view;

UIView *view1                                   = [[UIView alloc] init];
view1.translatesAutoresizingMaskIntoConstraints = NO;
view1.backgroundColor                           = [UIColor redColor];
[superview addSubview:view1];

UIEdgeInsets padding                            = UIEdgeInsetsMake(200, 50, 200, 50);

[superview addConstraints:@[

                            //约束
                            [NSLayoutConstraint constraintWithItem:view1
                                                         attribute:NSLayoutAttributeTop
                                                         relatedBy:NSLayoutRelationEqual
                                                            toItem:superview
                                                         attribute:NSLayoutAttributeTop
                                                        multiplier:1.0
                                                          constant:padding.top],

                            [NSLayoutConstraint constraintWithItem:view1
                                                         attribute:NSLayoutAttributeLeft
                                                         relatedBy:NSLayoutRelationEqual
                                                            toItem:superview
                                                         attribute:NSLayoutAttributeLeft
                                                        multiplier:1.0
                                                          constant:padding.left],

                            [NSLayoutConstraint constraintWithItem:view1
                                                         attribute:NSLayoutAttributeBottom
                                                         relatedBy:NSLayoutRelationEqual
                                                            toItem:superview
                                                         attribute:NSLayoutAttributeBottom
                                                        multiplier:1.0
                                                          constant:-padding.bottom],

                            [NSLayoutConstraint constraintWithItem:view1
                                                         attribute:NSLayoutAttributeRight
                                                         relatedBy:NSLayoutRelationEqual
                                                            toItem:superview
                                                         attribute:NSLayoutAttributeRight
                                                        multiplier:1
                                                          constant:-padding.right],

                            ]];
只是简单的设置了一个边距,如果视图的关系比较复杂,维护起来会是一个很痛苦的事情,我们看一下Masonry是如何实现的,导入Masonry.h头文件,约束的代码:
UIView  *childView=[UIView new];
[childView setBackgroundColor:[UIColor redColor]];
//先将子View加入在父视图中
[self.view addSubview:childView];
__weak typeof(self) weakSelf = self;
UIEdgeInsets padding = UIEdgeInsetsMake(200, 50, 200, 50);
[childView mas_makeConstraints:^(MASConstraintMaker *make) {
    make.edges.equalTo(weakSelf.view).with.insets(padding);
}];
通过mas_makeConstraints设置边距有种鸟枪换炮的感觉,我们即将开启一段新的旅程,可以紧接着看下面比较实用的功能~
实用知识
1.View设置大小
UIView  *childView=[UIView new];
[childView setBackgroundColor:[UIColor redColor]];
//先将子View加入在父视图中
[self.view addSubview:childView];
__weak typeof(self) weakSelf = self;
[childView mas_makeConstraints:^(MASConstraintMaker *make) {
    //设置大小
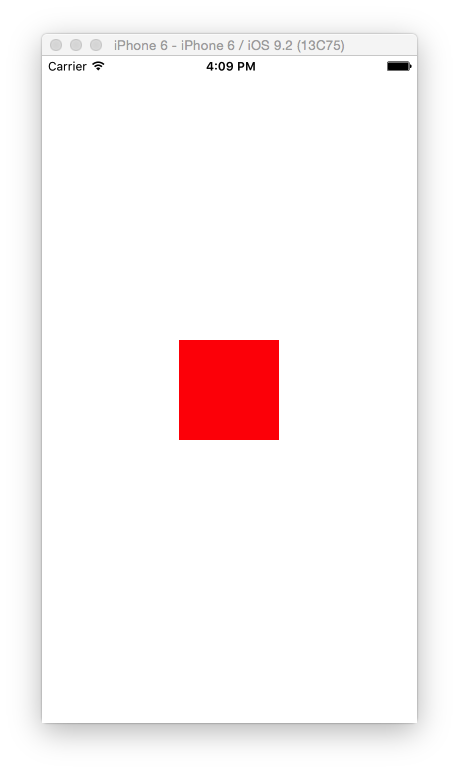
    make.size.mas_equalTo(CGSizeMake(100, 100));
    //居中
    make.center.equalTo(weakSelf.view);
}];
效果如下:
这里友情其实一个小内容,目前我们设置约束都是通过mas_makeConstraints用来创建约束,mas_updateConstraints用来更新约束,mas_remakeConstraints重置约束,清除之前的约束,保留最新的约束,如果想深入解释下,可以阅读下面的英文解释~
/**
 *  Creates a MASConstraintMaker with the callee view.
 *  Any constraints defined are added to the view or the appropriate superview once the block has finished executing
 *
 *  @param block scope within which you can build up the constraints which you wish to apply to the view.
 *
 *  @return Array of created MASConstraints
 */
- (NSArray *)mas_makeConstraints:(void(^)(MASConstraintMaker *make))block;

/**
 *  Creates a MASConstraintMaker with the callee view.
 *  Any constraints defined are added to the view or the appropriate superview once the block has finished executing.
 *  If an existing constraint exists then it will be updated instead.
 *
 *  @param block scope within which you can build up the constraints which you wish to apply to the view.
 *
 *  @return Array of created/updated MASConstraints
 */
- (NSArray *)mas_updateConstraints:(void(^)(MASConstraintMaker *make))block;

/**
 *  Creates a MASConstraintMaker with the callee view.
 *  Any constraints defined are added to the view or the appropriate superview once the block has finished executing.
 *  All constraints previously installed for the view will be removed.
 *
 *  @param block scope within which you can build up the constraints which you wish to apply to the view.
 *
 *  @return Array of created/updated MASConstraints
 */
- (NSArray *)mas_remakeConstraints:(void(^)(MASConstraintMaker *make))block;
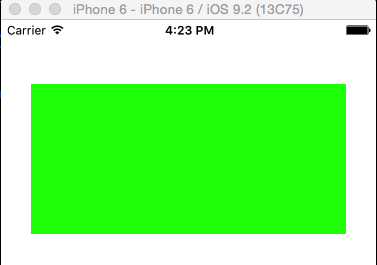
2.设置高度,这里设置左右边距,因此不设置宽度,如果想单独设置width可参考高度的设置方式:
UIView  *childView=[UIView new];
[childView setBackgroundColor:[UIColor greenColor]];
//先将子View加入在父视图中
[self.view addSubview:childView];
__weak typeof(self) weakSelf = self;
[childView mas_makeConstraints:^(MASConstraintMaker *make) {
    //距离顶部44
    make.top.equalTo(weakSelf.view.mas_top).with.offset(44);
    //距离左边30
    make.left.equalTo(weakSelf.view.mas_left).with.offset(30);
    //距离右边30,注意是负数
    make.right.equalTo(weakSelf.view.mas_right).with.offset(-30);
    //高度150
    make.height.mas_equalTo(@150);
}];
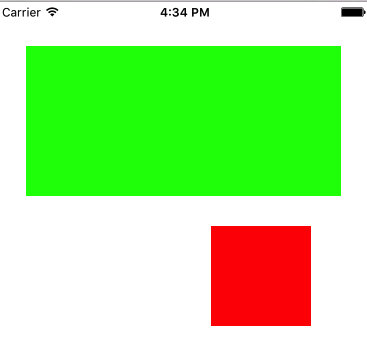
3.子视图之间的位置设置:
UIView  *childView=[UIView new];
[childView setBackgroundColor:[UIColor greenColor]];
//先将子View加入在父视图中
[self.view addSubview:childView];
__weak typeof(self) weakSelf = self;
[childView mas_makeConstraints:^(MASConstraintMaker *make) {
    //距离顶部44
    make.top.equalTo(weakSelf.view.mas_top).with.offset(44);
    //距离左边30
    make.left.equalTo(weakSelf.view.mas_left).with.offset(30);
    //距离右边30,注意是负数
    make.right.equalTo(weakSelf.view.mas_right).with.offset(-30);
    //高度150
    make.height.mas_equalTo(@150);
}];
//地址:http://www.cnblogs.com/xiaofeixiang/
UIView *nextView=[UIView new];
[nextView setBackgroundColor:[UIColor redColor]];
[self.view addSubview:nextView];
[nextView mas_makeConstraints:^(MASConstraintMaker *make) {
    make.top.equalTo(childView.mas_bottom).with.offset(30);
    make.right.equalTo(childView.mas_right).with.offset(-30);
    make.width.mas_equalTo(@100);
    make.height.mas_equalTo(@100);
}];
4.链式写法,算是一个便利的写法:
    UIView  *childView=[UIView new];
    [childView setBackgroundColor:[UIColor greenColor]];
    //先将子View加入在父视图中
    [self.view addSubview:childView];
    __weak typeof(self) weakSelf = self;
    [childView mas_makeConstraints:^(MASConstraintMaker *make) {
        make.top.and.left.mas_equalTo(weakSelf.view).with.offset(100);
        make.bottom.and.right.mas_equalTo(weakSelf.view).with.offset(-100);
        //第二种写法更简单,相对于就是父视图
//        make.top.and.left.mas_equalTo(100);
//        make.bottom.and.right.mas_equalTo(-100);
    }];

    UILabel *label=[UILabel new];
    [label setText:@"博客园-FlyElephant"];
    [label setTextColor:[UIColor redColor]];
    [label setTextAlignment:NSTextAlignmentCenter];
    [self.view addSubview:label];
    [label mas_makeConstraints:^(MASConstraintMaker *make) {
        make.left.mas_equalTo(weakSelf.view).with.offset(10);
        make.height.mas_equalTo(20);
        make.right.mas_equalTo(weakSelf.view).with.offset(-10);
        make.bottom.mas_equalTo(weakSelf.view).with.offset(-50);
    }];

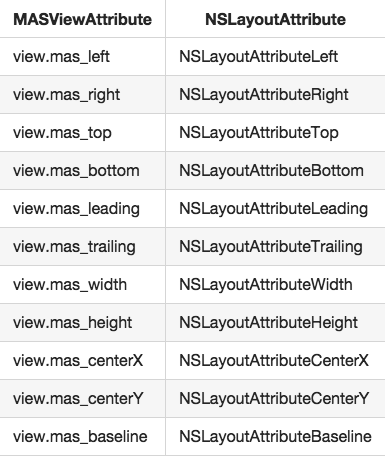
网上关于Masonry的教程很多,给的例子的也很多,这几种情况基本上满足了开发中的需求,不会有太多的出入,算是一个简易版的教程,Masonry的中属性和iOS中的属性是有对应的关系,不过因为很简单,基本上没怎么看,下图是一个对照关系:
总结:
- 可以给控件添加left/right/top/bottom/size/height/width/insert约束;
- 库提供了三个方法,mas_makeConstraints添加约束,mas_updateConstraints修改约束,mas_remakeConstraints清除以前约束并添加新约束;
- 可以通过view.mas_bottom获得view的某个约束;
- 在约束的block中,使用make来给当前控件添加约束。

