Android 使用RecycleView列表实现加载更多的示例代码
1.界面布局
<?xml version="1.0" encoding="utf-8"?>
<FrameLayout xmlns:android="http://schemas.android.com/apk/res/android"
    xmlns:tools="http://schemas.android.com/tools"
    android:layout_width="match_parent"
    android:layout_height="match_parent"
    android:background="#f0f3f5"
    tools:context=".MainActivity">

    <LinearLayout
        android:layout_width="match_parent"
        android:layout_height="match_parent"
        android:orientation="vertical"
        tools:context=".MainActivity">

        <ImageView
            android:layout_width="match_parent"
            android:layout_height="wrap_content"
            android:src="@mipmap/logo"/>
        <LinearLayout
            android:layout_width="match_parent"
            android:layout_height="wrap_content"
            android:layout_marginTop="10dp"
            android:orientation="vertical">
            <LinearLayout
                android:layout_width="match_parent"
                android:layout_height="wrap_content"
                android:orientation="horizontal"
                android:gravity="center">

                <TextView
                    android:layout_width="0dp"
                    android:layout_weight="1"
                    android:layout_height="wrap_content"
                    android:gravity="center"
                    android:text="电影名"/>
                <LinearLayout
                    android:layout_width="0dp"
                    android:layout_weight="1"
                    android:gravity="center"
                    android:layout_height="wrap_content"
                    android:orientation="horizontal">

                    <TextView
                        android:layout_width="wrap_content"
                        android:layout_height="match_parent"
                        android:text="电影评分" />

                </LinearLayout>
                <TextView
                    android:layout_width="0dp"
                    android:layout_weight="1"
                    android:gravity="center"
                    android:layout_height="wrap_content"
                    android:text="电影图片"/>
            </LinearLayout>

        </LinearLayout>
        <androidx.swiperefreshlayout.widget.SwipeRefreshLayout
            android:layout_height="wrap_content"
            android:layout_width="wrap_content"
            android:id="@+id/s1">

            <androidx.recyclerview.widget.RecyclerView
                android:id="@+id/r1"
                android:layout_width="match_parent"
                android:layout_height="wrap_content" />

        </androidx.swiperefreshlayout.widget.SwipeRefreshLayout>
    </LinearLayout>

</FrameLayout>
列表布局list.xml
<?xml version="1.0" encoding="utf-8"?>
<LinearLayout xmlns:android="http://schemas.android.com/apk/res/android"
    android:orientation="horizontal"
    android:layout_width="match_parent"
    android:layout_height="160dp">
    <TextView
        android:id="@+id/t2"
        android:layout_width="0dp"
        android:layout_weight="1.5"
        android:gravity="center"
        android:layout_height="wrap_content"
        android:layout_gravity="center"
        android:text="我不是药神"/>
    <TextView
        android:id="@+id/t3"
        android:layout_width="0dp"
        android:layout_weight="1"
        android:layout_height="wrap_content"
        android:layout_gravity="center"
        android:gravity="center"
        android:text="9.0"/>
    <ImageView
        android:id="@+id/i1"
        android:layout_width="0dp"
        android:layout_weight="1.5"
        android:layout_height="150dp"
        android:padding="20dp"
        android:src="@mipmap/ic_launcher"/>
</LinearLayout>
加载更多布局foot_view.xml
<?xml version="1.0" encoding="utf-8"?>
<TextView xmlns:android="http://schemas.android.com/apk/res/android"
          xmlns:tools="http://schemas.android.com/tools"
          android:id="@+id/tv_foot"
          android:layout_width="match_parent"
          android:layout_height="wrap_content"
          android:padding="10dp"
          android:gravity="center"
          tools:text="下拉刷新"
          android:orientation="vertical"/>

2.功能实现
(1)添加网络权限
<uses-permission android:name="android.permission.INTERNET"/>
(2)添加使用到的第三方库
  implementation 'com.android.support:design:28.0.0'
    implementation 'com.android.support:support-v4:28.0.0'
    implementation 'com.android.support:appcompat-v7:28.0.0'
    implementation 'com.squareup.okhttp3:okhttp:3.12.1'
    debugImplementation 'com.squareup.okhttp3:logging-interceptor:3.12.1'
    implementation 'com.google.code.gson:gson:2.8.5'
    implementation 'com.github.bumptech.glide:glide:4.9.0'
    annotationProcessor 'com.github.bumptech.glide:compiler:4.9.0'
(3)数据解析
使用GsonFormat插件,快速将json字符串转换成一个Java Bean,免去我们根据json字符串手写对应Java Bean的过程。
定义一个类OneModel.class
public class OneModel implements Serializable {

}
使用快捷键(Alt+s)粘贴全部过去数据,之后一直点击OK

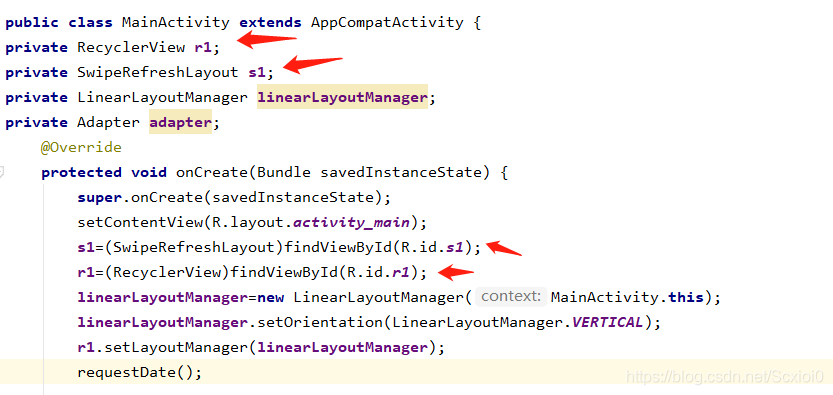
(4)绑定控件ID
private RecyclerView r1;
private SwipeRefreshLayout s1;
private LinearLayoutManager linearLayoutManager;
private Adapter adapter;

(5)定义一个Adapter类
package com.example.note4;

import android.content.Context;
import android.graphics.Color;
import android.os.Handler;
import android.util.Log;
import android.view.LayoutInflater;
import android.view.View;
import android.view.ViewGroup;
import android.widget.ImageView;
import android.widget.TextView;

import androidx.recyclerview.widget.RecyclerView;

import com.bumptech.glide.Glide;

import java.util.List;
public class Adapter extends RecyclerView.Adapter<Adapter.ViewHolder> {
    private Context mContext;
    private List<DateModel.SubjectsBean> mData;//数据
    private int max_count = 6;//最大显示数
    private Boolean isFootView = false;//是否添加了FootView
    private String footViewText = "";//FootView的内容

    //两个final int类型表示ViewType的两种类型
    private final int NORMAL_TYPE = 0;
    private final int FOOT_TYPE = 1111;

    public Adapter(Context context, List<DateModel.SubjectsBean> data) {
        this.mContext = context;
        this.mData = data;
    }

    public class ViewHolder extends RecyclerView.ViewHolder {
        public TextView t3,t2;
        public ImageView i1;
        private TextView tvFootView;

        //初始化viewHolder,此处绑定后在onBindViewHolder中可以直接使用
        public ViewHolder(View itemView, int viewType) {
            super(itemView);
            if (viewType == NORMAL_TYPE) {
                t3 = (TextView) itemView.findViewById(R.id.t3);
                t2 = (TextView) itemView.findViewById(R.id.t2);
                i1=(ImageView)itemView.findViewById(R.id.i1);
            } else if (viewType == FOOT_TYPE) {
                tvFootView = (TextView) itemView.findViewById(R.id.tv_foot);
            }
        }
    }

    @Override
    public ViewHolder onCreateViewHolder(ViewGroup parent, int viewType) {
        View normal_views = LayoutInflater.from(parent.getContext()).inflate(
                R.layout.list, parent, false);
        View foot_view = LayoutInflater.from(parent.getContext()).inflate(
                R.layout.foot_view, parent, false);

        if (viewType == FOOT_TYPE)
            return new ViewHolder(foot_view, FOOT_TYPE);
        return new ViewHolder(normal_views, NORMAL_TYPE);
    }

    @Override
    public int getItemViewType(int position) {
        if (position == max_count - 1) {
            return FOOT_TYPE;
        }
        return NORMAL_TYPE;
    }

    @Override
    public void onBindViewHolder(ViewHolder holder, int position) {
        DateModel.SubjectsBean subjectsBean=mData.get(position);
        //如果footview存在,并且当前位置ViewType是FOOT_TYPE
        if (isFootView && (getItemViewType(position) == FOOT_TYPE)) {
            holder.tvFootView.setText(footViewText);
            // 刷新太快 所以使用Hanlder延迟两秒
            Handler handler = new Handler();
            handler.postDelayed(new Runnable() {
                @Override
                public void run() {
                    max_count += 5;
                    notifyDataSetChanged();
                }
            }, 1000);

        } else {
            holder.t2.setText(subjectsBean.getTitle());
            holder.t3.setText(subjectsBean.getRate());
            Glide.with(mContext).load(subjectsBean.getCover()).into(holder.i1);
        }
    }

    @Override
    public int getItemCount() {
        if (mData.size() <= max_count) {
            return mData.size();
        }
        return max_count;
    }

    //创建一个方法来设置footView中的文字
    public void setFootViewText(String footViewText) {
        isFootView = true;
        this.footViewText = footViewText;
    }

}
(6)网络请求
public void getDate(DateModel dateModel)
    {
        if(dateModel==null||dateModel.getSubjects()==null)
        {
            Toast.makeText(MainActivity.this,"失败",Toast.LENGTH_SHORT).show();
            return;
        }
        Toast.makeText(MainActivity.this,"成功",Toast.LENGTH_SHORT).show();
        adapter=new Adapter(MainActivity.this,dateModel.getSubjects());
        adapter.setFootViewText("加载中...");
        r1.setAdapter(adapter);
        s1.setRefreshing(false);
    }
    public void requestDate() {

        String url = "https://movie.douban.com/j/search_subjects?type=movie&tag=%E8%B1%86%E7%93%A3%E9%AB%98%E5%88%86&sort=recommend&page_limit=200&page_start=0";
        OkHttpClient okHttpClient = new OkHttpClient();
        final Request request = new Request.Builder()
                .url(url)
                .get()
                .build();
        Call call = okHttpClient.newCall(request);
        call.enqueue(new Callback() {
            @Override
            public void onFailure(Call call, IOException e) {
                runOnUiThread(new Runnable() {
                    @Override
                    public void run() {
                        Toast.makeText(MainActivity.this, "网络连接失败", Toast.LENGTH_SHORT).show();
                    }
                });
            }

            @Override
            public void onResponse(Call call, Response response) throws IOException {
                String result = response.body().string();
                Gson gson = new Gson();
                final DateModel dateModel = gson.fromJson(result, DateModel.class);
                runOnUiThread(new Runnable() {
                    @Override
                    public void run() {
                        Toast.makeText(MainActivity.this, "网络连接成功", Toast.LENGTH_SHORT).show();
                        getDate(dateModel);
                    }
                });
            }
        });
    }
(7)功能实现

linearLayoutManager=new LinearLayoutManager(MainActivity.this);
        linearLayoutManager.setOrientation(LinearLayoutManager.VERTICAL);
        r1.setLayoutManager(linearLayoutManager);
        requestDate();

        s1.setOnRefreshListener(new SwipeRefreshLayout.OnRefreshListener() {
            @Override
            public void onRefresh() {
                new Handler().postDelayed(new Runnable() {
                    @Override
                    public void run() {
                        requestDate();
                    }
                },1000);
            }
        });
(8)源代码
点击下载
到此这篇关于Android 使用RecycleView列表实现加载更多的文章就介绍到这了,更多相关Android加载更多内容请搜索我们以前的文章或继续浏览下面的相关文章希望大家以后多多支持我们!
赞 (0)

