如何利用Vue+Element做个小页面
目录
- 前言
- 项目结构
- MarkDown编辑器
- 消息模块
- 消息导航
- 内容代码(消息)
- 设置模块
- 总结
前言
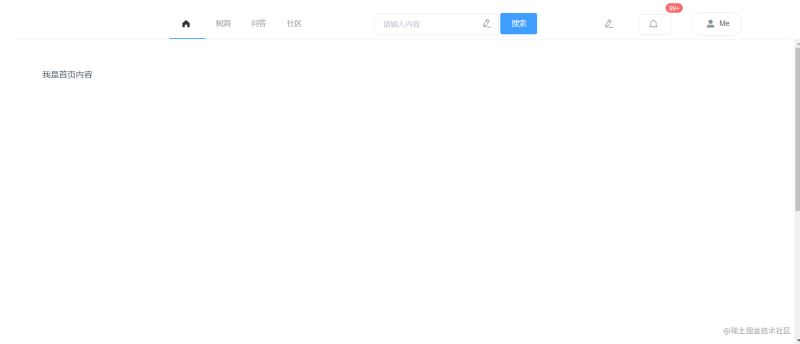
直接看效果,干啥慢慢猜~
项目结构

这个的话可以看到分了一些组件嘛。然后总体还是vue+elementui 后面活下来了再用uniapp做移动端嘛。
MarkDown编辑器
这个是咱们比较主要的功能嘛。
也是用了meavon这个开源的Markdown组件嘛。

然后是文章上传嘛,这里有个弹窗嘛。

代码如下
<template>
  <div id="main">
    <div>
      <div>
        <input type="text" v-model="form.title" placeholder="请输入文章标题" required>
        <el-button @click="submit" type="primary">发布文章</el-button>

      </div>

      <mavon-editor
        v-model="form.value"
        ref="md"
        @change="change"
        style="min-height: 800px;width: 100%"
      />
    </div>

    <el-dialog
      style="width:80%;margin: 0 auto"
      title="文章提交"
      :visible.sync="dialogFormVisible"
    >
      <el-form :model="ruleForm"
               :rules="rules"
               ref="ruleForm"
               label-width="100px"
               class="demo-ruleForm">

        <el-form-item label="文章封面URL" >
          <el-input v-model="ruleForm.url"></el-input>
        </el-form-item>

        <el-form-item label="选择社区" prop="community">
          <el-select v-model="ruleForm.community" placeholder="请选择发布社区">
            <el-option label="社区一" value="A"></el-option>
            <el-option label="社区二" value="B"></el-option>
          </el-select>
        </el-form-item>

        <el-form-item label="选择专栏" prop="community">
          <el-select v-model="ruleForm.column" placeholder="请选择发布专栏">
            <el-option label="java" value="java"></el-option>
            <el-option label="python" value="python"></el-option>
          </el-select>
        </el-form-item>

        <el-form-item label="选择权限" prop="level">
          <el-select v-model="ruleForm.level" placeholder="请选择文章权限">
            <el-option label="私密" value="0"></el-option>
            <el-option label="公开阅览" value="1"></el-option>
            <el-option label="公开读写权限" value="2"></el-option>
            <el-option label="完全公开(所有人持有)" value="3"></el-option>
          </el-select>
        </el-form-item>

        <el-form-item label="文章类型" prop="type">
          <el-radio-group v-model="ruleForm.type">
            <el-radio label="原创" value="0"></el-radio>
            <el-radio label="转载" value="1"></el-radio>
            <el-radio label="翻译" value="2"></el-radio>
          </el-radio-group>
        </el-form-item>
        <el-form-item label="文章描述" prop="desc">
          <el-input type="textarea" v-model="ruleForm.desc"></el-input>
        </el-form-item>
      </el-form>

      <div  style="margin: 0 auto" slot="footer" class="dialog-footer">
        <el-button @click="dialogFormVisible = false">取 消</el-button>
        <el-button type="primary" @click="submitForm('ruleForm')">确 定</el-button>
      </div>
    </el-dialog>
  </div>
</template>

<script>
import { mavonEditor } from 'mavon-editor'     //引入mavon-editor组件
import 'mavon-editor/dist/css/index.css'       //引入组件的样式
export default {
  // 注册
  name: "writeblog",
  components: {
    mavonEditor,
  },

  data() {
    return {
      dialogFormVisible: false,
      form: {
        value:'', // 输入的markdown
        html:'',    // 及时转的html
        ruleForm:this.ruleForm,
        title: '',
      },
      ruleForm: {
        url: '',
        community:"",
        column: '',
        level:'',
        desc: '',
        type:'',
      },

      rules: {
        desc: [
          { required: true, message: '请输入文章描述', trigger: 'blur' },
          { min: 1, max: 150, message: '长度在 1 到 150 个字符', trigger: 'blur' }
        ],

        community: [
          { required: true, message: '请选择发布社区', trigger: 'blur' },
        ],

        level:[
          { required: true, message: '请选择文章权限', trigger: 'blur' },
        ],

        type: [
          { required: true, message: '请选择文章类型', trigger: 'change' }
        ],

      }
    }
  },

  methods: {
    // 所有操作都会被解析重新渲染
    change(value, render){        //value为编辑器中的实际内容,即markdown的内容,render为被解析成的html的内容
      this.form.html = render;
    },
    // 提交
    submit(){
      //点击提交后既可以获取html内容,又可以获得markdown的内容,之后存入到服务端就可以了
      console.log(this.form.value);
      console.log(this.form.html);
      this.dialogFormVisible=true;
    },
    submitForm(formName) {
      this.$refs[formName].validate((valid) => {
        if (valid) {
          if (this.form.title===""){
            alert("标题不能为空")
            return
          }
          alert('submit!');
          this.dialogFormVisible = false;
          console.log(this.ruleForm)
        } else {

          console.log('error submit!!');
          return false;
        }
      });
    },
  },
  mounted() {

  }
}
</script>
<style scoped>
#center {
  margin-top: 5%;
  width: 96%;
  height: 96%;
  border: 1px;
}

img {
  margin: auto;
  margin-left: 30%;
  height: 40%;
  width: 40%;
  position: relative;
  top: 10%;
}

input {
  width: 85%;
  height: 30px;
  border-width: 2px;
  border-radius: 5px;
  border-color: #00c4ff;
  border-bottom-color: #2C7EEA;
  color: #586e75;
  font-size: 15px;

}
</style>
这次的前端代码其实是完全重构,原来上个学期期末写的玩意咋说呢,还不如我以前直接用Django做的Dome。做着做着变成了个人博客,然后又重新改回多人社区,赶鸭子上架连文档都没有搞好,所有后面我直接摆烂了,本来寒假要动工的,但是学习任务拉满,唉。
消息模块
这个也是一个比较重要的模块,因为这个消息可以把几个模块联合起来。

先来说说那个标号

是咋来的,这个其实就是elementui里面的这个

然后是咱页面

后面的几个其实是类似的

这个你们直接看着写
消息导航
首先是咱的消息导航代码
<template>
<div>
  <el-container style="height: 500px; border: 1px solid #eee">
    <el-aside width="200px" style="background-color: white">
      <el-menu :default-openeds="['1']">
        <el-submenu index="1">
          <template slot="title">
            <i class="el-icon-message"></i>问答消息</template>
          <el-menu-item-group>
            <router-link class="alink" to="/notices/aComment">
              <el-menu-item index="1-1">
                <el-badge :value="5" :max="99" class="item">
                  评论消息
                </el-badge>
              </el-menu-item>
            </router-link>
            <router-link class="alink" to="/notices/thumbNews">
              <el-menu-item index="1-2">
                点赞消息
              </el-menu-item>
            </router-link>
            <router-link to="/notices/replyMessage" class="alink">
              <el-menu-item index="1-3">
                回答消息
              </el-menu-item>
            </router-link>
          </el-menu-item-group>
        </el-submenu>

        <el-submenu index="2">
          <template slot="title"><i class="el-icon-message"></i>文章消息</template>
          <el-menu-item-group>
            <router-link to="/notices/articleComment" class="alink">
              <el-menu-item index="2-1">
                文章评论
              </el-menu-item>
            </router-link>

            <router-link class="alink" to="/notices/thumbArticles">
              <el-menu-item index="2-2">
                文章点赞
              </el-menu-item>
            </router-link>

            <router-link class="alink" to="/notices/articlePush">
              <el-menu-item index="2-3">
                文章push
              </el-menu-item>
            </router-link>
          </el-menu-item-group>
        </el-submenu>

        <el-submenu index="3">
          <template slot="title"><i class="el-icon-message-solid"></i>系统通知</template>
          <el-menu-item-group>
            <router-link class="alink" to="/notices/auditInformation">
              <el-menu-item index="3-1">
                审核消息
              </el-menu-item>
            </router-link>
            <router-link class="alink" to="/notices/activeMessage">
              <el-menu-item index="3-2">
                活动消息
              </el-menu-item>
            </router-link>
          </el-menu-item-group>
        </el-submenu>

        <el-submenu index="4">
          <template slot="title"><i class="el-icon-s-custom"></i>好友</template>
          <el-menu-item-group>
            <router-link class="alink" to="/notices/friendVerification">
              <el-menu-item index="4-1">
                好友验证
              </el-menu-item>
            </router-link>
            <router-link class="alink" to="/notices/friendsMessage">
              <el-menu-item index="4-2">
                好友消息
              </el-menu-item>
            </router-link>
          </el-menu-item-group>
        </el-submenu>

        <el-submenu index="5">
          <template slot="title"><i class="el-icon-setting"></i>设置</template>
          <router-link class="alink" to="/notices/noticesettings">
            <el-menu-item-group>
              <el-menu-item index="5-1">消息设置</el-menu-item>
            </el-menu-item-group>
          </router-link>
        </el-submenu>

      </el-menu>
    </el-aside>
      <el-container
        style="background-image: url(/static/logo/noticesbg.jpg);
        background-repeat: no-repeat;
        background-size:100% 100%;
        "
      >
        <el-main>
          <div style="width: 80%;margin: 0 auto">
            <router-view></router-view>
          </div>
        </el-main>
      </el-container>
  </el-container>
</div>
</template>

<script>
export default {
  name: "notices",
  data() {

    return {

    }
  },
}
</script>

<style scoped>
.el-header {
  background-color: #e5efe2;
  color: #333;
  line-height: 60px;
}

.el-aside {
  color: #333;
}
.router-link-active {
  text-decoration: none;
}

.alink{

  text-decoration: none;
}
</style>
内容代码(消息)
<template>
<div style="background-color: rgba(239,250,246,0.53)">
<br>
<div class="head" style="width: 90%;margin: 0 auto">
<el-button style="margin-left:80%" type="primary" plain>清空所有</el-button>
</div>
<br>
<div style="width: 80%;margin-left: 1%" class="main">
<el-card shadow="hover" v-for="(message,index) in Messages" :key="index">
<div style="height:100px">
<div style="width:14%;height: 100%;border-radius: 100px;display:inline-block;">
<img
style="width:100%;height: 100%;border-radius: 100px"
src="/static/temporary/headpic.jpg"
class="image"
>
</div>
<div style="display:inline-block;margin-left: 5%">
<p class="message">{{message.from}} 评论了你 <i class="el-icon-info"></i></p>
<p style="font-weight:bold"
>
{{message.info}}</p>
<p class="message">
来自问答:{{message.quiz}}
</p>
</div>
<div style="display:inline-block;margin-left: 20%">
<p>
<el-button icon="el-icon-delete" ></el-button>
</p>
<p>
{{message.data}}
</p>
</div>
</div>
<br>
</el-card>
</div>
<br>
<div class="footer" style="margin: 0 auto;width: 100%;">
<div class="block" >
<el-pagination
background
layout="total, prev, pager, next, jumper"
:total=total>
</el-pagination>
</div>
</div>
</div>
</template>
<script>
export default {
name: "aComment",
data(){
return{
total: 999,
Messages:[
{"info":"Huterox is best 并且非常地帅气","from":"Futerox","quiz":"小姐姐老是不回你信息怎么办","data":"2022-3-27"},
{"info":"Huterox is best 并且非常地帅气","from":"Futerox","quiz":"小姐姐老是不回你信息怎么办","data":"2022-3-27"},
{"info":"Huterox is best 并且非常地帅气","from":"Futerox","quiz":"小姐姐老是不回你信息怎么办","data":"2022-3-27"},
{"info":"Huterox is best 并且非常地帅气","from":"Futerox","quiz":"小姐姐老是不回你信息怎么办","data":"2022-3-27"},
{"info":"Huterox is best 并且非常地帅气","from":"Futerox","quiz":"小姐姐老是不回你信息怎么办","data":"2022-3-27"},
]
}
},
}
</script>
<style scoped>
.message{
width: 20em;
overflow: hidden;
text-overflow:ellipsis;
white-space: nowrap;
}
</style>
设置模块
这个不一样的是咱的设置模块

<template>
<div style="width: 70%;">
  <el-card shadow="hover">
    <div style="display:inline-block;margin-left: 5%">
      <p>
          问答评论消息提醒
      </p>
    </div>
      <div style="display:inline-block;margin-left: 60%">
        <p>
          <el-switch
            v-model="askcommentvalue"
            active-text="开启"
          >
          </el-switch>
        </p>
      </div>
  </el-card>

  <el-card shadow="hover">
    <div style="display:inline-block;margin-left: 5%">
      <p>
        问答回答消息提醒
      </p>
    </div>
    <div style="display:inline-block;margin-left: 60%">
      <p>
        <el-switch
          v-model="askanswervalue"
          active-text="开启"
        >
        </el-switch>
      </p>
    </div>
  </el-card>

  <el-card shadow="hover">
    <div style="display:inline-block;margin-left: 5%">
      <p>
        文章评论消息提醒
      </p>
    </div>
    <div style="display:inline-block;margin-left: 60%">
      <p>
        <el-switch
          v-model="articlecomment"
          active-text="开启"
        >
        </el-switch>
      </p>
    </div>
  </el-card>

  <el-card shadow="hover">
    <div style="display:inline-block;margin-left: 5%">
      <p>
        文章点赞消息提醒
      </p>
    </div>
    <div style="display:inline-block;margin-left: 60%">
      <p>
        <el-switch
          v-model="articlethumb"
          active-text="开启"
        >
        </el-switch>
      </p>
    </div>
  </el-card>
</div>
</template>

<script>
export default {
  name: "noticesettings",
  data() {
    return {
      askcommentvalue: true,
      askanswervalue: true,
      articlecomment: true,
      articlethumb: true,

    }
  },
}
</script>
<style scoped>
</style>
总结
之所以要写这个其实也是为了我后面直接嫖组件,因为等整个项目搞好了,我会发现这个前端代码不好直接嫖到别当项目里面,所以顺便记录一下。毕竟前端这种东西,完全看感觉,后面调不回来了,这里还能找那种感觉,有样图嘛,然后这个项目后面也是要开源的。
相关推荐
-
基于vue-cli3和element实现登陆页面
1.先用vue-cli3创建一个项目 2.安装element模块 全局安装 npm i element-ui -S 3在main.js引入模块 import ElementUI from 'element-ui'; import 'element-ui/lib/theme-chalk/index.css'; Vue.use(ElementUI); 4.这里先扩展一个小知识点 在package.json文件中找scripts下serve,在后面加上--open 可以实现运行项目后自动打开浏览器 5
-
vue+element使用动态加载路由方式实现三级菜单页面显示的操作
需要用到中间件的方式,这样就可以实现了我们想要的方式 publish-center.vue <template> <router-view></router-view> </template> <script> export default { } </script> <el-menu :default-active="$route.path" class="el-menu-vertical-dem
-
vue+element实现打印页面功能
项目中遇到了要打印页面的功能,我感觉我这个方法不太好,欢迎各位来改善指导 使用print插件 https://github.com/xyl66/vuePlugs_printjs 1.在min.js中引入 2.import Print from '@/plugs/print' 3.Vue.use(Print) // 注册 <template> <section ref="print"> <要打印内容/> <div class="no-
-

如何利用Vue+Element做个小页面
目录 前言 项目结构 MarkDown编辑器 消息模块 消息导航 内容代码(消息) 设置模块 总结 前言 直接看效果,干啥慢慢猜~ 项目结构 这个的话可以看到分了一些组件嘛.然后总体还是vue+elementui 后面活下来了再用uniapp做移动端嘛. MarkDown编辑器 这个是咱们比较主要的功能嘛. 也是用了meavon这个开源的Markdown组件嘛. 然后是文章上传嘛,这里有个弹窗嘛. 代码如下 <template> <div id="main">
-
如何使用Vue+Element做个个人中心
目录 前言 个人空间 信息修改 基本信息实现 信息修改实现 头像修改实现 账号管理实现 文章列表实现 收藏实现 问答收藏 文章收藏 总结 前言 最近想要换个脑子玩玩,写个页面玩玩~ 先看看效果: 后面加个路由超链接,嘿嘿~ 个人空间 我们先来聊聊主要的这个玩意,也就是咱们的入口. 对应的路由是: 这里面的组件可不少,里面还有很多分组件,没写,有空我就写写. { path: '/myspace', name: 'myspace', component: myspace, children:[ {
-
如何利用vue+element ui实现好看的登录界面
目录 界面效果图 下面直接上代码: 附加背景图片 总结 闲暇之余使用vue+element ui制作了个登录界面 话不多说,先上 界面效果图 下面直接上代码: <template> <div class="loginbody"> <div class="logindata"> <div class="logintext"> <h2>Welcome</h2> </div&
-
利用vue + element实现表格分页和前端搜索的方法
前言 ElementUI是饿了么前端开源的一个基于Vue的前端框架,已经帮我们封装好了一系列功能性的组件,比如栅格系统.表格.表单.树形菜单.通知等.对于搞后台管理界面的项目,特别是不需要考虑兼容ie8.ie9以下的项目.ElementUI是一个不错的选择. 而且ElementUI的文档写得十分详尽,参照demo可以很快上手. 本文主要介绍了关于vue + element实现表格分页和前端搜索的相关内容,分享出来供大家参考学习,下面话不多说了,来一起看看详细的介绍吧. 实现思路 1.前端后台管理
-
vue+element搭建后台小总结 el-dropdown下拉功能
本文实例为大家分享了el-dropdown下拉功能的具体代码,供大家参考,具体内容如下 功能:点击el-dropdown 下拉 下拉的数据 从后台获取 遍历到界面上 且多个el-dropdown下拉 共用 一个 @command 事件 @command="handleCommand" 上代码部分 html //全部城市 下拉 //handleCommand下拉事件 all_city点击后显示在上面的数据 item.label下拉的数据 :command点击传的值 用flag来区分同
-
利用vue和element-ui设置表格内容分页的实例
html代码 因为我写在template中,也就是新建了组建中,贴出代码. <el-pagination small layout="prev, pager, next" :total="total" @current-change="current_change"> </el-pagination> 代码中,small代表是否使用小型分页样式 layout代表组件布局,子组件名用逗号分隔 属性: total代表总条目数
-
vue+canvas实现拼图小游戏
利用 vue+canvas 实现拼图小游戏,供大家参考,具体内容如下 思路步骤 一个拼图拼盘和一个原图参照 对原图的切割以及随机排序 通过W/A/D/S或上下左右进行移动 难度的自主选择 对拼图是否完成的判定 JS实现部分 数据分析 row:拼图的总行数:column:拼图的总列数. (用来设置拼图难度,也是每个拼图块宽高的设置规则) pic[{x,y,row,column,index}]:小拼图的集合,其内元素为小拼图的数据结构. (x.y:拼图块在canvas的绘制规则,初始化后不会进行改变
-
解决vue+element 键盘回车事件导致页面刷新的问题
背景 今天发现输入框输入内容后回车就会刷新页面 解决 <el-form :inline="true" @submit.native.prevent> </el-form> el-from 加上 @submit.native.prevent 具体是参考element-ui文档解决的 W3C 标准中有如下规定: When there is only one single-line text input field in a form, the user agent