react express实现webssh demo解析
目录
- 正文
- 实现 WebSSH 的基本思路
- 实现 Demo 的代码
- 服务器端代码
- 前端代码
- 在 React 应用中使用 WebSSH 组件
- 效果
- 总结
正文
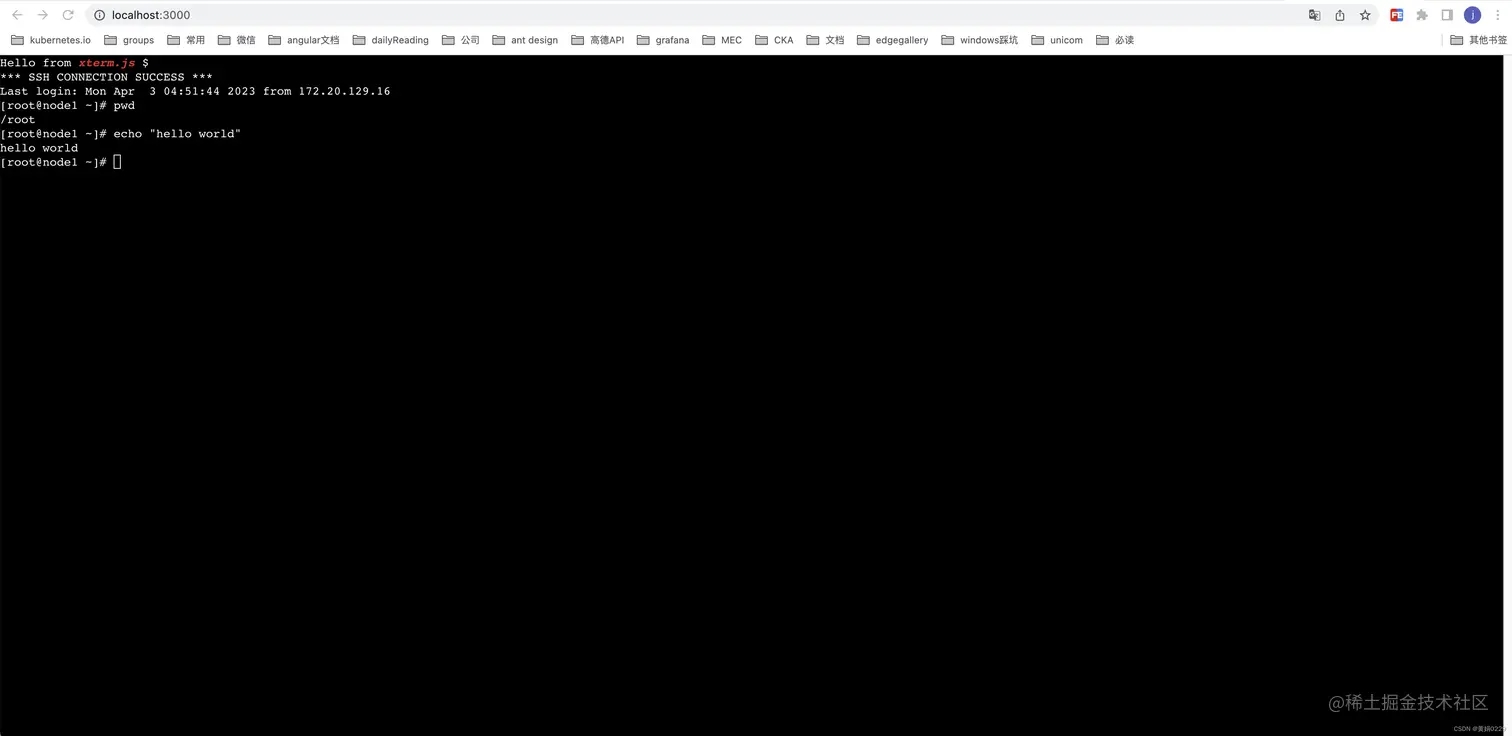
下面是一个简单的 WebSSH Demo,实现了通过浏览器连接 SSH 服务器并进行交互的功能。
实现 WebSSH 的基本思路
WebSSH 可以分成以下几个模块:
- 前端界面:使用 xterm.js 实现一个基于浏览器的终端界面。
- WebSocket 连接:使用 WebSocket 连接连接 WebSSH 服务器后端。
- SSH 连接:使用 ssh2.js 库连接 SSH 服务器,然后在 WebSocket 和 SSH 之间建立一个双向通讯。
实现 Demo 的代码
服务器端代码
服务器端代码使用 Node.js 和 WebSocket 模块实现,主要用于连接到远程 SSH 服务器并与前端建立 WebSocket 连接。
const SSHClient = require('ssh2').Client;
const utf8 = require('utf8');
export const createNewServer = (machineConfig: any, socket: any) => {
  const ssh = new SSHClient();
  const { host, username, password } = machineConfig;
  // 连接成功
  ssh.on('ready', function () {
    socket.send('\r\n*** SSH CONNECTION SUCCESS ***\r\n');
    ssh.shell(function (err: any, stream: any) {
      // 出错
      if (err) {
        return socket.send('\r\n*** SSH SHELL ERROR: ' + err.message + ' ***\r\n');
      }
      // 前端发送消息
      socket.on('message', function (data: any) {
        stream.write(data);
      });
      // 通过sh发送消息给前端
      stream.on('data', function (d: any) {
        socket.send(utf8.decode(d.toString('binary')));
        // 关闭连接
      }).on('close', function () {
        ssh.end();
      });
    })
    // 关闭连接
  }).on('close', function () {
    socket.send('\r\n*** SSH CONNECTION CLOSED ***\r\n');
    // 连接错误
  }).on('error', function (err: any) {
    socket.send('\r\n*** SSH CONNECTION ERROR: ' + err.message + ' ***\r\n');
    // 连接
  }).connect({
    port: 22,
    host,
    username,
    password
  });
}
前端代码
前端代码主要包括一个包装 xterm.js 的 React 组件和一些 WebSockets 相关的代码。
import React, { useEffect, useRef } from 'react';
import { Terminal } from 'xterm';
import { WebLinksAddon } from 'xterm-addon-web-links';
import { FitAddon } from 'xterm-addon-fit';
import 'xterm/css/xterm.css';
const FontSize = 14;
const Col = 80;
const WebTerminal = () => {
  const webTerminal = useRef(null);
  const ws = useRef(null);
  useEffect(() => {
    // 初始化终端
    const ele = document.getElementById('terminal');
    if (ele && !webTerminal.current) {
      const height = ele.clientHeight;
      // 初始化
      const terminal = new Terminal({
        cursorBlink: true,
        cols: Col,
        rows: Math.ceil(height / FontSize),
      });
      // 辅助
      const fitAddon = new FitAddon();
      terminal.loadAddon(new WebLinksAddon());
      terminal.loadAddon(fitAddon);
      terminal.open(ele);
      terminal.write('Hello from \x1B[1;3;31mxterm.js\x1B[0m $ ');
      fitAddon.fit();
      webTerminal.current = terminal;
    }
    // 初始化ws连接
    if (ws.current) ws.current.close();
    const socket = new WebSocket('ws://localhost:3001');
    socket.onopen = () => {
      socket.send('connect success');
    };
    ws.current = socket;
  }, []);
  useEffect(() => {
    // 新增监听事件
    const terminal = webTerminal.current;
    const socket = ws.current;
    if (terminal && socket) {
      // 监听
      terminal.onKey(e => {
        const { key } = e;
        socket.send(key);
      });
      // ws监听
      socket.onmessage = e => {
        console.log(e);
        if (typeof e.data === 'string') {
          terminal.write(e.data);
        } else {
          console.error('格式错误');
        }
      };
    }
  }, []);
  return <div id="terminal"  style={{ backgroundColor: '#000', width: '100vw', height: '100vh' }}/>;
};
export default WebTerminal;
WebSSH 组件借助 Hooks 特性进行 WebSocket 和 xterm.js 的初始化。具体来说,这个组件使用了 useEffect Hook 在组件挂载时完成以下工作:
- 初始化 Terminal 组件。
- 初始化 WebSocket 连接。
- 为 Terminal 组件绑定输入事件和 WebSocket 发送数据的逻辑。
在 React 应用中使用 WebSSH 组件
你需要在你的 React的index.js 文件中引入 WebSSH 组件,并在你的应用中渲染它:
import WebSSH from './components/WebSSH';
import React from 'react';
import ReactDOM from 'react-dom';
ReactDOM.render(
  <WebSSH />,
  document.getElementById('root')
);
效果

编辑
总结
在本篇博客中,我们学习了如何使用 xterm.js、WebSocket 和 ssh2.js 库构建一个 WebSSH 应用程序。我们创建了一个简单的 Demo 来演示该过程。
完整代码参考
GitHub - judithhuang/webssh-demo
以上就是react express实现webssh demo解析的详细内容,更多关于react express实现webssh的资料请关注我们其它相关文章!
赞 (0)

