Vue + iView实现Excel上传功能的完整代码

1、HTML部分

<Col span="2">上传文件:</Col>
<Col span="22" class="uploadExcelBox">
    <Upload ref="uploadExcel" :loading="uploadLoading" :action="uploadFileUrl" accept="xlsx,xls" :format="uploadFormat" :before-upload="beforeImgFile" :on-success="successImgFile" :on-error="errorImgFile" :show-upload-list="true">
         <Button type="success">上传附件</Button>
	 </Upload>
     <div v-if="uploadingFile !== null">待上传文件:
          <span class="blueFont">{{ fileName }}</span>
          <Button @click="uploadFun(index)" :loading="loadingStatus" class="manualUploadBtn">{{ loadingStatus ? '上传中...' : '点击开始上传' }}</Button>
      </div>
</Col>

2、JS部分

<script>
    // import excel from '@/libs/excel'
	import service from '@/libs/request' //用来取当前域名
	import reportFormApi from '@/api/reportForm'
    export default {
        data() {
            return {
                uploadLoading:false,//上传控件loading状态
				uploadFileUrl: "",
				uploadFormat:['xlsx','xls'],
				uploadingFile:null,//待上传的文件
                loadingStatus:false,//upload组件的状态
                fileName:"",//待上传文件的名称
            }
        },
        mounted() {
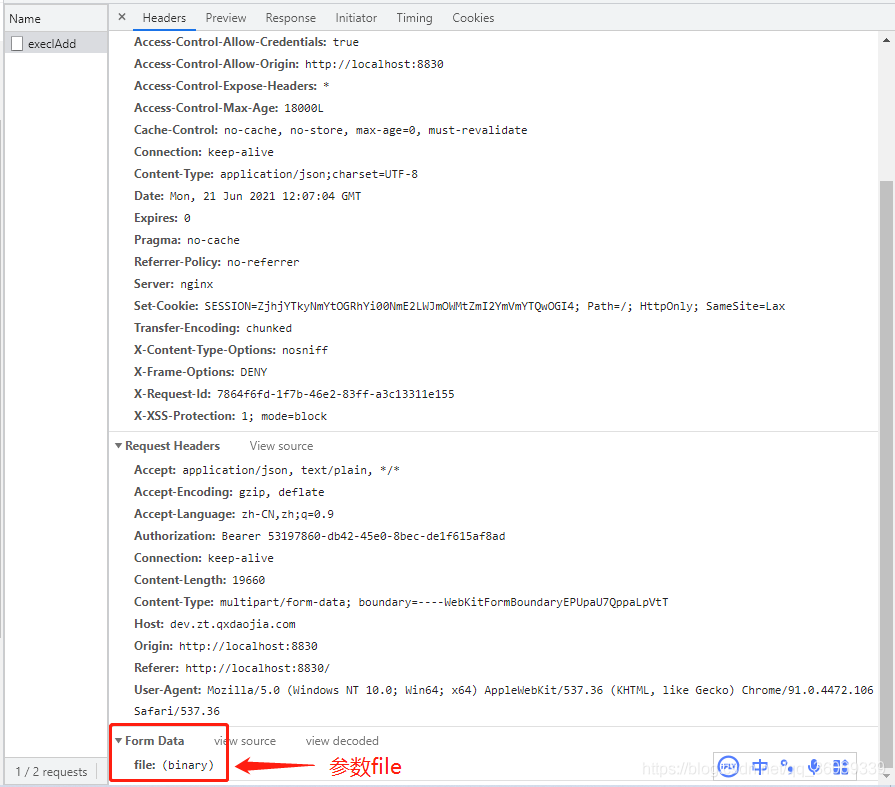
            this.uploadFileUrl = service.apiUrl + "/qingximaster/winInfo/execlAdd";//上传Excel的接口路径,后端人员提供。
        },
        methods: {
			// 图片上传之前
			beforeImgFile(file) {
				// console.log(file);
				const fileExt = file.name.split('.').pop().toLocaleLowerCase()
				if (fileExt === 'xlsx' || fileExt === 'xls') {
					var formdata = new FormData();
					formdata.append("file",file);
                    this.fileName = formdata.get('file').name;//通过formdata.get('file')方法,可以取file文件里的信息,例如Excel的文件名。
					this.uploadingFile =  formdata;//注意:这个将作为参数传给接口实现上传。传给接口的file不需要 formdata.get('file'),直接传file。
				} else {
					this.$Notice.warning({
						title: '文件类型错误',
						desc: '文件:' + file.name + '不是EXCEL文件,请选择后缀为.xlsx或者.xls的EXCEL文件。'
					})
				}
				return false
			},
			// 上传成功
			successImgFile(response, file, fileList) {
                this.$Notice.success({
                    title: '提示',
                    desc: '上传成功!'
                })
			},
			// 上传失败
			errorImgFile(error, file, fileList) {
				this.$Notice.success({
                    title: '提示',
                    desc: '上传失败!'
                })
				console.log(error);
			},
			uploadFun(index){//调接口上传Excel
				this.loadingStatus = true;
				reportFormApi.uploadExcel({
                    url: this.uploadFileUrl,
                    file: this.uploadingFile
                }).then(res =>{
					this.uploadingFile = null;
                    this.fileName = "";
                    if(res.code==0){
                        this.infoList[index].content = JSON.stringify(res.data);
					    // console.log(this.infoList[index].content);
                        this.$Message.success("上传成功!");
                    }else{
                        this.$Message.error(res.message);
                    }
				}).finally(()=>{
					this.loadingStatus = false;
                    this.uploadLoading = false;
                })
			},
        }
    }

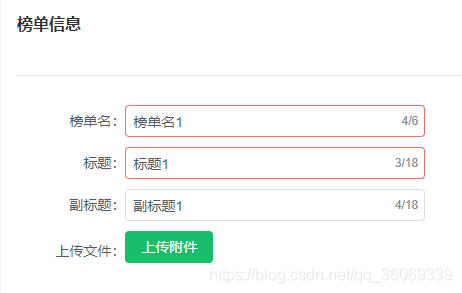
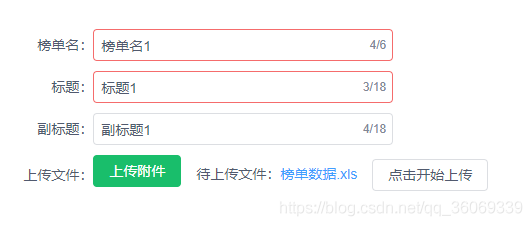
3、页面效果如下

(1)进入页面默认展示的样子
(2)选中要上传的Excel
(3)“点击开始上传”之后

以上就是Vue + iView实现Excel上传的详细内容,更多关于vue iview excel上传的资料请关注我们其它相关文章!

(0)

相关推荐

  • vue iView 上传组件之手动上传功能

    基于 Vue 的 UI 组件库现在已经有很多了,尤其是移动端的.现在又多了一个 iView . iView 主要服务于 PC 界面的中后台业务,是一套高质量的开源 UI 组件库,先上地址: https://github.com/iview/iview 官网是: https://www.iviewui.com/ 特性 使用单文件的 Vue 组件化开发模式 基于 npm + webpack + babel 开发,支持 ES2015 高质量.功能丰富 友好的 API ,自由灵活地使用空间 详细.友好的

  • 使用Vue+Spring Boot实现Excel上传功能

    1.使用Vue-Cli创建前端项目 运用vue-cli工具可以很轻松地构建前端项目,当然,使用WebStorm来构建会更加简洁(如图).本文推荐使用WebStorm,因为在后续开发中,IDE会使我们的开发更加简洁.部分配置如图: 2.Navbar编写 作为一个WebApp,Navbar作为应用的导航栏是必不可少的.在本项目中,笔者引入了bootstrap对Navbar进行了轻松地构建.在vue中我们需要在components文件夹中将我们的组件加进去,对于本工程来说,Navbar是我们要加入的第

  • vue excel上传预览和table内容下载到excel文件中

    excel上传预览 这里会用到 npm i element-ui npm i xlsx 在vue的template中写上,排版和css看个人需求 <div> 选择文件 <input type="file" d="file_input" @change="importf(this)" accept=".csv, application/vnd.openxmlformats-officedocument.spreadshe

  • vue实现Excel文件的上传与下载功能的两种方式

    一.前言项目中使用到比较多的关于Excel的前端上传与下载,整理出来,以便后续使用或分析他人. 1.前端vue:模板下载与导入Excel 导入Excel封装了子组件,点击导入按钮可调用子组件,打开文件上传的对话框,上传成功后返回结果 <el-col style="padding: 10px 0 20px;"> <el-button class="pull-right" icon="el-icon-upload" type=&qu

  • 详解Vue ElementUI手动上传excel文件到服务器

    概述 具体需求场景如下: 选择excel文件后,需要把导入的excel文件手动上传到后台服务器,并将导入成功后的统计结果显示出来.官网也有手动上传的示例,通过 action="url" 传入地址的方式,但在实际项目中请求需要自己配置,下面具体说明实现的方法. 说明: 在上传文件到展示统计结果,我们后端给了两个接口:首先调用文件上传接口,上传成功后,根据后端返回的mark再调用统计结果接口. 属性设置 .vue文件 <el-row> <div class="e

  • Vue + iView实现Excel上传功能的完整代码

    1.HTML部分 <Col span="2">上传文件:</Col> <Col span="22" class="uploadExcelBox"> <Upload ref="uploadExcel" :loading="uploadLoading" :action="uploadFileUrl" accept="xlsx,xls&quo

  • cropper js基于vue的图片裁剪上传功能的实现代码

    前些日子做了一个项目关于vue项目需要头像裁剪上传功能,看了一篇文章,在此基础上做的修改完成了这个功能,与大家分享一下.原文:http://www.jb51.net/article/135719.htm 首先下载引入cropper js, npm install cropper js --save 在需要的页面引入:import Cropper from "cropper js" html的代码如下: <template> <div id="demo&quo

  • Vue实现腾讯云点播视频上传功能的实现代码

    基于Vue+ElementUI+vod-js-sdk-v6,完成腾讯云点播视频上传功能 最近做的一个项目,需要用到腾讯云点播的视频上传!!写一个尽可能详细的博客供各位参考,欢迎指正: ok,下面进入正题. 首先是需要用到的依赖:ElementUI.vod-js-sdk-v6.axios npm i vod-js-sdk-v6 npm i axios import vue from 'vue' import { Upload, Progress } from 'element-ui' vue.us

  • Java中使用fileupload组件实现文件上传功能的实例代码

    使用fileupload组件的原因: Request对象提供了一个getInputStream()方法,通过这个方法可以读取到客户端提交过来的数据,但是由于用户可能会同时上传多个文件,在servlet中编程解析这些上传数据是一件非常麻烦的工作.为方便开发人员处理文件上传数据,Apache开源组织提供了一个用来处理表单文件上传的一个开源组件(Commons-fileupload),该组件性能优异,并且使用及其简单,可以让开发人员轻松实现web文件上传功能. 使用Commons-fileupload

  • Android头像上传功能的实现代码(获取头像加剪切)

    因为项目中需要用到头像上传的功能,所以就下个Ddmo先来实现下. demo我是类似仿微信的,在一个GridView中展示所有的图片,其中第一个item可以去照相:获取到图片后再进行剪切. 图片的剪切是从网上找的感觉不错就用,暂时也没有测试. 获取图片可以用:https://github.com/lovetuzitong/MultiImageSelector来实现 这里的圆形图像是用https://github.com/hdodenhof/CircleImageView来实现的 Demo写的比较粗

  • webuploader 实现图片批量上传功能附实例代码

    1.导入资源 2.JSP代码 <div class="page-container"> <div class="row cl"> <label class="form-label col-xs-4 col-sm-2"><span class="c-red">*</span>项目名称:</label> <div class="formCont

  • springboot+thymeleaf 文件上传功能的实现代码

    pom.xml <dependency> <groupId>org.springframework.boot</groupId> <artifactId>spring-boot-starter-thymeleaf</artifactId> </dependency> <dependency> <groupId>org.springframework.boot</groupId> <artifa

  • asp.net core集成CKEditor实现图片上传功能的示例代码

    背景 本文为大家分享了asp.net core 如何集成CKEditor ,并实现图片上传功能的具体方法,供大家参考,具体内容如下. 准备工作 1.visual studio 2019 开发环境 2.net core 2.0 及以上版本 实现方法 1.新建asp.net core web项目 2.下载CKEditor 这里我们新建了一个系统自带的样本项目,去 CKEditor官网下载一个版本,解压后拷贝大wwwroot中 3.增加图片上传控制器 @using CompanyName.Projec

  • Java SpringBoot实现文件上传功能的示例代码

    测试代码 pom.xml: <?xml version="1.0" encoding="UTF-8"?> <project xmlns="http://maven.apache.org/POM/4.0.0" xmlns:xsi="http://www.w3.org/2001/XMLSchema-instance" xsi:schemaLocation="http://maven.apache.org

  • Golang实现图片上传功能的示例代码

    目录 1.前端代码 2.JS代码 3.后端代码 该代码为使用beego实现前后端图片上传.话不多说,直接上代码. 1.前端代码 html代码: <div class="col-5 f-l text text-r">背景图(必须):</div> <div class="img-box"> <label> <span class="copy-btn Hui-iconfont"></s

随机推荐