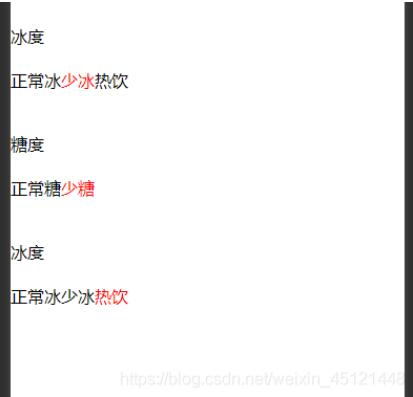
小程序实现商品属性选择或规格选择
本文实例为大家分享了小程序实现商品属性选择或规格选择的具体代码,供大家参考,具体内容如下
实现效果

1.wxml
<view wx:for="{{list}}" wx:key="index" wx:key="index" wx:for-index="childIndex" style="margin: 40px 0">
  <view>{{item.name}}</view>

  <view class="s" wx:for="{{item.option_value}}" wx:key="index" >
   <text class="{{indexArr[childIndex] == index ? 'active':''}}" bindtap="choice" data-fid="{{childIndex}}" data-id="{{index}}">
    {{item.name}}
   </text>
  </view>
</view>
2.js
data: {
 //数据
  list: [
   {
    "goods_option_id": 1737,
    "option_id": 1737,
    "name": "冰度",
    "option_value": [
     {
      "goods_option_value_id": 3606,
      "option_value_id": 3606,
      "name": "正常冰",
      "image": "xxxxxx.png"
     },
     {
      "goods_option_value_id": 3605,
      "option_value_id": 3605,
      "name": "少冰",
      "image": "xxxxxx.png"
     },
     {
      "goods_option_value_id": 3604,
      "option_value_id": 3604,
      "name": "热饮",
      "image": "xxxxxx.png"
     }
    ]
   },
   {
    "goods_option_id": 1738,
    "option_id": 1738,
    "name": "糖度",
    "option_value": [
     {
      "goods_option_value_id": 3608,
      "option_value_id": 3608,
      "name": "正常糖",
      "image": "xxxxxx.png"
     },
     {
      "goods_option_value_id": 3607,
      "option_value_id": 3607,
      "name": "少糖",
      "image": "xxxxxx.png"
     }
    ]
   },
   {
    "goods_option_id": 1737,
    "option_id": 1737,
    "name": "冰度",
    "option_value": [
     {
      "goods_option_value_id": 3606,
      "option_value_id": 3606,
      "name": "正常冰",
      "image": "xxxxxx.png"
     },
     {
      "goods_option_value_id": 3605,
      "option_value_id": 3605,
      "name": "少冰",
      "image": "xxxxxx.png"
     },
     {
      "goods_option_value_id": 3604,
      "option_value_id": 3604,
      "name": "热饮",
      "image": "xxxxxx.png"
     }
    ]
   }
  ],
  arr: [],
  indexArr: []
 },

choice(e) {
  const fid = e.currentTarget.dataset.fid;
   const id = e.currentTarget.dataset.id;
  const arr = this.data.arr,
     arr2 = this.data.indexArr;

   arr[fid] = this.data.list[fid].option_value[id].name;
  arr2[fid] = id;

  this.setData({
   arr: arr,
   indexArr: arr2
  })
 },

 onLoad: function (options) {
  const res = this.data.indexArr;
  this.data.list.forEach((e,i) => {
   res[i] = 0;
   this.setData({
    indexArr: res
   })
  });
 }
以上就是本文的全部内容,希望对大家的学习有所帮助,也希望大家多多支持我们。
赞 (0)

