python中elasticsearch_dsl模块的使用方法
目录
- 前言
- 连接elasticsearch
- elasticsearch_dsl.Search
- query方法
- filter方法
- index方法
- elasticsearch_dsl.query
- elasticsearch_dsl.Q
- 嵌套类型
- 查询
- 排序
- 分页
- 聚合
- 高亮显示
- source限制返回字段
- 删除
- 案例分析
前言
elasticsearch-dsl是基于elasticsearch-py封装实现的,提供了更简便的操作elasticsearch的方法。
安装:
install elasticsearch_dsl

连接elasticsearch
from elasticsearch_dsl import connections, Search

es = connections.create_connection(hosts=["127.0.0.1:9200"], timeout=20)
print(es)
还可以通过alias给连接设置别名,后续可以通过别名来引用该连接,默认别名为default。
from elasticsearch_dsl import connections, Search

# 方式一:连接es
es = connections.create_connection(hosts=["127.0.0.1:9200"], timeout=20)
print(es)

# 方式二:连接es
connections.create_connection(alias="my_new_connection", hosts=["127.0.0.1:9200"], timeout=20)
elasticsearch_dsl.Search
search对象代表整个搜索请求,包括:queries、filters、aggregations、sort、pagination、additional parameters、associated client。
API被设置为可链接的即和用.连续操作。search对象是不可变的,除了聚合,对对象的所有更改都将导致创建包含该更改的浅表副本。
当初始化Search对象时,传递elasticsearch客户端作为using的参数
示例代码1:
from elasticsearch_dsl import connections, Search

# 方式一:连接es
es = connections.create_connection(hosts=["127.0.0.1:9200"], timeout=20)
# print(es)

# 方式二:连接es
connections.create_connection(alias="my_new_connection", hosts=["127.0.0.1:9200"], timeout=20)

# 不使用别名使用
res = Search(using=es).index("test_index").query()
# print(res)
for data in res:
    print(data.to_dict())

print("*" * 100)

# 使用别名后这样使用
res2 = Search(using="my_new_connection").index('test_index').query()
# print(e)
for data in res2:
    print(data.to_dict())
运行结果:

示例代码2:
from elasticsearch_dsl import connections, Search

# 方式一:连接es
es = connections.create_connection(hosts=["127.0.0.1:9200"], timeout=20)
# print(es)

# 不使用别名使用
res = Search(using=es).index("test_index").query()
# print(res)
for data in res:
    print(data.to_dict())

print("*" * 100)

# 书写方式一:按条件查询数据
res2 = Search(using=es).index("test_index").query("match", name="张三")  # 查询时注意分词器的使用
for data in res2:
    print(data.to_dict())

print("*" * 100)

# 书写方式二:按条件查询数据
res3 = Search(using=es).index("test_index").query({"match": {"name": "张三"}})
for data in res3:
    print(data.to_dict())
运行结果:

在上述执行execute方法将请求发送给elasticsearch:
response = res.execute()不需要执行execute()方法,迭代后可以通过to_dict()方法将Search对象序列化为一个dict对象,这样可以方便调试。
query方法
查询,参数可以是Q对象,也可以是query模块中的一些类,还可以是自已写上如何查询。
示例代码1:
from elasticsearch_dsl import connections, Search, Q
import time

# 方式一:连接es
es = connections.create_connection(hosts=["127.0.0.1:9200"], timeout=20)
# print(es)

res = Search(using=es, index="test_index").query().query()  # 当调用.query()方法多次时,内部会使用&操作符
print(res.to_dict())
运行结果:

filter方法
在过滤上下文中添加查询,可以使用filter()函数来使之变的简单。
示例代码1:
from elasticsearch_dsl import connections, Search, Q

# 方式一:连接es
es = connections.create_connection(hosts=["127.0.0.1:9200"], timeout=20)
# print(es)

# res = Search(using=es).index("test_index").filter({"match": {"name": "北"}})
# res = Search(using=es).index("test_index").filter("terms", tags=["name", "id"])
res = Search(using=es).index("test_index").query("bool", filter=[
    Q("terms", tags=["name", "id"])])  # 上面代码在背后会产生一个bool查询,并将指定的条件查询放入到filter分支
print(res)
for data in res:
    print(data.to_dict())
示例代码2:
from elasticsearch_dsl import connections, Search, Q
import time

# 方式一:连接es
es = connections.create_connection(hosts=["127.0.0.1:9200"], timeout=20)
# print(es)

# 范围查询
# res = Search(using=es, index="test_index").filter("range", timestamp={"gte": 0, "lt": time.time()}).query({"match": {"name": "北"}})
res = Search(using=es, index="test_index").filter("range", id={"gte": 1, "lte": 4}).query({"match": {"name": "北"}})
print(res)
for data in res:
    print(data.to_dict())

# 普通过滤
res2 = Search(using=es, index="test_index").filter("terms", id=["2", "4"]).execute()
print(res2)
for data in res2:
    print(data.to_dict())
运行结果:

示例代码3:
from elasticsearch_dsl import connections, Search, Q

# 方式一:连接es
es = connections.create_connection(hosts=["127.0.0.1:9200"], timeout=20)
# print(es)

# 方式一
q = Q('range', age={"gte": 25, "lte": 27})
res = Search(using=es, index="account_info").query(q)
print(res.to_dict())
for data in res:
    print(data.to_dict())

print("*" * 100)

# 方式二
q2 = Q('range', **{"age": {"gte": 25, "lte": 27}})
res2 = Search(using=es, index="account_info").query(q2)
print(res2.to_dict())
for data in res2:
    print(data.to_dict())
运行结果:

index方法
指定索引
usring方法
指定哪个elasticsearch
elasticsearch_dsl.query
该库为所有的Elasticsearch查询类型都提供了类。以关键字参数传递所有的参数,最终会把参数序列化后传递给Elasticsearch,这意味着在原始查询和它对应的dsl之间有这一个清理的一对一的映射。
示例代码:
from elasticsearch_dsl import connections, Search, Q
from elasticsearch_dsl.query import MultiMatch, Match

# 方式一:连接es
es = connections.create_connection(hosts=["127.0.0.1:9200"], timeout=20)
# print(es)

# 相对与{"multi_match": {"query": "ha", "fields": ["firstname", "lastname"]}}
m1 = MultiMatch(query="Ha", fields=["firstname", "lastname"])
res = Search(using=es, index="test_index").query(m1)
print(res)
for data in res:
    print(data.to_dict())

# 相当于{"match": {"firstname": {"query": "Hughes"}}}
m2 = Match(firstname={"query": "Hughes"})
res = Search(using=es, index="test_index").query(m2)
print(res)
for data in res:
    print(data.to_dict())
elasticsearch_dsl.Q
使用快捷方式Q通过命名参数或者原始dict类型数据来构建一个查询实例。Q的格式一般是Q("查询类型", 字段="xxx")或Q("查询类型", query="xxx", fields=["字段1", "字段2"])
示例代码1:
from elasticsearch_dsl import connections, Search, Q
from elasticsearch_dsl.query import MultiMatch, Match

# 方式一:连接es
es = connections.create_connection(hosts=["127.0.0.1:9200"], timeout=20)
# print(es)

# q = Q("match", city="Summerfield")
q = Q("multi_match", query="Summerfield", fields=["city", "firstname"])
res = Search(using=es, index="test_index").query(q)
print(res)
for data in res:
    print(data.to_dict())
查询对象可以通过逻辑运算符组合起来:
Q("match", title="python") | Q("match", title="django")
# {"bool": {"should": [...]}}

Q("match", title="python") & Q("match", title="django")
# {"bool": {"must": [...]}}

~Q("match", title="python")
# {"bool": {"must_not": [...]}}
示例代码2:
from elasticsearch_dsl import connections, Search, Q

# 方式一:连接es
es = connections.create_connection(hosts=["127.0.0.1:9200"], timeout=20)
# print(es)

# q = Q("multi_match", query="123.244.101.255", fields=["clientip", "timestamp"])
q = Q('match', name='张') | Q("match", name="北")
res = Search(using=es, index="test_index").query(q)
# print(res)
for data in res:
    print(data.to_dict(), data.name)

print("*" * 100)

q = Q('match', name='张') & Q("match", name="北")
res = Search(using=es, index="test_index").query(q)
# print(res)
for data in res:
    print(data.to_dict(), data.name)

print("*" * 100)

q = ~Q('match', name='张')
res = Search(using=es, index="test_index").query(q)
# print(res)
for data in res:
    print(data.to_dict(), data.name)
运行结果:

示例代码3:
from elasticsearch_dsl import connections, Search, Q

# 连接es
es = connections.create_connection(hosts=["127.0.0.1:9200"], timeout=20)
# print(es)

s = Search(using=es, index="account_info")

# constant_score内置属性
q = Q({"constant_score": {"filter": {"term": {"age": 25}}}})

res = s.query(q).execute()
for hit in res:
    print(hit.to_dict())

print("*" * 100)

q2 = Q("bool", must=[Q("match", address="山")], should=[Q("match", gender="男"), Q("match", emplyer="AAA")], minimum_should_match=1)
res2 = s.query(q2).execute()

for hit in res2:
    print(hit.to_dict())
运行结果:

嵌套类型
有时候需要引用一个在其他字段中的字段,例如多字段(title.keyword)或者在一个json文档中的address.city。为了方便,Q允许你使用双下划线‘__’代替关键词参数中的‘.’
示例代码:
from elasticsearch_dsl import connections, Search, Q

# 方式一:连接es
es = connections.create_connection(hosts=["127.0.0.1:9200"], timeout=20)
# print(es)

# res = Search(using=es, index="test_index").query("match", address__city="北京")
res = Search(using=es, index="test_index").filter("term", address__city="北京")
# print(res)
for data in res:
    print(data.to_dict(), data.name)
查询
示例代码:
from elasticsearch_dsl import Search
from elasticsearch import Elasticsearch

# 连接es
es = Elasticsearch(hosts=["127.0.0.1:9200"], sniffer_timeout=60, timeout=30)

# 获取es中所有的索引
# 返回类型为字典,只返回索引名
index_name = es.cat.indices(format="json", h="index")
print(index_name)

# 查询多个索引
es_multi_index = Search(using=es, index=["personal_info_5000000", "grade", "test_index"])
print(es_multi_index.execute())

# 查询一个索引
es_one_index = Search(using=es, index="test_index")
print(es_one_index.execute())

print("*" * 100)

# 条件查询1
es_search1 = es_one_index.filter("range", id={"gte": 1, "lt": 5})
print(es_search1.execute())

# 条件查询2
es_search2 = es_one_index.filter("term", name="张")
print(es_search2.execute())

print("*" * 100)

# 结果转换为字典
es_search3 = es_search2.to_dict()
print(es_search3)
es_search4 = es_search2.execute().to_dict()
print(es_search4)
运行结果:

排序
示例代码:
from elasticsearch_dsl import connections, Search, A

# 连接es
es = connections.create_connection(hosts=["127.0.0.1:9200"], timeout=20)
# print(es)

s = Search(using=es, index="account_info")
res = s.query().sort('-age').execute()
# print(res)
for data in res:
    print(data.to_dict())
运行结果:

分页
要指定from、size
示例代码:
from elasticsearch_dsl import connections, Search, A

# 连接es
es = connections.create_connection(hosts=["127.0.0.1:9200"], timeout=20)
# print(es)

s = Search(using=es, index="account_info")
res = s.query()[2: 5].execute()  # {"from": 2, "size": 5}
# print(res)
for data in res:
    print(data.to_dict())
运行结果:

要访问匹配的所有文档,可以使用scan()函数,scan()函数使用scan、scroll elasticsearch API,需要注意的是这种情况下结果是不会被排序的。
示例代码:
from elasticsearch_dsl import connections, Search

# 连接es
es = connections.create_connection(hosts=["127.0.0.1:9200"], timeout=20)
# print(es)

s = Search(using=es, index="account_info")
res = s.query()
# print(res)
for hit in res.scan():
    print(hit.age, hit.address)
运行结果:

聚合
使用A快捷方式来定义一个聚合。为了实现聚合嵌套,你可以使用.bucket()、.metirc()以及.pipeline()方法。
bucket 即为分组,其中第一个参数是分组的名字,自己指定即可,第二个参数是方法,第三个是指定的field。
metric 也是同样,metric的方法有sum、avg、max、min等等,但是需要指出的是有两个方法可以一次性返回这些值,stats和extended_stats,后者还可以返回方差等值。
示例代码1:
from elasticsearch_dsl import connections, Search, A

# 连接es
es = connections.create_connection(hosts=["127.0.0.1:9200"], timeout=20)
# print(es)

s = Search(using=es, index="account_info")
a = A("terms", field="gender")
s.aggs.bucket("gender_terms", a)
res = s.execute()
# print(res)
for hit in res.aggregations.gender_terms:
    print(hit.to_dict())
运行结果:

示例代码2:
from elasticsearch_dsl import connections, Search, A

# 连接es
es = connections.create_connection(hosts=["127.0.0.1:9200"], timeout=20)
# print(es)

s = Search(using=es, index="account_info")
s.aggs.bucket("per_gender", "terms", field="gender")
s.aggs["per_gender"].metric("sum_age", "sum", field="age")
s.aggs["per_gender"].bucket("terms_balance", "terms", field="balance")

res = s.execute()
# print(res)
for hit in res.aggregations.per_gender:
    print(hit.to_dict())
运行结果:

示例代码3:
from elasticsearch_dsl import connections, Search, Q

# 连接es
es = connections.create_connection(hosts=["127.0.0.1:9200"], timeout=20)
# print(es)

s = Search(using=es, index="account_info")

res = s.aggs.bucket("aaa", "terms", field="gender").metric("avg_age", "avg", field="age")

print(res.to_dict())
运行结果:

示例代码4: 【聚合,内置排序】
from elasticsearch_dsl import connections, Search, Q

# 连接es
es = connections.create_connection(hosts=["127.0.0.1:9200"], timeout=20)
# print(es)

"""
{
	'terms': {
		'field': 'age',
		'order': {
			'_count': 'desc'
		}
	}
}
"""
s = Search(using=es, index="account_info")
res = s.aggs.bucket("agg_age", "terms", field="age", order={"_count": "desc"})
print(res.to_dict())
response = s.execute()
for hit in response.aggregations.agg_age:
    print(hit.to_dict())

"""
{
	'terms': {
		'field': 'age',
		'order': {
			'_count': 'asc'
		}
	},
	'aggs': {
		'avg_age': {
			'avg': {
				'field': 'age'
			}
		}
	}
}
"""
s2 = Search(using=es, index="account_info")
res2 = s2.aggs.bucket("agg_age", "terms", field="age", order={"_count": "asc"}).metric("avg_age", "avg", field="age")
print(res2.to_dict())
response = s2.execute()
for hit in response.aggregations.agg_age:
    print(hit.to_dict())
运行结果:

示例代码5:
from elasticsearch_dsl import connections, Search, Q

# 连接es
es = connections.create_connection(hosts=["127.0.0.1:9200"], timeout=20)
# print(es)

"""
{
	'aggs': {
		'avg_age': {
			'avg': {
				'field': 'age'
			}
		}
	}
}
"""
s = Search(using=es, index="account_info").query("range", age={"gte": 28})
res = s.aggs.metric("avg_age", "avg", field="age")
print(res.to_dict())
response = s.execute()
print(response)
for hit in response:
    print(hit.to_dict())
运行结果:

高亮显示
示例代码:【目前似乎没有效果,待验证】
from elasticsearch_dsl import connections, Search, Q

# 连接es
es = connections.create_connection(hosts=["127.0.0.1:9200"], timeout=20)
# print(es)

s = Search(using=es, index="test_index")
res = s.highlight("id").execute().to_dict()
print(res)
运行结果:

source限制返回字段
示例代码:
from elasticsearch_dsl import connections, Search, Q

# 连接es
es = connections.create_connection(hosts=["127.0.0.1:9200"], timeout=20)
# print(es)

s = Search(using=es, index="account_info")
res = s.query().execute()
for hit in res:
    print(hit.to_dict())

# 限制返回字段
s2 = Search(using=es, index="account_info")
res2 = s2.query().source(['account_number', 'address']).execute()
for hit in res2:
    print(hit.to_dict())
运行结果:

删除
调用Search对象上的delete方法而不是execute来实现删除匹配查询的文档
示例代码:
from elasticsearch_dsl import connections, Search, Q

# 连接es
es = connections.create_connection(hosts=["127.0.0.1:9200"], timeout=20)
# print(es)

s = Search(using=es, index="test_index")
res = s.query("match", name="张").delete()
print(res)
运行结果:

案例分析
创建索引:
from elasticsearch_dsl import Search
from elasticsearch import Elasticsearch

# 连接es
es = Elasticsearch(hosts=["127.0.0.1:9200"], sniffer_timeout=60, timeout=30)

body = {
    "mappings": {
        "properties": {
            "account_number": {
                "type": "integer"
            },
            "balance": {
                "type": "integer"
            },
            "firstname": {
                "type": "text"
            },
            "lastname": {
                "type": "text"
            },
            "age": {
                "type": "integer"
            },
            "gender": {
                "type": "keyword"
            },
            "address": {
                "type": "text"
            },
            "employer": {
                "type": "text"
            },
            "email": {
                "type": "text"
            },
            "province": {
                "type": "text"
            },
            "state": {
                "type": "text"
            }
        }
    }
}

# 创建 index
es.indices.create(index="account_info", body=body)
查看索引:

使用kibana批量生成数据:
POST account_info/_bulk
{"index": {"_index":"account_info"}}
{"account_number":1,"balance":20,"firstname":"三","lastname":"张","age":25,"gender":"男","address":"北京朝阳","employer":"AAA","email":"123@qq.com","province":"北京","state":"正常"}
{"index": {"_index":"account_info"}}
{"account_number":2,"balance":70,"firstname":"二","lastname":"张","age":26,"gender":"男","address":"北京海淀","employer":"AAA","email":"123@qq.com","province":"北京","state":"正常"}
{"index": {"_index":"account_info"}}
{"account_number":3,"balance":80,"firstname":"四","lastname":"张","age":27,"gender":"女","address":"辽宁朝阳","employer":"BBB","email":"123@qq.com","province":"辽宁","state":"正常"}
{"index": {"_index":"account_info"}}
{"account_number":4,"balance":60,"firstname":"五","lastname":"张","age":28,"gender":"男","address":"山东青岛","employer":"AAA","email":"123@qq.com","province":"山东","state":"正常"}
{"index": {"_index":"account_info"}}
{"account_number":5,"balance":40,"firstname":"六","lastname":"张","age":29,"gender":"女","address":"山东济南","employer":"AAA","email":"123@qq.com","province":"山东","state":"正常"}
{"index": {"_index":"account_info"}}
{"account_number":6,"balance":50,"firstname":"七","lastname":"张","age":30,"gender":"男","address":"河北唐山","employer":"BBB","email":"123@qq.com","province":"河北","state":"正常"}
{"index": {"_index":"account_info"}}
{"account_number":7,"balance":30,"firstname":"一","lastname":"张","age":31,"gender":"女","address":"河北石家庄","employer":"AAA","email":"123@qq.com","province":"河北","state":"正常"}
查看生成的数据:


根据条件查询:
1.查询balance在40~70的信息
from elasticsearch_dsl import connections, Search, Q

# 连接es
es = connections.create_connection(hosts=["127.0.0.1:9200"], timeout=20)
# print(es)

s = Search(using=es, index="account_info")

# 查询balance在40~70的信息
q = Q("range", balance={"gte": 40, "lte": 70})

res = s.query(q)
for data in res:
    print(data.to_dict())

print("共查到%d条数据" % res.count())

2.查询balance在40~70的男性信息
from elasticsearch_dsl import connections, Search, Q

# 连接es
es = connections.create_connection(hosts=["127.0.0.1:9200"], timeout=20)
# print(es)

s = Search(using=es, index="account_info")

# 查询balance在40~70的信息
q1 = Q("range", balance={"gte": 40, "lte": 70})
# 男性
q2 = Q("term", gender="男")

# and
q = q1 & q2

res = s.query(q)
for data in res:
    print(data.to_dict())

print("共查到%d条数据" % res.count())

3.省份为北京、25或30岁的男性信息
from elasticsearch_dsl import connections, Search, Q

# 连接es
es = connections.create_connection(hosts=["127.0.0.1:9200"], timeout=20)
# print(es)

s = Search(using=es, index="account_info")

# 方式一:
# 省份为北京
q1 = Q("match", province="北京")
# 25或30岁的男性信息
q2 = Q("bool", must=[Q("terms", age=[25, 30]), Q("term", gender="男")])

# and
q = q1 & q2

res = s.query(q)
for data in res:
    print(data.to_dict())

print("共查到%d条数据" % res.count())

print("*" * 100)

# 方式二
# 省份为北京
q1 = Q("match", province="北京")
# 25或30岁的信息
# q2 = Q("bool", must=[Q("terms", age=[25, 30]), Q("term", gender="男")])
q2 = Q("term", age=25) | Q("term", age=30)
# 男性
q3 = Q("term", gender="男")

res = s.query(q1).query(q2).query(q3)  # 多次query就是& ==> and 操作
for data in res:
    print(data.to_dict())

print("共查到%d条数据" % res.count())

4.地址中有“山”字,年龄不在25~28岁的女性信息
from elasticsearch_dsl import connections, Search, Q

# 连接es
es = connections.create_connection(hosts=["127.0.0.1:9200"], timeout=20)
# print(es)

s = Search(using=es, index="account_info")

# 地址中有“山”字且为女性
q1 = Q("match", address="山") & Q("match", gender="女")
# 年龄在25~28岁
q2 = ~Q("range", age={"gte": 25, "lte": 28})

# 使用filter过滤
# query和filter的前后关系都行
res = s.filter(q2).query(q1)
for data in res:
    print(data.to_dict())

print("共查到%d条数据" % res.count())

5.根据年龄进行聚合,然后计算每个年龄的评价balance数值
示例代码:
from elasticsearch_dsl import connections, Search, A

# 连接es
es = connections.create_connection(hosts=["127.0.0.1:9200"], timeout=20)
# print(es)

s = Search(using=es, index="account_info")

# 先用年龄聚合,然后拿到返平均数
# size指定最大返回多少条数据,默认10条
# 实质上account的数据中,age分组没有100个这么多
q = A("terms", field="age", size=100).metric("age_per_balance", "avg", field="balance")

s.aggs.bucket("res", q)

# 执行并拿到返回值
response = s.execute()
# res是bucket指定的名字
# response.aggregations.to_dict是一个{'key': 25, 'doc_count': 1, 'age_per_balance': {'value': 20.0}}的数据,和用restful查询的一样

for data in response.aggregations.res:
    print(data.to_dict())
运行结果:

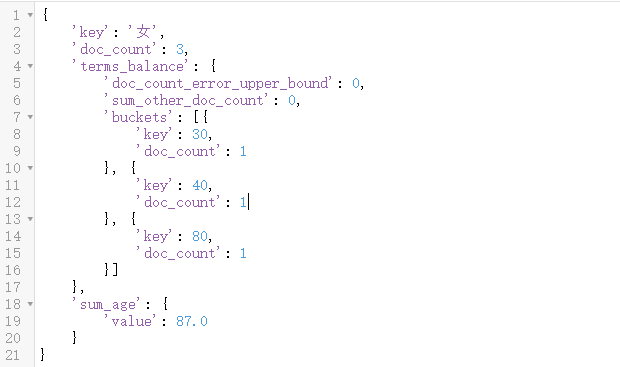
6.根据年龄聚合,求25~28岁不同性别的balance值。
示例代码:
from elasticsearch_dsl import connections, Search, A

# 连接es
es = connections.create_connection(hosts=["127.0.0.1:9200"], timeout=20)
# print(es)

s = Search(using=es, index="account_info")

# 这次就用这种方法
# range 要注意指定ranges参数和from to
a1 = A("range", field="age", ranges={"from": 25, "to": 28})
a2 = A("terms", field="gender")
a3 = A("avg", field="balance")

s.aggs.bucket("res", a1).bucket("gender_group", a2).metric("balance_avg", a3)

# 执行并拿到返回值
response = s.execute()
# res是bucket指定的名字

for data in response.aggregations.res:
    print(data.to_dict())
运行结果: 【注意:不包含年龄28的值】

总结:
假如是数组,如:bool的must、terms,那么就要字段=[ ]假如是字典,如:range,那么就要字段={xxx: yyy, .... }假如是单值,如:term、match,那么就要字段=值假如查的是多个字段,如:multi_mathc,那么就要加上query="要查的值", fields=["字段1", "字段2", ...]然后各个条件的逻辑关系,可以通过多次query和filter或直接用Q("bool", must=[Q...], should=[Q...])再加上& | ~表示
到此这篇关于python中elasticsearch_dsl模块的使用方法的文章就介绍到这了,更多相关python elasticsearch_dsl模块内容请搜索我们以前的文章或继续浏览下面的相关文章希望大家以后多多支持我们!
相关推荐
-
python中的Elasticsearch操作汇总
这篇文章主要介绍了python中的Elasticsearch操作汇总,文中通过示例代码介绍的非常详细,对大家的学习或者工作具有一定的参考学习价值,需要的朋友可以参考下 导入包 from elasticsearch import Elasticsearch 本地连接 es = Elasticsearch(['127.0.0.1:9200']) 创建索引 es.indices.create(index="python_es01",ignore=400) ingore=400 ingore是
-
python elasticsearch环境搭建详解
windows下载zip linux下载tar 下载地址:https://www.elastic.co/downloads/elasticsearch 解压后运行:bin/elasticsearch (or bin\elasticsearch.bat on Windows) 检查是否成功:访问 http://localhost:9200 linux下不能以root用户运行, 普通用户运行报错: java.nio.file.AccessDeniedException 原因:当前用户没有执行权限 解
-
Python操作Elasticsearch处理timeout超时
Elasticsearch 是一个分布式的开源搜索和分析引擎,适用于所有类型的数据,包括文本.数字.地理空间.结构化和非结构化数据.Elasticsearch 在 Apache Lucene 的基础上开发而成,由 Elasticsearch N.V.(即现在的 Elastic)于 2010 年首次发布 Elasticsearch 以其简单的 REST 风格 API.分布式特性.速度和可扩展性而闻名,是 Elastic Stack 的核心组件:Elastic Stack 是适用于数据采集.充实.存
-
Python 操作 ElasticSearch的完整代码
官方文档:https://elasticsearch-py.readthedocs.io/en/master/ 1.介绍 python提供了操作ElasticSearch 接口,因此要用python来操作ElasticSearch,首先要安装python的ElasticSearch包,用命令pip install elasticsearch安装或下载安装:https://pypi.python.org/pypi/elasticsearch/5.4.0 2.创建索引 假如创建索引名称为ott,类型
-
python3实现elasticsearch批量更新数据
废话不多说,直接上代码! updateBody = { "query":{ "range":{ "write_date": { "gte": "2019-01-15 12:30:17", "lte": "now" } } }, "script": { "inline": "ctx._source.index = par
-
python 使用elasticsearch 实现翻页的三种方式
使用ES做搜索引擎拉取数据的时候,如果数据量太大,通过传统的from + size的方式并不能获取所有的数据(默认最大记录数10000),因为随着页数的增加,会消耗大量的内存,导致ES集群不稳定.因此延伸出了scroll,search_after等翻页方式. 一.from + size 浅分页 "浅"分页可以理解为简单意义上的分页.它的原理很简单,就是查询前20条数据,然后截断前10条,只返回10-20的数据.这样其实白白浪费了前10条的查询. GET test/_search { &
-
Python插入Elasticsearch操作方法解析
这篇文章主要介绍了Python插入Elasticsearch操作方法解析,文中通过示例代码介绍的非常详细,对大家的学习或者工作具有一定的参考学习价值,需要的朋友可以参考下 在用scrapy做爬虫的时候,需要将数据存入的es中.网上找了两种方法,照葫芦画瓢也能出来,暂记下来: 首先安装了es,版本是5.6.1的较早版本 用pip安装与es版本相对的es相关包 pip install elasticsearch-dsl==5.1.0 方法一: 以下是pipelines.py模块的完整代码 # -*-
-

python中elasticsearch_dsl模块的使用方法
目录 前言 连接elasticsearch elasticsearch_dsl.Search query方法 filter方法 index方法 elasticsearch_dsl.query elasticsearch_dsl.Q 嵌套类型 查询 排序 分页 聚合 高亮显示 source限制返回字段 删除 案例分析 前言 elasticsearch-dsl是基于elasticsearch-py封装实现的,提供了更简便的操作elasticsearch的方法. 安装: install elastic
-
Python中optionParser模块的使用方法实例教程
本文以实例形式较为详尽的讲述了Python中optionParser模块的使用方法,对于深入学习Python有很好的借鉴价值.分享给大家供大家参考之用.具体分析如下: 一般来说,Python中有两个内建的模块用于处理命令行参数: 一个是 getopt,<Deep in python>一书中也有提到,只能简单处理 命令行参数: 另一个是 optparse,它功能强大,而且易于使用,可以方便地生成标准的.符合Unix/Posix 规范的命令行说明. 示例如下: from optparse impo
-
python中requests模块的使用方法
本文实例讲述了python中requests模块的使用方法.分享给大家供大家参考.具体分析如下: 在HTTP相关处理中使用python是不必要的麻烦,这包括urllib2模块以巨大的复杂性代价获取综合性的功能.相比于urllib2,Kenneth Reitz的Requests模块更能简约的支持完整的简单用例. 简单的例子: 想象下我们试图使用get方法从http://example.test/获取资源并且查看返回代码,content-type头信息,还有response的主体内容.这件事无论使用
-
Python中pandas模块DataFrame创建方法示例
本文实例讲述了Python中pandas模块DataFrame创建方法.分享给大家供大家参考,具体如下: DataFrame创建 1. 通过列表创建DataFrame 2. 通过字典创建DataFrame 3. 通过Numpy数组创建DataFrame DataFrame这种列表式的数据结构和Excel工作表非常类似,其设计初衷是讲Series的使用场景由一维扩展到多维. DataFrame由按一定顺序的多列数据组成,各列的数据类型可以有所不同(数值.字符串.布尔值). Series对象的Ind
-
详解Python中Addict模块的使用方法
目录 介绍 1.安装 2.用法 3.要牢记的事情 4.属性,如键.item等 5.默认值 6.转化为普通字典 7.计数 8.更新 9.Addict 是怎么来的 介绍 Addit 是一个Python模块,除了提供标准的字典语法外,Addit 生成的字典的值既可以使用属性来获取,也可以使用属性进行设置. 这意味着你不用再写这样的字典了: body = { 'query': { 'filtered': { 'query': {
-
linux环境下python中MySQLdb模块的安装方法
前言 最近开始学习python数据库编程后,在了解了基本概念,打算上手试验一下时,卡在了MYSQLdb包的安装上,折腾了半天才解决.记录一下我在linux中安装此包遇到的问题. 系统是ubuntn15.04. 1.下载 第一个问题是pycharm软件的模块安装功能Project Interpreter无法自动下载安装MYSQLdb包,显示 Error occurred when installling package 那没办法了,只好手动下载了.MYSQLdb包linux系统的下载的地址是:ht
-
python中struct模块之字节型数据的处理方法
简介 这个模块处理python中常见类型数据和Python bytes之间转换.这可用于处理存储在文件或网络连接中的bytes数据以及其他来源.在python中没有专门处理字节的数据类型,建立字节型数据也比较麻烦,我们知道的bytes()函数也只能对无符号整型做处理,并且数据如下(没错,数字为多少就有多少个\x00,我们要是用这种方式来存储大量数据,结果可想而知): va = bytes(1) # va: '\x00' vb = bytes(2) # vb: '\x00\x00' vc = by
-
python中wx模块的具体使用方法
wx包中的方法都是以大写字母开头的,而这和Python的习惯是相反的. 本节介绍如何创建python程序的图形用户界面(GUI),也就是那些带有按钮和文本框的窗口.这里介绍wxPython : 下载地址:http://www.wxpython.org/download.php 根据自己的操作系统下载相应版本. 安装: 安装过程非常简单,以win7系统为例,点击下载的exe 文件,保持安装目录与本机的python目录一致就OK了. 创建并显示一个框架 import wx # 需要导入wx模块 ap
-
python中添加模块导入路径的方法
python中自定义模块导入路径的方式主要有以下3种: (1)使用sys.path.append()随着程序执行,会动态地添加模块导入的路径,但是程序执行结束后就会立即失效(临时性的) import sys sys.path.append('自定义路径') (2)加入到环境变量PYTHONPATH用于当前用户 在用户主目录下有一个 .bashrc 隐藏文件,打开文件 sudo vim ~/.bashrc 添加单个路径的方法 export PYTHONPATH=<自定义路径>:$PYTHONPA
-
Python中schedule模块定时任务的使用方法(2)
目录 1 设置时间间隔随机数 2 设置定时任务执行到指定时间 3 计算当前到下一次执行的时间差单位为秒 上一篇文章Python中schedule模块关于定时任务使用方法 1 设置时间间隔随机数 在有一些场景下,为了模拟比较自然的情景,需要采用随机的时间间隔,这就派上用场了 如下代码,设置随机间隔从2秒到10秒之间取随机数 import schedule import time def do_func(name,age): print(time.strftime('%Y-%m-%d %H:%M:%