flutter Container容器实现圆角边框
本文实例为大家分享了flutter Container容器实现圆角边框的具体代码,供大家参考,具体内容如下
在这里使用 Container 容器来实现圆角矩形边框效果
1 圆角矩形边框
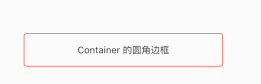
Container(
margin: EdgeInsets.only(left: 40, top: 40),
//设置 child 居中
alignment: Alignment(0, 0),
 height: 50,
width: 300,
//边框设置
decoration: new BoxDecoration(
//背景
 color: Colors.white,
 //设置四周圆角 角度
 borderRadius: BorderRadius.all(Radius.circular(4.0)),
 //设置四周边框
border: new Border.all(width: 1, color: Colors.red),
),
child: Text("Container 的圆角边框"),
 ),
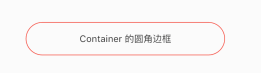
2 圆角矩形边框
Container(
margin: EdgeInsets.only(left: 40, top: 40),
//设置 child 居中
alignment: Alignment(0, 0),
height: 50,
width: 300,
//边框设置
decoration: new BoxDecoration(
//背景
color: Colors.white,
 //设置四周圆角 角度 这里的角度应该为 父Container height 的一半
 borderRadius: BorderRadius.all(Radius.circular(25.0)),
 //设置四周边框
border: new Border.all(width: 1, color: Colors.red),
 ),
 child: Text("Container 的圆角边框"),
 ),
3 可点击的圆角矩形边框
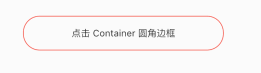
使用 InkWell 来实现 ,更多关于 InkWell 可查看 flutter InkWell 设置水波纹点击效果详述
Container(
 margin: EdgeInsets.only(left: 40, top: 40),
   child: new Material(
   //INK可以实现装饰容器
   child: new Ink(
    //用ink圆角矩形
    // color: Colors.red,
    decoration: new BoxDecoration(
    //背景
    color: Colors.white,
    //设置四周圆角 角度
    borderRadius: BorderRadius.all(Radius.circular(25.0)),
    //设置四周边框
    border: new Border.all(width: 1, color: Colors.red),
    ),
    child: new InkWell(
     //圆角设置,给水波纹也设置同样的圆角
     //如果这里不设置就会出现矩形的水波纹效果
     borderRadius: new BorderRadius.circular(25.0),
     //设置点击事件回调
     onTap: () {},
     child: Container(
     //设置 child 居中
     alignment: Alignment(0, 0),
     height: 50,
     width: 300,
     child: Text("点击 Container 圆角边框"),
     )),
   ),
   ),
  ),
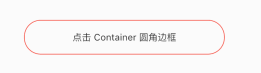
4 可点击的圆角矩形边框
Container(
  margin: EdgeInsets.only(left: 40, top: 40),
   child: new Material(
   child: new Ink(
    //设置背景
    decoration: new BoxDecoration(
    //背景
    color: Colors.white,
    //设置四周圆角 角度
    borderRadius: BorderRadius.all(Radius.circular(25.0)),
    //设置四周边框
    border: new Border.all(width: 1, color: Colors.red),
    ),
    child: new InkResponse(
    borderRadius: new BorderRadius.all(new Radius.circular(25.0)),
    //点击或者toch控件高亮时显示的控件在控件上层,水波纹下层
//    highlightColor: Colors.deepPurple,
    //点击或者toch控件高亮的shape形状
    highlightShape: BoxShape.rectangle,
    //.InkResponse内部的radius这个需要注意的是,我们需要半径大于控件的宽,如果radius过小,显示的水波纹就是一个很小的圆,
    //水波纹的半径
    radius: 300.0,
    //水波纹的颜色
    splashColor: Colors.yellow,
    //true表示要剪裁水波纹响应的界面 false不剪裁 如果控件是圆角不剪裁的话水波纹是矩形
    containedInkWell: true,
    //点击事件
    onTap: () {
     print("click");
    },
    child: Container(
     //设置 child 居中
     alignment: Alignment(0, 0),
     height: 50,
     width: 300,
     child: Text("点击 Container 圆角边框"),
    ),
    ),
   ),
   ),
  ),
以上就是本文的全部内容,希望对大家的学习有所帮助,也希望大家多多支持我们。
相关推荐
-

Android实现圆角矩形和圆形ImageView的方式
Android中实现圆角矩形和圆形有很多种方式,其中最常见的方法有ImageLoader设置Option和自定义View. 1.ImageLoader加载图片 public static DisplayImageOptions getRoundOptions() { DisplayImageOptions options = new DisplayImageOptions.Builder() // 是否设置为圆角,弧度为多少,当弧度为90时显示的是一个圆 .displayer(new Round
-
android 设置圆角图片实现代码
复制代码 代码如下: <?xml version="1.0" encoding="utf-8"?> <LinearLayout xmlns:android="http://schemas.android.com/apk/res/android" android:id="@+id/layout" android:orientation="vertical" android:layout_wi
-
Android图片特效:黑白特效、圆角效果、高斯模糊
1.黑白效果 复制代码 代码如下: /** * 将彩色图转换为黑白图 * * @param 位图 * @return 返回转换好的位图 */ public static Bitmap convertToBlackWhite(Bitmap bmp) { int width = bmp.getWidth(); // 获取位图的宽 int height = bmp.getHeight(); // 获取位图的高 int[] pi
-
Android中TextView显示圆圈背景或设置圆角的方法
前言 在我们学习android这么久,而且使用TextView那么长时间,我们一直没有用过给TextView添加背景,或者是给TextView添加添加边框,以及怎么样设置TextView的形状.今天在写代码的时候就用到了,怎么在java代码部分设置TextView的背景,和TextView的形状及边框. 方法如下: 接下来我们来看一下,怎么在Java代码部分怎么设置TextView的背景颜色,其实很简单的就一句话. tvTemp.setBackgroundColor(Color.parseCol
-
Android中实现圆角图片的几种方法
Android中实现圆角图片有多种姿势,不知你解锁了几种? 方法一:setXfermode法 此种方式就是再new一个相同尺寸的bitmap,然后使用paint.setXfermode(new PorterDuffXfermode(Mode.SRC_IN));先画圆角矩形,再画原始bitmap,然后就得到了一个圆角的bitmap了. public static Bitmap getRoundedCornerBitmap(Bitmap bitmap, float roundPx) { Bitmap
-
Android中Glide加载圆形图片和圆角图片实例代码
一.简介: 介绍两种使用 BitmapTransformation 来实现 Glide 加载圆形图片和圆角图片的方法.Glide 并不能直接支持 Round Pictures ,需要使用 BitmapTransformation 来进行处理. 二.网上的实现方式 这里介绍下网上常见的方式和使用 RoundedBitmapDrawable 两种方法,本质上是差不多的: 使用 Canvas 和 Paint 来绘制 使用 Android.support.v4.graphics.drawable.Rou
-
android实现圆角矩形背景的方法
本文实例讲述了android实现圆角矩形背景的方法.分享给大家供大家参考.具体如下: 1. java代码如下: import android.graphics.Canvas; import android.graphics.Color; import android.graphics.ColorFilter; import android.graphics.Paint; import android.graphics.Rect; import android.graphics.drawable.
-
Android中实现EditText圆角的方法
一.在drawable下面添加xml文件rounded_editview.xml 复制代码 代码如下: <?xml version="1.0" encoding="utf-8"?><shape xmlns:android="http://schemas.android.com/apk/res/android" android:shape="rectangle"> <solid andr
-
android 实现圆角图片解决方案
现在我们就来看看怎么样把图片的四角都变成圆形的,为什么要这样做那,如果要是这样界面就会非常的美观,下面我们就来看看代码吧. java代码: 复制代码 代码如下: public static Bitmap toRoundCorner(Bitmap bitmap, int pixels) { Bitmap output = Bitmap.createBitmap(bitmap.getWidth(), bitmap.getHeight(), Config.ARGB_8888); Canvas canv
-
Android关于Glide的使用(高斯模糊、加载监听、圆角图片)
高斯模糊.加载监听.圆角图片这些相信大家都很熟悉,那如何实现这些效果,请大家参考本文进行学习. 1.引用 compile 'com.github.bumptech.glide:glide:3.7.0' 2.加载图片 2.1 基本加载 Glide.with(context) .load(url) .into(imageView); 2.2 设置加载中和加载失败的情况 Glide.with(context) .load(url) .placeholder(R.drawable.loa