Springboot项目实现将类从@ComponentScan中排除
目录
- 将类从@ComponentScan中排除
- 问题描述
- 方案一
- 方案二
- 方案三
- 方案四
- @ComponentScan 详解
将类从@ComponentScan中排除
问题描述
最近在学习SpringCloud的Ribbon,在使用
@RibbonClient(name = "SPRINGCLOUD-P-DEPT",
   configuration = RibbonConfig.class)
为服务指定负载均衡策略的时候,根据Ribbon官方文档介绍,自定义的Ribbon配置类不允许被Springboot的**@ComponentScan**注解扫描到,所以需要将自定义的配置类RibbonConfig从在Springboot自动注入的范围内排除
方案一
我们都知道,Springboot的**@SpringBootApplication**会自动扫描本类所在包下的所有类和子类,所以只需要将RibbonConfig定义在Springboot启动类所在包外面即可
方案二
通过在启动类中添加
@ComponentScan(excludeFilters = @ComponentScan.Filter(
  type = FilterType.ASSIGNABLE_TYPE,
  classes = RibbonConfig.class))
通过FilterType.ASSIGNABLE_TYPE来指定要排除的类
如果需要排除的类太多了这个就很麻烦
方案三
通过自定义注解实现
@ComponentScan(excludeFilters = @ComponentScan.Filter(
  type = FilterType.ANNOTATION,
  classes = ScanIgnore.class))
与方案二不同的是,这里用的是FilterType.ANNOTATION
方案四
通过实现TypeFilter类来自定义过滤器
@ComponentScan(excludeFilters = {
 @Filter(
  type = FilterType.CUSTOM,
  classes = TypeExcludeFilter.class),
 @Filter(
  type = FilterType.CUSTOM,
  classes = AutoConfigurationExcludeFilter.class) })
此处给出的就是**@SpringbootApplication中的实现方式,通过FilterType.CUSTOM**来根据自动一过滤器来排除bean
最后贴出枚举类FilterType:
/*
 * Copyright 2002-2013 the original author or authors.
 *
 * Licensed under the Apache License, Version 2.0 (the "License");
 * you may not use this file except in compliance with the License.
 * You may obtain a copy of the License at
 *
 *      https://www.apache.org/licenses/LICENSE-2.0
 *
 * Unless required by applicable law or agreed to in writing, software
 * distributed under the License is distributed on an "AS IS" BASIS,
 * WITHOUT WARRANTIES OR CONDITIONS OF ANY KIND, either express or implied.
 * See the License for the specific language governing permissions and
 * limitations under the License.
 */
package org.springframework.context.annotation;
/**
 * Enumeration of the type filters that may be used in conjunction with
 * {@link ComponentScan @ComponentScan}.
 *
 * @author Mark Fisher
 * @author Juergen Hoeller
 * @author Chris Beams
 * @since 2.5
 * @see ComponentScan
 * @see ComponentScan#includeFilters()
 * @see ComponentScan#excludeFilters()
 * @see org.springframework.core.type.filter.TypeFilter
 */
public enum FilterType {
 /**
  * Filter candidates marked with a given annotation.
  * @see org.springframework.core.type.filter.AnnotationTypeFilter
  */
 ANNOTATION,
 /**
  * Filter candidates assignable to a given type.
  * @see org.springframework.core.type.filter.AssignableTypeFilter
  */
 ASSIGNABLE_TYPE,
 /**
  * Filter candidates matching a given AspectJ type pattern expression.
  * @see org.springframework.core.type.filter.AspectJTypeFilter
  */
 ASPECTJ,
 /**
  * Filter candidates matching a given regex pattern.
  * @see org.springframework.core.type.filter.RegexPatternTypeFilter
  */
 REGEX,
 /** Filter candidates using a given custom
  * {@link org.springframework.core.type.filter.TypeFilter} implementation.
  */
 CUSTOM
}
@ComponentScan 详解
@ComponentScan 的作用就是根据定义的扫描路径,把符合扫描规则的类装配到spring容器中,注解定义如下。
@Retention(RetentionPolicy.RUNTIME)
@Target({ElementType.TYPE})
@Documented
@Repeatable(ComponentScans.class)
public @interface ComponentScan {
    @AliasFor("basePackages")
    String[] value() default {};
    @AliasFor("value")
    String[] basePackages() default {};
    Class<?>[] basePackageClasses() default {};
    Class<? extends BeanNameGenerator> nameGenerator() default BeanNameGenerator.class;
    Class<? extends ScopeMetadataResolver> scopeResolver() default AnnotationScopeMetadataResolver.class;
    ScopedProxyMode scopedProxy() default ScopedProxyMode.DEFAULT;
    String resourcePattern() default "**/*.class";
    boolean useDefaultFilters() default true;
    ComponentScan.Filter[] includeFilters() default {};
    ComponentScan.Filter[] excludeFilters() default {};
    boolean lazyInit() default false;
    @Retention(RetentionPolicy.RUNTIME)
    @Target({})
    public @interface Filter {
        FilterType type() default FilterType.ANNOTATION;
        @AliasFor("classes")
        Class<?>[] value() default {};
        @AliasFor("value")
        Class<?>[] classes() default {};
        String[] pattern() default {};
    }
}
basePackages与value: 用于指定包的路径,进行扫描basePackageClasses: 用于指定某个类的包的路径进行扫描nameGenerator: bean的名称的生成器useDefaultFilters: 是否开启对@Component,@Repository,@Service,@Controller的类进行检测includeFilters: 包含的过滤条件
FilterType.ANNOTATION:按照注解过滤
FilterType.ASSIGNABLE_TYPE:按照给定的类型
FilterType.ASPECTJ:使用ASPECTJ表达式
FilterType.REGEX:正则
FilterType.CUSTOM:自定义规则
excludeFilters: 排除的过滤条件,用法和includeFilters一样
我的工程结构如下,测试对controller和service的扫描,其中HelloController没有加@Controller等任何注解,就是一个普通类。

修改配置类如下:应用默认的过滤器,扫描service包:
@Configuration
@ComponentScan(value = "com.xhx.spring.service",
        useDefaultFilters = true
)
public class MyConfig {
}
系统注入了两个service进去

改成如下所示:HelloController所在的包的类也被扫描了进去
@Configuration
@ComponentScan(value = "com.xhx.spring.service",
        useDefaultFilters = true,
        basePackageClasses = HelloController.class
)
public class MyConfig {
}
系统中会注入下面就给类
把默认的过滤器关掉,扫描带Controller注解的。
@Configuration
@ComponentScan(value = "com.xhx.spring",
        useDefaultFilters = false,
        includeFilters = {
            @ComponentScan.Filter(type = FilterType.ANNOTATION,classes = {Controller.class})
        }
)
public class MyConfig {
}

按照类的类型扫描,虽然HelloController没有加注解,但是被注入到了spring容器中
@Configuration
@ComponentScan(value = "com.xhx.spring",
        useDefaultFilters = false,
        includeFilters = {
            @ComponentScan.Filter(type = FilterType.ASSIGNABLE_TYPE,classes = {HelloController.class})
        }
)
public class MyConfig {
}

自定义扫描过滤器
package com.xhx.spring.componentscan.config;
import org.springframework.core.type.classreading.MetadataReader;
import org.springframework.core.type.classreading.MetadataReaderFactory;
import org.springframework.core.type.filter.TypeFilter;
import java.io.IOException;

/**
 * xuhaixing
 * 2018/9/18 23:07
 **/
public class MyTypeFilter implements TypeFilter {
    @Override
    public boolean match(MetadataReader metadataReader, MetadataReaderFactory metadataReaderFactory) throws IOException {
        String className = metadataReader.getClassMetadata().getClassName();
        if(className.contains("Controller")){
            return true;
        }
        return false;
    }
}
修改配置类
@Configuration
@ComponentScan(value = "com.xhx.spring",
        useDefaultFilters = false,
        includeFilters = {
            @ComponentScan.Filter(type = FilterType.CUSTOM,classes = {MyTypeFilter.class})
        }
)
public class MyConfig {
}
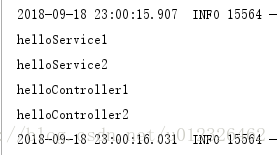
输出结果:

输出spring容器中的bean的测试类:只过滤输出了名字中含有hello的类。
package com.xhx.spring.componentscan;
import com.xhx.spring.componentscan.config.MyConfig;
import org.junit.Test;
import org.junit.runner.RunWith;
import org.springframework.boot.test.context.SpringBootTest;
import org.springframework.context.annotation.AnnotationConfigApplicationContext;
import org.springframework.test.context.junit4.SpringRunner;
import java.util.Arrays;
import java.util.List;
import java.util.stream.Collectors;

@RunWith(SpringRunner.class)
@SpringBootTest
public class ComponentScanApplicationTests {
    @Test
    public void testLoads() {
        AnnotationConfigApplicationContext context = new AnnotationConfigApplicationContext(MyConfig.class);
        List<String> hello = Arrays.stream(context.getBeanDefinitionNames()).collect(Collectors.toList());
        hello.stream().filter(name->name.contains("hello")).peek(System.out::println).count();
    }
}
以上为个人经验,希望能给大家一个参考,也希望大家多多支持我们。
相关推荐
-

SpringBoot中@ComponentScan的使用详解
目录 SpringBoot @ComponentScan的使用 SpringBoot @ComponentScan 作用 SpringBoot @ComponentScan的使用 SpringBoot的启动类中有一个@ComponentScan,之前项目由于这个注解造成打包失败,这里对于这个注解进行总结,防止下次遇到这个问题再被难住. 其实这个注解主要是针对于第三方jar包中注解的应用. 如果第三方包中没有使用注解那么就完全不需要使用这个注解 使用方式如图所示,这里扫描的是 maven项目的依赖
-
springboot @ComponentScan注解原理解析
这篇文章主要介绍了springboot @ComponentScan注解原理解析,文中通过示例代码介绍的非常详细,对大家的学习或者工作具有一定的参考学习价值,需要的朋友可以参考下 @ComponentScan 告诉Spring从哪里找到bean. 如果你的其他包都在@SpringBootApplication注解的启动类所在的包及其下级包,则你什么都不用做,SpringBoot会自动帮你把其他包都扫描了. 如果你有一些bean所在的包,不在启动类的包及其下级包,那么你需要手动加上@Compone
-
为什么说要慎用SpringBoot @ComponentScan
目录 场景复现 解密 解决方案 场景复现 为了统一定制一个过滤器(Filter),所以在另外一个工程里面创建了一个过滤器,并通过jar包的方法导入当前项目,通过@ComponentScan({"org.example.config"})指定扫描包路径. 下面的我的启动类: 导入的jar: 问题 预期效果是这样,正常加载 启动后,原来的Swagger目录进去是这样的,原来的Controller全部都没有被加载进来 解密 以为过滤器导致所有路径没有加载,后面百度了解BasicErrorCo
-
Springboot项目实现将类从@ComponentScan中排除
目录 将类从@ComponentScan中排除 问题描述 方案一 方案二 方案三 方案四 @ComponentScan 详解 将类从@ComponentScan中排除 问题描述 最近在学习SpringCloud的Ribbon,在使用 @RibbonClient(name = "SPRINGCLOUD-P-DEPT", configuration = RibbonConfig.class) 为服务指定负载均衡策略的时候,根据Ribbon官方文档介绍,自定义的Ribbon配置类不允许被Sp
-
SpringBoot项目的测试类实例解析
这篇文章主要介绍了SpringBoot项目的测试类实例解析,文中通过示例代码介绍的非常详细,对大家的学习或者工作具有一定的参考学习价值,需要的朋友可以参考下 1. package soundsystem; import static org.junit.Assert.*; import org.junit.Test; import org.junit.runner.RunWith; import org.springframework.beans.factory.annotation.Autow
-
SpringBoot项目中的多数据源支持的方法
1.概述 项目中经常会遇到一个应用需要访问多个数据源的情况,本文介绍在SpringBoot项目中利用SpringDataJpa技术如何支持多个数据库的数据源. 具体的代码参照该 示例项目 2.建立实体类(Entity) 首先,我们创建两个简单的实体类,分别属于两个不同的数据源,用于演示多数据源数据的保存和查询. Test实体类: package com.example.demo.test.data; import javax.persistence.Entity; import javax.pe
-
SpringBoot项目中使用redis缓存的方法步骤
本文介绍了SpringBoot项目中使用redis缓存的方法步骤,分享给大家,具体如下: Spring Data Redis为我们封装了Redis客户端的各种操作,简化使用. - 当Redis当做数据库或者消息队列来操作时,我们一般使用RedisTemplate来操作 - 当Redis作为缓存使用时,我们可以将它作为Spring Cache的实现,直接通过注解使用 1.概述 在应用中有效的利用redis缓存可以很好的提升系统性能,特别是对于查询操作,可以有效的减少数据库压力. 具体的代码参照该
-
SpringBoot项目中使用AOP的方法
本文介绍了SpringBoot项目中使用AOP的方法,分享给大家,具体如下: 1.概述 将通用的逻辑用AOP技术实现可以极大的简化程序的编写,例如验签.鉴权等.Spring的声明式事务也是通过AOP技术实现的. 具体的代码参照 示例项目 https://github.com/qihaiyan/springcamp/tree/master/spring-aop Spring的AOP技术主要有4个核心概念: Pointcut: 切点,用于定义哪个方法会被拦截,例如 execution(* cn.sp
-
springBoot项目启动类启动无法访问的解决方法
网上也查了一些资料,我这里总结.下不来虚的,也不废话. 解决办法: 1.若是maven项目,则找到右边Maven Projects --->Plugins--->run(利用maven启动)则可以加载到webapp资源 2.上面方法治标不治本.在项目的pom文件中添加<bulid>标签标注路径即可,pom.xml后部分代码如下: 刷新maven加载,重启项目.若还是无法访问,重新导入项目 <dependencies> xxxxxxxxxxxx </dependen
-
SpringBoot 项目如何在tomcat容器中运行的实现方法
一. SpringBoot内嵌容器的部署方式 SpringBoot内部默认提供内嵌的tomcat容器,所以可以直接打成jar包,丢到服务器上的任何一个目录,然后在当前目录下执行java -jar demo.jar即可运行,但是这种方式的运行退出进程就结束了.如果想在后台可以运行,则需要执行 java -jar demo.jar > log_demo.file 2>&1 & 即可在后台运行该服务了,log_demo.file是日志文件.如需停止该进程 执行ps -ef|grep
-
在IDEA中创建跑得起来的Springboot项目
1. 关于 Tomcat 可能有一点会觉得很奇怪. 这明明跑动起来的是一个 web 程序,为什么启动方式不是启动 tomcat? 而是启动的一个 Java 类的 主方法? 这是因为这个 com.how2java.springboot.SpringbootApplication 类的主方法就把 tomcat 嵌入进去了,不需要手动启动 tomcat 了呢. 2. 关于插件 首先,在IDEA中开发Springboot应用和Eclipse里面一样,本质上都是一个maven 项目. 但是呢,IDEA 本
-
在SpringBoot项目中利用maven的generate插件
使用maven 插件 generate生成MyBatis相关文件 在项目中增加 maven 依赖 - mybatis-spring-boot-starter - mysql-connector-java - mybatis-generator-maven-plugin 插件 自动读取 resources 下的generatorConfig.xml 文件 <?xml version="1.0" encoding="UTF-8"?> <project
-
SpringBoot项目中处理返回json的null值(springboot项目为例)
在后端数据接口项目开发中,经常遇到返回的数据中有null值,导致前端需要进行判断处理,否则容易出现undefined的情况,如何便捷的将null值转换为空字符串? 以SpringBoot项目为例,SSM同理. 1.新建配置类(JsonConfig.java) import com.fasterxml.jackson.core.JsonGenerator; import com.fasterxml.jackson.core.JsonProcessingException; import com.f